


A Comprehensive Guide to Capture Images from Webcam in JavaScript

A webcam allows users to capture images and video streams in real-time. It is usually built into a laptop or physically connected to a computer via a USB port. Webcams can be used in many scenarios, including video conference calls, face recognition, security surveillance, etc.
How to Access a Webcam via your Browsers?
Dynamsoft Web TWAIN (DWT) has a webcam add-on that provides a Javascript webcam API based on DirectShow. In this guide, we are going to build an online webcam demo with this add-on.
Note: The Webcam add-on is made for Windows. Use the camera add-on if you need to access cameras on macOS, Linux, and mobile devices.
| Webcam Add-on | Camera Add-on | |
|---|---|---|
| Cross-Platform | Only Windows | Yes |
| Internet Explorer Support | Yes | No |
| Protocol | DirectShow | MediaDevice |
| Camera Settings like Zoom and Exposure | Yes | No |
| Requires Dynamsoft Service | Yes | No |
| Requires HTTPS | No | Yes |
| Document Border Detection | No | Yes |
| Image Filter | No | Yes |
Why Dynamic Web TWAIN Webcam Add-on
- Browser compatibility – The add-on is compatible with some older browsers, for example, Internet Explorer, while the MediaDevice API in HTML5 is not.
- Resolution settings – Acquire and set resolution with the GetResolution() and SetResolution() API
- In-depth camera controls – Control zoom, exposure, iris, focus, brightness, hue, saturation, sharpness, contrast, gamma, white balance, rotation, etc.
- Scanner-quality image – Dynamsoft offers several image enhancement technology to help users generate a high-quality image.
If you are looking to build a robust, full-featured, enterprise-grade application, choosing a commercial SDK like Dynamsoft’s SDK will prove to provide an enormous return on your investment.
Before going further, try the online demo and test the functionalities.
[Try our free online webcam demo
About Dynamic Web TWAIN Webcam Add-on
Dynamic Web TWAIN webcam add-on enables web developers to capture images from a webcam with JavaScript. The webcam SDK supports embedding video streams in all mainstream browsers on Windows.
Device support
- UVC (USB video class) compatible webcam
- Built-in laptop camera
- Document Camera
Browser support
- Internet Explorer
- Edge
- Firefox
- Chrome
Server-side support
- Web server: Nginx, IIS, Tomcat, Apache, and more.
- Operating system: Linux, Windows, and more.
- Language: ASP.NET (C#/VB.NET), PHP, JSP, etc.
How to Use the Webcam Add-on Step by Step
Here we will show you how to easily integrate webcam capture and video preview in an HTML page with the SDK. First of all, download Dynamic Web TWAIN and copy the Resources folder to your project. Then create a new webpage HelloWorld.html.
Step #1 Add references
<head>
    <script src="Resources/dynamsoft.webtwain.initiate.js"> </script>
    <script src="Resources/dynamsoft.webtwain.config.js"> </script>
    <script src="Resources/addon/dynamsoft.webtwain.addon.webcam.js"> </script>
</head>
Step #2 Create a container
<div id="dwtcontrolContainer"></div>
Step #3 Add a drop-down list and two buttons
<select class="w100p" id="source"></select>
<input type="button" id="btn-switch" class="btn  bgBlue mt20" value="Hide Video" onclick="SwitchViews();" />
<input type="button" id="btn-grab" class="btn  bgBlue mt20" value="Acquire From a webcam" onclick="CaptureImage();" />
Step #4 Initialize the Dynamic Web TWAIN object
<script type="text/javascript">
    var DWObject;
    var isVideoOn = true;

    function Dynamsoft_OnReady() {
        DWObject = Dynamsoft.DWT.GetWebTwain('dwtcontrolContainer'); // Get the Dynamic Web TWAIN object that is embedded in the div with id 'dwtcontrolContainer'
        if (DWObject) {
            DWObject.Width = 504;
            DWObject.Height = 600;

            var arySource = DWObject.Addon.Webcam.GetSourceList();
            for (var i = 0; i < arySource.length; i++)
                document.getElementById("source").options.add(new Option(arySource[i], arySource[i]), i); // Get Webcam Source names and put them in a drop-down box
        }
        document.getElementById('source').onchange = function () {
      DWObject.Addon.Webcam.SelectSource(document.getElementById("source").options[document.getElementById("source").selectedIndex].value);
            SetIfWebcamPlayVideo(true);
        }
        document.getElementById('source').onchange();
    }
</script>
Step #5 Control the webcam
You can play and stop the video stream by using the API: DWObject.Addon.Webcam.StopVideo() and DWObject.Addon.Webcam.PlayVideo().
function enableButton(element) {
    element.style.backgroundColor = "";
    element.disabled = "";
}

function disableButton(element) {
    element.style.backgroundColor = "#aaa";
    element.disabled = "disabled";
}

function SetIfWebcamPlayVideo(bShow) {
    if (bShow) {
        DWObject.Addon.Webcam.StopVideo();
        DWObject.Addon.Webcam.PlayVideo(DWObject, 80, function () { });
        isVideoOn = true;
        enableButton(document.getElementById("btn-grab"));
        document.getElementById("btn-switch").value = "Hide Video";
    }
    else {
        DWObject.Addon.Webcam.StopVideo();
        isVideoOn = false;
        disableButton(document.getElementById("btn-grab"));
        document.getElementById("btn-switch").value = "Show Video";
    }
}

function SwitchViews() {
    if (isVideoOn == false) {
        // continue the video
        SetIfWebcamPlayVideo(true);
    } else {
        // stop the video
        SetIfWebcamPlayVideo(false);
    }
}
Step #6 Capture images by using CaptureImage()
function CaptureImage() {
    if (DWObject) {
        var funCaptureImage = function () {
            SetIfWebcamPlayVideo(false);
        };
        DWObject.Addon.Webcam.CaptureImage(funCaptureImage, funCaptureImage);
    }
}
That’s it. Here is a screenshot of the document scanner using camera running on Internet Explorer 11.
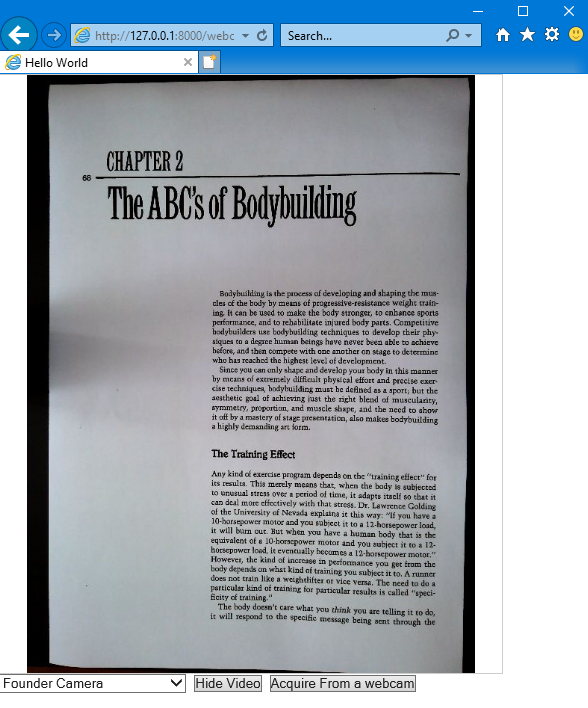
Document scanner running on Internet Explorer 11
How to Capture Images from Both Scanners and Webcams
It’s a common requirement for document/records management applications to capture images from both scanners and web cameras via web browsers. You can easily implement this by using the Dynamic Web TWAIN SDK and the webcam add-on.

Let’s continue working on the webpage HelloWorld.html.
Step #1 Rewrite the initialization part
Dynamsoft.DWT.AutoLoad = false;
Dynamsoft.DWT.RegisterEvent('OnWebTwainReady', Dynamsoft_OnReady); // Register OnWebTwainReady event. This event fires as soon as Dynamic Web TWAIN is initialized and ready to be used

var webCamStartingIndex;//This is used to separate scanners and webcams
var DWObject;
var isVideoOn = true;

function Dynamsoft_OnReady() {
    DWObject = Dynamsoft.DWT.GetWebTwain('dwtcontrolContainer'); // Get the Dynamic Web TWAIN object that is embedded in the div with id 'dwtcontrolContainer'
    if (DWObject) {
        DWObject.Width = 504;
        DWObject.Height = 600;

        document.getElementById('source').options.length = 0;
        var count = DWObject.SourceCount;
        for (var i = 0; i < count; i++) {
            document.getElementById('source').options.add(new Option(DWObject.GetSourceNameItems(i), i));
        }
        webCamStartingIndex = i;

        var arySource = DWObject.Addon.Webcam.GetSourceList();
        for (var i = 0; i < arySource.length; i++)
            document.getElementById("source").options.add(new Option(arySource[i], arySource[i]), i + webCamStartingIndex); // Get Webcam Source names and put them in a drop-down box

    }

    document.getElementById('source').onchange = function () {
        if (document.getElementById('source').selectedIndex < webCamStartingIndex) {
            if (arySource.length > 0)
                DWObject.Addon.Webcam.StopVideo();
            isVideoOn = false;
            document.getElementById("btn-grab").style.backgroundColor = "";
            document.getElementById('btn-grab').value = 'Acquire From a Scanner';
            document.getElementById("btn-switch").style.display = 'none';
        }
        else {
            DWObject.Addon.Webcam.SelectSource(document.getElementById("source").options[document.getElementById("source").selectedIndex].value);

            SetIfWebcamPlayVideo(true);

            document.getElementById('btn-grab').value = 'Acquire From a Webcam';
            document.getElementById("btn-switch").style.display = '';
        }
        document.getElementById("btn-grab").disabled = "";
    }

    document.getElementById('source').onchange();
}
Step #2 Capture images
function CaptureImage() {
    if (DWObject) {
        if (document.getElementById('source').selectedIndex < webCamStartingIndex) {
            DWObject.IfShowUI = true;
            DWObject.IfDisableSourceAfterAcquire = true;
            DWObject.SelectSourceByIndex(document.getElementById('source').selectedIndex);
            DWObject.CloseSource();
            DWObject.OpenSource();
            DWObject.AcquireImage();
        }
        else {

            var funCaptureImage = function () {
                SetIfWebcamPlayVideo(false);
            };
            DWObject.Addon.Webcam.CaptureImage(funCaptureImage, funCaptureImage);
        }
    }
}
How to Upload the Scanned Images to Server-Side
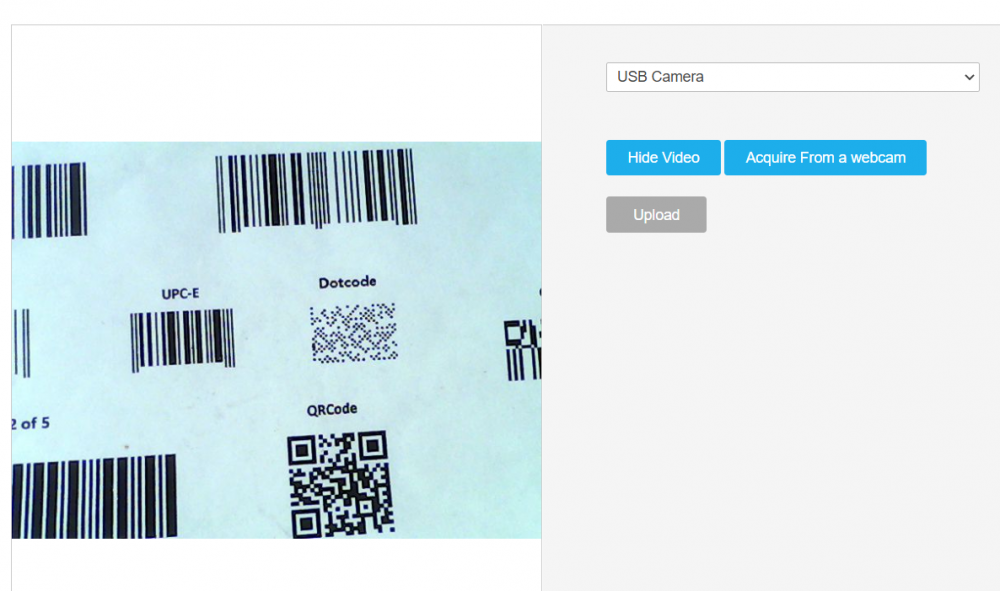
Step #1 Add a button for uploading
<input type="button" id="btn-upload" class="btn bgBlue mt20" value="Upload" onclick="upload();" disabled />
Step #2 Upload images
Once an image is ready, you can upload it to the webserver by calling HTTPUploadThroughPost().
function upload() {
    if (DWObject) {
        // If no image in buffer, return the function
        if (DWObject.HowManyImagesInBuffer == 0)
            return;

        var strHTTPServer = location.hostname; //The name of the HTTP server. For example: "www.dynamsoft.com";
        var CurrentPathName = unescape(location.pathname);
        var CurrentPath = CurrentPathName.substring(0, CurrentPathName.lastIndexOf("/") + 1);
        var strActionPage = CurrentPath + "filename"; // Action page
        DWObject.IfSSL = false; // Set whether SSL is used
        DWObject.HTTPPort = location.port == "" ? 80 : location.port;

        var Digital = new Date();
        var uploadfilename = Digital.getMilliseconds(); // Uses milliseconds according to local time as the file name

        //Upload image in JPEG
        DWObject.HTTPUploadThroughPost(strHTTPServer, DWObject.CurrentImageIndexInBuffer, strActionPage, uploadfilename + ".jpg", OnHttpUploadSuccess, OnHttpUploadFailure);
    }
}
The SDK supports ASP.NET(C#/VB.NET), PHP, JSP, ASP, etc. to receive image data on the server-side.
PHP Code
<?php
	$strJson = "{\"success\":false}";

	try{

		$file = $_FILES["RemoteFile"];

		$fileName = $_POST["fileName"];
        if ($fileName == "" || $fileName == null) $fileName = $file["name"];

        $filePath = dirname(__FILE__) . "/upload/";
        if (!file_exists($filePath)) {
            mkdir($filePath);
        }

        if (file_exists($filePath . $fileName))
        {
            $iniNum = 0;
            if (strpos($fileName, "(") !== FALSE && strpos($fileName, ")") !== FALSE)
            {
                $leftPhPos =  strrpos($fileName, "(");
                $rightPhPos = strrpos($fileName, ")");
                if ($leftPhPos < $rightPhPos) {
                    $numStr = substr($fileName, $leftPhPos + 1, $rightPhPos - $leftPhPos - 1);
                    if (is_numeric($numStr))
                    {
                    	$iniNum = intval($numStr);
                        $fileName = substr($fileName, 0, $leftPhPos) . substr($fileName, $rightPhPos + 1);
                    }
                    else {
                        $iniNum = 0;
                    }
                }
            }
            $indexPoint = strrpos($fileName, ".");
            $str1 = substr($fileName, 0, $indexPoint) . "(";
            $str2 = ")" . substr($fileName, $indexPoint);
            for ($i = $iniNum; ; ++$i)
            {
                if (!file_exists($filePath . ($str1 . $i . $str2)))
                {
                    $fileName = $str1 . $i . $str2;
                    break;
                }
            }
        }

		$fileFullPath = $filePath . $fileName;

		if(strpos($file["type"], 'text/plain') === false){
			move_uploaded_file($file["tmp_name"] , $fileFullPath);
		}else{
		    $file_contents = base64_decode(str_replace(' ', '+', file_get_contents($file['tmp_name'])));
		    file_put_contents($fileFullPath, $file_contents);
		}

		$strJson = "{\"success\":true, \"fileName\":\"" . $fileName . "\"}";


	}
	catch(Exception $ex){
		$strJson = "{\"success\":false, \"error\": \"" . ex.Message.Replace("\\", "\\\\") . "\"}";
	}

    // Response.Clear();
    header("Content-Type: application/json; charset=utf-8");
    echo $strJson;
?>
JSP Code
<%@page import="java.util.*,java.io.File,java.io.FileOutputStream,org.apache.commons.fileupload.FileUpload,org.apache.commons.fileupload.FileItem,org.apache.commons.fileupload.disk.DiskFileItemFactory,org.apache.commons.fileupload.servlet.ServletFileUpload,sun.misc.BASE64Decoder"%>
<%@page contentType="application/json; charset=utf-8" %>
<%@page language="java" %>
<%
    String strJson = "{\"success\":false}";

    try{

        // get more info from: http://commons.apache.org/proper/commons-fileupload/

        DiskFileItemFactory factory = new DiskFileItemFactory();

        ServletContext servletContext = this.getServletConfig().getServletContext();
        File repository = (File) servletContext.getAttribute("javax.servlet.context.tempdir");
        factory.setRepository(repository);

        ServletFileUpload upload = new ServletFileUpload(factory);

        List<FileItem> items = upload.parseRequest(request);
        Iterator<FileItem> iter = items.iterator();

        String fileName = null;
        String tempFileName = null;
        String contentType = null;
        FileItem fileItem = null;

        while (iter.hasNext()) {
            FileItem item = iter.next();
            String fieldName = item.getFieldName();

            if(fieldName.equals("fileName")){
                fileName = item.getString();
            }else if(fieldName.equals("RemoteFile")){
                tempFileName = item.getName();
                contentType = item.getContentType();
                fileItem = item;
            }
        }

        if(fileName == null || fileName.isEmpty()){
            fileName = tempFileName;
        }
        String path = application.getRealPath(request.getServletPath());
        String dir = new java.io.File(path).getParent();
        String filePath = dir + "/UploadedImages/" + fileName;

        File file = new File(filePath);

        if(!file.getParentFile().exists()){
            file.getParentFile().mkdir();
        }
        if(!file.exists()){
            file.createNewFile();
        }
        if(!contentType.contains("text/plain")){
            fileItem.write(file);
        }else{
            String base64Str = fileItem.getString();
            byte[] b = null;
            b = (new BASE64Decoder()).decodeBuffer(base64Str);
            FileOutputStream fileOutStream = new FileOutputStream(file);
            fileOutStream.write(b);
            fileOutStream.flush();
            fileOutStream.close();
        }

        strJson = "{\"success\":true, \"fileName\":\"" + fileName + "\"}";
    }
    catch(Exception ex){
        strJson = "{\"success\":false, \"error\": \"" + ex.getMessage().replace("\\", "\\\\") + "\"}";
    }

    out.clear();
    out.write(strJson);
    out.close();
%>
ASP.NET(C#) Code
<%@ Page Language="C#" %>
<%@ Import Namespace="System.IO" %>
<%
    string strJson = "{\"success\":false}";
    try
    {
        HttpPostedFile file = Request.Files["RemoteFile"];
        string fileName = Request.Form["fileName"];
        if (string.IsNullOrEmpty(fileName)) fileName = file.FileName;
        string filePath = Server.MapPath(".") + "\\UploadedImages\\" + fileName;
        if (!file.ContentType.Contains("text/plain"))
        {
            file.SaveAs(filePath);
        }
        else
        {
            Stream fs = file.InputStream;
            byte[] base64Bytes = new byte[fs.Length];
            fs.Read(base64Bytes, 0, (int) fs.Length);
            StringBuilder base64Str = new StringBuilder();
            foreach (byte b in base64Bytes)
            {
                base64Str.Append((char) b);
            }
            File.WriteAllBytes(filePath, Convert.FromBase64String(base64Str.ToString()));
        }
        strJson = "{\"success\":true, \"fileName\":\"" + fileName + "\"}";
    }
    catch (Exception ex)
    {
        strJson = "{\"success\":false, \"error\": \"" + ex.Message.Replace("\\", "\\\\") + "\"}";
    }
    Response.Clear();
    Response.ContentType = "application/json; charset=utf-8";
    Response.Write(strJson);
    Response.End();
%>
Download Sample Code
If you want to take a look at the complete code for the server-side, please check out the source code below:
Also, you can get the sample code from the code gallery.
Mobile Web Capture from Cameras
If you need to control cameras on Linux/macOS or control mobile phone cameras, you can try out the camera add-on.
Since DWT 17.2, there has been a scanDocument API which makes it easy to call a built-in document scanner to scan documents using mobile cameras in a mobile-friendly interface. The scanner has features like automatic capture, document borders detection and image filter. You can use the new API to create a mobile document scanner.
Next Step
I hope you found this article useful. Let us know if you have any questions about image capture in webcam applications.