---
layout: default-layout
title: Scan & Parse MRZ - Dynamsoft Capture Vision MAUI Edition
description: This page introduces how to scan and parse a MRZ with Dynamsoft Capture Vision MAUI Edition.
keywords: MAUI, MRZ, passport, id card, visa
needAutoGenerateSidebar: true
needGenerateH3Content: true
noTitleIndex: true
---
# MAUI User Guide for MRZ Scanner Integration
## Table of Contents
- [MAUI User Guide for MRZ Scanner Integration](#maui-user-guide-for-mrz-scanner-integration)
- [Table of Contents](#table-of-contents)
- [Supported Machine-Readable Travel Document Types](#supported-machine-readable-travel-document-types)
- [ID (TD1 Size)](#id-td1-size)
- [ID (TD2 Size)](#id-td2-size)
- [Passport (TD3 Size)](#passport-td3-size)
- [System Requirements](#system-requirements)
- [.NET](#net)
- [Android](#android)
- [iOS](#ios)
- [Installation](#installation)
- [Visual Studio for Mac](#visual-studio-for-mac)
- [Visual Studio for Windows](#visual-studio-for-windows)
- [Build Your MRZ Scanner App](#build-your-mrz-scanner-app)
- [Set up Development Environment](#set-up-development-environment)
- [Initialize the Project](#initialize-the-project)
- [Visual Studio](#visual-studio)
- [Visual Studio for Mac](#visual-studio-for-mac-1)
- [Include the Library](#include-the-library)
- [Initialize MauiProgram](#initialize-mauiprogram)
- [License Activation](#license-activation)
- [Initialize the Capture Vision SDK](#initialize-the-capture-vision-sdk)
- [Add the CameraView control in the Main Page](#add-the-cameraview-control-in-the-main-page)
- [Open the Camera and Start Reading MRZ](#open-the-camera-and-start-reading-mrz)
- [Obtaining Recognized Text Lines and Parsed MRZ](#obtaining-recognized-text-lines-and-parsed-mrz)
- [Run the Project](#run-the-project)
- [Licensing](#licensing)
## Supported Machine-Readable Travel Document Types
The Machine Readable Travel Documents (MRTD) standard specified by the International Civil Aviation Organization (ICAO) defines how to encode information for optical character recognition on official travel documents.
Currently, the SDK supports three types of MRTD:
> [!Note]
> If you need support for other types of MRTDs, our SDK can be easily customized. Please contact support@dynamsoft.com.
### ID (TD1 Size)
The MRZ (Machine Readable Zone) in TD1 format consists of 3 lines, each containing 30 characters.
### ID (TD2 Size)
The MRZ (Machine Readable Zone) in TD2 format consists of 2 lines, with each line containing 36 characters.
### Passport (TD3 Size)
The MRZ (Machine Readable Zone) in TD3 format consists of 2 lines, with each line containing 44 characters.
## System Requirements
### .NET
- 8.0 and 9.0.
### Android
- Supported OS: **Android 5.0** (API Level 21) or higher.
- Supported ABI: **armeabi-v7a**, **arm64-v8a**, **x86** and **x86_64**.
- Development Environment: Visual Studio 2022 recommended.
- JDK: 1.8+
### iOS
- Supported OS: **iOS 13.0** or higher.
- Supported ABI: **arm64** and **x86_64**.
- Development Environment: Visual Studio 2022 for Mac and Xcode 14.3+ recommended.
## Installation
### Visual Studio for Mac
In the **NuGet Package Manager>Manage Packages for Solution** of your project, search for **Dynamsoft.CaptureVisionBundle.Maui** and **Dynamsoft.MRZ.Maui**. Select it and click **install**.
### Visual Studio for Windows
You need to add the library via the project file and complete additional steps for the installation.
1. Add the library in the project file:
```xml
...
...
```
2. Open the **Package Manager Console** and run the following commands:
```bash
dotnet build
```
> [!Note]
>
> - Windows has a limitation of 260 characters in the path. If you don't use console to install the package, you will receive an error "Could not find a part of the path 'C:\Users\admin\.nuget\packages\dynamsoft.imageprocessing.ios\2.4.200\lib\net7.0-ios16.1\Dynamsoft.ImageProcessing.iOS.resources\DynamsoftImageProcessing.xcframework\ios-arm64\dSYMs\DynamsoftImageProcessing.framework.dSYM\Contents\Resources\DWARF\DynamsoftImageProcessing'"
> - The library only supports Android and iOS platforms. Be sure that you remove the other platforms like Windows, maccatalyst, etc.
## Build Your MRZ Scanner App
Now you will learn how to create a simple mrz scanner using Dynamsoft Capture Vision MAUI SDK.
>[!Note]
>
> - You can get the similar source code of the ScanMRZ app from the following link
> - [C#](https://github.com/Dynamsoft/mrz-scanner-mobile-maui/tree/main/MRZScanner){:target="_blank"}.
### Set up Development Environment
If you are a beginner with MAUI, please follow the guide on the .Net MAUI official website to set up the development environment.
### Initialize the Project
#### Visual Studio
1. Open the Visual Studio and select **Create a new project**.
2. Select **.Net MAUI App** and click **Next**.
3. Name the project **ScanMRZ**. Select a location for the project and click **Next**.
4. Select **.Net 9.0** and click **Create**.
#### Visual Studio for Mac
1. Open Visual Studio and select **New**.
2. Select **Multiplatform > App > .Net MAUI App > C#** and click **Continue**.
3. Select **.Net 9.0** and click **Continue**.
4. Name the project **ScanMRZ** and select a location, click **Create**.
### Include the Library
Please view the [installation section](#installation) on how to add the library.
Add the following code to the **App.xaml.cs** file to use the library:
```c#
using Dynamsoft.MRZScannerBundle.Maui;
```
### Add Your Code for MRZ Scanning
1. Edit the **MainPage.xaml** file.
Replace your **MainPage.xaml** with the following code.
```c#
using System.Collections.ObjectModel;
using Dynamsoft.MRZScannerBundle.Maui;
namespace ScanMRZ;
public partial class MainPage : ContentPage
{
public ObservableCollection TableItems { get; set; } = new();
public MainPage()
{
InitializeComponent();
BindingContext = this;
}
private async void OnScanMRZ(object sender, EventArgs e)
{
// The string "DLS2eyJvcmdhbml6YXRpb25JRCI6IjIwMDAwMSJ9" here grants a time-limited free trial which requires network connection to work.
// You can request a 30-day trial license via the Request a Trial License page https://www.dynamsoft.com/customer/license/trialLicense?product=dbr&utm_source=guide&package=maui.
var config = new MRZScannerConfig("DLS2eyJvcmdhbml6YXRpb25JRCI6IjIwMDAwMSJ9");
var result = await MRZScanner.Start(config);
TableItems.Clear();
if (result.ResultStatus == EnumResultStatus.Finished && result.Data is not null)
{
var data = result.Data;
TableItems.Add(new TableItem { Key = "Name", Value = $"{data.FirstName} {data.LastName}" });
TableItems.Add(new TableItem { Key = "Sex", Value = data.Sex.ToUpperInvariant() });
TableItems.Add(new TableItem { Key = "Age", Value = data.Age.ToString() });
TableItems.Add(new TableItem { Key = "Document Type", Value = data.DocumentType });
TableItems.Add(new TableItem { Key = "Document Number", Value = data.DocumentNumber });
TableItems.Add(new TableItem { Key = "Issuing State", Value = data.IssuingState });
TableItems.Add(new TableItem { Key = "Nationality", Value = data.Nationality });
TableItems.Add(new TableItem { Key = "Date Of Birth (YYYY-MM-DD)", Value = data.DateOfBirth });
TableItems.Add(new TableItem { Key = "Date Of Expire (YYYY-MM-DD)", Value = data.DateOfExpire });
}
else
{
var msg = result.ResultStatus == EnumResultStatus.Canceled
? "Scanning canceled"
: result.ErrorString ?? "Unknown error";
TableItems.Add(new TableItem { Key = "Result", Value = msg });
}
}
}
public class TableItem
{
public string Key { get; set; }
public string Value { get; set; }
}
```
2. Edit the MainPage.xaml file.
Add the following code to the **MainPage.xaml** file:
```xml
```
### Configure the Camera Permission
Open the **Info.plist** file under the **Platforms/iOS/** folder (Open with XML Text Editor). Add the following lines to request camera permission on iOS platform:
```xml
NSCameraUsageDescriptionThe APP needs to access your camera.
```
### Run the Project
Select your device and run the project.
You can get the similar source code of the ScanMRZ app from the following link:
- [C#](https://github.com/Dynamsoft/mrz-scanner-mobile-maui/tree/main/MRZScanner){:target="_blank"}.
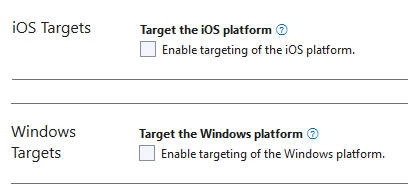
> [!Note] If you are running Android only on Visual Studio Windows, please manually exclude iOS and Windows platforms. Otherwise, the Visual Studio will report type or namespace not found errors.
## Licensing
When getting started with MRZ Scanner, we recommend getting your own 30-day trial license through the following modal:
{% include trialLicense.html %}
If you have any questions about the trial license or would like to inquire about acquiring a full license, do not hesitate to [contact us](https://www.dynamsoft.com/company/contact/){:target="_blank"}


