---
layout: default-layout
title: Detect and Normalize Document - MAUI User Guide
description: This page introduce how to detect and normalize document with Dynamsoft Capture Vision MAUI SDK.
keywords: user guide, maui
needAutoGenerateSidebar: true
needGenerateH3Content: true
noTitleIndex: true
---
# MAUI User Guide for Document Scanner Integration
## Table of Contents
- [MAUI User Guide for Document Scanner Integration](#maui-user-guide-for-document-scanner-integration)
- [Table of Contents](#table-of-contents)
- [System Requirements](#system-requirements)
- [.Net](#net)
- [Android](#android)
- [iOS](#ios)
- [Installation](#installation)
- [Visual Studio for Mac](#visual-studio-for-mac)
- [Visual Studio for Windows](#visual-studio-for-windows)
- [Build Your Document Scanner App](#build-your-document-scanner-app)
- [Set up Development Environment](#set-up-development-environment)
- [Initialize the Project](#initialize-the-project)
- [Visual Studio](#visual-studio)
- [Visual Studio for Mac](#visual-studio-for-mac-1)
- [Include the Library](#include-the-library)
- [Initialize MauiProgram](#initialize-mauiprogram)
- [Add a CameraPage for Capturing the Document](#add-a-camerapage-for-capturing-the-document)
- [Add a EditorPage for Detected Boundary Editing](#add-a-editorpage-for-detected-boundary-editing)
- [Add a ImagePage for Displaying the Processed Document](#add-a-imagepage-for-displaying-the-processed-document)
- [Configure the Camera Permission](#configure-the-camera-permission)
- [Run the Project](#run-the-project)
- [Licensing](#licensing)
## System Requirements
### .Net
- .NET 10.0.
### Android
- Supported OS: **Android 5.0** (API Level 21) or higher.
- Supported ABI: **armeabi-v7a**, **arm64-v8a**, **x86** and **x86_64**.
- Development Environment: Visual Studio 2022 recommended.
- JDK: 1.8+
### iOS
- Supported OS: **iOS 13.0** or higher.
- Supported ABI: **arm64** and **x86_64**.
- Development Environment: Visual Studio 2022 for Mac and Xcode 14.3+ recommended.
## Installation
### Visual Studio for Mac
In the **NuGet Package Manager>Manage Packages for Solution** of your project, search for **Dynamsoft.CaptureVisionBundle.Maui**. Select it and click **install**.
### Visual Studio for Windows
You need to add the library via the project file and complete additional steps for the installation.
1. Add the library in the project file:
```xml
...
...
```
2. Open the **Package Manager Console** and run the following commands:
```bash
dotnet build
```
> Note:
>
> - Windows system have a limitation of 260 characters in the path. If you don't use console to install the package, you will receive error "Could not find a part of the path 'C:\Users\admin\.nuget\packages\dynamsoft.imageprocessing.ios\2.2.300\lib\net7.0-ios16.1\Dynamsoft.ImageProcessing.iOS.resources\DynamsoftImageProcessing.xcframework\ios-arm64\dSYMs\DynamsoftImageProcessing.framework.dSYM\Contents\Resources\DWARF\DynamsoftImageProcessing'"
> - The library only support Android & iOS platform. Be sure that you remove the other platforms like Windows, maccatalyst, etc.
## Build Your Document Scanner App
Now you will learn how to create a simple document scanner app using Dynamsoft Capture Vision MAUI SDK.
>Note:
>
> - You can get the similar source code of the simple document scanner app from the following link
> - [ScanDocument MAUI Sample](https://github.com/Dynamsoft/capture-vision-maui-samples/tree/main/ScanDocument){:target="_blank"}.
### Set up Development Environment
If you are a beginner with MAUI, please follow the guide on the .Net MAUI official website to set up the development environment.
### Initialize the Project
#### Visual Studio
1. Open the Visual Studio and select **Create a new project**.
2. Select **.Net MAUI App** and click **Next**.
3. Name the project **ScanDocument**. Select a location for the project and click **Next**.
4. Select **.Net 10.0** and click **Create**.
#### Visual Studio for Mac
1. Open Visual Studio and select **New**.
2. Select **Multiplatform > App > .Net MAUI App > C#** and click **Continue**.
3. Select **.Net 10.0** and click **Continue**.
4. Name the project **ScanDocument** and select a location, click **Create**.
### Include the Library
Add NuGet package **Dynamsoft.CaptureVisionBundle.Maui** to your project. You can view the [installation section](#installation) on how to add the library.
### Initialize MauiProgram.cs
In **MauiProgram.cs**, add a custom handler for the [`CameraView`]({{ site.dce_maui_api }}camera-view.html) control. Specifically, it maps the [`CameraView`]({{ site.dce_maui_api }}camera-view.html) type to the `CameraViewHandler` type.
```c#
using Microsoft.Extensions.Logging;
using Dynamsoft.CameraEnhancer.Maui;
using Dynamsoft.CameraEnhancer.Maui.Handlers;
namespace ScanDocument;
public static class MauiProgram
{
public static MauiApp CreateMauiApp()
{
var builder = MauiApp.CreateBuilder();
builder
.UseMauiApp()
.ConfigureFonts(fonts =>
{
fonts.AddFont("OpenSans-Regular.ttf", "OpenSansRegular");
fonts.AddFont("OpenSans-Semibold.ttf", "OpenSansSemibold");
})
.ConfigureMauiHandlers(handlers =>
{
handlers.AddHandler();
handlers.AddHandler(typeof(ImageEditorView), typeof(ImageEditorViewHandler));
});
#if DEBUG
builder.Logging.AddDebug();
#endif
return builder.Build();
}
}
```
### Add a CameraPage for Capturing the Document
1. Create a new ContentPage(XAML) and name it CameraPage.
2. Add the following code to the **CameraPage.xaml**:
```xml
```
3. Add the following code to the **CameraPage.xaml.cs**:
```csharp
using Dynamsoft.Core.Maui;
using Dynamsoft.CameraEnhancer.Maui;
using Dynamsoft.CaptureVisionRouter.Maui;
using Dynamsoft.License.Maui;
using Dynamsoft.DocumentNormalizer.Maui;
namespace ScanDocument;
public partial class CameraPage : ContentPage, ICapturedResultReceiver, ICompletionListener, ILicenseVerificationListener
{
CameraEnhancer enhancer;
CaptureVisionRouter router;
bool isClicked;
public CameraPage()
{
InitializeComponent();
// Initialize the license.
// The license string here is a trial license. Note that network connection is required for this license to work.
// You can request an extension via the following link: https://www.dynamsoft.com/customer/license/trialLicense?product=ddn&utm_source=samples&package=mobile
LicenseManager.InitLicense("DLS2eyJvcmdhbml6YXRpb25JRCI6IjIwMDAwMSJ9", this);
enhancer = new CameraEnhancer();
router = new CaptureVisionRouter();
router.SetInput(enhancer);
router.AddResultReceiver(this);
}
protected override void OnHandlerChanged()
{
base.OnHandlerChanged();
if (this.Handler != null)
{
enhancer.SetCameraView(camera);
}
}
protected override async void OnAppearing()
{
base.OnAppearing();
await Permissions.RequestAsync();
enhancer?.Open();
router?.StartCapturing(EnumPresetTemplate.PT_DETECT_DOCUMENT_BOUNDARIES, this);
}
protected override void OnDisappearing()
{
base.OnDisappearing();
enhancer?.Close();
router?.StopCapturing();
}
public void OnProcessedDocumentResultReceived(ProcessedDocumentResult result)
{
if (isClicked)
{
isClicked = false;
if (result?.DetectedQuadResultItems?.Length > 0)
{
var data = router.GetIntermediateResultManager().GetOriginalImage(result.OriginalImageHashId);
if (data != null)
{
MainThread.BeginInvokeOnMainThread(async () =>
{
await Navigation.PushAsync(new EditorPage(data, result.DetectedQuadResultItems));
});
}
}
}
}
void OnCaptureBtnClicked(System.Object sender, System.EventArgs e)
{
isClicked = true;
}
public void OnLicenseVerified(bool isSuccess, string message)
{
if (!isSuccess)
{
Console.WriteLine("License initialization failed: " + message);
}
}
public void OnFailure(int errorCode, string errorMessage)
{
MainThread.BeginInvokeOnMainThread(() =>
{
DisplayAlert("Error", errorMessage, "OK");
});
}
}
```
### Add a EditorPage for Detected Boundary Editing
1. Create a new ContentPage(XAML) and name it EditorPage.
2. Add the following code to the **EditorPage.xaml**:
```xml
```
3. Add the following code to the **EditorPage.xaml.cs**:
```csharp
using Dynamsoft.Core.Maui;
using Dynamsoft.DocumentNormalizer.Maui;
using Dynamsoft.CameraEnhancer.Maui;
namespace ScanDocument;
public partial class EditorPage : ContentPage
{
ImageData data;
DetectedQuadResultItem[] items;
public EditorPage(ImageData data, DetectedQuadResultItem[] items)
{
InitializeComponent();
this.data = data;
this.items = items;
}
protected override void OnHandlerChanged()
{
SetUp();
}
void SetUp()
{
editorView.OriginalImage = data;
var layer = editorView.GetDrawingLayer(EnumDrawingLayerId.DLI_DDN);
IList drawingItems = new List();
foreach (DetectedQuadResultItem item in this.items)
{
drawingItems.Add(new QuadDrawingItem(item.Location));
}
layer.DrawingItems = drawingItems;
}
void OnNormalizeBtnClicked(System.Object sender, System.EventArgs e)
{
var item = editorView.GetSelectedDrawingItem();
if (item == null)
{
item = editorView.GetDrawingLayer(EnumDrawingLayerId.DLI_DDN).DrawingItems[0];
}
if (item?.MediaType == EnumDrawingItemMediaType.DIMT_QUADRILATERAL)
{
MainThread.BeginInvokeOnMainThread(async () =>
{
await Navigation.PushAsync(new ImagePage(data, ((QuadDrawingItem)item).Quad));
});
}
}
}
```
### Add a ImagePage for Displaying the Processed Document
1. Create a new ContentPage(XAML) and name it ImagePage.
2. Add the following code to the **ImagePage.xaml**:
```xml
```
3. Add the following code to the **ImagePage.xaml.cs**:
```csharp
using Dynamsoft.Core.Maui;
using Dynamsoft.CameraEnhancer.Maui;
using Dynamsoft.CaptureVisionRouter.Maui;
using Dynamsoft.DocumentNormalizer.Maui;
namespace ScanDocument;
public partial class ImagePage : ContentPage
{
ImageData data;
Quadrilateral quadrilateral;
CaptureVisionRouter cvr;
public ImagePage(ImageData data, Quadrilateral quadrilateral)
{
InitializeComponent();
this.data = data;
this.quadrilateral = quadrilateral;
this.cvr = new CaptureVisionRouter();
}
protected override void OnHandlerChanged()
{
base.OnHandlerChanged();
normalize(EnumImageColourMode.ICM_Colour);
}
private void OnButtonClicked(object sender, EventArgs e)
{
Button button = sender as Button;
if (button != null)
{
if (button.Text == "gray")
{
normalize(EnumImageColourMode.ICM_GRAYSCALE);
}
else if (button.Text == "color")
{
normalize(EnumImageColourMode.ICM_Colour);
}
else if (button.Text == "binary")
{
normalize(EnumImageColourMode.ICM_BINARY);
}
}
}
private void normalize(EnumImageColourMode type)
{
var name = EnumPresetTemplate.PT_NORMALIZE_DOCUMENT;
var settings = cvr.GetSimplifiedSettings(name);
settings.DocumentSettings.ColourMode = type;
settings.Roi = quadrilateral;
settings.RoiMeasuredInPercentage = false;
cvr.UpdateSettings(name, settings);
var result = cvr.Capture(data, name);
if (result?.Items?.Length > 0)
{
foreach (var item in result.Items)
{
if (item.Type == EnumCapturedResultItemType.EnhancedImage)
{
EnhancedImageResultItem enhancedImage = (EnhancedImageResultItem)item;
image.Source = enhancedImage.ImageData?.ToImageSource();
return;
}
}
}
}
}
```
### Configure the Camera Permission
Open the **Info.plist** file under the **Platforms/iOS/** folder (Open with XML Text Editor). Add the following lines to request camera permission on iOS platform:
```xml
NSCameraUsageDescriptionThe sample needs to access your camera.
```
### Run the Project
Select your device and run the project.
You can get the similar source code of the ScanDocument app from the following link:
- [ScanDocument MAUI Sample](https://github.com/Dynamsoft/capture-vision-maui-samples/tree/main/ScanDocument){:target="_blank"}.
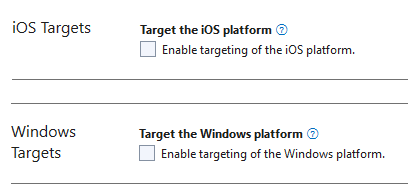
> Note: If you are running Android only on Visual Studio Windows, please manually exclude iOS and Windows platforms. Otherwise, the Visual Studio will report type or namespace not found errors.
## Licensing
- A one-day trial license is available by default for every new device to try Dynamsoft Capture Vision SDK.
- You can request a 30-day trial license via the [Request a Trial License](https://www.dynamsoft.com/customer/license/trialLicense?product=dcv&package=mobile&utm_source=docs){:target="_blank"} link.
- [Contact us](https://www.dynamsoft.com/company/contact/){:target="_blank"} to purchase a full license.