How to Upload Files with Django
Django is a Web application framework written in Python. In this article, I will focus on how to use Django to upload files. Besides a basic demo that based on HTML form, I will also share how to combine Dynamic Web TWAIN SDK with Django to scan and upload image files to Web server.
Django Download & Installation
To download and install Django, you just need to launch command line tools and type in:
pip install django
Basic Steps to Upload File with Django
-
Create a new Django project
django-admin startproject project -
Create an application
python manage.py startapp application - Create a folder templates. Declare the directory
[os.path.join(BASE_DIR, 'templates')]in settings.py. - Create a basic HTML page under templates.
- If you have static resources, such as CSS files, JavaScript files, image files and so on, declare the static resources path in settings.py.
- Map URLs in urls.py, and then create corresponding functions in views.py.
I will explain more precisely with following examples.
Uploading Files with Form
Create a new Django project simpleform:
django-admin startproject simpleform
Create an application formupload:
python manage.py startapp formupload
Create a folder templates, and declare its directory in settings.py:
TEMPLATES = [
    {
        'BACKEND': 'django.template.backends.django.DjangoTemplates',
        'DIRS': [os.path.join(BASE_DIR, 'templates')],
        'APP_DIRS': True,
        'OPTIONS': {
            'context_processors': [
                'django.template.context_processors.debug',
                'django.template.context_processors.request',
                'django.contrib.auth.context_processors.auth',
                'django.contrib.messages.context_processors.messages',
            ],
        },
    },
]
Create a simple Web page index.htm under templates:
<html>
<head>
  <title>Django File Upload</title>
  <style>
    h1 {
      font-size: 2em;
      font-weight: bold;
      color: #777777;
      text-align: center
    }
    table {
      margin: auto;
    }
  </style>
</head>

<body>
  <h1>
      {{what}}
  </h1>
  <table>
    <tr>
      <td>
        <form action="{{ request.build_absolute_uri }}upload/" method="POST" enctype="multipart/form-data">
          <input type="file" name="file"/>
          <br />
          <input type="submit" value="Upload File" />
        </form>
      </td>
    </tr>
  </table>

</body>

</html>
The identifier {{what}} will be rendered by Django’s template engine.
Open urls.py and add URL mapping:
from formupload import views

urlpatterns = [
    url(r'^$', views.home, name="home"),
    url(r'^upload/', views.upload, name="upload"),
]
When you enter URLs in Web browsers, Django will forward requests to corresponding functions.
Open views.py and add following methods:
def home(request):
    return render(request, 'index.htm', {'what':'Django File Upload'})

def upload(request):
    if request.method == 'POST':
        handle_uploaded_file(request.FILES['file'], str(request.FILES['file']))
        return HttpResponse("Successful")

    return HttpResponse("Failed")

def handle_uploaded_file(file, filename):
    if not os.path.exists('upload/'):
        os.mkdir('upload/')

    with open('upload/' + filename, 'wb+') as destination:
        for chunk in file.chunks():
            destination.write(chunk)
Launch the Django project with the following command:
python manage.py runserver
Visit 127.0.0.1:8000 and try to upload a file. Oops! You will see the error message “CSRF verification failed. Request aborted.”
There are two ways to solve this problem:
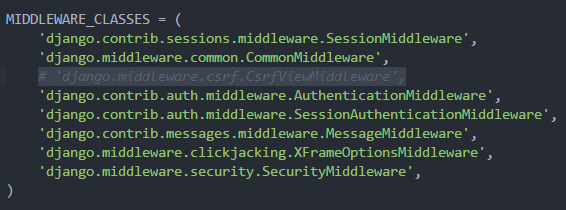
- Comment out “django.middleware.csrf.CsrfViewMiddleware” in settings.py.

- Use {% csrf_token %} with Form:
<form action="{{ request.build_absolute_uri }}upload/" method="POST" enctype="multipart/form-data">
          {% csrf_token %}
          <input type="file" name="file"/>
          <br />
          <input type="submit" value="Upload File" />
</form>
For more information about CSRF, you can read Cross Site Request Forgery protection.
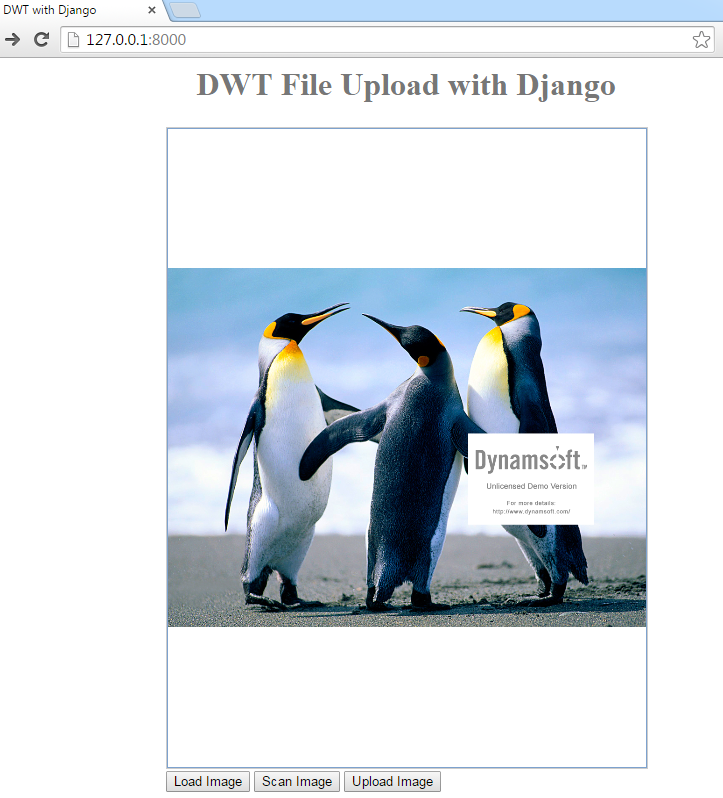
Uploading Image Files with Dynamic Web TWAIN
Create a new Django project dwt:
django-admin startproject dwt
Create an application dwtupload:
python manage.py startapp dwtupload
Same as the previous example, create a folder templates, and declare its directory in settings.py.
Create a simple Web page index.htm under templates:
{% load staticfiles %}
<html>

<head>
  <title>DWT with Django</title>
  <script type="text/javascript" src="{% static "dynamsoft.webtwain.initiate.js" %}"></script>
  <script type="text/javascript" src="{% static "dynamsoft.webtwain.config.js" %}"></script>
  <script type="text/javascript" src="{% static "jquery-2.1.4.min.js" %}"></script>
  <style>
    h1 {
      font-size: 2em;
      font-weight: bold;
      color: #777777;
      text-align: center
    }
    table {
      margin: auto;
    }
  </style>
</head>

<body>
  <h1>
            {{what}}
  </h1>
  <table>
    <tr>
      <td>
        <!-- dwtcontrolContainer is the default div id for Dynamic Web TWAIN control.
                   If you need to rename the id, you should also change the id in dynamsoft.webtwain.config.js accordingly. -->
        <div id="dwtcontrolContainer"></div>
      </td>
    </tr>

    <tr>
      <td>
        <input type="button" value="Load Image" onclick="btnLoad_onclick();" />
        <input type="button" value="Scan Image" onclick="AcquireImage();" />
        <input id="btnUpload" type="button" value="Upload Image" onclick="btnUpload_onclick()">
      </td>
    </tr>
  </table>

  <!--Custom script goes here-->
  <script type="text/javascript">
    Dynamsoft.WebTwainEnv.RegisterEvent('OnWebTwainReady', Dynamsoft_OnReady);
    var DWObject;

    function Dynamsoft_OnReady() {
      DWObject = Dynamsoft.WebTwainEnv.GetWebTwain('dwtcontrolContainer'); // Get the Dynamic Web TWAIN object that is embeded in the div with id 'dwtcontrolContainer'
      DWObject.Width = 480; // Set the width of the Dynamic Web TWAIN Object
      DWObject.Height = 640; // Set the height of the Dynamic Web TWAIN Object
    }

    function btnLoad_onclick() {
      var OnSuccess = function() {};

      var OnFailure = function(errorCode, errorString) {};

      DWObject.IfShowFileDialog = true;
      DWObject.LoadImageEx("", EnumDWT_ImageType.IT_ALL, OnSuccess, OnFailure);
    }

    function AcquireImage() {
      if (DWObject) {
        DWObject.IfShowUI = false;
        DWObject.IfDisableSourceAfterAcquire = true; // Scanner source will be disabled/closed automatically after the scan.
        DWObject.SelectSource(); // Select a Data Source (a device like scanner) from the Data Source Manager.
        DWObject.OpenSource(); // Open the source. You can set resolution, pixel type, etc. after this method. Please refer to the sample 'Scan' -> 'Custom Scan' for more info.
        DWObject.AcquireImage(); // Acquire image(s) from the Data Source. Please NOTE this is a asynchronous method. In other words, it doesn't wait for the Data Source to come back.
      }
    }

    function btnUpload_onclick() {
      DWObject.HTTPPort = 8000;
      var CurrentPathName = unescape(location.pathname); // get current PathName in plain ASCII
      var CurrentPath = CurrentPathName.substring(0, CurrentPathName.lastIndexOf("/") + 1);
      var strActionPage = CurrentPath + "upload/";
      var strHostIP = "127.0.0.1"; // server IP e.g. 192.168.8.84

      var OnSuccess = function(httpResponse) {
        alert("Succesfully uploaded");
      };

      var OnFailure = function(errorCode, errorString, httpResponse) {
        alert(httpResponse);
      };

      var date = new Date();
      var csrftoken = getCookie('csrftoken');
      DWObject.SetHTTPFormField('csrfmiddlewaretoken', csrftoken);
      DWObject.HTTPUploadThroughPostEx(
        strHostIP,
        DWObject.CurrentImageIndexInBuffer,
        strActionPage,
        date.getTime() + ".jpg",
        1, // JPEG
        OnSuccess, OnFailure
      );
    }

    function getCookie(name) {
      var cookieValue = null;
      if (document.cookie && document.cookie != '') {
          var cookies = document.cookie.split(';');
          for (var i = 0; i < cookies.length; i++) {
              var cookie = jQuery.trim(cookies[i]);
              // Does this cookie string begin with the name we want?
              if (cookie.substring(0, name.length + 1) == (name + '=')) {
                  cookieValue = decodeURIComponent(cookie.substring(name.length + 1));
                  break;
              }
          }
      }
      return cookieValue;
    }

  </script>

</body>

</html>
You may have noticed the identifiers {% loadstaticfiles %} and {% static “dynamsoft.webtwain.initiate.js” %} that used for loading JavaScript files. To make them work, we have to declare static file directories in settings.py:
STATICFILES_DIRS = (
    os.path.join(BASE_DIR, "Resources"),
)
In addition, we get the CSRF token from cookies:
function getCookie(name) {
    var cookieValue = null;
    if (document.cookie && document.cookie != '') {
        var cookies = document.cookie.split(';');
        for (var i = 0; i < cookies.length; i++) {
            var cookie = jQuery.trim(cookies[i]);
            // Does this cookie string begin with the name we want?
            if (cookie.substring(0, name.length + 1) == (name + '=')) {
                cookieValue = decodeURIComponent(cookie.substring(name.length + 1));
                break;
            }
        }
    }
    return cookieValue;
}
var csrftoken = getCookie('csrftoken');
To pass CSRF protection, we have to set the CSRF token with the API provided by Dynamic Web TWAIN SDK:
DWObject.SetHTTPFormField('csrfmiddlewaretoken', csrftoken);
Finally, add URL mapping to urls.py and add corresponding functions to views.py. The only difference for DWT project is to change request.FILES[‘file’] to request.FILES[‘RemoteFile’].


