


How to Automate Barcode Scanning in Zapier Workflows with JavaScript
Zapier is a workflow automation platform. It has integrated over 6000 applications and we can chain different applications in the same workflow without writing code.
In this article, we are going to build a Zapier app integration to scan barcodes. We can scan barcodes in a web application and the app will trigger workflows. Dynamsoft Barcode Reader is used for barcode scanning.
What you’ll build: A complete barcode-to-workflow pipeline — a JavaScript web scanner powered by Dynamsoft Barcode Reader sends scanned barcodes to a Flask polling server, which a custom Zapier integration polls to trigger automated Zaps (e.g., logging ISBN book data into Notion).
Key Takeaways
- Zapier does not offer a native barcode scanning trigger; you can bridge the gap with a custom polling integration backed by a Flask API and the Dynamsoft Barcode Reader JavaScript SDK.
- The polling server uses timestamp-based IDs so Zapier’s deduplication treats each scan as a unique event.
- Dynamsoft Barcode Reader’s
ReadSingleBarcodepreset stops scanning after one successful read, keeping the UX simple for single-item workflows. - This pattern generalizes beyond ISBN lookup — any downstream Zapier action (Google Sheets, Slack, email) can consume the barcode trigger.
Common Developer Questions
How do I automate barcode scanning in Zapier workflows?
Use a browser barcode scanner to post each successful scan to a small backend API, then let a custom Zapier polling trigger fetch those new scan records and fire downstream actions. In this tutorial the frontend reads one barcode at a time and the Flask service turns each scan into a Zap-consumable event.
How do I create a custom Zapier polling trigger for a barcode reader API?
Expose a GET endpoint that returns newly scanned barcode records and make sure each record has a unique ID so Zapier can deduplicate correctly. The article uses millisecond timestamps for that ID, which is enough to let repeated scans of different books become separate Zap events.
How do I connect a JavaScript webcam barcode scanner to Zapier and Notion?
Open the camera with Dynamsoft’s browser scanner, send the decoded barcode plus device UUID to the Flask endpoint, and configure Zapier to poll that endpoint and pass the barcode into a Notion action. That is the full end-to-end path implemented in this integration.
Prerequisites
- Python 3 with Flask installed
- Node.js (optional, for local front-end tooling)
- A Zapier account (free tier works for testing)
- A 30-day free trial license for Dynamsoft Barcode Reader
Step 1: Build a Web Barcode Scanner
Let’s build a Python back end and a JavaScript front end for the barcode scanner.
The frontend generates a UUID as the unique identifier and sends the scanned barcodes to the backend.
The backend has two endpoints to serve as a polling server for a Zapier integration.
/authfor authorization./codefor adding a barcode and retrieving the scanned barcode of a device (device is differentiated by UUID).
The /code endpoint would return scanned barcodes in an array like the following:
[
    {
        "id": 1710134464039,
        "barcode": "9781477701461"
    },
    {
        "id": 1710134706906,
        "barcode": "9780743258074"
    },
    {
        "id": 1710135037503,
        "barcode": "9780321344755"
    },
    {
        "id": 1710137117234,
        "barcode": "9780062874788"
    }
]
Timestamp is used as the ID so that we can scan multiple barcodes and Zapier’s deduplication mechanism will treat them as different records.
Set Up the Flask Back End
We use Flask to provide two endpoints — one for authentication and one for barcode data:
-
/auth:@app.route('/auth', methods=['POST','GET']) def auth(): response = {} response["success"] = True json_string = json.dumps(response) resp = Response(json_string) resp.headers['Content-Type'] = 'application/json' return respHere, it always returns true as we are using UUID as the identifier and no authorization is actually required.
-
/code:data = {} @app.route('/code', methods=['POST','GET']) def code(): global data new_barcode_items = [] if request.method == 'POST': uuid = request.args.get('uuid') barcode = request.args.get('barcode') barcodes = []; if uuid in data: barcodes = data[uuid] else: data[uuid] = barcodes item = {} item["id"] = int(time.time()*1000) item["barcode"] = barcode barcodes.append(item) else: uuid = request.args.get('uuid') if uuid in data: barcodes = data[uuid] for item in barcodes: new_barcode_items.append(item) json_string = json.dumps(new_barcode_items) resp = Response(json_string) resp.headers['Content-Type'] = 'application/json' return respIf the method is
POST, add a new barcode item in thedatadict. If the method isGET, return the scanned barcodes of a UUID in an array. -
Serve static files under the root.
app = Flask(__name__, static_url_path='/', static_folder='./')
Build the JavaScript Front End
-
Create a new
scanner.htmlfile with the following template:<!DOCTYPE html> <html> <head> <meta charset="UTF-8"> <meta name="viewport" content="width=device-width, initial-scale=1.0"> <title>Scan Barcode to Zapier</title> <style> </style> </head> <body> <div id="app"></div> <script></script> </body> </html> -
Include Dynamsoft Barcode Reader in the page:
<script src="https://cdn.jsdelivr.net/npm/dynamsoft-barcode-reader@10.0.21/dist/dbr.bundle.js"></script> -
Initialize the product with a license. You can apply for one here.
let license = "LICENSE-KEY"; Dynamsoft.License.LicenseManager.initLicense(license); -
Create an instance of Camera Enhancer to open the camera.
let view = await Dynamsoft.DCE.CameraView.createInstance();
let cameraEnhancer = await Dynamsoft.DCE.CameraEnhancer.createInstance(view);
document.getElementById("cameraViewContainer").append(view.getUIElement());
await cameraEnhancer.open();
Add the following element as the container for the camera view.
<style> #cameraViewContainer{ position: fixed; width: 100%; height: 100%; top:0; left:0; } </style> <div id="cameraViewContainer"></div> -
Create an instance of Capture Router to read barcodes from the camera frames.
let router = await Dynamsoft.CVR.CaptureVisionRouter.createInstance(); router.setInput(cameraEnhancer); await router.startCapturing("ReadSingleBarcode"); -
The barcode reading results can be received in the
onDecodedBarcodesReceivedcallback. Here, we save the result in a text input.router.addResultReceiver({ onDecodedBarcodesReceived: (result) => { if (result.barcodeResultItems.length > 0) { document.getElementById("barcode").value = result.barcodeResultItems[0].text; stopScanning(); } }}); -
Generate or load the UUID when the app starts.
function loadUUID(){ let uuid = localStorage.getItem("uuid"); if (!uuid) { uuid = generateUUID(); localStorage.setItem("uuid",uuid); } document.getElementById("uuid").value = uuid; } function generateUUID() { var temp_url = URL.createObjectURL(new Blob()); var uuid = temp_url.toString(); // blob:https://xxx.com/b250d159-e1b6-4a87-9002-885d90033be3 URL.revokeObjectURL(temp_url); return uuid.substr(uuid.lastIndexOf("/") + 1); } -
Send the barcode to the backend.
function send(){
    let uuid = document.getElementById("uuid").value;
    let barcode = document.getElementById("barcode").value;
    let xhr = new XMLHttpRequest();
    xhr.open('POST', "/code?uuid="+uuid+"&barcode="+barcode);
    xhr.onreadystatechange = function(){
        if(xhr.readyState === 4){
            document.getElementById("barcode").value = "";
            alert("Sent");
        }
    }
    xhr.onerror = function(){
        console.log("error");
        alert("failed");
    }
    xhr.send();
}
The web barcode scanner is implemented. We can deploy it to a platform like Vercel for production usage.
Step 2: Create the Zapier Integration
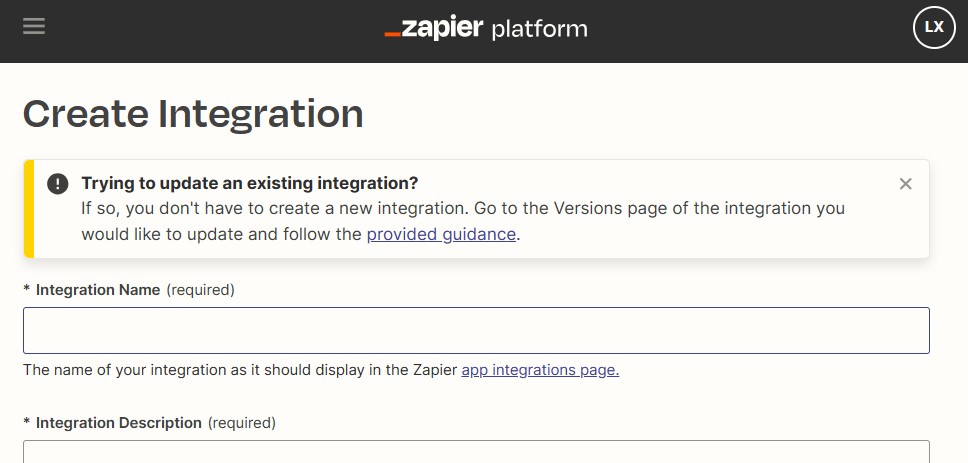
Go to developer.zapier.com and build a new integration with Platform UI.
Configure API Key Authentication
-
Choose
API Keyto set up the authentication.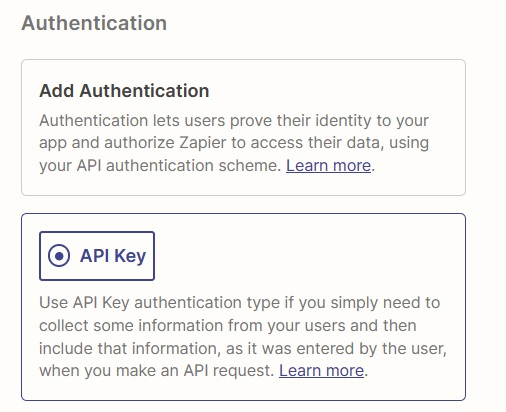
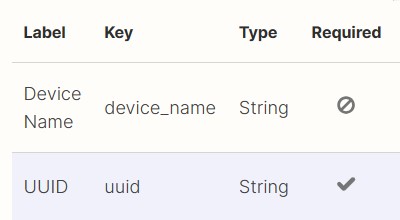
-
Add two authentication fields: UUID and device name.
-
Set up the endpoint URL for authentication. Here, we use
https://zapier-barcode-reader.vercel.app/auth.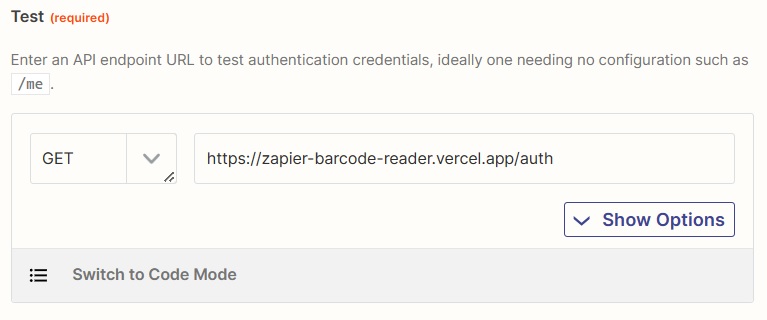
-
Specify
Device Nameas the connection label so that users can see the name in a zap’s setup page.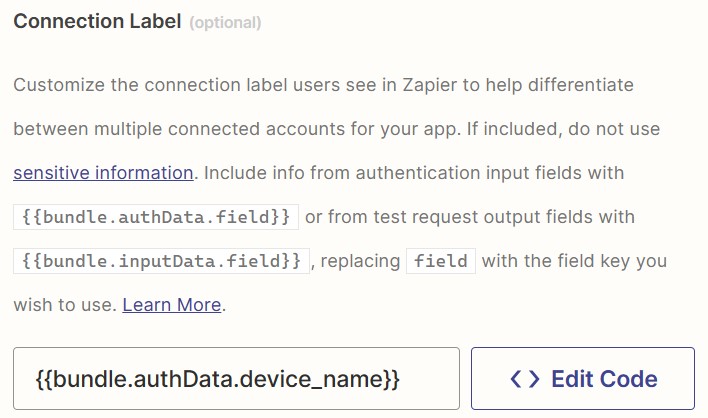
Set Up the Polling Trigger
-
Create a new trigger named
Barcode Scanned.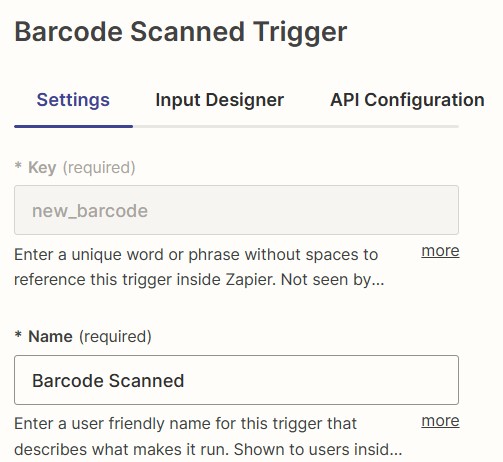
-
Configure the API request.
- Choose the type as
Polling. -
Set up the endpoint URL. Here, we use
https://zapier-barcode-reader.vercel.app/code.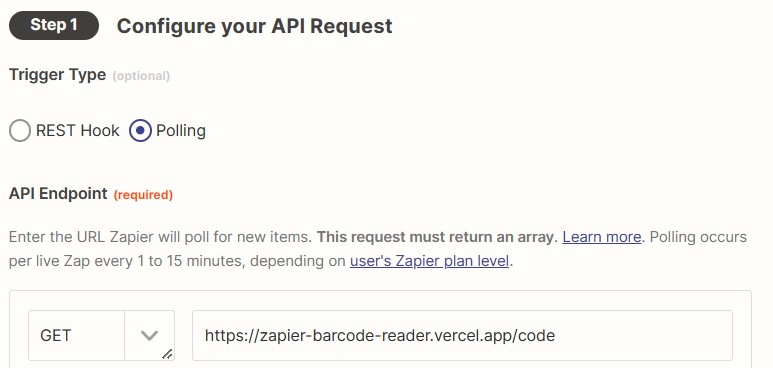
-
Provide a sample data:
{
  "id": 1710134464039,
  "barcode": "9780321344755"
}
- Choose the type as
Step 3: Create a Zap Workflow
Now that the integration is done, let’s use it in a Zap. The workflow will:
- Trigger when an ISBN barcode of a book is scanned.
- Query the book’s info via Google’s API by running JavaScript.
- Create a new Notion record to store the scanned book.
Here are the detailed steps:
Add the Barcode Reader Trigger
-
Create a new zap and select
Dynamsoft Barcode Readerintegration we made as the trigger.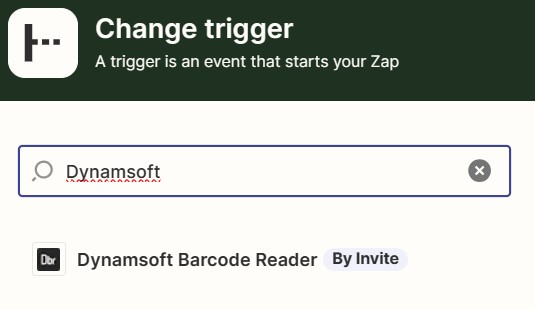
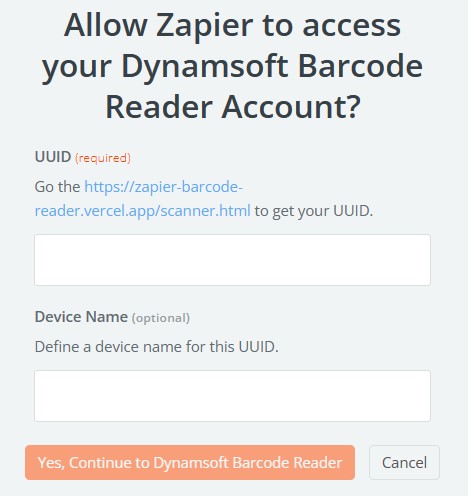
-
Connect to an account by entering the UUID and device name.
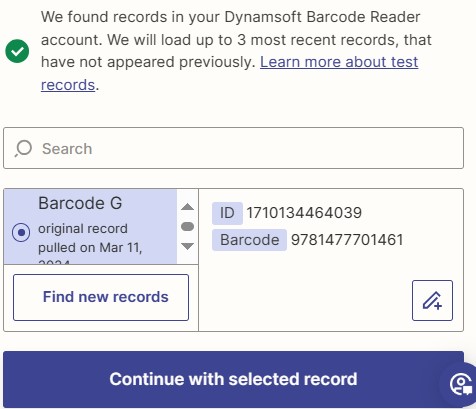
-
Scan a barcode in the web barcode scanner and send it to Zapier. Then, we can get the records in the test step.
Query Book Info with JavaScript
Next, create a step to run JavaScript code to get the book’s info like title, author and description.
-
Select
Code by Zapieras the action.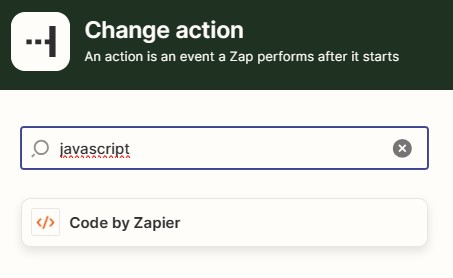
-
Select
Run JavaScript.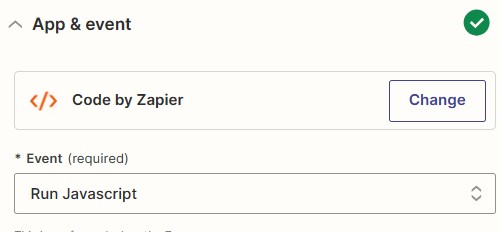
-
Use
Barcodein the previous step as the input data.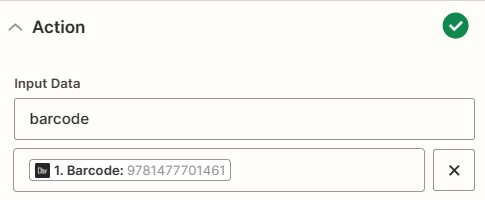
-
In the code input, enter the following JavaScript code to query the book’s info.
output = []; let response = await fetch("https://www.googleapis.com/books/v1/volumes?q=isbn:"+inputData.barcode); let object = await response.json() let items = object["items"] if (items.length>0) { let item = items[0]; let title = item["volumeInfo"]["title"]; let desc = item["volumeInfo"]["description"]; let authors = item["volumeInfo"]["authors"].join(" "); output = [{"title":title,"desc":desc,"authors":authors}]; } -
In the test step, we should be able to get the following results.

Save the Book Record to Notion
- In Notion, create a new database with the following fields: ISBN, title, author and description.
-
Create a new step. Select Notion and select
Create Database Itemas the action.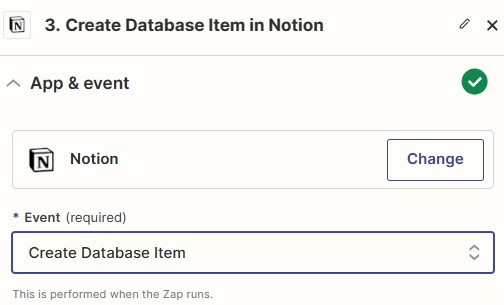
- Connect your Notion account via OAuth.
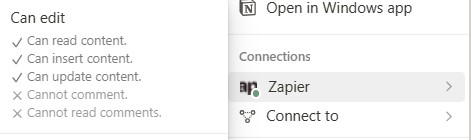
-
Go to Notion and connect the database to Zapier.
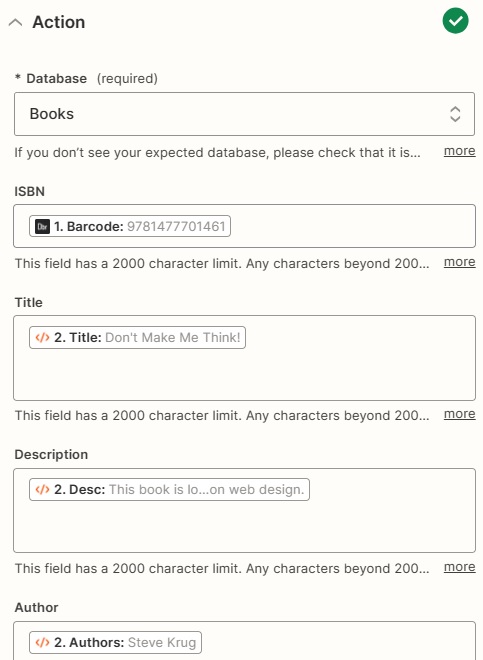
-
In the action part, fill in the info.
-
Run the test and we can see a new item is inserted into the Notion database.

All right, we’ve now gone through the steps of scanning barcodes into Zapier.
Common Issues and Edge Cases
- Zapier polling returns empty results: The polling endpoint only returns barcodes already stored in the server’s in-memory
datadict. If the Flask server restarts, all stored barcodes are lost. For production, persist scans to a database (e.g., SQLite or PostgreSQL). - Duplicate barcode triggers: Zapier deduplicates by the
idfield. The server usesint(time.time()*1000)(millisecond timestamp) as the ID. If two barcodes are scanned within the same millisecond, only one will trigger. Add a random suffix or use a UUID per scan to guarantee uniqueness. - Camera not opening in the browser:
CameraEnhancer.open()requires HTTPS (orlocalhost). If you deploy the front end without TLS, the browser will block camera access silently. Ensure HTTPS is configured on your hosting platform.
Source Code
Get the source code of the web barcode scanner to have a try: Get the complete sample project source code on GitHub