


How to Scan and Digitize Documents in Blazor WebAssembly with C# and .NET
Last week, we developed a RESTful service using .NET C# and Twain.Wia.Sane.Scanner library to scan documents from TWAIN, WIA, SANE, and eSCL scanners. This week, we will repurpose the C# code to construct a Blazor WebAssembly application that digitizes documents directly from a web browser, all without the need for JavaScript.
What you’ll build: A Blazor WebAssembly app that scans and digitizes documents from TWAIN, WIA, SANE, and eSCL scanners entirely in C#—no JavaScript required.
Key Takeaways
- Blazor WebAssembly allows you to build a browser-based document scanner using only C# and the Twain.Wia.Sane.Scanner NuGet package, eliminating the need for JavaScript interop.
- The Dynamic Web TWAIN Service exposes a RESTful API on the local machine, enabling any web app to communicate with physical scanners over HTTP.
- Scanned images are streamed as
byte[], converted to Base64, and displayed inline in the browser using Blazor’s data-binding syntax. - This approach works cross-platform (Windows, macOS, Linux) and supports TWAIN, WIA, SANE, and eSCL scanner protocols.
Common Developer Questions
How do I scan documents from a web browser using Blazor WebAssembly and C#?
Reference the Twain.Wia.Sane.Scanner package in the Blazor WebAssembly project, point it at the Dynamic Web TWAIN Service host, and call its C# methods to enumerate scanners and create scan jobs. The browser UI stays in Razor components while the actual scanner communication happens through the local REST service.
Can Blazor WebAssembly access TWAIN or WIA scanners without JavaScript?
Yes. In this approach, Blazor never calls native scanner drivers directly. It talks to the Dynamic Web TWAIN Service over HTTP through a C# wrapper library, so the app can stay in C# without JavaScript scanner interop.
How do I display scanned document images in a Blazor app?
Read the scanned page bytes from the service, convert them to Base64, and bind the result to an image data URL in the Razor component. That lets Blazor render the scanned document inline with normal data binding.
This article is Part 1 in a 5-Part Series.
- Part 1 - How to Scan and Digitize Documents in Blazor WebAssembly with C# and .NET
- Part 2 - Build a Blazor WebAssembly Barcode and QR Code Scanner with Dynamsoft
- Part 3 - How to Build a Blazor WebAssembly PDF Annotation Viewer with Dynamsoft
- Part 4 - Build a C# Blazor WebAssembly Passport MRZ Scanner with Dynamsoft
- Part 5 - How to Implement TWAIN Document Scanning in a .NET Blazor WebAssembly App
Prerequisites
- Install the Dynamic Web TWAIN Service on a machine that is connected to scanners and hosts a web service.
-
Modify the host IP address to make it publicly accessible.
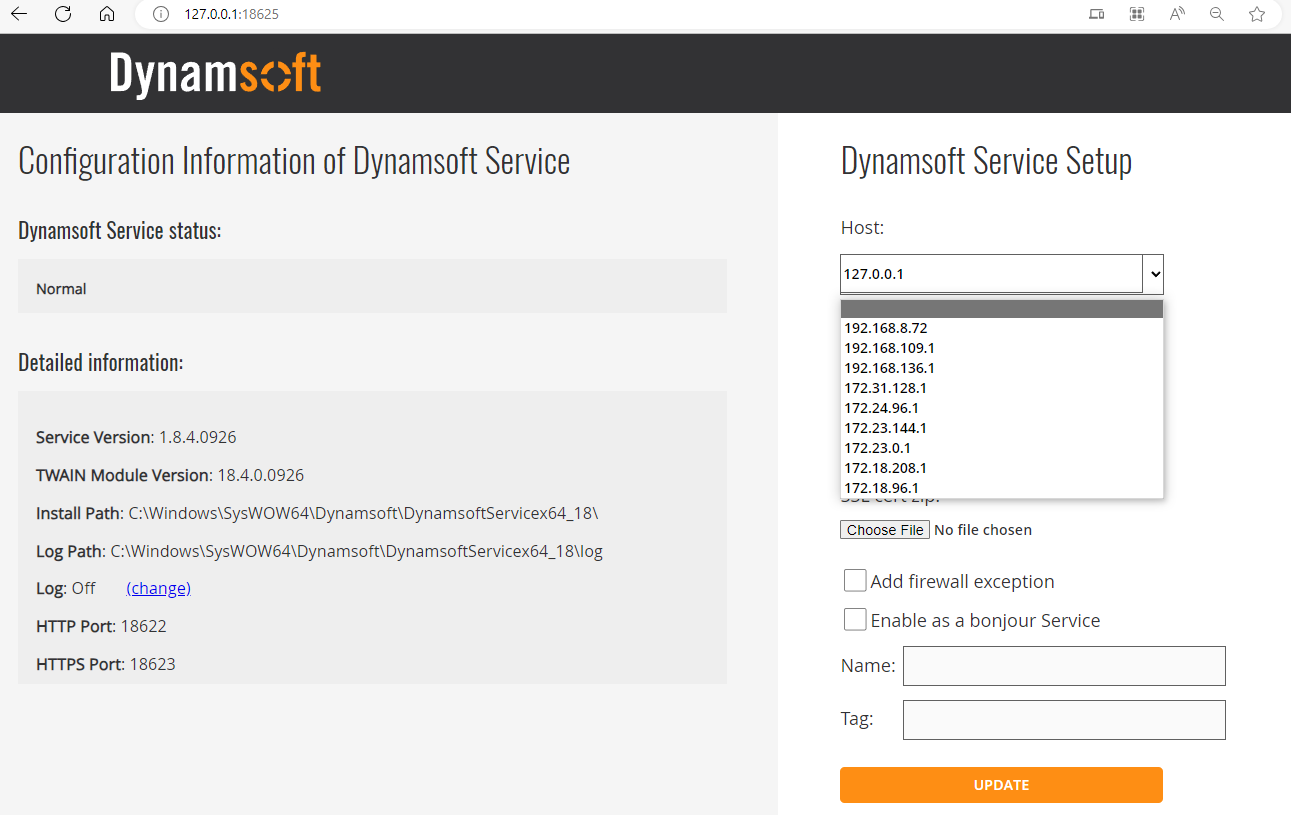
You can test it by visiting
http://[host-ip]:18626/DWTAPI/Scannersin a browser. If you see the following page, it means the Dynamic Web TWAIN Service is successfully installed and running.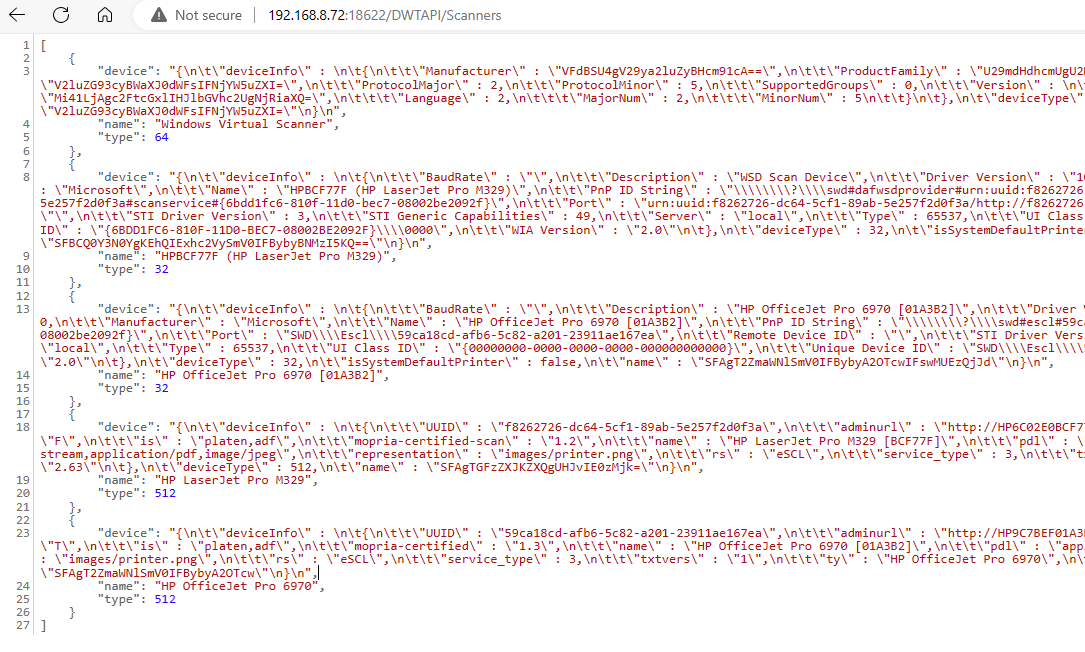
- Get a 30-day free trial license for Dynamic Web TWAIN Service.
Build a Web-Based Document Scanner with Blazor WebAssembly
In the following paragraphs, we will demonstrate the process of constructing a web-based document digitization application from scratch. For clarity, we will start by establishing an empty Blazor WebAssembly project, which will only encompass an Index.razor file.
Step 1: Set Up the Blazor WebAssembly Project
-
Create the Blazor project using Visual Studio or the command line:
dotnet new blazorwasm-empty -o blazorwasm-empty-project -
Install the NuGet package:
dotnet add package Twain.Wia.Sane.Scanner --version 1.1.0
Step 2: Build the Document Scanner UI in HTML
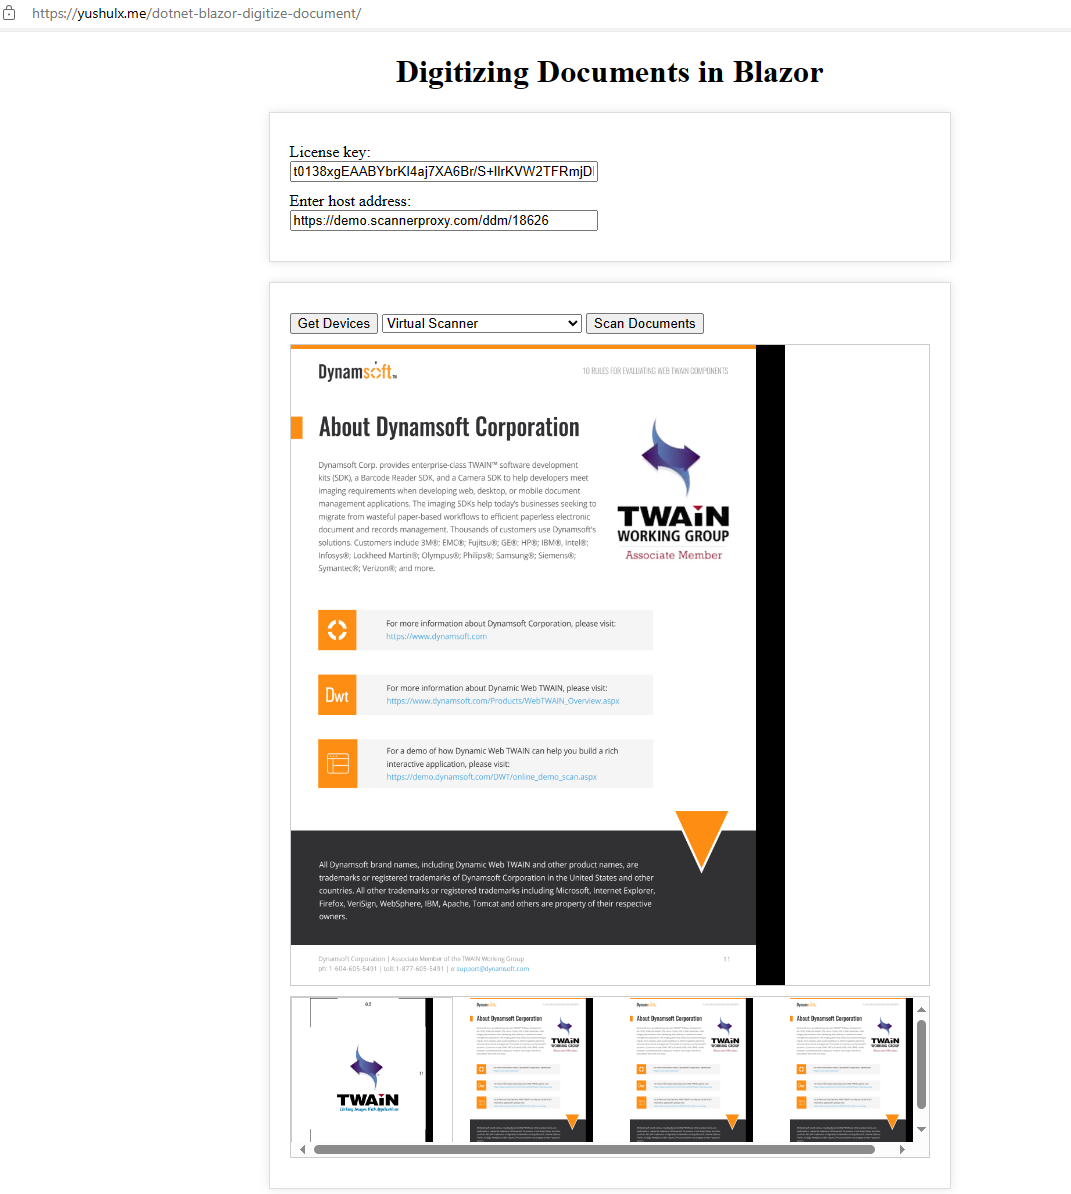
We construct the app UI as follow:
<div id="loading-indicator" class="loading-indicator">
    <div class="spinner"></div>
</div>

<div class="connection">
    <div class="row">
        <div>
            <label>License key: </label>
            <div class="filler"></div>
            <input type="text" placeholder="">
        </div>
    </div>
     <div class="row">
        <div>
            <label>Enter host address: </label>
            <div class="filler"></div>
            <input type="text" id="host" placeholder="">
        </div>
    </div>
</div>

<div class="container" id="dwt">
    <div class="row">
        <div>
            <button onclick="getDevices()">Get Devices</button>
            <select id="sources">
            </select>
            <button onclick="acquireImage()">Scan Documents</button>
        </div>

    </div>

    <div class="row">
        <div class="full-img">
            <img id="scanner-image">
        </div>
    </div>

    <div class="row">
        <div class="thumb-bar" id="thumb-bar">
            <div class="thumb-box" id="thumb-box">
            </div>
        </div>
    </div>
</div>
The loading-indicator is used to show the loading animation. The connection section is for users to enter the license key and host address. The dwt section is for the document scanning part.
Step 3: Convert HTML to Razor Syntax
Razor is a markup syntax that enables developers to embed C# code within HTML, facilitating the creation of dynamic web pages using C#. In the following sections, we will convert the above HTML code to comply with the Razor syntax.
How to import a .NET library into a Blazor project?
Import the Twain.Wia.Sane.Scanner namespace in the Index.razor file to use the ScannerController class:
@page "/"
@using Twain.Wia.Sane.Scanner

@code {
    private ScannerController scannerController = new ScannerController();
}
How to append options to select element in Blazor?
To append options to a select element in a Blazor app using C#, we typically use the Blazor rendering system, rather than manipulating the DOM directly with JavaScript.
<button @onclick="GetDevices">Get Devices</button>
<select id="sources" @bind="selectedValue">
    @foreach (var device in devices)
    {
        <option value="@device["name"].ToString()">@device["name"].ToString()</option>
    }
</select>

@code {
    private bool isLoading = false;

    private string host = "http://127.0.0.1:18622";
    private List<Dictionary<string, object>> devices = new List<Dictionary<string, object>>();
    private string licenseKey = "LICENSE-KEY";

    private string jobId = "";
    private string selectedValue { get; set; } = string.Empty;

    private List<string> imageUrls { get; set; } = new List<string>();
    public async Task GetDevices()
    {
        isLoading = true;

        try
        {
            var scannerInfo = await scannerController.GetDevices(host);
            try
            {
                var scanners = JsonConvert.DeserializeObject<List<Dictionary<string, object>>>(scannerInfo);
                for (int i = 0; i < scanners.Count; i++)
                {
                    var scanner = scanners[i];
                    devices.Add(scanner);
                    Console.WriteLine($"\nIndex: {i}, Name: {scanner["name"]}");
                }
            }
            catch (Exception ex)
            {
                Console.WriteLine($"Error: {ex.Message}");
            }
            if (devices.Count > 0)
            {
                selectedValue = devices[0]["name"].ToString();
            }
        }
        catch (Exception ex)
        {
            Console.WriteLine(ex.Message);
        }

        isLoading = false;
    }
}
- The
hostandlicenseKeyneed to be modified to your own values. - The
List<Dictionary<string, object>> devicesstores the options for the select element. - The
@foreachdirective is used to render each option in the devices list. - The
@binddirective is used for two-way data binding. It bind the selected value to theselectedValueproperty.
How to show the loading indicator?
To show a loading indicator when pressing the button and hide it once the function completes, we use a boolean flag that tracks whether data is being loaded. Based on the value of this flag, the loading indicator can be rendered conditionally.
<div id="loading-indicator" class="loading-indicator" style="@(isLoading ? "display: flex;" : "display: none;")">
    <div class="spinner"></div>
</div>
How to acquire the image stream and display it in the browser?
The image stream is of type byte[]. To display such a byte[] image stream in an <img> element in Blazor, it can be converted to a Base64 string. Using the data: URL scheme, this string can be embedded directly into the src attribute of the <img> element. All image URLs are stored in the imageUrls list. By clicking on a thumbnail, the corresponding image will be displayed in the <img> element.
<button @onclick="AcquireImage">Scan Documents</button>

<div class="row">
    <div class="full-img">
        <img id="scanner-image" src="@imageDataUrl">
    </div>
</div>

<div class="row">
    <div class="thumb-bar" id="thumb-bar">
        <div class="thumb-box" id="thumb-box">
            @foreach (var url in imageUrls)
            {
                <img src="@url" @onclick="() => OnImageClick(url)" />
            }
        </div>
    </div>
</div>

@code {
    public async Task AcquireImage()
    {
        if (devices.Count == 0)
        {
            return;
        }

        int selectedIndex = devices.FindIndex(device => device["name"].ToString() == selectedValue);
        if (selectedIndex < 0) return;
        var parameters = new Dictionary<string, object>
                {
                    {"license", licenseKey},
                    {"device", devices[selectedIndex]["device"]}
                };

        parameters["config"] = new Dictionary<string, object>
                {
                    {"IfShowUI", false},
                    {"PixelType", 2},
                    {"Resolution", 200},
                    {"IfFeederEnabled", false},
                    {"IfDuplexEnabled", false}
                };
        var jobInfo = await scannerController.CreateJob(host, parameters);
        string jobId = "";

        try
        {
            var job = JsonConvert.DeserializeObject<Dictionary<string, object>>(jobInfo);
            jobId = (string)job["jobuid"];

            if (string.IsNullOrEmpty(jobId))
            {
                Console.WriteLine("Failed to create job.");
            }
        }
        catch (Exception ex)
        {
            Console.WriteLine($"Error: {ex.Message}");
        }

        if (!string.IsNullOrEmpty(jobId))
        {
            byte[] bytes = await scannerController.GetImageStream(host, jobId);
            imageDataUrl = $"data:image/png;base64,{Convert.ToBase64String(bytes)}";
            AddImageUrl(imageDataUrl);
        }
    }

    private void AddImageUrl(string url)
    {
        imageUrls.Add(url);
    }

    private void OnImageClick(string url)
    {
        imageDataUrl = url;
    }
}
Deploy the Blazor App to GitHub Pages
After completing the Blazor project, we can deploy it to GitHub Pages.
- Create a new repository on GitHub.
- Push the Blazor project to the repository.
- Navigate to the repository:
Settings > Actions > General > Workflow permissionsand enableRead and write permissions. -
Create a new workflow file named
main.ymlin the.github/workflowsfolder. Replacedotnet-blazor-digitize-documentwith your own repository name.name: blazorwasm on: push: branches: [ main ] pull_request: branches: [ main ] workflow_dispatch: jobs: build: runs-on: ubuntu-latest steps: - uses: actions/checkout@v3 - name: Setup .NET Core SDK uses: actions/setup-dotnet@v2 with: dotnet-version: '7.0.x' include-prerelease: true - name: Publish .NET Core Project run: dotnet publish blazorwasm-empty-project.csproj -c Release -o release --nologo - name: Change base-tag in index.html from / to dotnet-blazor-digitize-document run: sed -i 's/<base href="\/" \/>/<base href="\/dotnet-blazor-digitize-document\/" \/>/g' release/wwwroot/index.html - name: copy index.html to 404.html run: cp release/wwwroot/index.html release/wwwroot/404.html - name: Add .nojekyll file run: touch release/wwwroot/.nojekyll - name: Commit wwwroot to GitHub Pages uses: JamesIves/github-pages-deploy-action@3.7.1 with: GITHUB_TOKEN: $ BRANCH: gh-pages FOLDER: release/wwwroot - To test your local Dynamic Web TWAIN Service on a GitHub page, install ngrok and run
ngrok http 18622to expose the local port18622to the internet.
Try the Online Demo
Visit https://yushulx.me/blazor-barcode-mrz-document-scanner/ and use your own license key.
Common Issues and Edge Cases
- Dynamic Web TWAIN Service not detected: If visiting
http://127.0.0.1:18626/DWTAPI/Scannersreturns no response, confirm the service is running and the host IP in the service configuration matches your machine’s address. On Linux, check that the service has proper permissions. - CORS errors when connecting from Blazor: When the Blazor app runs on a different origin (e.g., GitHub Pages) than the Dynamic Web TWAIN Service, you must expose the service via a tunnel such as ngrok. Direct cross-origin requests to
localhostwill be blocked by the browser. - Scanned image not rendering: If the
<img>element remains blank after scanning, verify that thejobIdreturned byCreateJobis valid and thatGetImageStreamreturns a non-emptybyte[]. An expired or invalid license key is the most common cause.