


Bundle a .NET TWAIN Document Scanner and Dynamic Web TWAIN Service into One Windows Installer with WiX
Bundle a .NET WinForms TWAIN document scanner and the Dynamic Web TWAIN Service into one Windows installer using WiX Toolset v4. This eliminates the need for users to run separate installers for the application and its scanner service, improving the desktop distribution experience.
What you’ll build: A single Windows installer (MSI + EXE bundle) that packages a .NET WinForms TWAIN document scanning application together with the Dynamic Web TWAIN Service, using WiX Toolset v4.
Key Takeaways
- WiX Toolset v4 lets you create professional MSI installers and multi-package bundles for .NET desktop applications entirely from XML.
- Bundling the Dynamic Web TWAIN Service MSI with your application MSI into one EXE eliminates the need for users to run two separate installers.
- The WixUI extension adds a standard Windows installer UI (license dialog, install directory picker) with minimal configuration.
- This approach works for any .NET WinForms or WPF app that depends on the Dynamsoft Service for TWAIN, WIA, or SANE scanner access.
Common Developer Questions
How do I bundle the Dynamic Web TWAIN Service with my .NET desktop application into one installer?
First build an MSI for your .NET scanner application, then create a WiX bundle project that chains that MSI together with the Dynamic Web TWAIN Service MSI inside one bootstrapper EXE. That is the packaging pattern this tutorial uses to turn a two-installer dependency into one Windows installation flow.
How do I create a WiX v4 MSI installer for a .NET WinForms application in Visual Studio 2022?
Create an MSI Package (WiX v4) project, add your WinForms output files as WiX components, and define the package metadata plus feature/component references in the .wxs files. The article walks through that XML-based setup directly inside Visual Studio 2022.
How do I add a UI wizard to a WiX MSI package so users can choose the install directory?
Install the WixToolset.UI.wixext package and add the WixUI_InstallDir configuration to Package.wxs so the MSI shows the normal install wizard and directory picker. Without that extension, the default WiX package builds but provides almost no interactive installer UI.
Step 1: Download Dynamic Web TWAIN Service for Windows
What is WiX Toolset?
The WiX Toolset is an open-source project that allows developers to create Windows installation packages from XML source code.
Step 2: Install WiX Toolset in Visual Studio 2022
- Install the HeatWave extension for VS2022 from the Visual Studio Marketplace.
-
Open the project creation window and select
WiXfrom theAll languagesdropdown to display all available WiX project templates.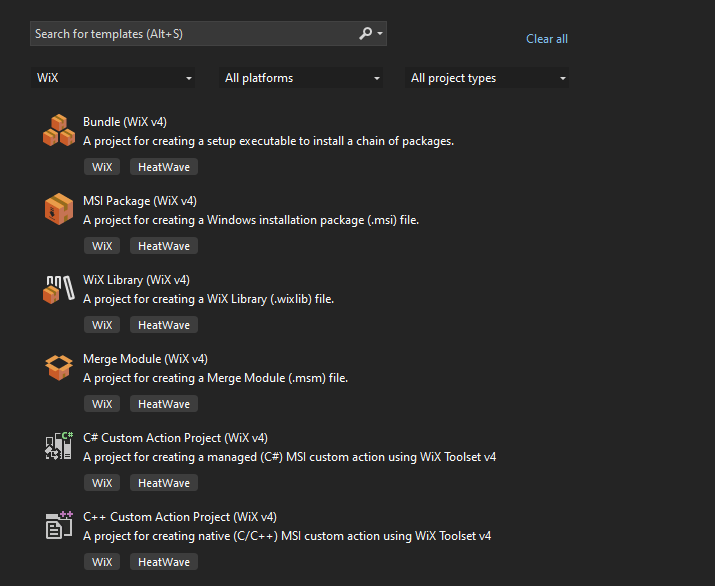
Step 3: Build the .NET WinForms TWAIN Document Scanner
- Get the source code of the .NET document scanning application from GitHub.
-
Get a 30-day free trial license and update the license key in the
Form1.csfile.private static string licenseKey = "LICENSE-KEY"; -
Build the application to generate the necessary files, which will be located in the
bin\Release\net7.0-windowsfolder.dotnet build -c ReleaseThe following list enumerates all the files required for the application:
 Twain.Wia.Sane.Scanner.dll
 WinFormsDocScan.deps.json
 WinFormsDocScan.dll
 WinFormsDocScan.exe
 WinFormsDocScan.pdb
 WinFormsDocScan.runtimeconfig.json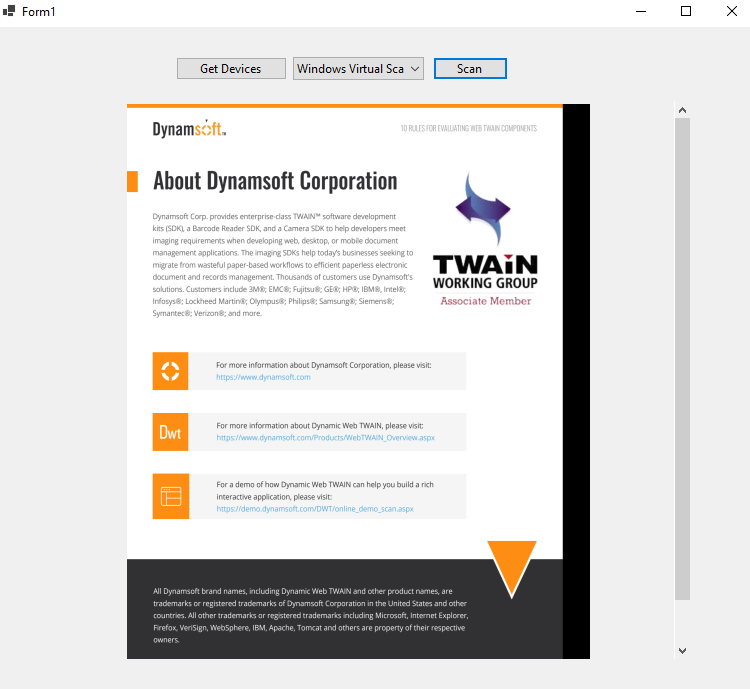
Step 4: Create an MSI Installer Package with WiX v4
-
Select the
MSI Package (WiX v4)option to create a new WiX project. The structure of the project is displayed below.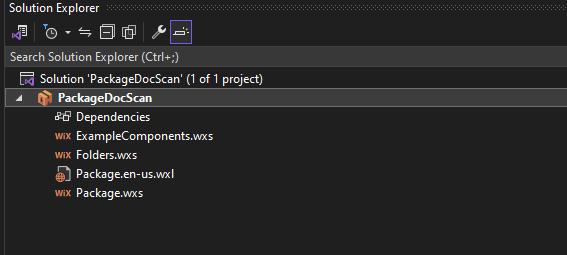
-
Open the
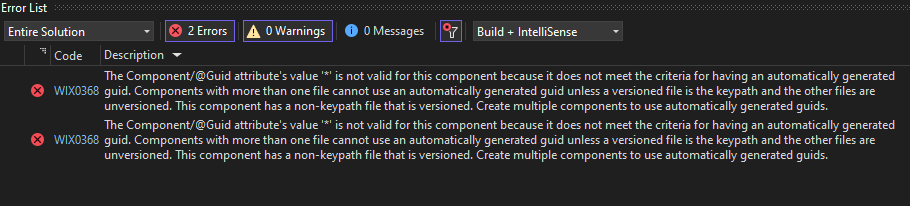
ExampleComponents.wxsfile and add all the files associated with the document scanner application.<Wix xmlns="http://wixtoolset.org/schemas/v4/wxs"> <Fragment> <ComponentGroup Id="ExampleComponents" Directory="INSTALLFOLDER"> <Component Guid="485f0a38-7e1e-4597-a68d-27e96642c12c"> <File Source="..\WinFormsDocScan\bin\Release\net7.0-windows\WinFormsDocScan.exe" KeyPath="yes"/> <File Source="..\WinFormsDocScan\bin\Release\net7.0-windows\Twain.Wia.Sane.Scanner.dll"/> <File Source="..\WinFormsDocScan\bin\Release\net7.0-windows\WinFormsDocScan.deps.json"/> <File Source="..\WinFormsDocScan\bin\Release\net7.0-windows\WinFormsDocScan.dll"/> <File Source="..\WinFormsDocScan\bin\Release\net7.0-windows\WinFormsDocScan.pdb"/> <File Source="..\WinFormsDocScan\bin\Release\net7.0-windows\WinFormsDocScan.runtimeconfig.json"/> </Component> </ComponentGroup> </Fragment> </Wix>Note: The project will fail to build if a GUID (Globally Unique Identifier) is not provided.
You can generate a valid GUID using the following PowerShell command:
[guid]::NewGuid() - When you build the project, it will generate the following files:
cab1.cab,PackageDocScan.msiandPackageDocScan.wixpdb.cab1.cabcontains all the files of the document scanner application.PackageDocScan.msiis the installer package.PackageDocScan.wixpdbis the project database file.
Since we want to keep the installer package and the application files together, we need to modify the
Package.wxsfile to include the application files in the installer package.<Wix xmlns="http://wixtoolset.org/schemas/v4/wxs"> <Package Name="PackageDocScan" Manufacturer="Dynamsoft" Version="1.0.0.0" UpgradeCode="d79d6f4a-f2ec-41ff-9445-b6219ae8f99a"> <MajorUpgrade DowngradeErrorMessage="!(loc.DowngradeError)" /> <Feature Id="Main"> <ComponentGroupRef Id="ExampleComponents" /> </Feature> <Media Id="1" Cabinet="cab1.cab" EmbedCab="yes"/> </Package> </Wix> -
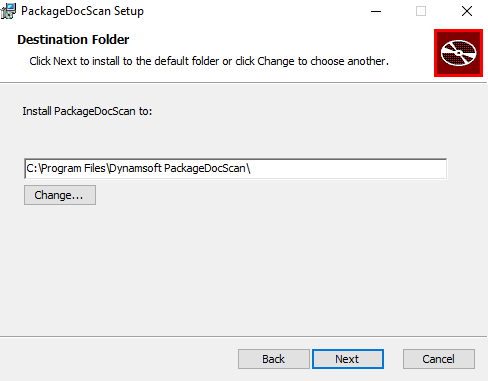
Rebuild the project, and you will notice that only two files are generated:
PackageDocScan.msiandPackageDocScan.wixpdb. To install the application, double-click on thePackageDocScan.msifile. The application will be installed in theC:\Program Files\Dynamsoft PackageDocScandirectory.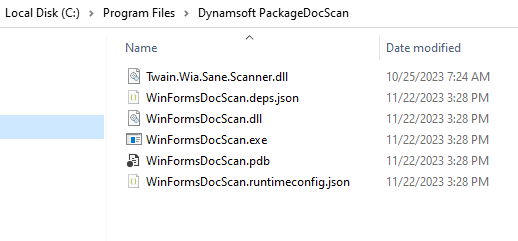
The installation is successful, but it lacks user-friendly interaction during the process. To enhance this, we need to add a user interface to the installer package.
-
Open the
NuGet Package Managerand install theWixToolset.UI.wixext WiXpackage for WiX.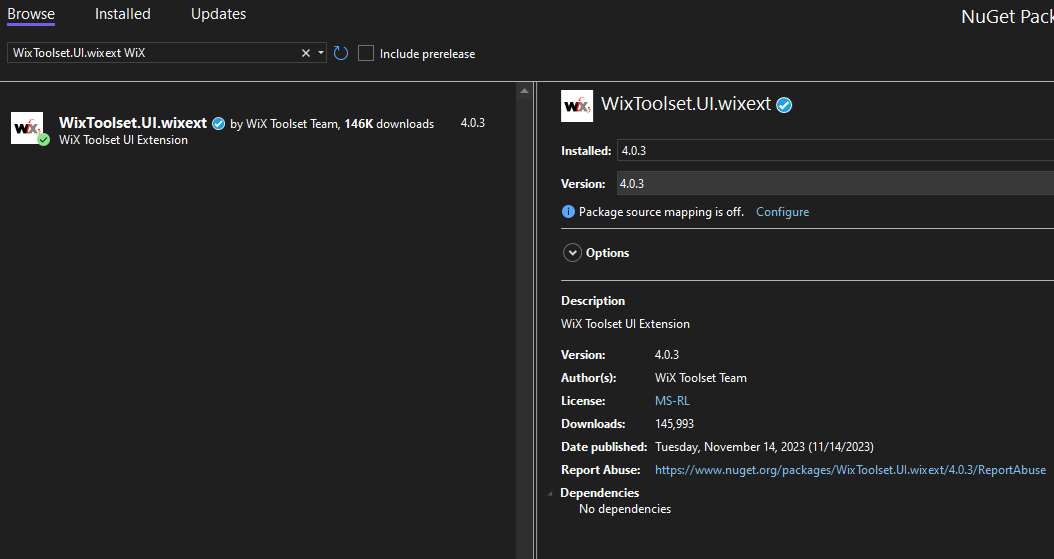
Then add the following code to the
Package.wxsfile.<Wix xmlns="http://wixtoolset.org/schemas/v4/wxs" xmlns:ui="http://wixtoolset.org/schemas/v4/wxs/ui"> ... <ui:WixUI Id="WixUI_InstallDir" InstallDirectory="INSTALLFOLDER" /> ...After rebuilding the project, you will notice that the installer package now includes a user interface, similar to what is typically seen when installing Windows applications.
Step 5: Bundle Dynamic Web TWAIN Service and the Scanner App into One Installer
Now that the MSI package is ready, we can proceed to create a Bundle (WiX v4) project that will include both the Dynamic Web TWAIN Service and the document scanner application.
The Bundle.wxs file is as belows.
<Wix xmlns="http://wixtoolset.org/schemas/v4/wxs" xmlns:bal="http://wixtoolset.org/schemas/v4/wxs/bal">
  <Bundle Name="BundleDocScan" Manufacturer="TODO Manufacturer" Version="1.0.0.0" UpgradeCode="8515efd9-92c0-4232-bd0f-a572a0ccbce5">
    <BootstrapperApplication>
      <bal:WixStandardBootstrapperApplication
		  LicenseUrl="https://www.dynamsoft.com/company/license-agreement/"
		  Theme="hyperlinkLicense"
		  LogoFile="logo.png"/>
    </BootstrapperApplication>

    <Chain>
		<MsiPackage SourceFile="..\PackageDocScan\bin\x64\Release\en-US\PackageDocScan.msi" />
		<MsiPackage SourceFile="msi\DynamsoftServiceSetup.msi" />
    </Chain>

  </Bundle>
</Wix>
It contains two MsiPackage elements. The SourceFile attribute specifies the path to the installer package, while the LogoFile attribute defines the path to the logo image.
Running the bundle’s executable file will install both the Dynamic Web TWAIN Service and the document scanner application.

With this setup, the .NET document scanner application can now be distributed to any Windows user for installation and use.
Common Issues and Edge Cases
- WiX build fails with missing GUID error: Every
<Component>element in WiX requires a unique GUID. Generate one with[guid]::NewGuid()in PowerShell and paste it into theGuidattribute. - Bundle installs one MSI but silently skips the other: Ensure both
<MsiPackage>SourceFilepaths are correct relative to the bundle project directory. A wrong path causes WiX to build successfully but produce an incomplete bundle. - Installer does not show a UI wizard: The default WiX MSI template has no UI. You must install the
WixToolset.UI.wixextNuGet package and add the<ui:WixUI>element toPackage.wxsas shown in Step 4.