


How to Stream an OpenCV Webcam Feed to a Web Browser Using Python, Node.js, C#, and Go
During the pandemic, the demand for camera apps is booming due to the social distancing situation. So, I collected some basic OpenCV webcam sample code implemented in different programming languages and built some simple web apps for remote webcam access. Hopefully, it will be helpful for someone who is getting started to build webcam apps. In this article, I will use JavaScript, C#, Python, and Golang.
What you’ll build: A cross-platform webcam app that captures live video with OpenCV and streams it to any desktop or mobile browser over HTTP — implemented in Python, Node.js, C#, and Go, with optional remote access via ngrok.
Key Takeaways
- OpenCV’s
VideoCaptureAPI works uniformly across Python, Node.js (opencv4nodejs), C# (OpenCvSharp), and Go (gocv) for real-time webcam frame capture. - Streaming a webcam feed to any web browser requires only a lightweight HTTP server that serves JPEG-encoded frames on demand — no WebSocket or WebRTC needed.
- All four implementations follow the same pattern: capture frame → encode to JPEG → serve via HTTP GET → refresh an
<img>element with a JavaScript timer. - Use ngrok to expose your local HTTP server to the internet for remote webcam monitoring without any cloud infrastructure.
Common Developer Questions
How do I stream an OpenCV webcam feed to a web browser in Python?
Capture webcam frames with OpenCV, encode each frame as JPEG, and serve those bytes through a lightweight HTTP endpoint that a browser page refreshes continuously. The Python version follows the same capture-encode-serve loop as the Node.js, C#, and Go versions in the article.
How do I access a webcam in Node.js using OpenCV?
Use the opencv4nodejs binding to open a VideoCapture, read frames in a loop, and either display them locally or feed them into an HTTP response path. The point of the article is that Node.js can use the same OpenCV capture pattern as the other languages shown.
How do I stream live webcam video over HTTP without WebSockets or WebRTC?
You can keep it simple by serving JPEG snapshots over ordinary HTTP and refreshing an <img> element on the page instead of building a persistent real-time transport stack. That makes the demo easy to reproduce across Python, Node.js, C#, and Go.
Prerequisites
- Python 3.x, Node.js, .NET SDK, or Go installed on your development machine
- A webcam connected to your machine
- The relevant OpenCV binding for your language (installed in the next step)
Step 1: Install OpenCV for Your Language
Since my development environment is Windows, the following installation steps may only work for Windows. If you want to install OpenCV on other operating systems, please visit the relevant tutorial pages. Building and installing OpenCV module takes time, so please be patient.
Node.js
Install opencv4nodejs:
npm i opencv4nodejs
Install OpenCvSharp:
For Windows
dotnet add package OpenCvSharp4
dotnet add package OpenCvSharp4.runtime.win
Python
Install OpenCV Python:
pip install opencv-python
Golang
Install gocv:
go get -u -d gocv.io/x/gocv
For Windows
Install MinGW-W64 x86_64-7.3.0-posix-seh-rt_v5-rev2.
Install CMake.
Build and install the OpenCV module:
chdir %GOPATH%\src\gocv.io\x\gocv
win_build_opencv.cmd
Add C:\opencv\build\install\x64\mingw\bin to your system path.
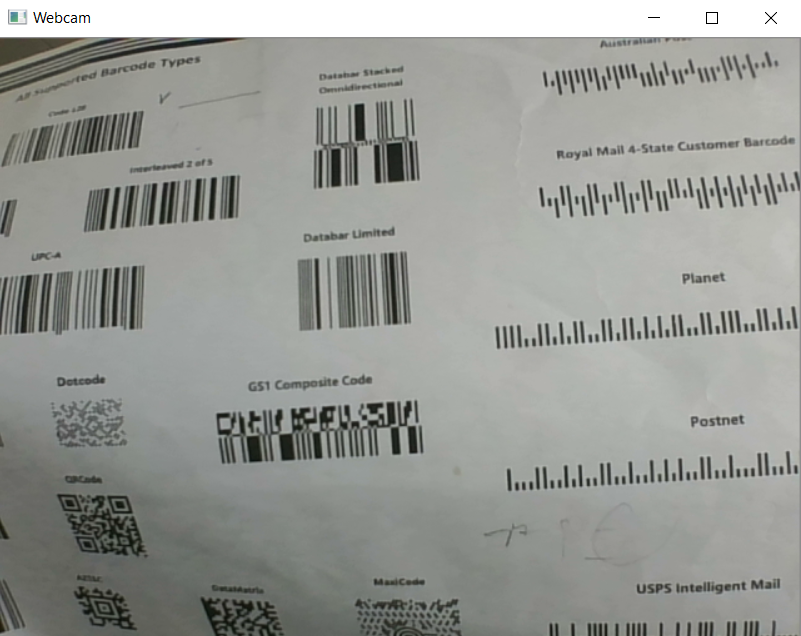
Step 2: Build a Desktop Webcam App
Node.js
Create a desktop.js file:
const cv = require('opencv4nodejs');

const vCap = new cv.VideoCapture(0);

const delay = 10;
while (true) {
  let frame = vCap.read();
  // loop back to start on end of stream reached
  if (frame.empty) {
    vCap.reset();
    frame = vCap.read();
  }

  cv.imshow('OpenCV Node.js', frame);
  const key = cv.waitKey(delay); // Press ESC to quit
  if (key == 27) {break;}
}
Run the app:
node desktop.js
C#
Create a .NET core project:
dotnet new console -n Desktop
Add the following code to Program.cs:
using System;
using OpenCvSharp;

namespace Desktop
{
    class Program
    {
        static void Main(string[] args)
        {
            VideoCapture capture = new VideoCapture(0);
            using (Window window = new Window("Webcam"))
            {
                using (Mat image = new Mat())
                {
                    while (true)
                    {
                        capture.Read(image);
                        if (image.Empty()) break;
                        window.ShowImage(image);
                        int key = Cv2.WaitKey(30);
                        if (key == 27) break;
                    }
                }
            }
        }
    }
}
Run the app:
dotnet run
Python
Create desktop.py:
import cv2

cap = cv2.VideoCapture(0)

while True:
    ret, frame = cap.read()
    cv2.imshow("Webcam", frame)
    if cv2.waitKey(1) & 0xFF == 27: # use ESC to quit
        break

cap.release()
cv2.destroyAllWindows()
Run the app:
python desktop.py
Golang
Create desktop.go:
package main

import (
	"fmt"

	"gocv.io/x/gocv"
)

func main() {
	webcam, _ := gocv.OpenVideoCapture(0)
	window := gocv.NewWindow("Webcam")
	img := gocv.NewMat()

	for {
		webcam.Read(&img)
		window.IMShow(img)
		key := window.WaitKey(10)
		if key == 27 { // ESC
			break
		}
	}

	fmt.Println("Exit")

	// must call close() to terminate the program
	webcam.Close()
}
Run the app:
go run desktop.go
Step 3: Stream the Webcam Feed to Any Browser
To implement the remote webcam access, I just need to create a simple HTML page with an image element and launch a simple HTTP server for successively sending webcam frames by HTTP GET request. To make the code as simple as possible, I just use the built-in HTTP APIs of the four programming languages and OpenCV video capture APIs.
Node.js
Create a simple HTML page:
<!DOCTYPE html PUBLIC "-//W3C//DTD XHTML 1.0 Transitional//EN" "http://www.w3.org/TR/xhtml1/DTD/xhtml1-transitional.dtd">
<html xmlns="http://www.w3.org/1999/xhtml">
<head>
    <meta http-equiv="Content-Type" content="text/html; charset=utf-8" />
    <title>Webcam</title>
</head>

<body>

    <img id="image"/>

    <script type="text/javascript">
        var image = document.getElementById('image');
        function refresh() {
            image.src = "/image?" + new Date().getTime();
            image.onload= function(){
                setTimeout(refresh, 30);
            }
        }

        refresh();
    </script>

</body>
</html>
Use setTimeout() to continuously get a new image from the web server and refresh the image element.
On the server-side, create a simple web server using the HTTP module:
const http = require('http');
var server = http.createServer(function (req, res) {
    if (req.url === '/' || req.url === '/index.htm') {

        res.writeHead(200, { 'Content-Type': 'text/html' });
        res.write(html);
        res.end();

    }
    else if (req.url.startsWith("/image")) {

        res.writeHead(200, { 'Content-Type': 'image/jpeg' });
        res.write(img);
        res.end();

    }
    else
        res.end('Invalid Request!');

});

server.listen(2020);
Analyze the request URLs and then send the corresponding responses. In the meantime, create a timer to capture webcam frames and encode them to JPEG format:
var img = null;
function capture() {
    var frame = wCap.read()
    if (frame.empty) {
        wCap.reset();
        frame = wCap.read();
    }

    img = cv.imencode('.jpg', frame);
    setTimeout(capture, 30);
}

capture();
To open the HTML file by double-clicking, change the relative image path to the absolute image path:
image.src = "http://localhost:2020/image?" + new Date().getTime();
C#
Inspired by Benjamin Summerton’s gist, I created the HTTP server as follows:
using System;
using System.IO;
using System.Text;
using System.Net;
using System.Threading.Tasks;
using OpenCvSharp;

namespace Web
{
    class Program
    {
        public static HttpListener listener;
        public static string url = "http://localhost:2020/";
        public static string pageData =
            "<!DOCTYPE>" +
            "<html>" +
            "  <head>" +
            "    <title>HttpListener Example</title>" +
            "  </head>" +
            "  <body>" +
            "<img id=\"image\"/>"+
            " <script type=\"text/javascript\">var image = document.getElementById('image');function refresh() {image.src = \"/image?\" + new Date().getTime();image.onload= function(){setTimeout(refresh, 30);}}refresh();</script>   "+
            "  </body>" +
            "</html>";

        public static VideoCapture capture = new VideoCapture(0);

        public static async Task HandleIncomingConnections()
        {
            while (true)
            {
                HttpListenerContext ctx = await listener.GetContextAsync();

                HttpListenerRequest req = ctx.Request;
                HttpListenerResponse resp = ctx.Response;

                if ((req.HttpMethod == "GET") && (req.Url.AbsolutePath.StartsWith("/image"))) {

                    resp.ContentType = "image/jpeg";
                    using (Mat image = new Mat())
                    {
                        capture.Read(image);
                        Cv2.ImEncode(".jpg", image, out var imageData);
                        await resp.OutputStream.WriteAsync(imageData, 0, imageData.Length);
                        resp.Close();
                    }
                }
                else {

                    // Write the response info
                    byte[] data = Encoding.UTF8.GetBytes(pageData);
                    resp.ContentType = "text/html";
                    resp.ContentEncoding = Encoding.UTF8;
                    resp.ContentLength64 = data.LongLength;

                    // Write out to the response stream (asynchronously), then close it
                    await resp.OutputStream.WriteAsync(data, 0, data.Length);
                    resp.Close();
                }
            }
        }

        static void Main(string[] args)
        {
            // Create a Http server and start listening for incoming connections
            listener = new HttpListener();
            listener.Prefixes.Add(url);
            listener.Start();
            Console.WriteLine("Listening for connections on {0}", url);

            // Handle requests
            Task listenTask = HandleIncomingConnections();
            listenTask.GetAwaiter().GetResult();

            // Close the listener
            listener.Close();
        }
    }
}
Python
Using Python’s built-in HTTP server class is pretty convenient. What we need to do is to define a custom handler for processing HTTP requests:
import http.server
import socketserver

class MyHandler(http.server.BaseHTTPRequestHandler):
    def do_GET(self):

        if self.path == '/':
            self.send_response(200)
            self.send_header("Content-type", "text/html")
            self.end_headers()
            self.wfile.write(bytes(pageData, "utf8"))
        elif self.path.startswith('/image'):
            self.send_response(200)
            self.send_header("Content-type", "image/jpeg")
            self.end_headers()

            ret, frame = cap.read()
            _, jpg = cv2.imencode(".jpg", frame)

            self.wfile.write(jpg)
        else:
            self.send_response(404)

with socketserver.TCPServer(("", PORT), MyHandler) as httpd:
    print("Serving at port ", PORT)
    try:
        httpd.serve_forever()
    except:
        pass
Golang
Like Python, it is easy to set up an HTTP web server within 30 seconds:
func handler(w http.ResponseWriter, r *http.Request) {
	if r.URL.Path == "/" {
		pageData := "<!DOCTYPE>" +
			"<html>" +
			"  <head>" +
			"    <title>HttpListener Example</title>" +
			"  </head>" +
			"  <body>" +
			"<img id=\"image\"/>" +
			" <script type=\"text/javascript\">var image = document.getElementById('image');function refresh() {image.src = \"/image?\" + new Date().getTime();image.onload= function(){setTimeout(refresh, 30);}}refresh();</script>   " +
			"  </body>" +
			"</html>"

		w.Header().Set("Content-Type", "text/html")
		w.Write([]byte(pageData))
	} else if strings.HasPrefix(r.URL.Path, "/image") {
		webcam.Read(&img)
		jpg, _ := gocv.IMEncode(".jpg", img)
		w.Write(jpg)
	} else {
		fmt.Fprintf(w, "Page Not Found")
	}

}

func main() {
	fmt.Println("Running at port 2020...")
	webcam, _ = gocv.OpenVideoCapture(0)
	img = gocv.NewMat()
	http.HandleFunc("/", handler)
	log.Fatal(http.ListenAndServe(":2020", nil))
	webcam.Close()
}
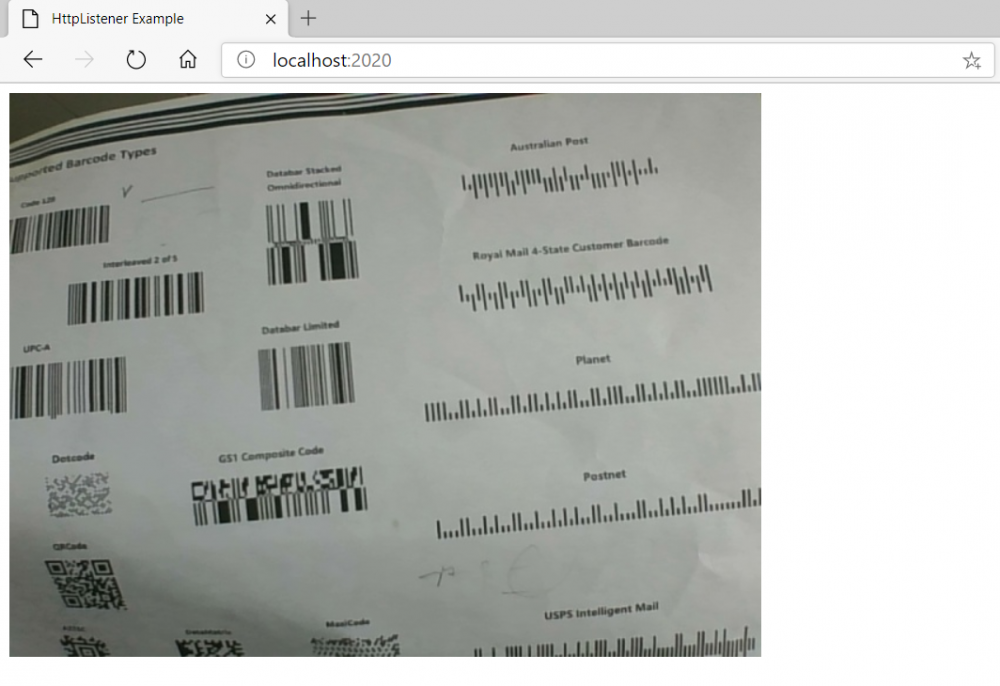
Once everything is done, I can run the web server and visit localhost:2020 to view the webcam video stream from any desktop web browser.
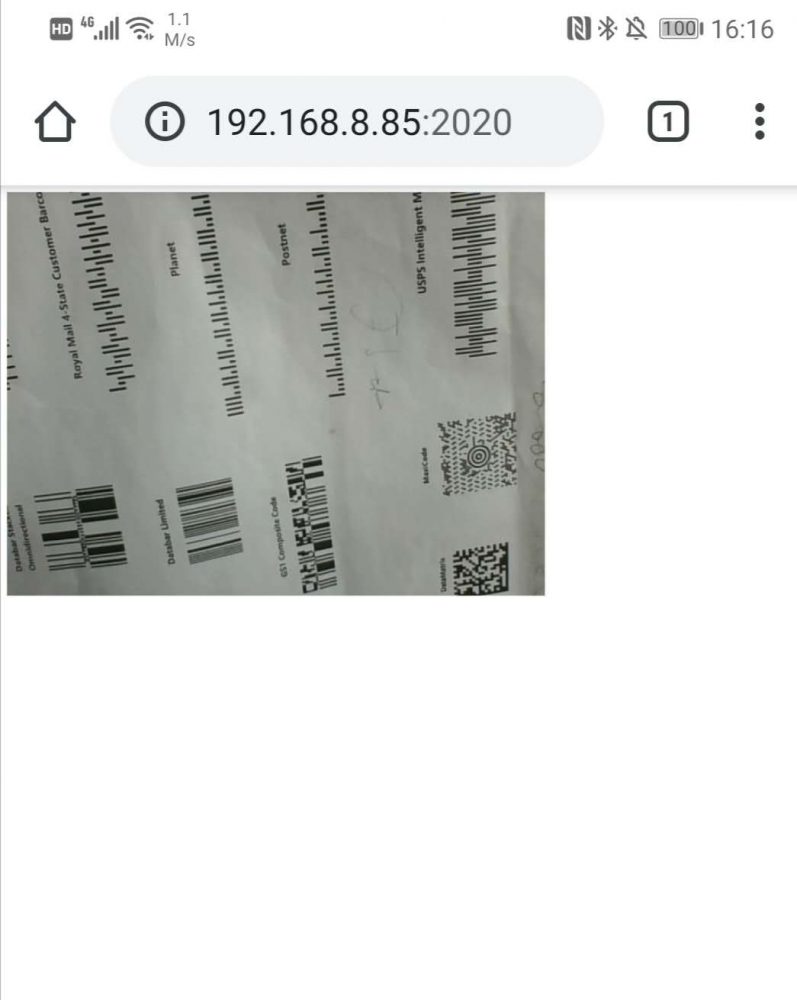
The page is also accessible from my mobile web browser.
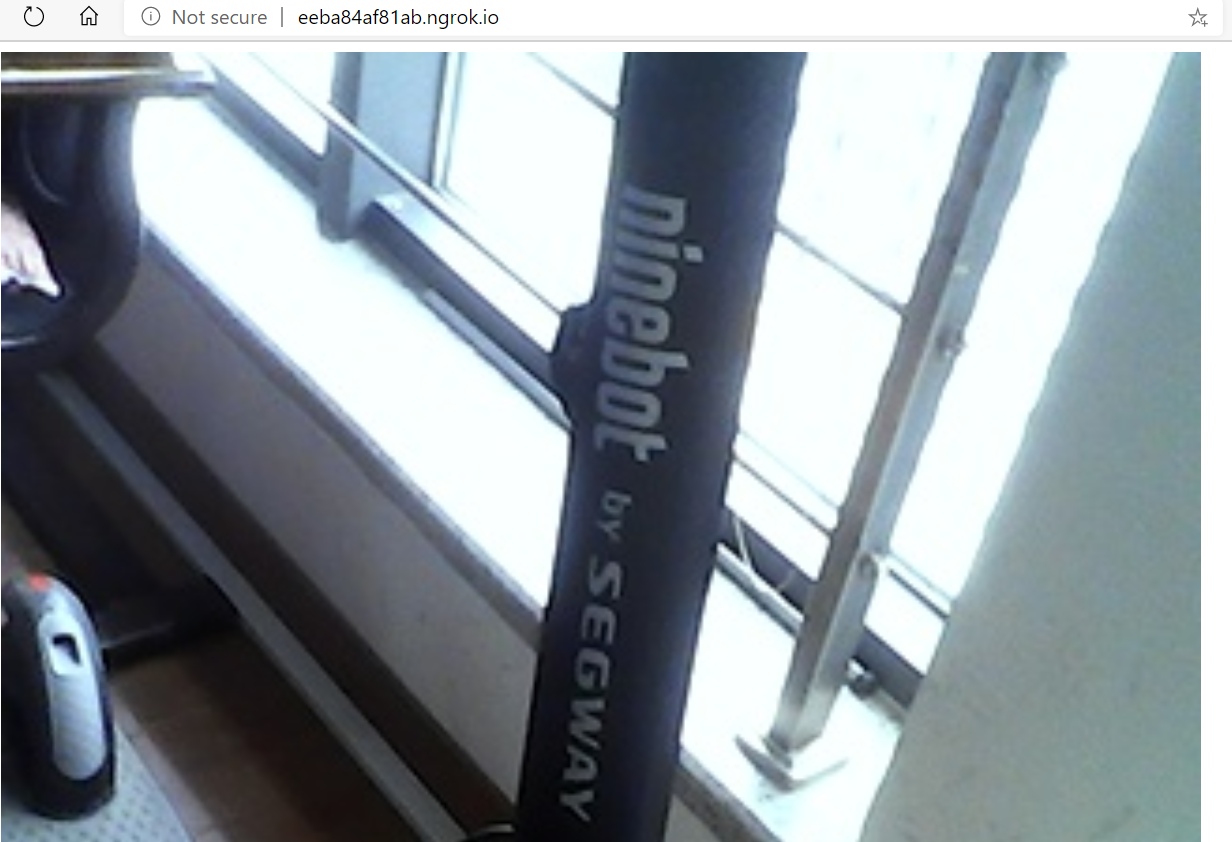
Finally, use ngrok to expose the local development server to the Internet.
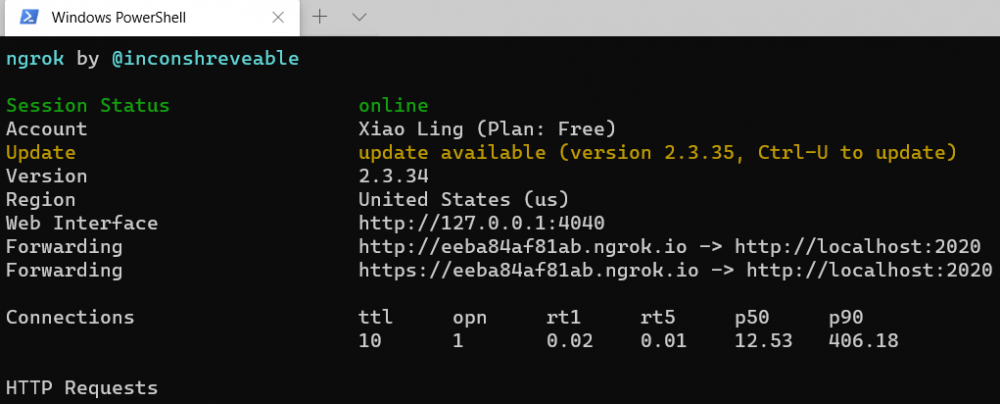
Now, I can watch the live video through the remote webcam no matter where I am.

Common Issues & Edge Cases
- Camera not detected (
VideoCapture(0)returns empty frames): Ensure no other application (e.g., Zoom, Teams) holds an exclusive lock on the webcam. Try index1or higher if multiple cameras are connected. - Browser shows a broken image when streaming: The HTTP server must set
Content-Type: image/jpegon every frame response. A missing or incorrect header causes the browser to discard the response silently. - High latency or choppy live stream: The
setTimeout(refresh, 30)polling interval controls perceived frame rate. Increase the delay (e.g.,100ms) to reduce CPU load, or switch to a multipart MJPEG response for lower latency at the cost of added server complexity.