


How to Build a Python Flet Chat App with Barcode Scanning and Gemini AI
Gemini is Google’s latest AI model, which can be used for free with a limit of 60 queries per minute, and is capable of recognizing text from images. Generally, 1D barcodes are accompanied by human-readable text, which can be used to verify the accuracy of barcode recognition results. In this article, we will use the Flet Python API to build a desktop chat app integrated with both barcode and Gemini APIs. The app will read barcodes from images using Dynamsoft Barcode Reader and perform OCR on text within images using Gemini’s text recognition capabilities.
This article is Part 5 in a 7-Part Series.
- Part 1 - Build a Python GUI Barcode Scanner on Raspberry Pi with Qt PySide6
- Part 2 - How to Build a Cross-Platform GUI Python Barcode and QR Code Reader with PySide6 and Qt Designer
- Part 3 - How to Read QR Codes from Screen Capture in Python with Qt and Dynamsoft Barcode SDK
- Part 4 - How to Integrate a Barcode Scanner in a Django Web App with Python
- Part 5 - How to Build a Python Flet Chat App with Barcode Scanning and Gemini AI
- Part 6 - How to Dockerize a Python Barcode Reader for ARM64 and ARM32 Devices
- Part 7 - ZXing vs ZBar vs Dynamsoft: Python Barcode Reader Comparison with Accuracy and Speed Benchmarks
What you’ll build: A Python Flet desktop chat application that scans barcodes from uploaded images using Dynamsoft Barcode Reader and cross-verifies the decoded text with Google Gemini AI’s vision capabilities.
Key Takeaways
- Flet enables building cross-platform desktop chat UIs in pure Python with real-time message broadcasting via PubSub.
- Dynamsoft Barcode Reader’s
CaptureVisionRouterdecodes 1D and 2D barcodes from image files in a single API call. - Google Gemini’s vision model can extract human-readable text near barcodes to independently verify barcode decoding accuracy.
- Combining barcode SDK output with LLM-based OCR creates a robust dual-verification workflow for barcode data integrity.
Common Developer Questions
How do I integrate a barcode scanner into a Python Flet desktop app?
Use Flet’s file picker to let the user choose an image, pass that image path into CaptureVisionRouter.capture(), and then publish the decoded result back into the chat-style interface. That keeps the whole barcode workflow inside a desktop Python app without switching frameworks.
Can Google Gemini AI verify barcode decoding results from images?
Yes. In this workflow Gemini is used to read the human-readable text printed near a 1D barcode so the application can compare that OCR-like result against the barcode SDK output. It is a verification layer rather than the primary decoder.
How do I build a chat-based UI in Python that processes image uploads and API responses?
Create a Flet ListView for messages, use pubsub to append new user and assistant messages, and wire the upload button to trigger both barcode decoding and Gemini requests. That gives the app a conversational UI while still handling image-processing tasks behind the scenes.
Step 1: Install the Required Python Packages
pip install -U google-generativeai dynamsoft-barcode-reader-bundle flet
Step 2: Set Up API Keys and Licenses
-

-
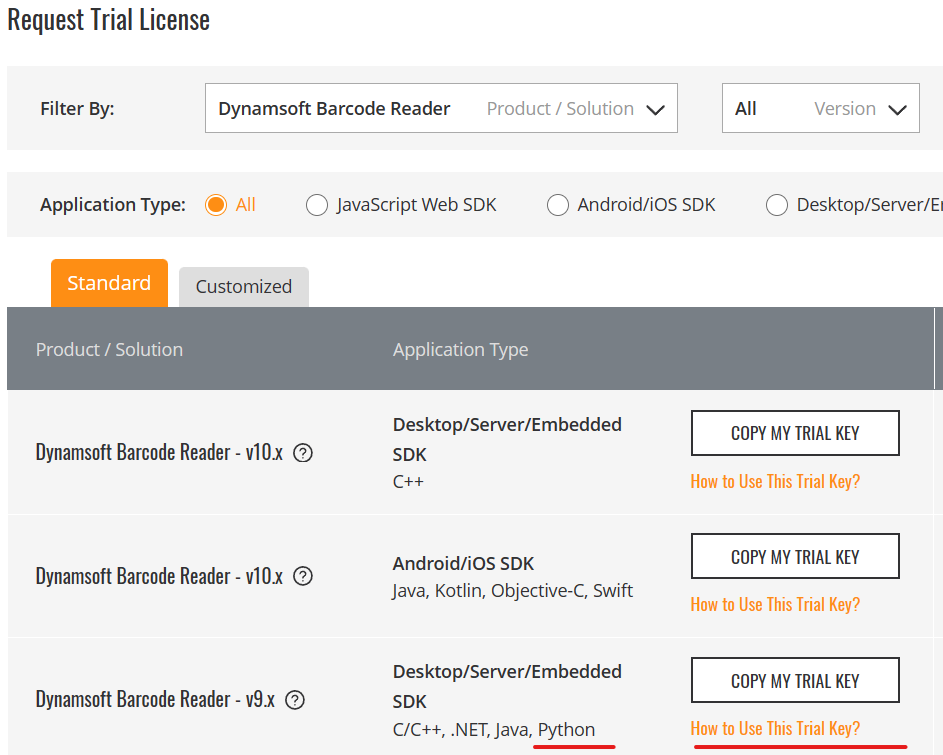
Get a 30-day free trial license for Dynamsoft Barcode Reader.
Step 3: Build the Chat UI with Flet
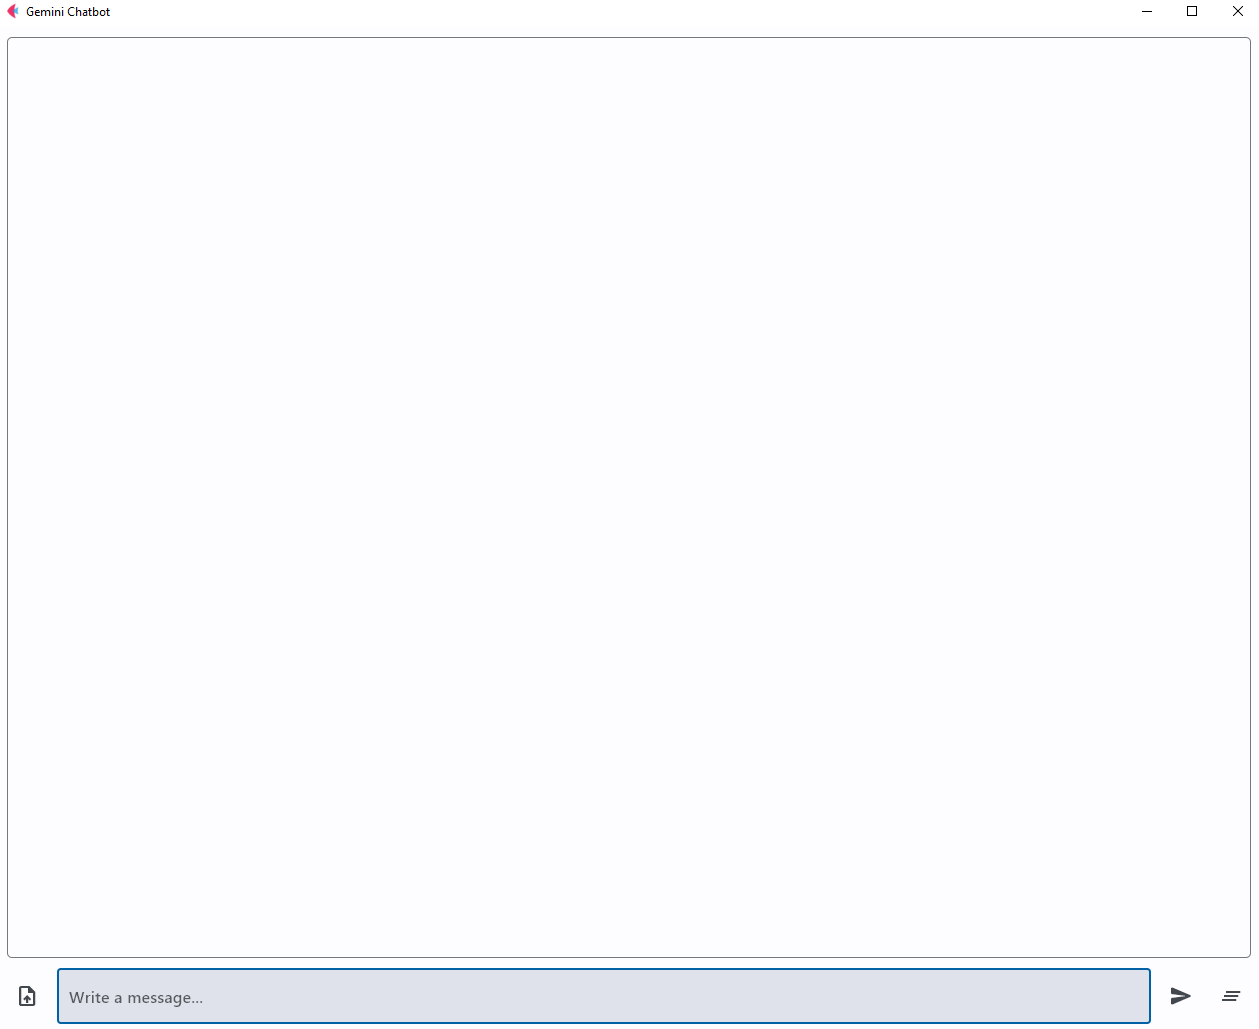
Flet empowers developers to create desktop applications using Python. Our application features a list view for displaying chat messages, a text input field, a button for uploading images, a button for sending messages, and a button to clear the chat history.
-
Chat messages:
chat = ft.ListView( expand=True, spacing=10, auto_scroll=True, ) -
Text input field:
new_message = ft.TextField( hint_text="Write a message...", autofocus=True, shift_enter=True, min_lines=1, max_lines=5, filled=True, expand=True, on_submit=send_message_click, ) -
Button to load an image:
def pick_files_result(e: ft.FilePickerResultEvent): global image_path image_path = None if e.files != None: image_path = e.files[0].path # TODO def pick_file(e): pick_files_dialog.pick_files() pick_files_dialog = ft.FilePicker(on_result=pick_files_result) page.overlay.append(pick_files_dialog) ft.IconButton( icon=ft.icons.UPLOAD_FILE, tooltip="Pick an image", on_click=pick_file, ) -
Button to send a message:
def on_message(message: Message): if message.message_type == "chat_message": m = ChatMessage(message) chat.controls.append(m) page.update() page.pubsub.subscribe(on_message) def send_message_click(e): global image_path if new_message.value != "": page.pubsub.send_all( Message("Me", new_message.value, message_type="chat_message")) question = new_message.value new_message.value = "" new_message.focus() page.update() page.pubsub.send_all( Message("Gemini", "Thinking...", message_type="chat_message")) # TODO ft.IconButton( icon=ft.icons.SEND_ROUNDED, tooltip="Send message", on_click=send_message_click, ),PubSubfacilitates asynchronous communication across page sessions. Thesubscribemethod enables the receipt of broadcast messages from other sessions, while thesend_allmethod allows for sending messages to all active sessions. Whenever a new message is received, the list view is automatically updated to display this new message. -
Button to clear the chat history:
  def clear_message(e):
      global image_path
      image_path = None
      chat.controls.clear()
      page.update()

  ft.IconButton(
      icon=ft.icons.CLEAR_ALL,
      tooltip="Clear all messages",
      on_click=clear_message,
  )
Step 4: Integrate Barcode Scanning with Dynamsoft Barcode Reader
The Dynamsoft Barcode Reader is an efficient library designed for barcode scanning. To enable barcode scanning in your app, you must integrate this library. Here’s how you can do it:
-
Import the Dynamsoft Barcode Reader library and initialize a barcode reader instance using your license key.
from dynamsoft_capture_vision_bundle import * license_key = "LICENSE-KEY" cvr_instance = CaptureVisionRouter() error_code, error_message = LicenseManager.init_license(license_key) -
Decode the barcode from the uploaded image and send the result to the chat.
 def pick_files_result(e: ft.FilePickerResultEvent):
     global image_path, barcode_text
     barcode_text = None
     image_path = None
     if e.files != None:
         image_path = e.files[0].path
         page.pubsub.send_all(
             Message("Me", image_path, message_type="chat_message", is_image=True))

         result = cvr_instance.capture(image_path, EnumPresetTemplate.PT_READ_BARCODES.value)

         if result.get_error_code() != EnumErrorCode.EC_OK:
             print("Error:", result.get_error_code(),
                   result.get_error_string())
         else:
             items = result.get_items()
             barcode_text = ""
             for item in items:
                 format_type = item.get_format_string()
                 text = item.get_text()
                 print("Barcode Format:", format_type)
                 print("Barcode Text:", text)
                 barcode_text += text + " "

             if barcode_text == "":
                 barcode_text = "No barcode found"

             page.pubsub.send_all(
                 Message("DBR", barcode_text, message_type="chat_message"))
Step 5: Add Gemini AI Text Recognition
Gemini can extract text from images. Once you’ve decoded a barcode, you can employ Gemini to verify the accuracy of the text decoded from the barcode. Here are the steps to use Gemini:
-
Set up the API key for Gemini.
import google.generativeai as genai import google.ai.generativelanguage as glm genai.configure(api_key='API-KEY') -
Initialize the text and vision models. The vision model takes both text and images as input.
model_text = genai.GenerativeModel('gemini-pro') chat_text = model_text.start_chat(history=[]) model_vision = genai.GenerativeModel('gemini-pro-vision') chat_vision = model_vision.start_chat(history=[]) -
Customize the command to effectively recognize text from the barcode image.
 def send_message_click(e):
     global image_path
     if new_message.value != "":
         ...

         if question == ":verify":
             question = "recognize text around the barcode"
             response = model_vision.generate_content(
                 glm.Content(
                     parts=[
                         glm.Part(
                             text=question),
                         glm.Part(
                             inline_data=glm.Blob(
                                 mime_type='image/jpeg',
                                 data=pathlib.Path(
                                     image_path).read_bytes()
                             )
                         ),
                     ],
                 ))

             text = response.text
             page.pubsub.send_all(
                 Message("Gemini", text, message_type="chat_message"))
Step 6: Verify Barcode Results Against Image Text
Now, we can check whether the text read from the barcode exists in the text recognized from the image. Since the text extracted by Gemini might include spaces, it’s essential to eliminate these spaces prior to comparison.
if barcode_text == None:
    return

text = text.replace(" ", "")
if text.find(barcode_text) != -1:
    page.pubsub.send_all(
        Message("Gemini", barcode_text + " is correct ✓", message_type="chat_message"))
else:
    page.pubsub.send_all(
        Message("Gemini", barcode_text + " may not be correct", message_type="chat_message"))
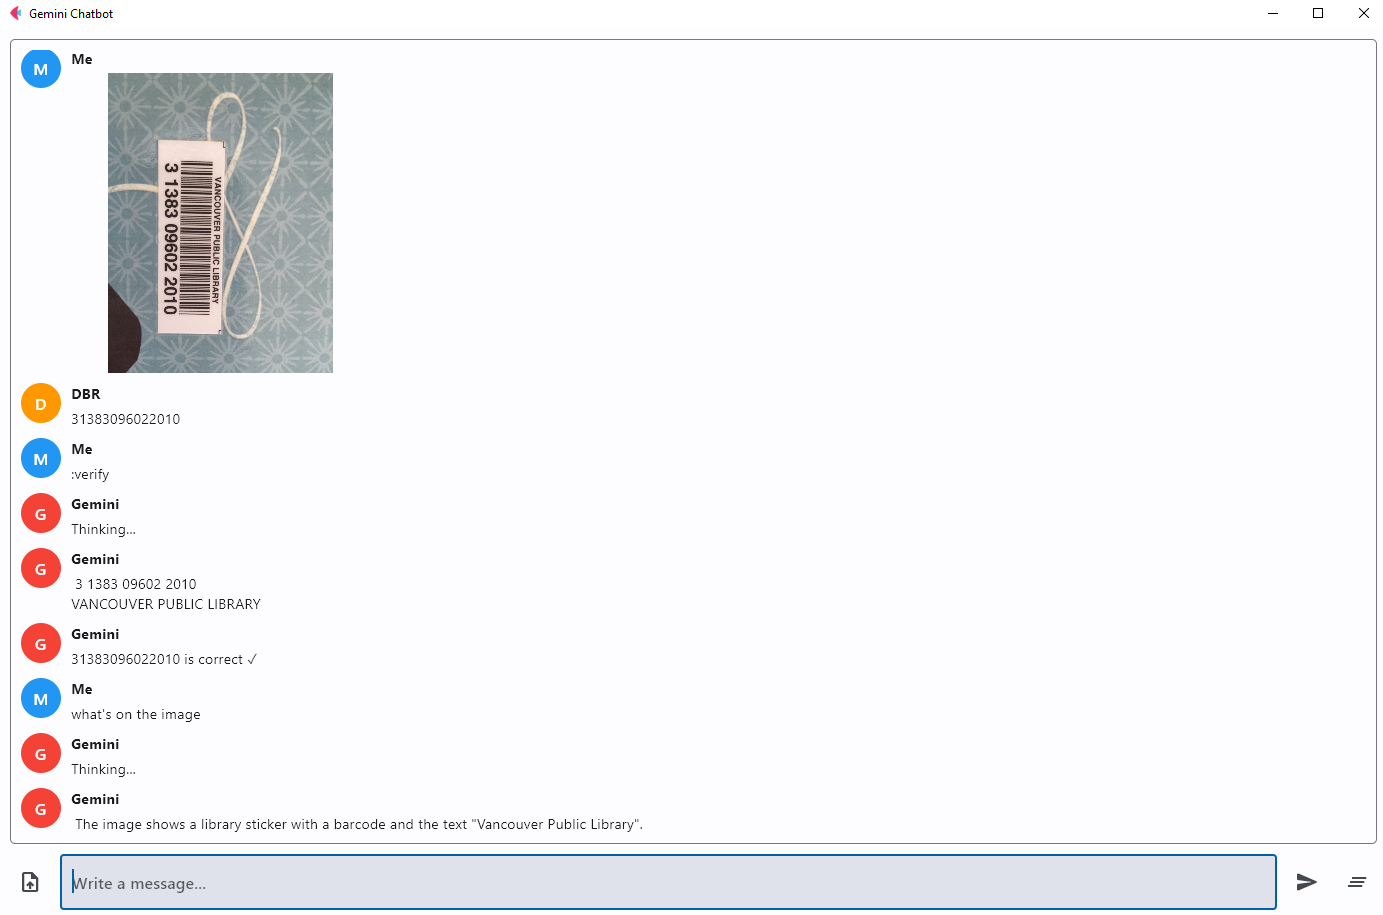
Launch the desktop application and test it with some images that contain 1D barcodes:
flet run chatbot.py
Common Issues and Edge Cases
- Gemini API rate limiting: The free tier allows 60 queries per minute. If you exceed this limit, wrap your API calls in a try/except block and retry after a short delay.
- No barcode detected in image: Low-resolution images or barcodes at extreme angles may fail to decode. Ensure input images are at least 640px wide and barcodes are not heavily rotated or occluded.
- Gemini vision model returns unexpected text: OCR output from Gemini may include extra whitespace or surrounding label text. Strip spaces and use substring matching (as shown in Step 6) rather than exact string equality.