


How to Access SANE Scanners from Browser JavaScript on Linux
Dynamic Web TWAIN is a cross-platform document scanning SDK that allows developers to build document management applications using HTML5 and JavaScript on Windows, Linux, and macOS. The Linux edition of Dynamic Web TWAIN supports both x64 and amr64 Linux OS, which means in addition to desktop PCs, you can also scan documents on embedded devices such as Raspberry Pi and Jetson Nano which save lots of money for developer. This post will illustrate how to build a simple web application to scan documents from a SANE scanner on Ubuntu 14.04.
What you’ll build: A browser-based document scanning web app that accesses SANE-compatible scanners on Linux using JavaScript and the Dynamic Web TWAIN SDK, deployable on x64 and arm64 devices.
Key Takeaways
- Dynamic Web TWAIN provides a JavaScript API for accessing SANE scanners directly from a web browser on Linux without native code.
- The SDK supports both x64 and arm64 Linux, enabling document scanning on embedded devices like Raspberry Pi and Jetson Nano.
- A lightweight nginx deployment is sufficient to host the scanning web app — no complex backend required.
- The SANE backend must be properly configured and the scanner visible via
scanimage -Lbefore the web app can detect it.
Common Developer Questions
How do I access a SANE scanner from browser JavaScript on Linux?
Install the Dynamic Web TWAIN service on the Linux machine, make sure the SANE backend can see the scanner, and then call the DWT JavaScript APIs from a normal web page. The browser never talks to the scanner hardware directly; it talks to the local scanning service that bridges into SANE.
Does Dynamic Web TWAIN support arm64 Linux devices like Raspberry Pi?
Yes. The Linux edition discussed here supports both x64 and arm64 targets, which makes the same browser-based scanning approach usable on boards such as Raspberry Pi and Jetson Nano as well as on standard desktop Ubuntu systems.
Why is my SANE scanner not detected by the web scanning app on Ubuntu?
If the scanner does not appear in the web UI, verify it first with scanimage -L at the Linux command line. When SANE cannot see the device, the browser app will not see it either, so the real fix is usually driver setup, permissions, or backend configuration rather than frontend JavaScript changes.
What Is SANE and Why Use It for Linux Scanning?
SANE stands for “Scanner Access Now Easy” and is an application programming interface (API) that provides standardized access to any raster image scanner hardware. It is written for UNIX (including GNU/Linux). The equivalent of SANE is TWAIN on Windows.

Build a Web Document Scanner with SANE and JavaScript
Step 1: Download the Dynamic Web TWAIN SDK
-
The package contains Dynamic Web TWAIN JavaScript libraries and a backend SANE scanning service.
Step 2: Activate Your License Key
Get a 30-day free trial license and update the following JavaScript code:
Dynamsoft.DWT.ProductKey = 'LICENSE KEY';
Step 3: Create the Scanning Web App
- Create a project folder and a
helloworld.htmlfile. - Copy
Resourcesfolder fromDynamic Web TWAIN SDK packageto your project. -
Include
webtwain.initiate.jsanddynamsoft.webtwain.config.jsto the HTML file.<head> <title>Use Dynamic Web TWAIN to Scan</title> <script type="text/javascript" src="Resources/dynamsoft.webtwain.initiate.js"></script> <script type="text/javascript" src="Resources/dynamsoft.webtwain.config.js"></script> </head> -
Create a div element for Dynamic Web TWAIN control.
<div id="dwtcontrolContainer"></div>If you want to rename the id, you should also change the id in the
dynamsoft.webtwain.config.jsaccordingly. -
Register an
onReadyevent, which will be triggered as Dynamic Web TWAIN is initialized and ready to be used.Dynamsoft.DWT.RegisterEvent('OnWebTwainReady', Dynamsoft_OnReady); var DWObject; function Dynamsoft_OnReady() { DWObject = Dynamsoft.DWT.GetWebTwain('dwtcontrolContainer'); if (DWObject) { var count = DWObject.SourceCount; for (var i = 0; i < count; i++) document.getElementById("source").options.add(new Option(DWObject.GetSourceNameItems(i), i)); } } -
Acquire an image according to the selected SANE scanner source.
 function AcquireImage() {
     if (DWObject) {
         var OnAcquireImageSuccess, OnAcquireImageFailure;

         OnAcquireImageSuccess = OnAcquireImageFailure = function (){
             DWObject.CloseSource();
         };

         DWObject.SelectSourceByIndex(document.getElementById("source").selectedIndex);
         DWObject.OpenSource();
         DWObject.IfDisableSourceAfterAcquire = true;
         DWObject.AcquireImage(OnAcquireImageSuccess, OnAcquireImageFailure);
     }
 }
Remember to
close the sourcewhen the scanning is finished!
Step 4: Deploy to an Nginx Web Server
-
Install and start
nginx:sudo apt-get update sudo apt-get install nginx sudo nginx - Create a folder
linux-dwtunder/usr/share/nginx/html/. - Copy
Resourcesandhelloworld.htmlto/usr/share/nginx/html/linux-dwt. -
Open
http://localhost/dwt-linux/helloworld.htmlin your web browser to scan documents. If there is no source listed, please check the scanner status usingscanimagein terminal:sudo scanimage -LWhen Dynamic Web TWAIN is working, you should see the relevant processes as follows:
ps aux | grep WebTwain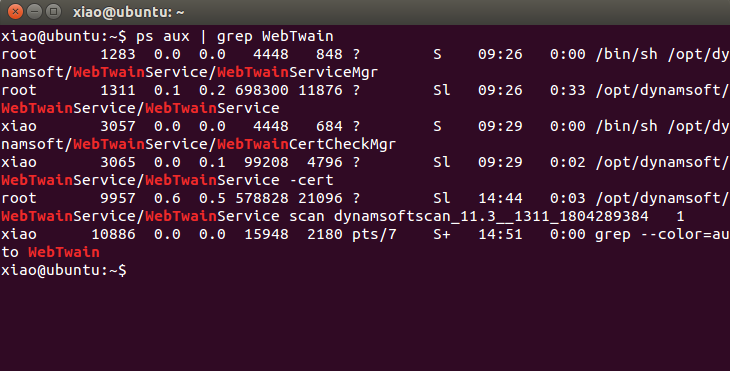
Try the Online Demo
https://demo.dynamsoft.com/web-twain/
Common Issues & Edge Cases
- Scanner not listed in the web app: Run
sudo scanimage -Lin the terminal to verify the SANE backend detects your scanner. If it doesn’t appear there, install the correct SANE driver for your hardware before troubleshooting the web app. - Permission denied when accessing the scanner: The Dynamic Web TWAIN service process needs permission to access the scanner device files under
/dev/. Add your user to thescannergroup (sudo usermod -aG scanner $USER) and restart the service. - Blank or corrupted scan output on arm64 devices: Some arm64 boards have limited USB bandwidth. Try scanning at a lower DPI or connecting the scanner directly without a USB hub.