


Build a JavaScript Mobile Document Scanner with Real-Time Web Upload
Document capture functionality is an essential aspect of any document management system, allowing users to capture digital images of physical documents through a variety of means, including scanners and mobile cameras. Dynamic Web TWAIN helps users easily integrate document capture functionality into their web-based document management system, enabling them to streamline their workflows and improve efficiency. Within this article, a collaboration scenario is presented where documents can be captured via a mobile camera and uploaded as images to a remote document management system built with Dynamic Web TWAIN SDK.
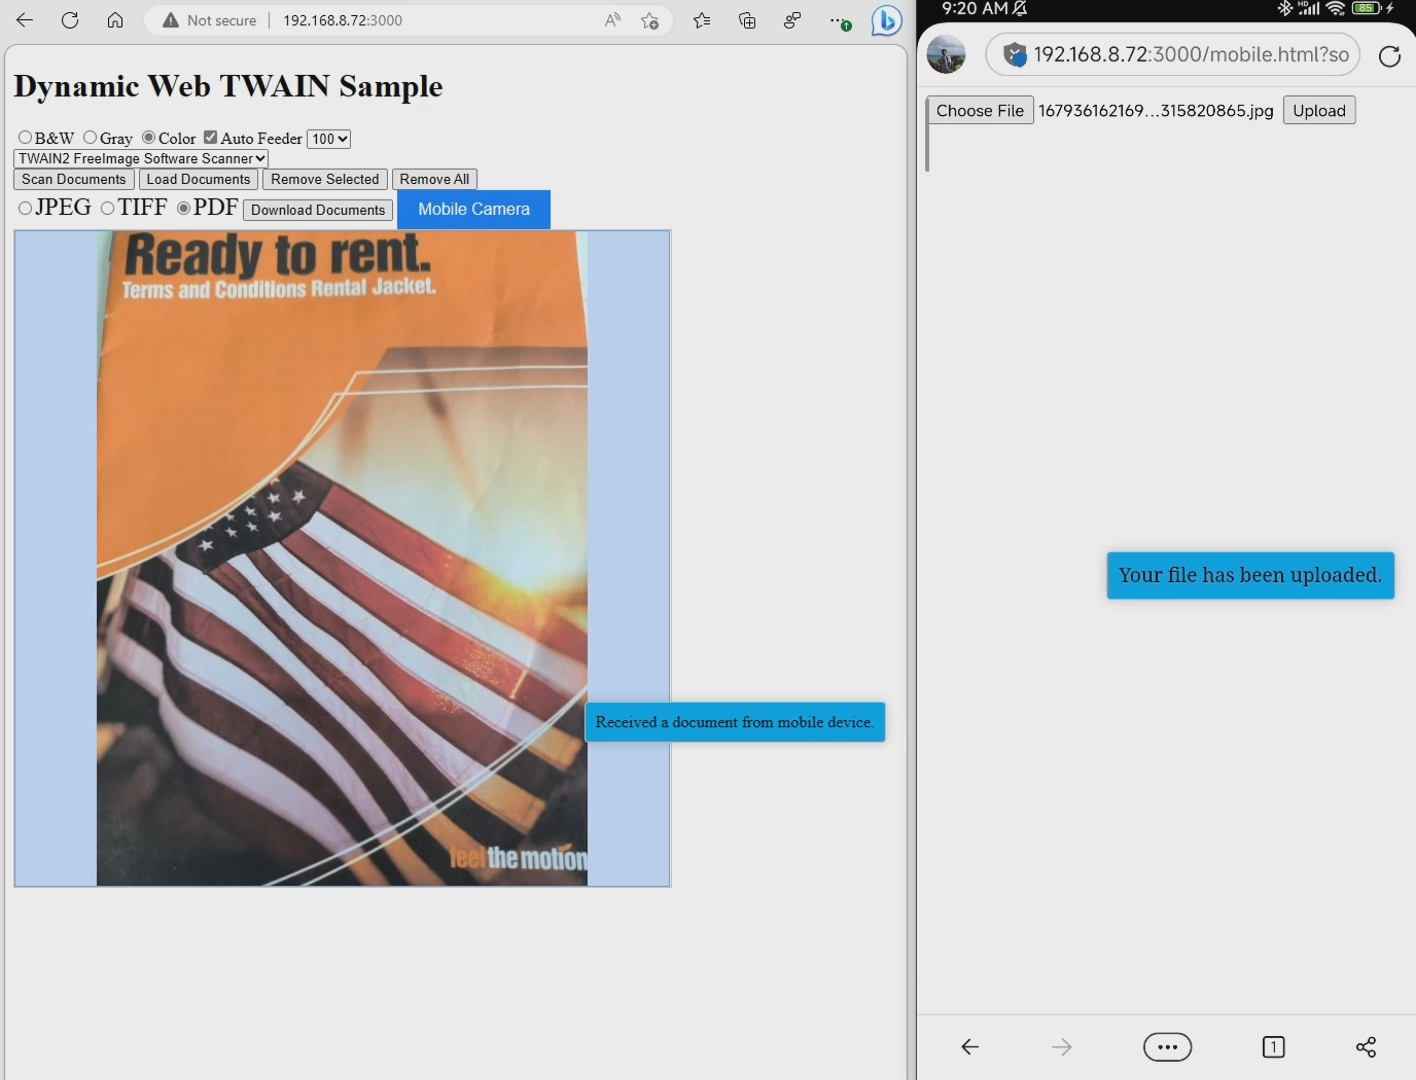
What you’ll build: A web-based document management system where mobile users capture documents with their phone camera and instantly upload them—via QR code pairing and Socket.IO—to a Dynamic Web TWAIN scanning dashboard running in the browser.
Key Takeaways
- Dynamic Web TWAIN combined with a Node.js backend lets you build a full document scanning and management web app with just a few npm packages.
- Socket.IO enables real-time push of uploaded document filenames from the server to the browser client, so scanned images appear instantly without polling.
- A QR code rendered in the browser encodes the upload URL plus the socket ID, allowing any mobile device on the same network to pair and upload documents.
- SQLite stores uploaded image metadata (filename, MIME type, size), keeping the architecture lightweight and self-contained for prototyping or small teams.
Common Developer Questions
How do I build a web-based document scanner that accepts uploads from a mobile camera in real time?
Build a Node.js app that serves both the desktop dashboard and the mobile upload page, then connect them with Socket.IO so uploads appear immediately in the browser. Dynamic Web TWAIN handles the desktop-side scanning dashboard, while the phone only needs to post captured images to the server.
How do I use Socket.IO to push uploaded file notifications to a browser client?
After a file is stored and recorded in SQLite, emit a message through the saved Socket.IO connection for that browser session. The desktop client receives the filename event and refreshes the document list without polling.
How do I pair a mobile phone to a web app using a QR code for document capture?
Generate a QR code on the desktop page that encodes the mobile upload URL plus the current socket ID. When the phone opens that URL, its uploads are automatically routed back to the correct desktop session.
Why Mobile Document Capture Matters
Efficient and streamlined document management systems are crucial for organizations to keep up with the fast-paced business world of today. One crucial aspect of such systems is the ability to capture and upload documents quickly and easily. Mobile camera technology offers a more convenient and flexible solution compared to traditional scanners. This scenario presents a common situation where a user captures a document and it is instantly viewable and processable in the organization’s document management system.
To achieve this, several Node.js packages can be utilized, including:
- express - a web application framework for Node.js
- multer - a Node.js middleware for handling
multipart/form-data, which is primarily used for uploading files - sqlite3 - a Node.js package that provides an asynchronous API for accessing a SQLite database
- socket.io - a Node.js package that enables real-time, bidirectional and event-based communication between the browser and the server
- qrcode - a Node.js package that generates QR codes
- dwt - Dynamic Web TWAIN SDK
Prerequisites
- Node.js installed on your machine
- A modern web browser (Chrome, Edge, or Firefox)
- A mobile device on the same local network for camera capture testing
- Get a 30-day free trial license for Dynamic Web TWAIN
Step 1: Create a Web Document Scanning Application
Dynamic Web TWAIN enables developers to easily integrate document scanning functionality into their web applications with a few lines of JavaScript code. Here are the basic steps involved:
- Create a new Node.js project and install the required packages.
npm install express dwt - Set up a web server using Express.
 const express = require('express');
 const app = express();
 const port = 3000;
 app.listen(port, '0.0.0.0', () => {
     console.log(`Server running at http://0.0.0.0:${port}/`);
 });
The ip variable is set to
0.0.0.0, which tells Express to listen to all available IP addresses. You can also set the port variable to the desired port number. -
Create a
publicfolder for storing static files, such as HTML, CSS, and JavaScript files. Copy index.html to thepublicfolder.This file demonstrates how to use Dynamic Web TWAIN API to create a web document scanning application. You need to apply for a trial license (see Prerequisites above) and replace the license key in
index.html.Dynamsoft.DWT.ProductKey = "LICENSE-KEY";Since the resource files of Dynamic Web TWAIN are located in the
node_modules/dwtfolder, you need to configure thenode_modulesfolder as a static folder. Add the following code to theapp.jsfile:app.use(express.static('public')); app.use('/node_modules', express.static(__dirname + '/node_modules')); - A simple web document scanning application is now ready. Run the following command to start the server:
node app.js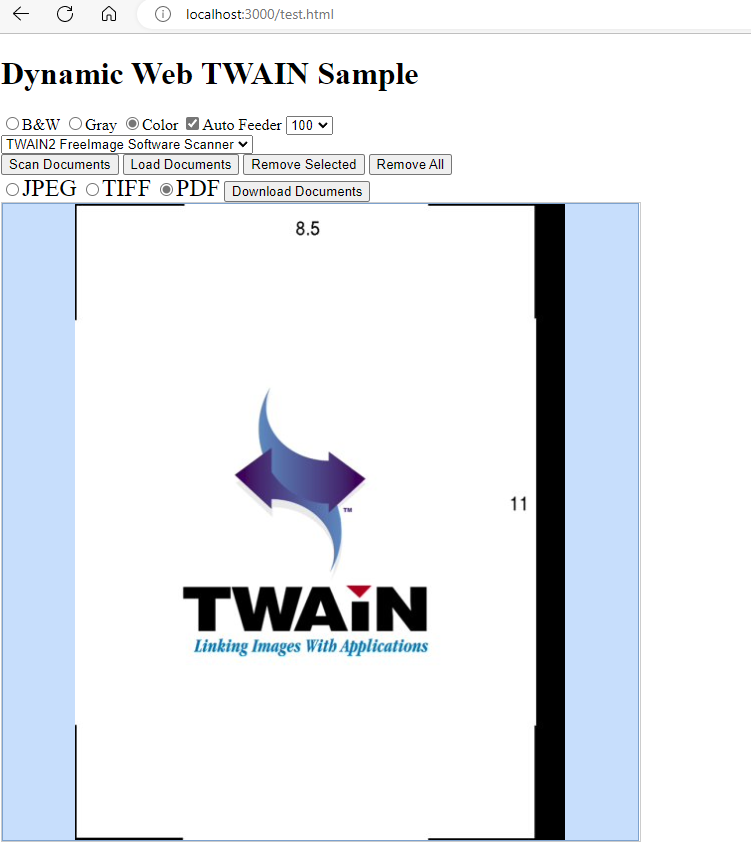
Step 2: Add Real-Time Communication with Socket.IO
Socket.IO is a JavaScript library that enables real-time, bidirectional communication between web clients and servers. It uses a WebSocket protocol under the hood. In this scenario, Socket.IO is used to push the file name of the uploaded documents to the web client for display.
Here are the steps to integrate Socket.IO into the web client and server:
- Install the
socket.iopackage:npm install socket.io - Modify the
app.jsfile to create aSocket.IOserver:const app = express(); const http = require('http'); const server = http.createServer(app); const port = process.env.PORT || 3000; const connections = new Map(); io.on('connection', (socket) => { connections.set(socket.id, socket); console.log(socket.id + ' connected'); socket.on('disconnect', () => { console.log(socket.id + ' disconnected'); connections.delete(socket.id); }); socket.on('message', (message) => { console.log('Message received: ' + message); socket.emit('message', 'from server'); }); }); server.listen(port, '0.0.0.0', () => { console.log(`Server running at http://0.0.0.0:${port}/`); }); - Add the following code to the
index.htmlfile to create aSocket.IOclient:<script src="/node_modules/socket.io/client-dist/socket.io.js"></script> const socket = io(); socket.on('message', (data) => { });
Step 3: Generate a QR Code to Connect Mobile Devices
QR code is a two-dimensional barcode that can be scanned using a mobile camera. It is a convenient way to share information between devices. In this scenario, a QR code is generated to display the URL of the web document scanning application. This allows users to scan the QR code using their mobile camera and open the web document scanning application on their mobile devices.
To generate a QR code in JavaScript:
- Include the
qrcodepackage in theindex.htmlfile:<script src="/node_modules/qrcode/build/qrcode.js"></script> - Create a
canvaselement used for rendering the QR code:<div class="qr-popup"> <div class="qr-box"> <span class="qr-close">×</span> <canvas id="qr-canvas"></canvas> </div> </div> - Encode the URL of the document capture and upload page as a QR code and display it in the
canvaselement:const generateBtn = document.getElementById('generate'); const qrPopup = document.querySelector(".qr-popup"); const qrClose = document.querySelector(".qr-close"); generateBtn.addEventListener('click', () => { let url = ''; if (window.location.protocol === 'https:') { url = 'https://' + window.location.host + "/mobile.html?socketid=" + socket.id; } else { url = 'http://' + window.location.host + "/mobile.html?socketid=" + socket.id; } console.log(url); QRCode.toCanvas(document.getElementById('qr-canvas'), url, function (error) { if (error) console.error(error) }) qrPopup.style.display = "block"; qrClose.onclick = function () { qrPopup.style.display = "none"; }; }); -
Read the QR code using a mobile camera or a QR code reader app.

Step 4: Upload Images from Mobile and Save to SQLite Database
Install multer and sqlite3 packages:
npm install multer sqlite3
On the client side
An input element with type file can be used to capture images from a mobile camera.
<form id='myForm' action="javascript:void(0)" method="POST" enctype="multipart/form-data">
    <input type="file" name="image" accept="image/*">
    <button type="submit">Upload</button>
</form>
Using fetch API can upload files to a web server.
const form = document.getElementById('myForm');

form.addEventListener('submit', (event) => {
    event.preventDefault();

    const formData = new FormData(form);
    let id = decodeURIComponent(window.location.search.replace(new RegExp("^(?:.*[&\\?]" + encodeURIComponent("socketid").replace(/[\.\+\*]/g, "\\$&") + "(?:\\=([^&]*))?)?.*$", "i"), "$1"));
    formData.append('id', id);

    fetch('/upload', {
        method: 'POST',
        body: formData
    })
        .then(function (response) {
            console.log(response);
            showMessage("Your file has been uploaded.");
        })
        .catch(function (error) {
            console.error(error);
            showMessage(error, 3000);
        });
});
On the server side
The multer package is used to save the uploaded images on the server-side.
const multer = require('multer');
const upload = multer({ dest: 'uploads/' });

app.use('/uploads', express.static(__dirname + '/uploads'));

app.post('/upload', upload.single('image'), (req, res) => {
    const id = req.body.id;
    const { filename, mimetype, size } = req.file;
});
By default, Multer assigns a random name to the uploaded file to avoid naming collisions and security vulnerabilities.
After storing an image file on the disk, you would typically add its filename and MIME type to a database, which would allow you to retrieve the image later on.
const sqlite3 = require('sqlite3').verbose();

app.post('/upload', upload.single('image'), (req, res) => {
    const id = req.body.id;
    const { filename, mimetype, size } = req.file;
    db.run('INSERT INTO images (filename, mimetype, size) VALUES (?, ?, ?)',
        [filename, mimetype, size],
        (err) => {
            if (err) {
                console.error(err);
                return res.sendStatus(500);
            }
            connections.get(id).emit('message', JSON.stringify({ 'filename': filename}));
            res.sendStatus(200);
        });
});
Upon receiving a request for an image, the web server will query the associated database to retrieve the file name and MIME type. With this information, the server will utilize the fs package to read the image file and send it to the client.
const fs = require('fs');
app.get('/image/:id', (req, res) => {
    const id = req.params.id;
    const imagePath = path.join(__dirname, 'uploads', id);

    db.all('SELECT mimetype FROM images WHERE filename = ?', [id], (err, rows) => {
        if (err) {
            console.error(err);
            return res.sendStatus(500);
        }

        if (rows.length > 0) {
            let mimetype = rows[0].mimetype;

            fs.readFile(imagePath, (err, data) => {
                if (err) {
                    res.status(404).send('Image not found');
                } else {
                    res.setHeader('Content-Type', mimetype);
                    res.send(data);
                }
            });
        }
        else {
            res.sendStatus(404);
        }
    });

});
Common Issues and Edge Cases
- Mobile device cannot reach the server. The phone and the desktop must be on the same local network. If you are behind a corporate firewall or using separate Wi-Fi networks, the QR code URL will not resolve. Use
ipconfig(Windows) orifconfig(macOS/Linux) to confirm the server’s LAN IP, and ensure port 3000 is not blocked. - Uploaded images appear corrupted or have no extension. Multer stores files with a random filename and no extension by default. When serving them back, always read the MIME type from the database and set the
Content-Typeheader accordingly, as shown in the/image/:idroute above. - Socket.IO connection drops after the QR code is scanned. If the mobile page loads but the upload notification never arrives on the desktop, verify that the
socketidquery parameter was correctly encoded in the QR code URL. A mismatch means the server cannot route themessageevent to the right desktop client.