


How to Configure a Windows Virtual TWAIN Scanner to Load Custom Images
When building a TWAIN-compatible application and there is no physical scanner available, you can use a virtual scanner application for development and testing. TWAIN working group has released a TWAIN DS sample on GitHub. In this article, I will detail how to set up the development environment, as well as how to substitute the default TWAIN logo with custom images.
What you’ll build: A modified Windows TWAIN data source (.ds file) that cycles through a folder of custom JPEG/PNG images instead of the default TWAIN logo, enabling repeatable hardware-free scanner testing using Visual Studio and C++.
Key Takeaways
- The TWAIN DS sample from the TWAIN working group can be compiled into a
.dsdynamic library and registered as a virtual scanner on Windows. - Custom images are fed by modifying the
CScanner_FreeImageconstructor to read a JSON-configured image folder, cycling images on each acquire event. - A
source.json/info.jsontwo-file scheme handles index persistence acrossTWAINDS_Sample32.dsreloads without requiring write access toC:\Windows\twain_32\. - This approach is ideal for automated CI/CD testing of TWAIN-dependent document scanning workflows without physical hardware.
Common Developer Questions
How do I configure a Windows virtual TWAIN scanner to load custom images instead of the default logo?
Modify the TWAIN DS sample so its image-loading path reads from a configurable folder rather than always falling back to the built-in TWAIN logo. In this guide, the CScanner_FreeImage constructor is the hook that swaps in JPEG or PNG files from your own test set.
How do I build and register the TWAIN DS sample as a virtual scanner on Windows?
Clone the TWAIN sample project, configure the required Qt toolchain in Visual Studio, and build the project as a .ds data source into the TWAIN installation path. Once built, tools like twacker or Dynamic Web TWAIN can enumerate it like a normal scanner source.
How do I cycle through multiple test images in the TWAIN virtual scanner automatically?
Persist the current image index in a JSON file on disk and update that index each time the acquire path runs. That disk-backed counter is necessary because the .ds file is reloaded on each acquire event, which resets any in-memory state.
This article is Part 1 in a 3-Part Series.
How the TWAIN Document Acquisition Process Works
Before getting started, let’s take a glimpse of the workflow of the document acquisition process.
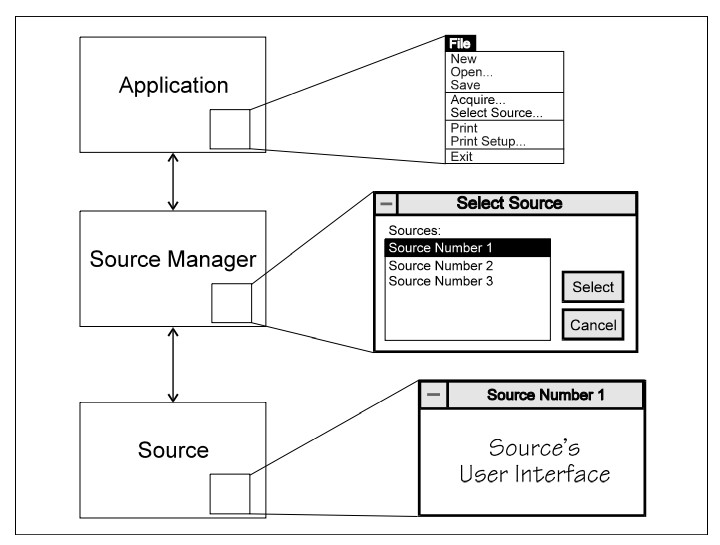
We are going to do something in the source layer.
Prerequisites
- Visual Studio 2017 or above
- Qt 5.12.11 msvc2017
- Get a 30-day free trial license for Dynamic Web TWAIN to test scanning from the browser.
- Test tools:
Step 1: Build and Debug the TWAIN DS Sample
Build the TWAIN DS Sample
-
Get the source code:
git clone https://github.com/twain/twain-samples.git -
Install Qt and add system variable
QTDIR: msvc2017 (x86) or msvc2017_64 (x64).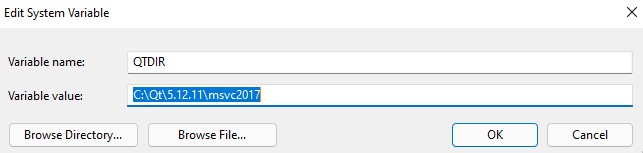
-
If you have installed multiple Qt kits, such as MinGW, ARM64, MSVC, you have to move MSVC ahead of others in
PATHto avoid deploying incompatible DLL files withwindeployqt.exe - Start Visual Studio as administrator because the output directory is
C:\Windows\twain_32\sample2\. Open the project in Visual Studio and update linking options according to your OS environment. - Build the project to generate a
TWAINDS_Sample32.dsfile, which is a dynamic library.
Debug the TWAIN DS Sample
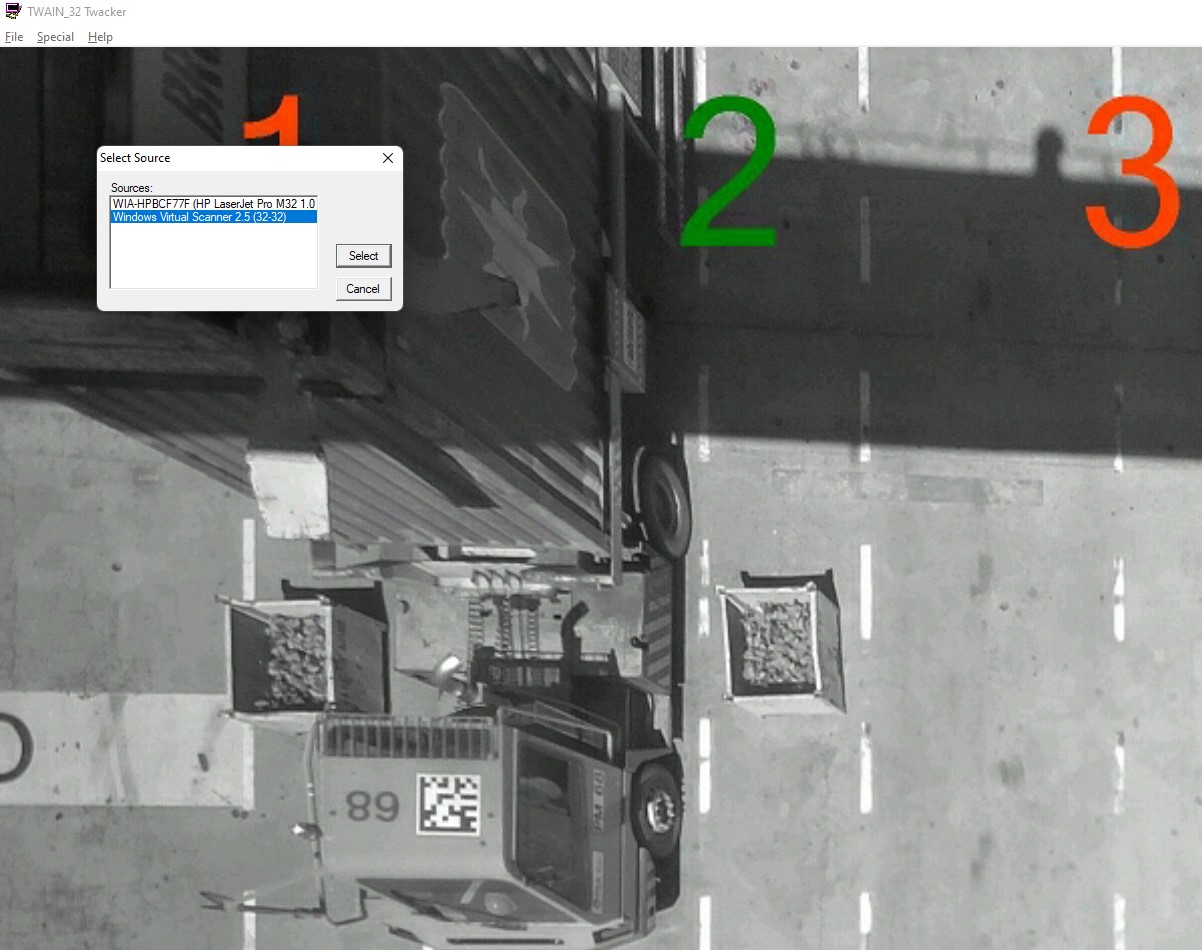
- Run twacker (32-bit/64-bit) application.
-
In Visual Studio, set a breakpoint in
DS_Entry()and then go toDebug > Attach to Processto find the twacker process.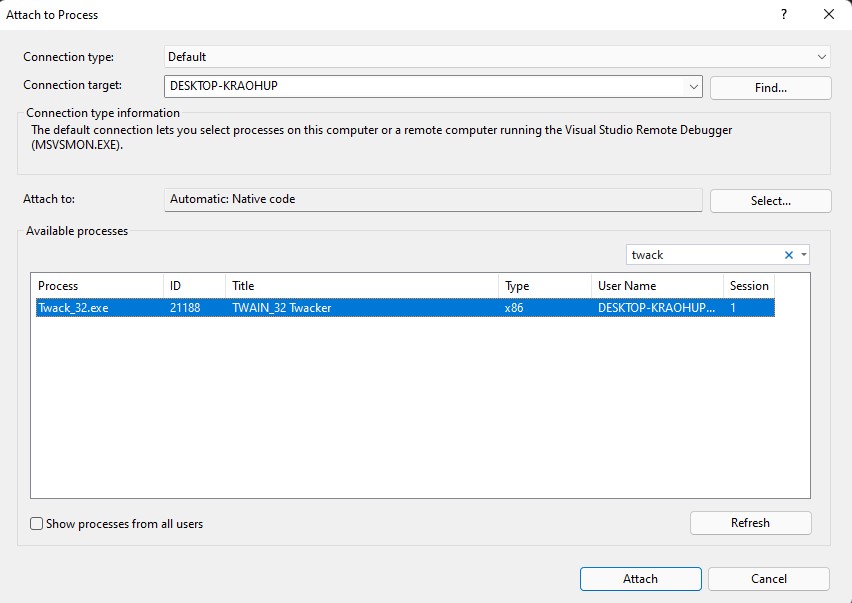
-
Click the
Attachbutton and then select the virtual scanner to trigger debugging.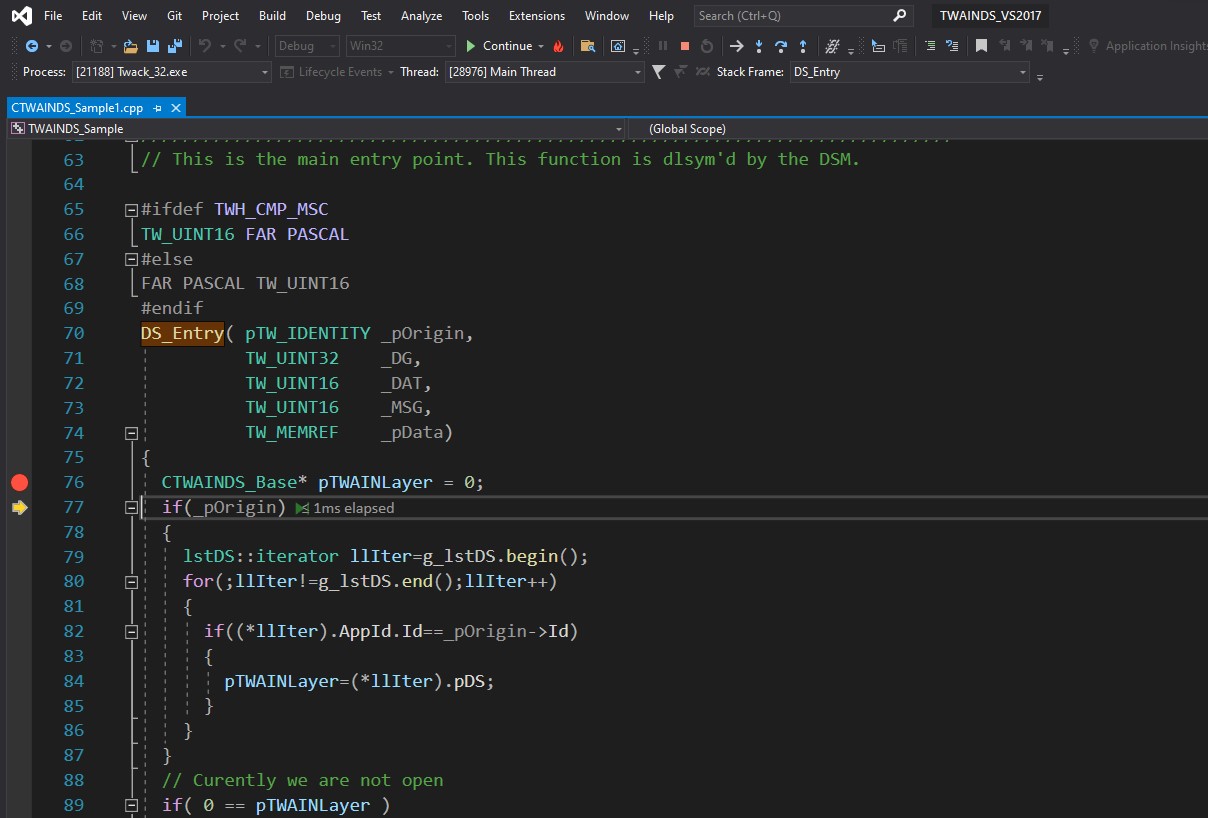
Step 2: Configure the Virtual Scanner to Load Custom Images
Instead of always serving the default TWAIN logo, we can modify the TWAIN DS sample source to load any JPEG or PNG from a configurable folder.
The DS_Entry() function is the entry point of the TWAIN data source in CTWAINDS_Sample1.cpp. We can set a breakpoint in this function to see the stack calls.
After debugging the code, I found an appropriate place for the custom image loading code is in the constructor of CScanner_FreeImage class.
When triggering the acquire image event, the TWAINDS_Sample32.ds file will be reloaded to the memory, which means all variables will be reset. Therefore, we use a JSON file to read and write the current image index in order to load different images by clicking the Acquire Image button.
Note: the C:\Windows\twain_32\sample2\ directory is not writable without administrator privileges. Thus, we create a read-only file source.json that contains the image set folder and put an info.json file in the image set folder to store the current image index and max image count for ADF. For example:
source.json
{
    "folder": "C:/Users/admin/Pictures/barcode"
}
info.json
{
    "index": 0,
    "maxcount": 10
}
The code is as follows:
#include "json.hpp"
using json = nlohmann::json;

#include <filesystem>
#include <fstream>
namespace fs = std::experimental::filesystem;

CScanner_FreeImage::CScanner_FreeImage()
{
    ...

    char sourceConfig[PATH_MAX];
    SSNPRINTF(sourceConfig, sizeof(sourceConfig), PATH_MAX, "%s%csource.json", szTWAIN_DS_DIR, PATH_SEPERATOR);
    vector<string> images;

    if (FILE_EXISTS(sourceConfig))
    {
        // Read the image folder from source.json
        ifstream stream(sourceConfig);
        json  source;
        stream >> source;
        stream.close();

        string imageFolder = source["folder"];

        if (FILE_EXISTS(imageFolder.c_str()))
        {
            // Get the image index
            string infoPath = imageFolder + PATH_SEPERATOR + "info.json";
            ifstream infoStream(infoPath);
            json info;
            infoStream >> info;
            infoStream.close();

            int index = info["index"];

            for (const auto& entry : fs::directory_iterator(imageFolder))
            {
                std::string path{ entry.path().u8string() };
                string suffix = path.substr(path.length() - 4, 4);
                // Get JPEG or PNG files
                if (!suffix.compare(".jpg") || !suffix.compare(".png"))
                {
                    images.push_back(path);
                }
            }

            if (images.size() > 0)
            {
                if (index >= images.size()) index = 0;

                // Set a custom image
                SSNPRINTF(m_szSourceImagePath, sizeof(m_szSourceImagePath), PATH_MAX, images[index].c_str());

                // Save image index to info.json
                index += 1;
                info["index"] = index;
                std::ofstream stream(infoPath);
                stream << info << std::endl;
                stream.close();
            }
        }
    }

    // If there's no config file for custom image set, use the default image
    if (images.size() == 0)
    {
        SSNPRINTF(m_szSourceImagePath, sizeof(m_szSourceImagePath), PATH_MAX, "%s%cTWAIN_logo.png", szTWAIN_DS_DIR, PATH_SEPERATOR);
    }
    ...
}
You can download json.hpp from https://github.com/nlohmann/json.
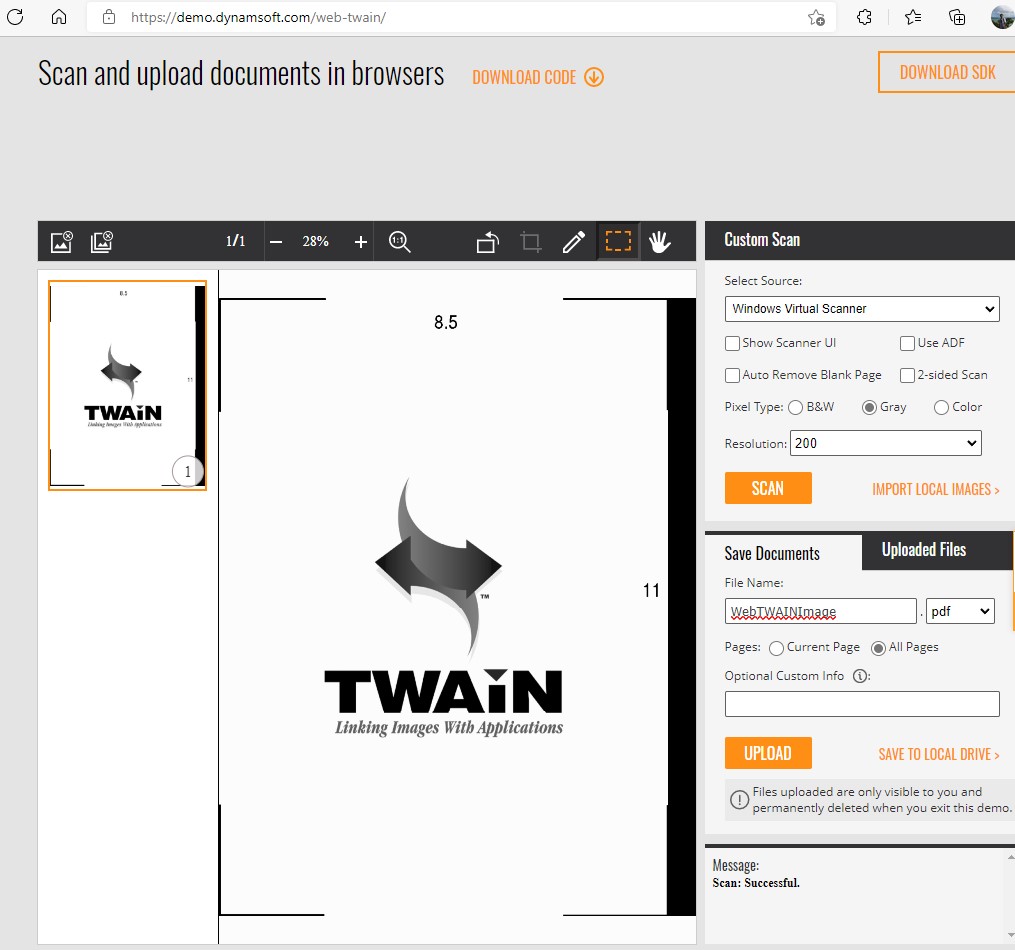
Now we can re-build the project and test it with Dynamic Web TWAIN online demo.
Before
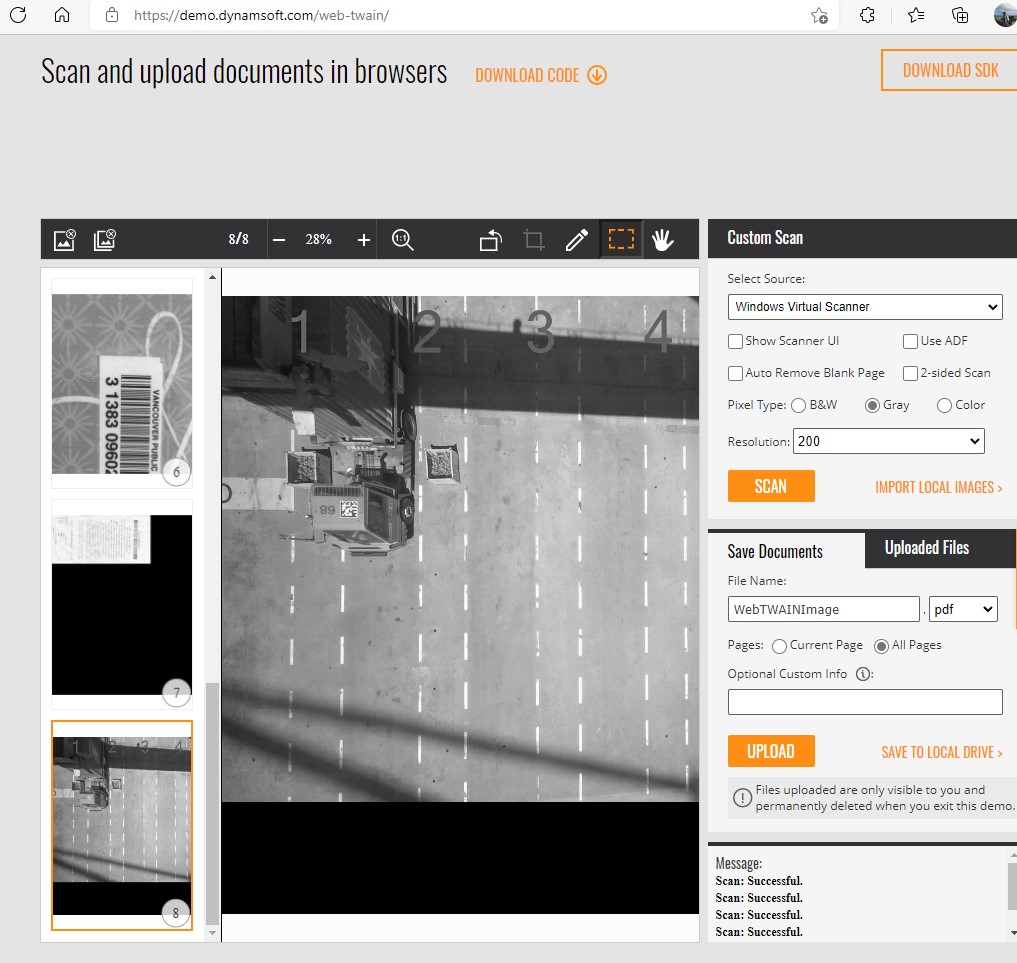
After
Common Issues & Edge Cases
windeployqt.exedeploys wrong Qt DLLs: When multiple Qt kits (MinGW, ARM64, MSVC) are installed, ensure the MSVC kit appears first inPATH. Mismatched DLLs cause silent load failures when the.dsis invoked by the TWAIN manager.- Access denied writing
info.jsontotwain_32\sample2\: TheC:\Windows\twain_32\sample2\directory requires administrator write access. Storeinfo.jsonin the user-owned image folder (as shown above) rather than the install directory. - Image index not advancing between acquires: Each acquire event causes
TWAINDS_Sample32.dsto reload, resetting all in-memory state. The index must be persisted to disk viainfo.json; in-memory counters will not survive between acquire calls.