


How to Build a .NET MAUI Document Scanner App with Capture, Normalize, and Share
.NET MAUI simplifies cross-platform app development by enabling a single codebase for multiple platforms. The Dynamsoft Capture Vision MAUI Bundle offers powerful APIs for document scanning, barcode reading, and MRZ recognition. In this tutorial, you’ll learn how to create a .NET MAUI document scanner that can capture, normalize, and share documents on both Android and iOS platforms. What you’ll build: A cross-platform .NET MAUI document scanner app that uses the Dynamsoft Capture Vision SDK to detect document edges via camera, normalize the captured image, and share the result to other apps on Android and iOS.
Key Takeaways
- The Dynamsoft Capture Vision MAUI Bundle provides a
CameraViewcontrol andNormalizedImagesResultcallback that handle real-time document edge detection and perspective correction in a .NET MAUI app. - Document normalization supports grayscale, color, and binary output modes through
EnumImageColourMode, letting you optimize scanned output for different use cases. - The same C# codebase runs on both Android and iOS — only platform-specific provisioning (Xcode signing, Android SDK) differs.
- Sharing the normalized document image uses the built-in .NET MAUI
Share.RequestAsyncAPI with a temporary cached file.
Common Developer Questions
How do I build a document scanner app in .NET MAUI with real-time edge detection?
Use the Dynamsoft Capture Vision MAUI bundle’s CameraView for live preview and subscribe to normalized image callbacks from the router. The camera feed keeps detecting document boundaries until the user taps the capture button, at which point the app freezes the best normalized result and navigates to a review page.
How do I normalize and share a captured document image in .NET MAUI on Android and iOS?
Read the ImageData from the first NormalizedImagesResult item, write it to a temporary cached file, and call .NET MAUI’s Share.RequestAsync with that file path. That keeps the capture and share flow identical across Android and iOS.
What SDK can I use for document scanning and perspective correction in a cross-platform .NET MAUI app?
The Dynamsoft.CaptureVisionBundle.Maui package provides the camera preview, document-edge detection, and perspective correction needed for this workflow. It is specifically designed to support Android and iOS from the same .NET MAUI codebase.
This article is Part 2 in a 5-Part Series.
- Part 1 - How to Build a .NET MAUI Barcode and QR Code Scanner in C#
- Part 2 - How to Build a .NET MAUI Document Scanner App with Capture, Normalize, and Share
- Part 3 - Build a Passport MRZ Scanner for Android and iOS in C# with .NET MAUI
- Part 4 - Build a .NET MAUI Windows Desktop Barcode Scanner with Live Camera Feed
- Part 5 - Build a .NET MAUI Cross-Platform Camera Barcode Scanner for Windows, Android, and iOS
.NET MAUI Document Scanner Demo Video
Prerequisites
To get started, ensure you have the following tools installed:
- Get a 30-day free trial license for Dynamsoft Capture Vision
- Xcode
- Android Studio
- Visual Studio for Windows or Visual Studio Code for macOS with the .NET MAUI extension
- Provisioning Profile for iOS (required if building a .NET MAUI app with Visual Studio Code on macOS):
- Log into your Apple Developer account.
- Navigate to Certificates, Identifiers & Profiles to create an App ID and Provisioning Profile.
- Download the
*.mobileprovisionfile and copy it to the~/Library/MobileDevice/Provisioning Profilesfolder.
Step 1: Set Up the .NET MAUI Document Scanner Project
Dynamsoft provides a .NET MAUI sample project demonstrating how to automatically capture and normalize documents from a camera stream. Based on this sample, we’ll make a few modifications:
- Update the target framework from
net7.0tonet8.0. - Add a button to trigger document capture and rectification.
- Allow users to share the normalized document to other apps.
Update the Target Framework from .NET 7 to .NET 8
The latest .NET version is 8.0, while the sample project uses .NET 7.0. To update the target framework:
- Open the
.csprojfile and change theTargetFrameworkvalue fromnet7.0tonet8.0. - Add
<SupportedOSPlatformVersion>to thePropertyGroupelement to ensure compatibility:<PropertyGroup Condition="$(TargetFramework.Contains('-ios'))"> <SupportedOSPlatformVersion>11.0</SupportedOSPlatformVersion> </PropertyGroup>
Add a Capture Button to Trigger Document Scanning
- Update the
CameraPage.xamlfile to add a round button for document capture:<?xml version="1.0" encoding="utf-8" ?> <ContentPage xmlns="http://schemas.microsoft.com/dotnet/2021/maui" xmlns:x="http://schemas.microsoft.com/winfx/2009/xaml" xmlns:controls="clr-namespace:Dynamsoft.CameraEnhancer.Maui;assembly=Dynamsoft.CameraEnhancer.Maui" x:Class="AutoNormalize.CameraPage" Title="Auto Normalize"> <AbsoluteLayout> <controls:CameraView x:Name="camera" AbsoluteLayout.LayoutBounds="0,0,1,1" AbsoluteLayout.LayoutFlags="All"/> <!-- Capture Button --> <Button x:Name="captureButton" BackgroundColor="White" WidthRequest="70" HeightRequest="70" CornerRadius="35" Clicked="OnCaptureButtonClicked" HorizontalOptions="Center" VerticalOptions="End" AbsoluteLayout.LayoutBounds="0.5, 0.9, 90, 90" AbsoluteLayout.LayoutFlags="PositionProportional"/> </AbsoluteLayout> </ContentPage> - Implement the
OnCaptureButtonClickedevent handler in theCameraPage.xaml.csfile:bool isReady = false; private void OnCaptureButtonClicked(object sender, EventArgs e) { isReady = true; } public void OnNormalizedImagesReceived(NormalizedImagesResult result) { if (result?.Items?.Count > 0 && isReady) { router?.StopCapturing(); enhancer?.ClearBuffer(); var data = result.Items[0].ImageData; MainThread.BeginInvokeOnMainThread(async () => { await Navigation.PushAsync(new ImagePage(data)); }); } } - Reset the
isReadyflag in theOnAppearingevent handler:protected override async void OnAppearing() { base.OnAppearing(); isReady = false; ... }
Share the Normalized Document to Other Apps
-
In the
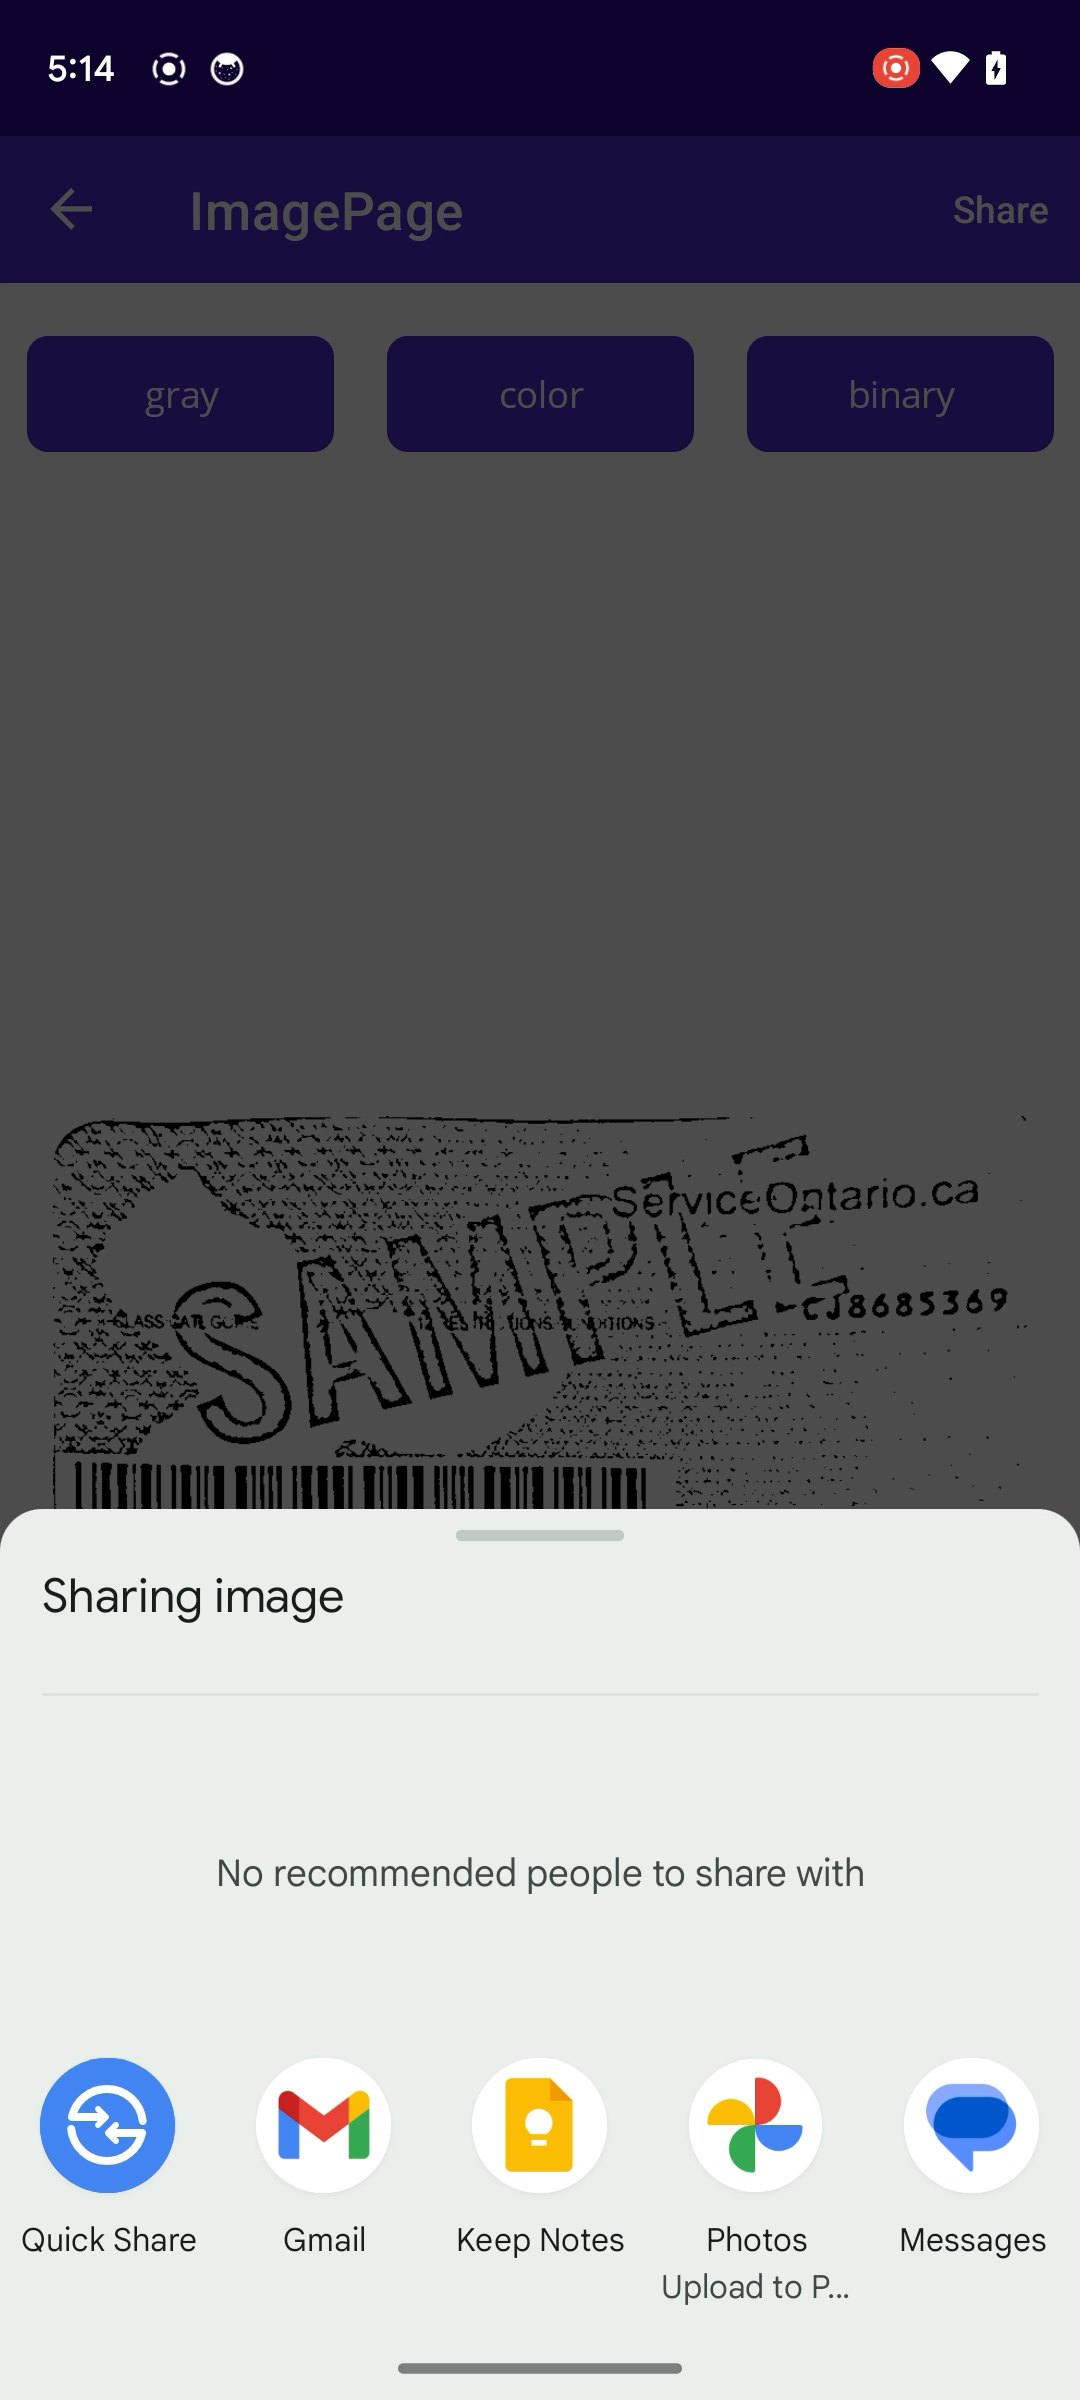
ImagePage.xamlfile, add aToolbarItemas a share button:<?xml version="1.0" encoding="utf-8" ?> <ContentPage xmlns="http://schemas.microsoft.com/dotnet/2021/maui" xmlns:x="http://schemas.microsoft.com/winfx/2009/xaml" x:Class="AutoNormalize.ImagePage" Title="ImagePage"> <!-- Toolbar Item for Share Button --> <ContentPage.ToolbarItems> <ToolbarItem Text="Share" Order="Primary" Priority="0" Clicked="OnShareButtonClicked"/> </ContentPage.ToolbarItems> <Grid RowDefinitions="Auto, *, Auto" ColumnDefinitions="*,*,*"> <Button Text="gray" Grid.Row="0" Grid.Column="0" Margin="10,20" Clicked="OnButtonClicked"/> <Button Text="color" Grid.Row="0" Grid.Column="1" Margin="10,20" Clicked="OnButtonClicked"/> <Button Text="binary" Grid.Row="0" Grid.Column="2" Margin="10,20" Clicked="OnButtonClicked"/> <Image x:Name="image" Grid.Row="1" Grid.ColumnSpan="3" Margin="20,0,20,20"/> </Grid> </ContentPage> -
Implement the
OnShareButtonClickedevent handler in theImagePage.xaml.csfile:private void normalize(EnumImageColourMode type) { var name = EnumPresetTemplate.PT_NORMALIZE_DOCUMENT; var settings = cvr.GetSimplifiedSettings(name); settings.DocumentSettings.ColourMode = type; cvr.UpdateSettings(name, settings); var result = cvr.Capture(data, name); if (result?.Items?.Count > 0 && result.Items[0].Type == EnumCapturedResultItemType.CRIT_NORMALIZED_IMAGE) { _item = (NormalizedImageResultItem)result.Items[0]; image.Source = _item.ImageData.ToImageSource(); } } private async void OnShareButtonClicked(object sender, EventArgs e) { if (_item == null) { await DisplayAlert("Error", "Image is not shareable.", "OK"); return; } var imageSource = _item.ImageData.ToImageSource(); if (imageSource is StreamImageSource streamImageSource) { var stream = await streamImageSource.Stream(CancellationToken.None); var tempFile = Path.Combine(FileSystem.CacheDirectory, "shared_image.jpg"); using (var memoryStream = new MemoryStream()) { await stream.CopyToAsync(memoryStream); await File.WriteAllBytesAsync(tempFile, memoryStream.ToArray()); } await Share.RequestAsync(new ShareFileRequest { Title = "Share Image", File = new ShareFile(tempFile) }); } else { await DisplayAlert("Error", "Image is not shareable.", "OK"); } }Explanation
- The
_itemvariable stores the normalized image data. After assigning the image data to theImagecontrol,image.Sourceis not directly available for image operations. - To share the image, save it as a temporary file and use the
Share.RequestAsyncmethod to share the file.
- The
Step 2: Run and Test the .NET MAUI Document Scanner
-
In Visual Studio Code, press
F1to open the command palette and pick a target device to run the app.
-
Capture and normalize a document, then share it with other apps.
Common Issues and Edge Cases
- iOS provisioning profile errors: If the app fails to deploy on a physical iOS device, verify that your App ID and provisioning profile match the bundle identifier in your
.csproj. An expired or mismatched profile is the most common cause of signing failures. - Camera permission not granted: On both Android and iOS, the app requires camera access. If the
CameraViewshows a blank screen, check that camera permissions are declared inAndroidManifest.xml(Android) andInfo.plist(iOS), and that the user has granted the permission at runtime. NormalizedImagesResultreturns empty items: This can occur if the document edges are not clearly visible against the background. Ensure adequate lighting and contrast between the document and the surface it rests on.