


How to Build a Simple PWA Barcode QR Code Scanner
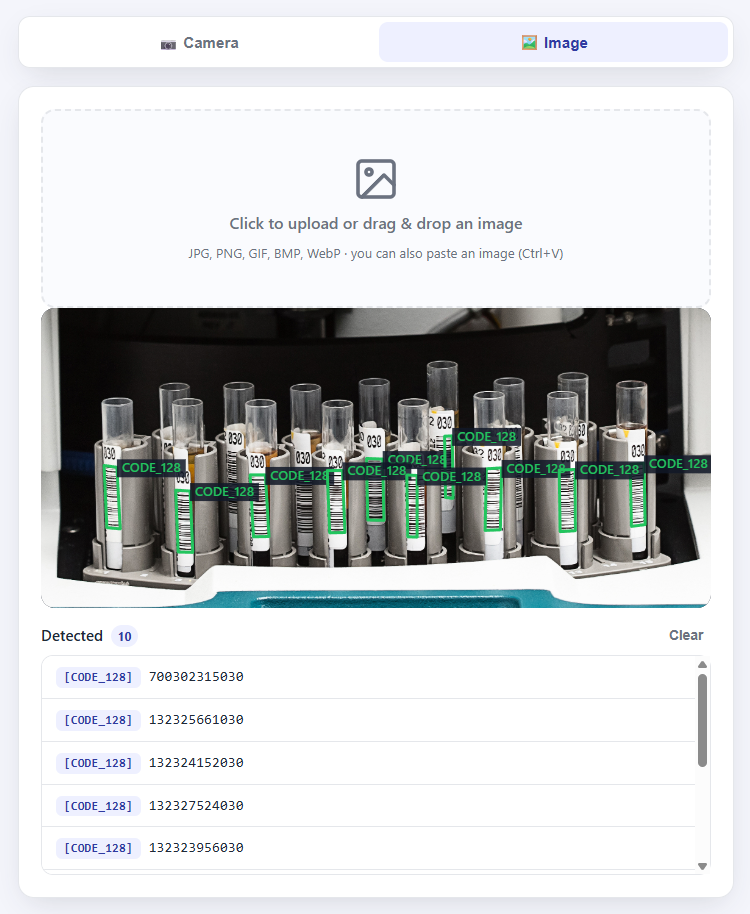
You can build an installable progressive web app (PWA) that scans 1D barcodes and QR codes in the browser with the latest Dynamsoft Barcode Reader Bundle. The app reads codes from the live camera and from uploaded images, draws a bounding box around every detection, and runs on both desktop and mobile — it even works offline after the first load.
What You’ll Build
- A PWA that can be installed on the desktop or added to the home screen on Android and iOS.
- A live camera scanner that recognizes barcodes as they appear in the viewfinder, with a dedicated scan frame and real-time overlays.
- An image scanner that detects barcodes in a photo you upload, drag-and-drop, or paste from the clipboard.
- A responsive UI that adapts to large desktop windows and narrow mobile screens, plus an offline-capable service worker.
Key Takeaways
- Use the Capture Vision API (
CaptureVisionRouter) instead of the olderBarcodeReader/BarcodeScannerobjects. The new API is the current way to call Dynamsoft Barcode Reader in the browser. - To scan a frame from the camera or an image, call
cvr.capture(source, 'ReadBarcodes_Default'), then read the barcode items fromresult.items. - The SDK is powered by WebAssembly; the engine and its ONNX model files load automatically from the CDN.
- The scanner needs HTTPS (camera access and PWA installation both require a secure context).
- A valid license key is required, but a free 30-day trial is available.
Prerequisites
To follow this tutorial, you need a text editor, a browser (Chrome or Edge recommended), and a way to serve the folder over HTTPS or localhost. Dynamsoft also requires a license — get a 30-day free trial license to use the barcode reader in your project.
Why PWA
Modern users spend more time in native apps than on the web, but native apps have drawbacks:
- It takes time to install a native app from the app store.
- Users install many apps but only use a few of them, which wastes storage.
Progressive web apps provide native-like capabilities such as installability, offline support, background sync and sensor access, while staying linkable and discoverable.
How Does a Progressive Web App Work
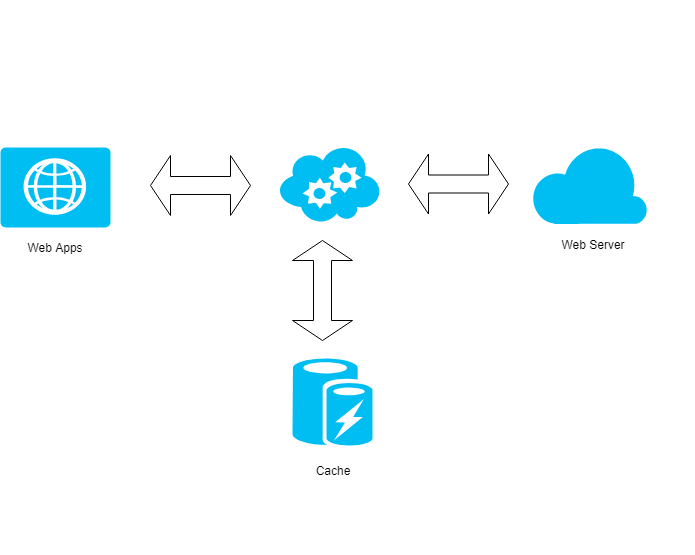
The main component of a PWA is a service worker, a script that runs in the background to cache resources and provide native capabilities.
PWA Browser Compatibility
Browser support matters for web development. You can see which PWA features are supported by Chrome, Safari, Edge, Firefox and Opera here: Progressive Web Apps feature compatibility by browser.
Building and Installing the PWA Barcode Scanner
A standard progressive web app has to meet the following criteria:
- Hosted over HTTPS.
- Include a web manifest file.
- Register a service worker.
Scaffolding a Progressive Web App
Create a manifest file manifest.json that tells the browser the app name, icons, colors and how it should launch:
{
    "name": "Barcode Scanner PWA",
    "short_name": "BarcodeScanner",
    "description": "A progressive web app for reading barcodes and QR codes with Dynamsoft.",
    "icons": [
        { "src": "icons/icon-192.png", "sizes": "192x192", "type": "image/png", "purpose": "any maskable" },
        { "src": "icons/icon-256.png", "sizes": "256x256", "type": "image/png", "purpose": "any maskable" },
        { "src": "icons/icon-512.png", "sizes": "512x512", "type": "image/png", "purpose": "any maskable" }
    ],
    "start_url": "./",
    "scope": "./",
    "display": "standalone",
    "theme_color": "#2F3BA2",
    "background_color": "#3E4EB8"
}
With the manifest in place, the app can be installed to a home screen or launched as a native app.
Next, create a service-worker.js file that caches the app shell so the scanner still opens offline:
self.addEventListener('install', (event) => {
  event.waitUntil(caches.open('barcode-scanner-v1')
    .then((cache) => cache.addAll(['./', './index.html', './style.css', './main.js', './overlay.js', './manifest.json']))
    .then(() => self.skipWaiting()));
});

self.addEventListener('fetch', (event) => {
  if (event.request.method !== 'GET') return;
  event.respondWith(
    caches.match(event.request).then((cached) => cached || fetch(event.request))
  );
});
Register the service worker from the main thread:
if ('serviceWorker' in navigator) {
    navigator.serviceWorker
        .register('./service-worker.js')
        .then(function () {
            console.log('Service Worker Registered');
        });
}
Now the PWA shell is in place. The next step is to add the barcode recognition SDK.
Step 1: Load the Latest SDK and Create a Capture Vision Router
Load the bundle from a CDN in index.html:
<script src="https://cdn.jsdelivr.net/npm/dynamsoft-barcode-reader-bundle@11.6.2100/dist/dbr.bundle.js"></script>
Then initialize the license, load the core module with the DBR engine, and create a CaptureVisionRouter instance:
const LICENSE_KEY = 'YOUR-LICENSE-KEY';
const DEFAULT_TEMPLATE = 'ReadBarcodes_Default';

let cvr;

async function initLicense() {
  await Dynamsoft.License.LicenseManager.initLicense(LICENSE_KEY, true);
  await Dynamsoft.Core.CoreModule.loadWasm(['DBR']);
  cvr = await Dynamsoft.CVR.CaptureVisionRouter.createInstance();
}
Step 2: Scan Barcodes from the Live Camera
Place a <video> element and an overlay canvas in the page, open the camera with getUserMedia, then draw each frame onto a canvas and pass it to cvr.capture():
const video = document.getElementById('cameraView');
const wrapper = document.getElementById('cameraViewWrap');
const renderer = new OverlayRenderer(document.getElementById('overlay'));

async function startCamera(deviceId) {
  const stream = await navigator.mediaDevices.getUserMedia({
    video: { deviceId: deviceId ? { exact: deviceId } : undefined, facingMode: 'environment' },
    audio: false
  });
  video.srcObject = stream;
  await video.play();
  scanLoop();
}

async function scanLoop() {
  const canvas = document.createElement('canvas');
  canvas.width = video.videoWidth;
  canvas.height = video.videoHeight;
  canvas.getContext('2d').drawImage(video, 0, 0);

  renderer.setContentSize(video.videoWidth, video.videoHeight, wrapper.clientWidth, wrapper.clientHeight);
  const result = await cvr.capture(canvas, DEFAULT_TEMPLATE);
  renderResults(result);
  requestAnimationFrame(scanLoop);
}
Step 3: Scan Barcodes from an Uploaded Image
For a static image, pass its URL (or an <img>/canvas element) to cvr.capture():
async function scanImage(imageUrl) {
  const result = await cvr.capture(imageUrl, DEFAULT_TEMPLATE);
  renderResults(result);
}
Step 4: Read the Results and Draw Bounding Boxes
Each barcode in result.items exposes text, formatString and a location.points array. Filter the items by CRIT_BARCODE, then draw a box around the points:
function renderResults(result) {
  const items = result.items || [];
  for (const item of items) {
    if (item.type !== Dynamsoft.Core.EnumCapturedResultItemType.CRIT_BARCODE) continue;
    const format = item.formatString || 'Unknown';
    console.log(`[${format}] ${item.text}`);
    renderer.drawBarcode(item.location.points, format);
  }
}
The OverlayRenderer helper in the sample maps the detection coordinates onto the displayed video or image, keeping the boxes aligned at any size.
Step 5: Make the UI Responsive for Desktop and Mobile
Use a fluid layout with an aspect-ratio and a media query so the scanner works on small screens:
.scanner-wrap { position: relative; width: 100%; aspect-ratio: 4 / 3; }
#cameraView, #overlay { position: absolute; inset: 0; width: 100%; height: 100%; }
@media (max-width: 640px) {
  .scanner-wrap { aspect-ratio: 1 / 1; }
}
Deploy and Install the PWA
Serve the folder over HTTPS, or locally over localhost with a simple static server. GitHub Pages is a convenient choice for hosting and testing:
python -m http.server 8080
Then open https://localhost:8080 (or your hosted URL). On desktop you can install the app from the browser’s address bar; on Android you can add it to the home screen.
Try my PWA barcode reader.
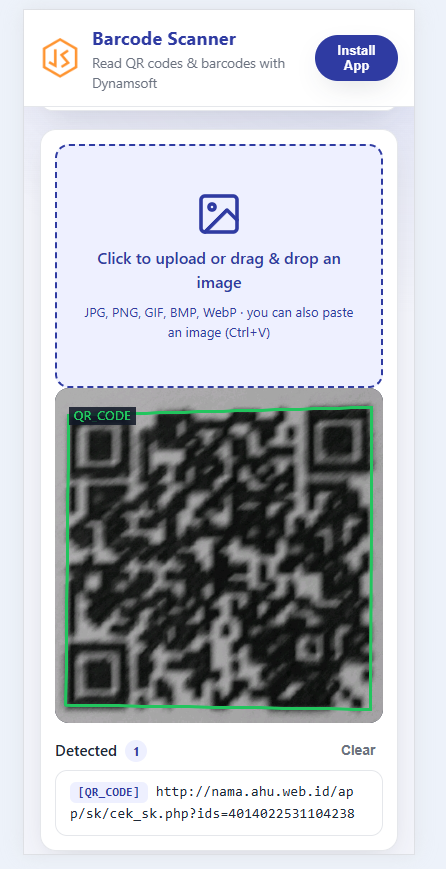
On a phone, the responsive layout switches to a full-width scan frame, a stacked toolbar, and a single-column result list:
Mobile
About Dynamsoft Barcode Reader JavaScript Edition
Dynamsoft Barcode Reader JavaScript Edition is a JavaScript barcode scanning library powered by WebAssembly. It supports Code 39, Code 93, Code 128, Codabar, EAN-8, EAN-13, UPC-A, UPC-E, Interleaved 2 of 5 (ITF), Industrial 2 of 5 (Code 2 of 5 Industry, Standard 2 of 5, Code 2 of 5), ITF-14, QR code, DataMatrix, PDF417, and Aztec code. The library can scan multiple barcodes from static images and a live camera video stream.
Common Developer Questions
How do I initialize the Dynamsoft Barcode Reader in JavaScript?
Call LicenseManager.initLicense() to set the license, load the core module with CoreModule.loadWasm(['DBR']), then create a CaptureVisionRouter with CaptureVisionRouter.createInstance(). You can then call cvr.capture(source, 'ReadBarcodes_Default') on a camera frame or an image.
What SDK version does this PWA sample use?
The sample uses the dynamsoft-barcode-reader-bundle package (v11.x) from a CDN, which exposes the current Capture Vision API instead of the older Dynamsoft.DBR.BarcodeScanner interface.
Can the scanner read both 1D barcodes and QR codes?
Yes. The default ReadBarcodes_Default template recognizes common 1D and 2D codes, including Code 128, Code 39, EAN/UPC, ITF, QR Code, DataMatrix, PDF417, and Aztec.
Does the PWA work offline?
Yes. The service worker caches the app shell (HTML, CSS, JS, and the manifest). Once the SDK engine has been loaded, the scanner UI remains available offline.
Does camera scanning require HTTPS?
Yes. Both camera access via getUserMedia and PWA installation require a secure context, so the app must be served over HTTPS or localhost.