Build a React Native QR Code Scanner using Vision Camera
In the previous series articles, we’ve created a react-native-vision-camera frame processor plugin of Dynamsoft Barcode Reader to scan barcodes. In this article, we are going to build a QR Code scanner using this plugin to better illustrate how to use it.
A preview of the final result:

The app consists of several pages. On the home page, users can tap the button to navigate to the scanner page. When a QR Code is found, the app will highlight the code and display the decoded text above the code. If continuous scan is disabled, the app will return to the home page with the result immediately. Users can tap the code for further actions like checking its details, opening the link, and copying the text to the clipboard.
This article is Part 3 in a 3-Part Series.
Alternatives to Vision Camera:
- Dynamsoft Capture Vision
- Use the JavaScript Edition of Dynamsoft Barcode Reader in a WebView. This works great in Expo’s managed mode.
Other React Native Vision Camera Frame Processor Plugins
Getting started with Dynamsoft Barcode Reader

Building a React Native QR Code Scanner
New project
$ npx react-native init QRCodeScanner
If you need to enable TypeScript1:
$ npx react-native init QRCodeScanner --template react-native-template-typescript
Update project files
We need to modify several project files.
Add camera permission
For Android, add the following to android\app\src\main\AndroidManifest.xml:
<uses-permission android:name="android.permission.CAMERA" />
For iOS add the following to ios\QRCodeScanner\Info.plist:
<key>NSCameraUsageDescription</key>
<string>For barcode scanning</string>
Install dependencies
Install the following packages used in this article:
$ npm install vision-camera-dynamsoft-barcode-reader react-native-worklets-core react-native-vision-camera react-native-svg @react-native-clipboard/clipboard @react-navigation/native @react-navigation/native-stack @alessiocancian/react-native-actionsheet react-native-screens react-native-safe-area-context
Extra steps are needed:
-
Update the
babel.config.jsfile:module.exports = { presets: ['module:metro-react-native-babel-preset'], + plugins: [['react-native-worklets-core/plugin']], }; - For iOS, run
pod installin theiosfolder. -
Run the project using the following commands:
$ npx react-native run-android # for Android
$ npx react-native run-ios     # for iOS
Show camera and decode
Open App.tsx and replace its content with the following:
import * as React from 'react';
import { SafeAreaView, StyleSheet, Text } from 'react-native';
import { Camera, CameraDevice, getCameraFormat, runAtTargetFps, useCameraDevice, useCameraDevices, useCameraFormat, useFrameProcessor } from 'react-native-vision-camera';
import { DBRConfig, decode, TextResult } from 'vision-camera-dynamsoft-barcode-reader';
import { useSharedValue, Worklets } from 'react-native-worklets-core';

export default function App() {
  const [hasPermission, setHasPermission] = React.useState(false);
  const [barcodeResults, setBarcodeResults] = React.useState([] as TextResult[]);
  const cameraFormat = useCameraFormat(backCam, [
    { videoResolution: { width: 1280, height: 720 } },
    { fps: 60 }
  ])
  const backCam = useCameraDevice('back');
  const onBarcodeScanned = (results:TextResult[]) =>{
    setBarcodeResults(results);
  }
  const onBarcodeScannedJS = Worklets.createRunInJsFn(onBarcodeScanned);
  const frameProcessor = useFrameProcessor((frame) => {
    'worklet'
    runAtTargetFps(5, () => {
      'worklet'

      const config:DBRConfig = {};
      config.license = "DLS2eyJoYW5kc2hha2VDb2RlIjoiMjAwMDAxLTE2NDk4Mjk3OTI2MzUiLCJvcmdhbml6YXRpb25JRCI6IjIwMDAwMSIsInNlc3Npb25QYXNzd29yZCI6IndTcGR6Vm05WDJrcEQ5YUoifQ==";
      config.template="{\"ImageParameter\":{\"BarcodeFormatIds\":[\"BF_QR_CODE\"],\"Description\":\"\",\"Name\":\"Settings\"},\"Version\":\"3.0\"}";
      const results = decode(frame,config)
      if (results) {
        onBarcodeScannedJS(results);
      }
    })
  }, [])

  React.useEffect(() => {
    (async () => {
      const status = await Camera.requestCameraPermission();
      setHasPermission(status === 'granted');
    })();
  }, []);

  return (
    <SafeAreaView style={styles.container}>
      {backCam != null &&
      hasPermission && (
        <>
          <Camera
            style={StyleSheet.absoluteFill}
            device={backCam}
            isActive={isActive}
            format={cameraFormat}
            frameProcessor={frameProcessor}
            pixelFormat="yuv"
          />
          {barcodeResults.map((barcode, idx) => (
            <Text key={idx} style={styles.barcodeText}>
              {barcode.barcodeFormat +": "+ barcode.barcodeText}
            </Text>
          ))}
        </>
      )}
    </SafeAreaView>
  );
}

const styles = StyleSheet.create({
  container: {
    flex: 1,
  },
  barcodeText: {
    fontSize: 20,
    color: 'white',
    fontWeight: 'bold',
  },
});
The vision camera frame processor plugin of Dynamsoft Barcode Reader is used to read barcodes from the camera. A template is specified to decode QR codes only (You can learn more about how to update Dynamsoft Barcode Reader runtime settings here).
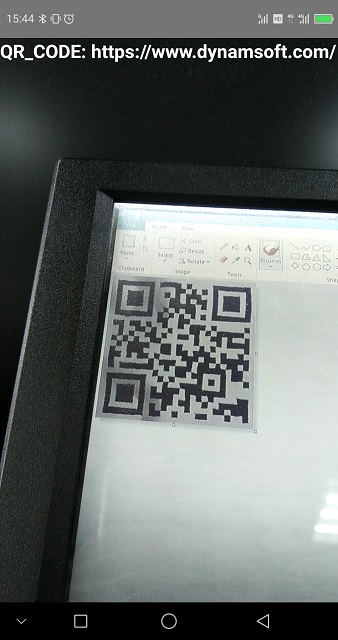
Let’s run it to have a test. The QR code results will be displayed in top-left text components.
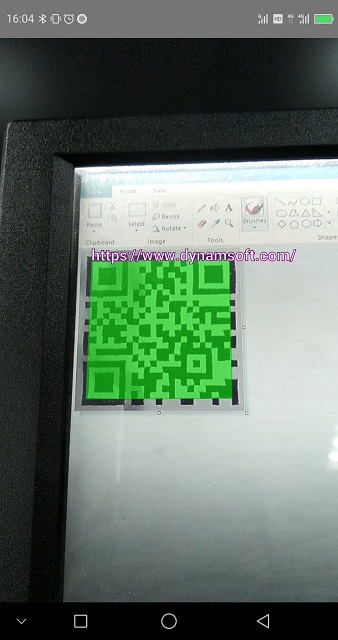
Show QR Code overlays
The next step is to draw QR Code overlays above the camera preview. In a previous article, we demonstrated how to do this using SVG in a web app. In this article, we are going to use SVG, as well.
The react-native-svg library is used to provide SVG support to React Native on iOS and Android.
Polygon is used to cover QR Codes and Text is used to show the results above QR Codes.
We need to set the viewBox attribute so that the SVG content will be correctly scaled to match the screen. Since the natural camera sensor orientation of Android is landscape, the frame may be rotated for preview while the frame we get is not rotated. We need to switch the width and height if the device is portrait.2
Here is the code:
const getPointsData = (tr:TextResult) => {
  var pointsData = tr.x1 + "," + tr.y1 + " ";
  pointsData = pointsData+tr.x2 + "," + tr.y2 +" ";
  pointsData = pointsData+tr.x3 + "," + tr.y3 +" ";
  pointsData = pointsData+tr.x4 + "," + tr.y4;
  return pointsData;
}

const getViewBox = () => {
  const frameSize = getFrameSize();
  const viewBox = "0 0 "+frameSize[0]+" "+frameSize[1];
  return viewBox;
}

const getFrameSize = ():number[] => {
  let width:number, height:number;
  if (Platform.OS === 'android') {
    if (frameWidth>frameHeight && Dimensions.get('window').width>Dimensions.get('window').height){
      width = frameWidth;
      height = frameHeight;
    }else {
      console.log("Has rotation");
      width = frameHeight;
      height = frameWidth;
    }
  } else {
    width = frameWidth;
    height = frameHeight;
  }
  return [width, height];
}

return (
  //...
    <Svg style={StyleSheet.absoluteFill} viewBox={getViewBox()}>
      {barcodeResults.map((barcode, idx) => (
        <Polygon key={"poly-"+idx}
        points={getPointsData(barcode)}
        fill="lime"
        stroke="green"
        opacity="0.5"
        strokeWidth="1"
        />
      ))}
       {barcodeResults.map((barcode, idx) => (
        <SVGText key={"text-"+idx}
          fill="white"
          stroke="purple"
          fontSize={getFrameSize()[0]/400*20}
          fontWeight="bold"
          x={barcode.x1}
          y={barcode.y1}
        >
          {barcode.barcodeText}
        </SVGText>
      ))}
    </Svg>
  //...
)
Set up a scan region
We can set up a scan region (or recognition area) to guide the user to aim the camera to the QR code. This can also improve the decoding speed.
Here, we use react-native-svg to draw a rectangle and update Dynamsoft Barcode Reader’s runtime settings to decode a specified region.
Added JSX in SVG:
<Rect
  x={0.1*getFrameSize()[0]}
  y={0.2*getFrameSize()[1]}
  width={0.8*getFrameSize()[0]}
  height={0.45*getFrameSize()[1]}
  strokeWidth="2"
  stroke="red"
/>
In frameProcessor, update the template to specify a region:
const frameProcessor = useFrameProcessor((frame) => {
  let settings;
  if (config.template){
    settings = JSON.parse(config.template);
  }else {
    const template =
    `{
      "ImageParameter": {
        "Name": "Settings"
      },
      "Version": "3.0"
    }`;
    settings = JSON.parse(template);
  }
  let left = 10;
  let right = 90;
  let top = 20;
  let bottom = 65;
  if (config.rotateImage == false && Platform.OS === 'android') {
    console.log("android with rotation disabled");
    left = 20;
    right = 65;
    top = 10;
    bottom = 90;
  }
  settings["ImageParameter"]["RegionDefinitionNameArray"] = ["Settings"];
  settings["RegionDefinition"] = {
                                  "Left": left,
                                  "Right": right,
                                  "Top": top,
                                  "Bottom": bottom,
                                  "MeasuredByPercentage": 1,
                                  "Name": "Settings",
                                };
  config.template = JSON.stringify(settings);
}
Here is a screenshot of the result:

Use React Navigation
To demonstrate how to use the camera component in a multi-page app, let’s create several pages and manage them using React Navigation.
-
Create a
Screensfolder with three files.Screens\Home.js Screens\Info.js Screens\BarcodeScanner.tsxThe previous code we write is moved to
BarcodeScanner.tsx.The Home page shows a button to navigate to the scanner page and the Info page shows the details of the code.
There is a continuous scan option. If it is disabled, the program will return to the Home page with the QR code results.
-
In the
App.tsxfile, use the navigator.import * as React from 'react'; import {StyleSheet, View } from 'react-native'; import { NavigationContainer } from '@react-navigation/native'; import { createNativeStackNavigator } from '@react-navigation/native-stack'; import BarcodeScanner from './Screens/BarcodeScanner'; import Home from './Screens/Home'; import Info from './Screens/Info'; import Test from './Screens/test'; const Root = createNativeStackNavigator() export default function App() { return ( <NavigationContainer> <Root.Navigator> <Root.Group> <Root.Screen name="Home" component={Home} /> <Root.Screen name="Info" component={Info} /> </Root.Group> <Root.Group screenOptions={{ headerShown: false }}> <Root.Screen name="BarcodeScanner" component={BarcodeScanner} /> </Root.Group> </Root.Navigator> </NavigationContainer> ); } const styles = StyleSheet.create({ container: { flex:1, alignItems: 'center', justifyContent: 'center', }, });
Add post-scan actions
After the QR code is scanned, we can show an action sheet to let the users open the link, copy the text or view its details when they touch the code.
Define an actionsheet:
<ActionSheet
  ref={actionSheetRef}
  title={'Select your action'}
  options={['View details', 'Open the link', 'Copy the text', 'Cancel']}
  cancelButtonIndex={3}
  onPress={async (index) => {
    if (pressedResult){
      if (index == 0){
        navigation.navigate("Info", {"barcode":pressedResult});
      } else if (index == 1) {
        const url = pressedResult.barcodeText;
        const supported = await Linking.canOpenURL(url);
        if (supported) {
          await Linking.openURL(url);
        } else {
          Alert.alert(`Don't know how to open this URL: ${url}`);
        }
      } else if (index == 2) {
        Clipboard.setString(pressedResult.barcodeText);
      }
    }
  }}
/>
Add an onPress event to the code overlay polygon to call the action sheet:
{barcodeResults.map((barcode, idx) => (
  <Polygon key={"poly-"+idx}
  points={getPointsData(barcode)}
  fill="lime"
  stroke="green"
  opacity="0.5"
  strokeWidth="1"
  onPress={() => {
    pressedResult = barcode;
    actionSheetRef.current.show();
  }}
  />
))}
All right, the React Native QR Code Scanner is now completed.
Source Code
You can check out the source code for more details. The example has more options like torch control, front and back camera switch, and resolution setting.
https://github.com/tony-xlh/react-native-barcode-overlays