


How to Scan Documents and Save as PDF from a Browser Using JavaScript
Portable Document Format (PDF) is a file format developed by Adobe to present documents in a manner independent of application software, hardware, and operating systems.1
The basic types of content in a PDF are:
- Typeset text stored as content streams;
- Vector graphics for illustrations and designs that consist of shapes and lines;
- Raster graphics for photographs and other types of images
- Multimedia objects in the document.
PDF is suitable as the container of the images of scanned documents (mainly raster graphics). We can also modify it in the following aspects for different needs:
- Turn the PDF file into a searchable one using OCR.
- Add encryption.
- Add metadata like the author, title and description.
- Add annotations.
Dynamic Web TWAIN has good support for the PDF format. In this article, we are going to create a demo web app to illustrate how to use it to scan documents and save them as a PDF file from browsers.
What you’ll build: A browser-based web app that captures documents via camera or scanner and saves them as PDF files with customizable page size, compression, and metadata — using JavaScript and Dynamic Web TWAIN.
Key Takeaways
- Dynamic Web TWAIN lets you scan documents and save them as PDF directly from any modern browser using JavaScript.
- The
SaveAllAsPDFmethod exports all scanned images into a single PDF file with one function call. - PDF output supports A4/Letter/Legal page types, JPEG/JBIG2/LZW compression, and editable metadata (author, title, keywords).
- The SDK works with both physical scanners (TWAIN/WIA/SANE) and mobile cameras for document capture.
Common Developer Questions
- How do I scan documents to PDF from a web browser using JavaScript?
- How do I set PDF page size and compression when saving scanned images?
- Can I scan documents from a camera and save as PDF in a web application?
Build a Browser-Based Document Scanner That Saves to PDF
Step 1: Set Up Prerequisites
- Download and install Dynamic Web TWAIN from here. Get a 30-day free trial license to try it out.
- Create a new folder for storing the web pages and put the
Resourcesfolder of Dynamic Web TWAIN in that folder. -
Create a
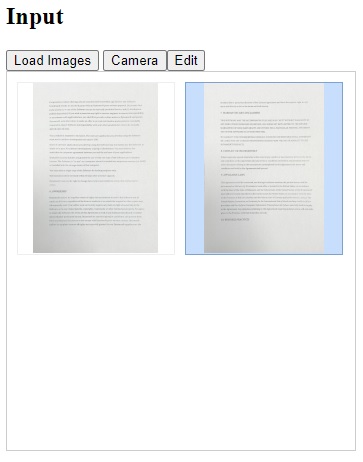
camera.htmlwhich scans documents using a camera. Here is its code:<!DOCTYPE html> <html> <head> <title>Scan to PDF</title> <meta name="viewport" content="width=device-width,initial-scale=1.0,maximum-scale=1.0,user-scalable=0" /> <script type="text/javascript" src="Resources/dynamsoft.webtwain.initiate.js"></script> <script type="text/javascript" src="Resources/dynamsoft.webtwain.config.js"></script> <script type="text/javascript" src="Resources/addon/dynamsoft.webtwain.addon.pdf.js"></script> <script type="text/javascript" src="Resources/addon/dynamsoft.webtwain.addon.camera.js"></script> </head> <body> <h2>Input</h2> <div class="panel"> <input type="button" value="Load Images" onclick="LoadImages();" /> <input type="button" value="Camera" onclick="StartCamera();" /> <input type="button" value="Edit" onclick="StartDocumentEditor();" /> </div> <div id="dwtcontrolContainer" style="width: 350px; height: 380px;"></div> <script type="text/javascript"> Dynamsoft.DWT.RegisterEvent('OnWebTwainReady', Dynamsoft_OnReady); // Register OnWebTwainReady event. This event fires as soon as Dynamic Web TWAIN is initialized and ready to be used Dynamsoft.DWT.UseLocalService = false; let DWObject; function Dynamsoft_OnReady() { DWObject = Dynamsoft.DWT.GetWebTwain('dwtcontrolContainer'); // Get the Dynamic Web TWAIN object that is embeded in the div with id 'dwtcontrolContainer' DWObject.SetViewMode(2, 2); } function LoadImages(){ if (DWObject) { DWObject.IfShowFileDialog = true; // Open the system's file dialog to load image DWObject.LoadImageEx("", Dynamsoft.DWT.EnumDWT_ImageType.IT_ALL); } } function StartCamera(){ if (DWObject) { DWObject.Addon.Camera.scanDocument().then( //open the camera to scan documents function(){ console.log("OK"); }, function(error){ console.log(error.message); } ); } } function StartDocumentEditor() { if (DWObject) { let documentEditor = DWObject.Viewer.createDocumentEditor(); documentEditor.show(); } } </script> </body> </html>Screenshot:
Step 2: Save Scanned Documents as a PDF File
Next, we are going to add a save button to save documents as a PDF file.
HTML:
<input type="button" value="Save as PDF" onclick="Save();" />
JavaScript:
function Save(){
  if (DWObject) {
    let OnSuccess = function () {
      alert("Success");
    };
    let OnFailure = function () {
      alert("Fail");
    };

    DWObject.SaveAllAsPDF("DynamicWebTWAIN.pdf", OnSuccess, OnFailure);
  }
}
Step 3: Customize PDF Page Size, Compression, and Metadata
We can use the Write.Setup function of the PDF addon to customize the settings of the PDF output.
-
Modify the metadata.
let pdfSaveSettings = { author: "Dynamsoft", creator: "DWT", creationDate: "", keyWords: "", modifiedDate: "", producer: "Dynamsoft Corporation", subject: "", title: "", version: 1.5}; DWObject.Addon.PDF.Write.Setup(pdfSaveSettings); -
Specify a page type.
Dynamic Web TWAIN supports the following page types.
Label Value Page_Default 0 Page_Custom 1 Page_A4 2 Page_A4_Reverse 3 Page_A3 4 Page_A3_Reverse 5 Page_Letter 6 Page_Letter_Reverse 7 Page_Legal 8 Page_Legal_Reverse 9 Specifying a page type is useful for saving document images captured using a camera to unify the page size.
let pdfSaveSettings = { pageType: 2 }; // pass 2 to set it as A4 DWObject.Addon.PDF.Write.Setup(pdfSaveSettings); -
Specify a compression type.
Dynamic Web TWAIN supports the following compression algorithms.
Label Value PDF_AUTO 0 PDF_FAX4 2 PDF_LZW 3 PDF_JPEG 5 PDF_JP2000 6 PDF_JBIG2 7 For example, we can use
JPEGas the compression type. We can also set the output quality by modifying the quality value.let pdfSaveSettings = { pageType: Dynamsoft.DWT.EnumDWT_PDFCompressionType.PDF_JPEG, quality: DWObject.JPEGQuality }; DWObject.Addon.PDF.Write.Setup(pdfSaveSettings);When set to
PDF_AUTO, Dynamic Web TWAIN will automatically choose the suitable compression type for each image.- For 1 Bit images, if the PDF version is over 1.4, use
JBIG2encoding, otherwise, useFAX4(CCITT Group 4 Fax). - For 8 Bit images, if the image is grayscale, use
JPEGencoding, otherwise, useLZW(Lempel-Ziv-Welch). - For 24 and 32 Bit images, use
JPEGencoding.
- For 1 Bit images, if the PDF version is over 1.4, use
Common Issues and Edge Cases
- Camera permission denied: On mobile browsers, the user must grant camera access. If denied,
Addon.Camera.scanDocument()will reject with an error. Prompt the user to check browser permissions. - Large PDF file size: When scanning many pages at high resolution, the output PDF can become very large. Use
PDF_JPEGcompression and adjustDWObject.JPEGQuality(e.g., 60–80) to balance quality and file size. - Page orientation mismatch: Camera-captured images may not match the selected page type dimensions. Use the built-in document editor (
DWObject.Viewer.createDocumentEditor()) to rotate or crop pages before saving.
Source Code
Check out the source code of the samples to have a try.
- camera.html (scan documents from cameras)
- scanner.html (scan documents from scanners)