Flutter Barcode Plugin - Writing C++ Code for Windows Desktop
Last week, I wrote a step-by-step tutorial sharing how to build a Flutter barcode SDK plugin with Dynamsoft Barcode Reader. The platform-specific code of Android is done. This week, I am going to focus on Windows desktop. Since the Flutter desktop plugin development is still on the early stage, there are not too many learning resources available. It will be interesting and challenging to explore the desktop plugin implementation using C++.

This article is Part 2 in a 5-Part Series.
- Part 1 - How to Implement Flutter Barcode Scanner for Android
- Part 2 - Flutter Barcode Plugin - Writing C++ Code for Windows Desktop
- Part 3 - Flutter Barcode Plugin for Web: Interop between Dart and JavaScript
- Part 4 - Flutter Barcode Plugin for Linux: from Dart to C++
- Part 5 - Flutter Barcode SDK for iOS and macOS
Pub.dev Package
https://pub.dev/packages/flutter_barcode_sdk
SDK Activation
Learning Resources
The following resources are inspiring for Flutter Windows plugin development.
- https://flutter.dev/desktop
- https://github.com/google/flutter-desktop-embedding
- https://github.com/flutter/samples/tree/master/experimental/desktop_photo_search
Integrating C++ Barcode SDK into Flutter Windows Plugin
Let’s peek the windows plugin folder structure:
bin
  /DynamsoftBarcodeReaderx64.dll

include

  /flutter_barcode_sdk

    /flutter_barcode_sdk_plugin.h

  /barcode_manager.h

  /DynamsoftBarcodeReader.h

  /DynamsoftCommon.h

lib
  /DBRx64.lib

CMakeLists.txt

flutter_barcode_sdk_plugin.cpp
CMakeLists.txtis the build configuration file of cmake.- We write C++ code to invoke Dynamsoft Barcode SDK in
flutter_barcode_sdk_plugin.cpp. - The
DynamsoftBarcodeReaderx64.dll,DBRx64.lib,DynamsoftBarcodeReader.h, andDynamsoftCommon.hfiles are extracted from the barcode SDK installer. - In addition to
flutter_barcode_sdk_plugin.cpp, some barcode decoding logics are implemented inbarcode_manager.h.
Getting Started with the HandleMethodCall() Method
The HandleMethodCall() method is the connection point between Dart and C++. We can parse Dart methods and corresponding arguments in this function.
void FlutterBarcodeSdkPlugin::HandleMethodCall(
      const flutter::MethodCall<flutter::EncodableValue> &method_call,
      std::unique_ptr<flutter::MethodResult<flutter::EncodableValue>> result)
  {
    const auto *arguments = std::get_if<EncodableMap>(method_call.arguments());

    if (method_call.method_name().compare("getPlatformVersion") == 0)
    {

    }
    else if (method_call.method_name().compare("setLicense") == 0)
    {

    }
    else if (method_call.method_name().compare("decodeFile") == 0)
    {

    }
    else if (method_call.method_name().compare("decodeFileBytes") == 0)
    {

    }
    else if (method_call.method_name().compare("decodeImageBuffer") == 0)
    {

    }
    else
    {
      result->NotImplemented();
    }
  }

}
The required C++ data types here include string, int and vector<unsigned char>. To convert Dart data types to C++ data types, we use:
std::string filename;
auto filename_it = arguments->find(EncodableValue("filename"));
if (filename_it != arguments->end())
{
  filename = std::get<std::string>(filename_it->second);
}


std::vector<unsigned char> bytes;
auto bytes_it = arguments->find(EncodableValue("bytes"));
if (bytes_it != arguments->end())
{
  bytes = std::get<vector<unsigned char>>(bytes_it->second);
}

int width = 0;
auto width_it = arguments->find(EncodableValue("width"));
if (width_it != arguments->end())
{
  width = std::get<int>(width_it->second);
}
The type of return value has to be Flutter data type:
EncodableList results;
result->Success(results);
So in the next section, we will discuss how to decode barcodes and encapsulate results into Flutter C++ data types.
Creating a BarcodeManager Class in barcode_manager.h
We define three barcode decoding methods as follows:
EncodableList DecodeFile(const char * filename)
{
    EncodableList out;
    int ret = reader->DecodeFile(filename, "");

    if (ret == DBRERR_FILE_NOT_FOUND)
    {
        printf("Error code %d. %s\n", ret, CBarcodeReader::GetErrorString(ret));
        return out;
    }

    return WrapResults();
}

EncodableList DecodeFileBytes(const unsigned char * bytes, int size)
{
    reader->DecodeFileInMemory(bytes, size, "");
    return WrapResults();
}

EncodableList DecodeImageBuffer(const unsigned char * buffer, int width, int height, int stride, int format)
{
    ImagePixelFormat pixelFormat = IPF_BGR_888;
    switch(format) {
        case 0:
            pixelFormat = IPF_GRAYSCALED;
            break;
        case 1:
            pixelFormat = IPF_ARGB_8888;
            break;
    }

    reader->DecodeBuffer(buffer, width, height, stride, pixelFormat, "");

    return WrapResults();
}
No matter which one we invoke, the way of encapsulating data is the same:
EncodableList WrapResults()
{
    EncodableList out;
    TextResultArray *results = NULL;
    reader->GetAllTextResults(&results);

    if (results->resultsCount == 0)
    {
        printf("No barcode found.\n");
        CBarcodeReader::FreeTextResults(&results);
    }

    for (int index = 0; index < results->resultsCount; index++)
    {
        EncodableMap map;
        map[EncodableValue("format")] = results->results[index]->barcodeFormatString;
        map[EncodableValue("text")] = results->results[index]->barcodeText;
        map[EncodableValue("x1")] = results->results[index]->localizationResult->x1;
        map[EncodableValue("y1")] = results->results[index]->localizationResult->y1;
        map[EncodableValue("x2")] = results->results[index]->localizationResult->x2;
        map[EncodableValue("y2")] = results->results[index]->localizationResult->y2;
        map[EncodableValue("x3")] = results->results[index]->localizationResult->x3;
        map[EncodableValue("y3")] = results->results[index]->localizationResult->y3;
        map[EncodableValue("x4")] = results->results[index]->localizationResult->x4;
        map[EncodableValue("y4")] = results->results[index]->localizationResult->y4;
        out.push_back(map);
    }

    CBarcodeReader::FreeTextResults(&results);
    return out;
}
EncodableMapis used to store every barcode return values.EncodableListis used to store everyEncodableMap.
CMake Configuration for Flutter Windows Plugin
To pass CMake build, we have to figure out how to link and bundle the third-party dynamic library.
-
Link Dynamsoft Barcode Reader:
link_directories("${PROJECT_SOURCE_DIR}/lib/") target_link_libraries(${PLUGIN_NAME} PRIVATE flutter flutter_wrapper_plugin "DBRx64") -
Bundle Dynamsoft Barcode Reader:
set(flutter_barcode_sdk_bundled_libraries
  "${PROJECT_SOURCE_DIR}/bin/"
  PARENT_SCOPE
)
Flutter Desktop Barcode Reader for Windows
So far, we have managed to implement the Flutter Windows plugin. It is time to build a simple Windows desktop barcode reading application.
The first step is to create a new Flutter project and add the dependency to pubspec.yaml:
dependencies:
  flutter:
    sdk: flutter

  flutter_barcode_sdk:
Afterwards, we initialize the Barcode Reader object:
class _DesktopState extends State<Desktop> {
  String _platformVersion = 'Unknown';
  final _controller = TextEditingController();
  String _barcodeResults = '';
  FlutterBarcodeSdk _barcodeReader;
  bool _isValid = false;
  String _file = '';

  @override
  void initState() {
    super.initState();
    initPlatformState();
    initBarcodeSDK();
  }

  Future<void> initBarcodeSDK() async {
    _barcodeReader = FlutterBarcodeSdk();
    // Get 30-day FREEE trial license from https://www.dynamsoft.com/customer/license/trialLicense/?product=dcv&package=cross-platform
    await _barcodeReader.setLicense('LICENSE-KEY');
  }
}
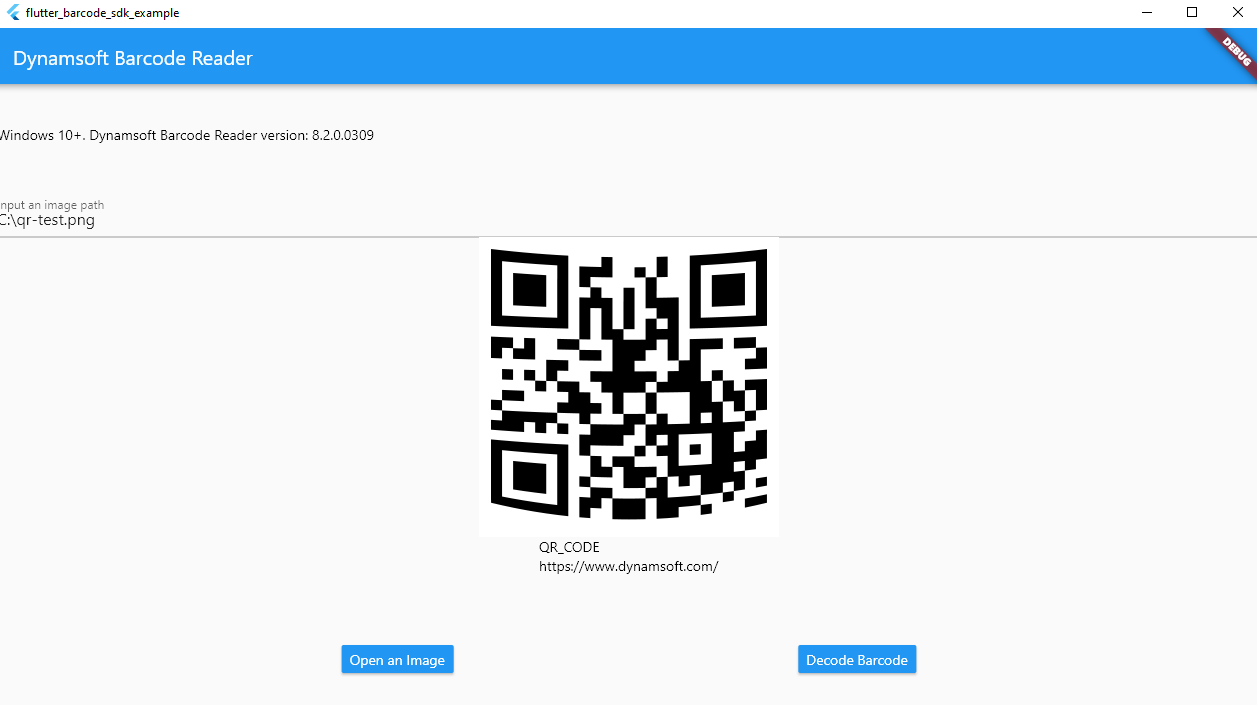
In aspects of UI, we combine different widgets including TextField, Image, MaterialButton and Text.
- TextFiedl: input the image path.
- Image: display the barcode image.
- MaterialButton: trigger barcode decoding.
- Text: display the barcode results.
Here is the UI code snippet:
@override
Widget build(BuildContext context) {
  return MaterialApp(
    home: Scaffold(
        appBar: AppBar(
          title: const Text('Dynamsoft Barcode Reader'),
        ),
        body: Column(children: [
          Container(
            height: 100,
            child: Row(children: <Widget>[
              Text(
                _platformVersion,
                style: TextStyle(fontSize: 14, color: Colors.black),
              )
            ]),
          ),
          TextField(
            controller: _controller,
            decoration: InputDecoration(
              labelText: 'Input an image path',
              errorText: _isValid ? null : 'File not exists',
            ),
          ),
          Expanded(
            child: SingleChildScrollView(
              child: Column(
                children: [
                  getDefaultImage(),
                  Text(
                    _barcodeResults,
                    style: TextStyle(fontSize: 14, color: Colors.black),
                  ),
                ],
              ),
            ),
          ),
          Container(
            height: 100,
            child: Row(
                mainAxisAlignment: MainAxisAlignment.spaceEvenly,
                children: <Widget>[
                  MaterialButton(
                      child: Text('Decode Barcode'),
                      textColor: Colors.white,
                      color: Colors.blue,
                      onPressed: () async {
                        if (_controller.text.isEmpty) {
                          setState(() {
                            _isValid = false;
                            _barcodeResults = '';
                            _file = '';
                          });
                          return;
                        }
                        File file = File(_controller.text);
                        if (!file.existsSync()) {
                          setState(() {
                            _isValid = false;
                            _barcodeResults = '';
                            _file = '';
                          });
                          return;
                        } else {
                          setState(() {
                            _isValid = true;
                            _file = _controller.text;
                          });
                        }
                        Uint8List bytes = await file.readAsBytes();
                        List<BarcodeResult> results =
                            await _barcodeReader.decodeFileBytes(bytes);
                        setState(() {
                          _barcodeResults = getBarcodeResults(results);
                        });
                      }),
                ]),
          ),
        ])),
  );
}
When there is no image file specified, we load the default image from the asset:
Widget getDefaultImage() {
  if (_controller.text.isEmpty || !_isValid) {
    return Image.asset('images/default.png');
  } else {
    return Image.file(File(_file));
  }
}
In the meantime, don’t forget to add the assets configuration to pubspec.yaml:
flutter:
  assets:
    - images/default.png
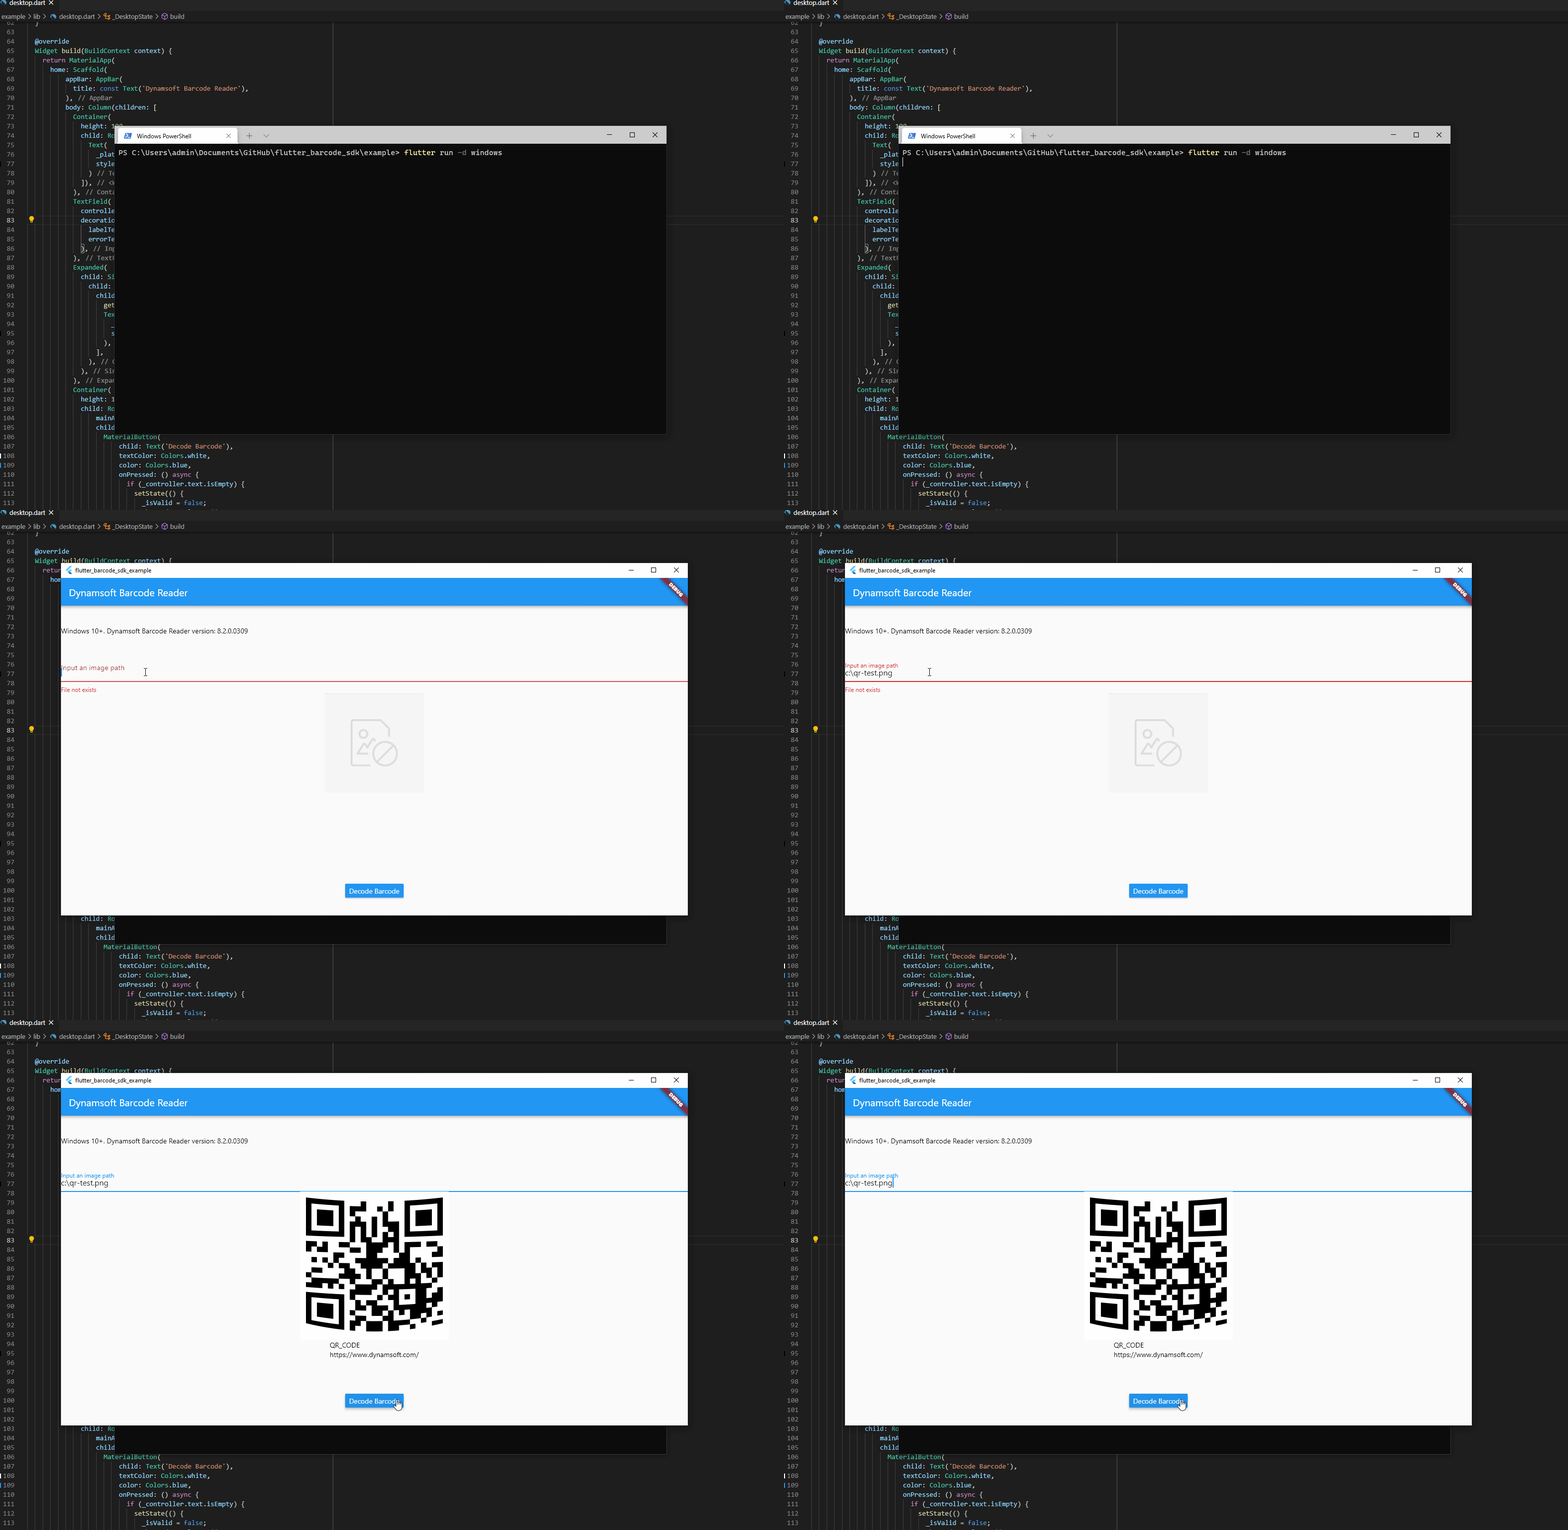
Finally, we can run the Windows barcode reader application using:
flutter run -d windows

Source Code
https://github.com/yushulx/flutter_barcode_sdk
Disclaimer:
The wrappers and sample code on Dynamsoft Codepool are community editions, shared as-is and not fully tested. Dynamsoft is happy to provide technical support for users exploring these solutions but makes no guarantees.


