Building an HTML 5 Barcode and QR Code Scanner Using JavaScript
If you need a JavaScript barcode and QR code scanner SDK, the Dynamsoft JavaScript Barcode SDK is no doubt the best. It allows developers to quickly build web barcode and QR code scanner applications with just a few lines of code. This article provides an in-depth look at the Dynamsoft JavaScript Barcode Scanner.
This article is Part 2 in a 2-Part Series.
Online Demo
https://yushulx.me/javascript-barcode-qr-code-scanner/examples/9.x/barcode-result-overlay.html
SDK Activation
Documentation
JavaScript Barcode Scanner API
Getting Started with the Dynamsoft JavaScript Barcode Scanner
The JavaScript Barcode Scanner is a component of the Dynamsoft JavaScript Barcode SDK, featuring a built-in camera view optimized for real-time barcode and QR code scanning.
Here’s a “hello world” example to get you started:
<!DOCTYPE html>
<html>
    <head>
        <meta charset="utf-8">
        <meta name="viewport" content="width=device-width,initial-scale=1.0">
        <title>Dynamsoft JavaScript Barcode Scanner</title>
        <script src="https://cdn.jsdelivr.net/npm/dynamsoft-javascript-barcode@9.6.42/dist/dbr.js"></script>
    </head>
<body>
    <script>
        Dynamsoft.DBR.BarcodeReader.license = "LICENSE-KEY";
        let scanner = null;
        (async()=>{
            scanner = await Dynamsoft.DBR.BarcodeScanner.createInstance();
            scanner.onFrameRead = results => {console.log(results);};
            scanner.onUnduplicatedRead = (txt, result) => {};
            await scanner.show();
        })();
    </script>
</body>
</html>
Save this sample code to an index.html file and deploy it to a web server. Since the HTML5 camera API requires HTTPS, consider using GitHub Pages to deploy the sample code.
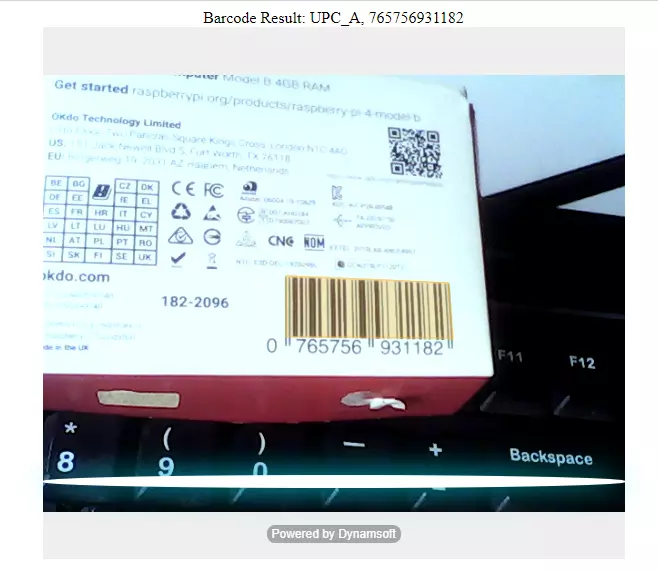
The default barcode scanner UI includes a camera source list, a camera resolution list, and a result overlay. The following sections will guide you on how to customize the UI and adjust parameters to optimize the performance of the barcode scanner.
Manually Loading the Wasm File
The Dynamsoft JavaScript Barcode Scanner, implemented using WebAssembly, requires time to download and compile the wasm file. To prevent blocking the UI, you can manually load the library after the page has loaded:
<script>
    window.onload = async function () {
        try {
            await Dynamsoft.DBR.BarcodeScanner.loadWasm();
            await initBarcodeScanner();
        } catch (ex) {
            alert(ex.message);
            throw ex;
        }
    };
    let scanner = null;
    async function initBarcodeScanner() {
        scanner = await Dynamsoft.DBR.BarcodeScanner.createInstance();
        scanner.onFrameRead = results => {console.log(results);};
        scanner.onUnduplicatedRead = (txt, result) => {};
        await scanner.show();
    }
</script>
UI Customization for HTML5 Barcode Scanner
The default camera view is fullscreen, which may cover other HTML UI elements. To enhance the UI layout, you can append the scanner UI component to a div element:
<div id="barcodeScanner">
    <span id='loading-status' style='font-size:x-large'>Loading Library...</span>
</div>
<script>
    ...
    async function initBarcodeScanner() {
        scanner = await Dynamsoft.DBR.BarcodeScanner.createInstance();
        scanner.onFrameRead = results => {console.log(results);};
        scanner.onUnduplicatedRead = (txt, result) => {};
        document.getElementById('barcodeScanner').appendChild(scanner.getUIElement());
        document.getElementById('loading-status').hidden = true;
        await scanner.show();
    }
</script>
Alternatively, replace the built-in UI element with your own custom UI element:
<div class="dce-video-container" id="videoContainer"></div>

<script>
    async function initBarcodeScanner() {
        scanner = await Dynamsoft.DBR.BarcodeScanner.createInstance();
        await scanner.setUIElement(document.getElementById('videoContainer'));
    }
</script>
To hide the close button, set its hidden attribute to true:
document.getElementsByClassName('dbrScanner-sel-camera')[0].hidden = true;
To display barcode results returned from onFrameRead, create a div element:
<div>
    Barcode Result: <a id='result'>N/A</a>
</div>
<script>
    ...
    scanner.onFrameRead = results => {
        console.log(results);
        for (let result of results) {
            document.getElementById('result').innerHTML = result.barcodeFormatString + ", " + result.barcodeText;
        }
    };
    ...
</script>
Use CSS to resize the camera view:
<style>
    body {
        display: flex;
        flex-direction: column;
        align-items: center;
    }

    #barcodeScanner {
        text-align: center;
        font-size: medium;
        height: 40vh;
        width: 40vw;
    }
</style>

With these custom UI modifications, the barcode scanner now appears more integrated and user-friendly.
Drawing Barcode Results on Overlay
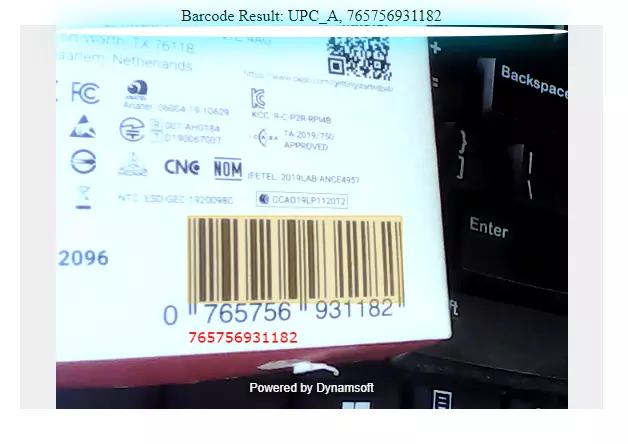
The Barcode Scanner instance contains a built-in overlay used to render the barcode bounding box but does not provide an API for rendering barcode text results. To visually display the results, we can create a canvas as the overlay:
<style>
    #videoview {
        position: relative;
        width: 100%;
        height: 100vh;
    }

    #videoContainer {
        position: relative;
        width: 100%;
        height: 100%;
        z-index: 1
    }

    #overlay {
        position: absolute;
        top: 0;
        left: 0;
        width: 100%;
        height: 100%;
        z-index: 2;
        object-fit: contain
    }
</style>

<div id="videoview">
    <div class="dce-video-container" id="videoContainer"></div>
    <canvas id="overlay"></canvas>
</div>
The canvas size matches the video frame size. Register the onPlayed event to dynamically update the canvas size:
function updateResolution() {
    if (scanner) {
        let resolution = scanner.getResolution();
        overlay.width = resolution[0];
        overlay.height = resolution[1];
    }
}

scanner.onPlayed = function () {
    updateResolution();
}
After obtaining the barcode and QR code results, draw the bounding box and text on the canvas:
function drawResult(context, localization, text) {
    context.beginPath();
    context.moveTo(localization.x1, localization.y1);
    context.lineTo(localization.x2, localization.y2);
    context.lineTo(localization.x3, localization.y3);
    context.lineTo(localization.x4, localization.y4);
    context.lineTo(localization.x1, localization.y1);
    context.stroke();

    context.font = '18px Verdana';
    context.fillStyle = '#ff0000';
    let x = [localization.x1, localization.x2, localization.x3, localization.x4];
    let y = [localization.y1, localization.y2, localization.y3, localization.y4];
    x.sort(function (a, b) {
        return a - b;
    });
    y.sort(function (a, b) {
        return b - a;
    });
    let left = x[0];
    let top = y[0];

    context.fillText(text, left, top + 50);
}

function showResults(results) {
    let context = clearOverlay();

    let txts = [];
    try {
        let localization;
        if (results.length > 0) {
            for (var i = 0; i < results.length; ++i) {
                txts.push(results[i].barcodeText);
                localization = results[i].localizationResult;
                drawResult(context, localization, results[i].barcodeText);
            }
            document.getElementById('result').innerHTML = txts.join(', ');
        }
        else {
            document.getElementById('result').innerHTML = "No barcode found";
        }

    } catch (e) {
        alert(e);
    }
}

scanner.onFrameRead = results => {
        showResults(results);
    };
With the overlay, the barcode scanner can provide a better user experience.

Optimizing QR Code Scanning
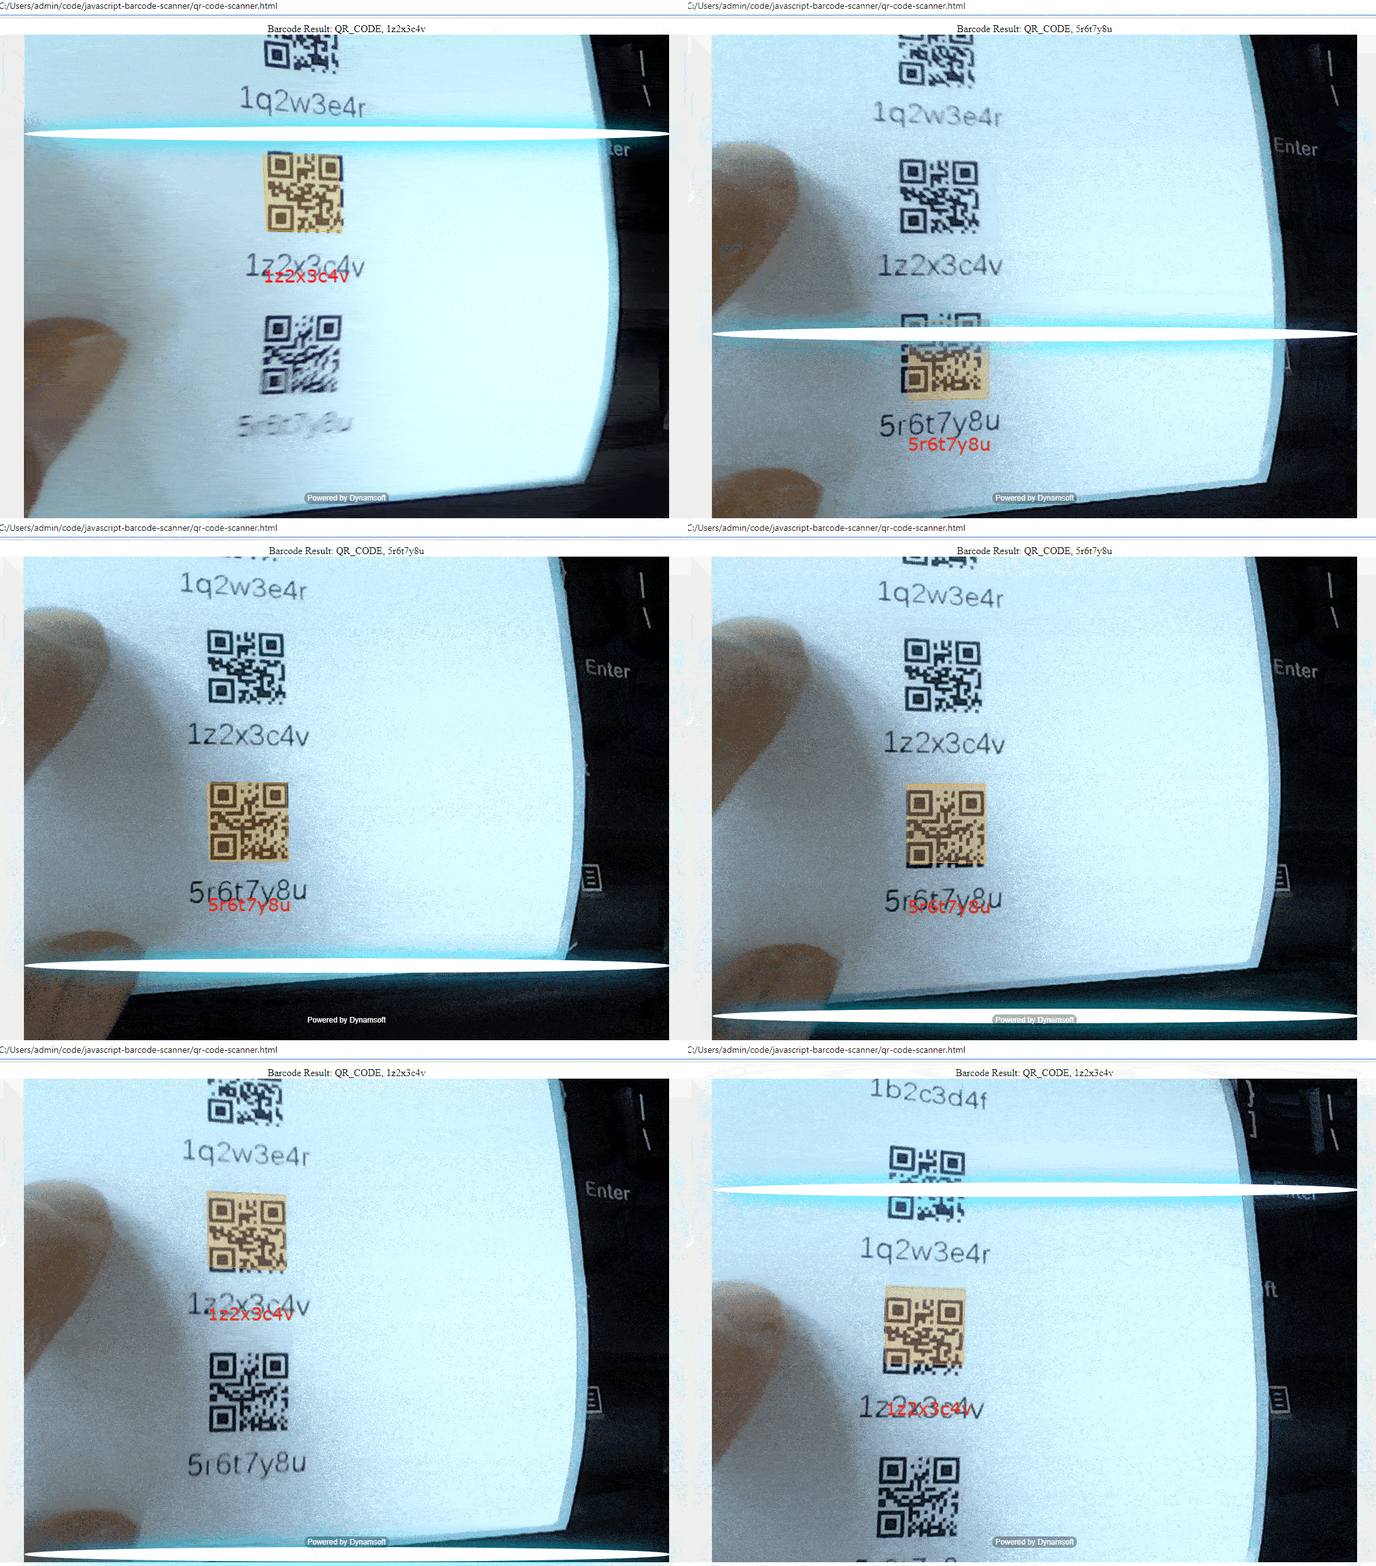
The Dynamsoft JavaScript Barcode SDK supports multi-code decoding by default. Decoding multiple barcodes simultaneously can lead to performance loss. For specific scenarios that only require one type of barcode symbology, the runtime parameters can be optimized.
For QR Code scanning:
-
Set the barcode type to
BF_QR_CODE:let settings = await scanner.getRuntimeSettings(); settings.barcodeFormatIds = Dynamsoft.DBR.EnumBarcodeFormat.BF_QR_CODE; await scanner.updateRuntimeSettings(settings); -
Adjust the deblur level to 0 and set the expected barcode count to 1:
  let settings = await scanner.getRuntimeSettings();
  settings.deblurLevel = 0;
  settings.expectedBarcodesCount = 1;
  await scanner.updateRuntimeSettings(settings);
With these settings, you can achieve optimal performance for QR Code scanning.

Download Dynamsoft Barcode Reader 30-Day Free Trial
Source Code
https://github.com/yushulx/javascript-barcode-qr-code-scanner


