


How to Scan Documents in Java Using TWAIN, WIA, eSCL, and SANE via REST API
Dynamic Web TWAIN is an SDK which enables document scanning from browsers. Under its hood, a backend service named Dynamic Web TWAIN Service is running to communicate with scanners via protocols like TWAIN, WIA, eSCL, SANE and ICA. The service runs on Windows, macOS and Linux.
Starting from Dynamic Web TWAIN v19.0, Dynamic Web TWAIN Service is officially accessible via REST APIs so that we can use different programming languages to create document scanning applications.
In this article, we are going to talk about how to access document scanners using the REST APIs in Java. A desktop app is built using JavaFX.
Some advantages of using the REST APIs of Dynamic Web TWAIN Service for document scanning in Java:
- It is cross-platform supporting multiple scanning protocols.
- If we directly call TWAIN API, we have to use JRE 32-bit as most drivers are 32-bit. Using the REST APIs does not have this problem.
What you’ll build: A cross-platform JavaFX desktop application that scans documents via TWAIN, WIA, eSCL, SANE, or ICA scanners using the Dynamic Web TWAIN Service REST API, with options for resolution, pixel type, duplex scanning, and PDF export.
Key Takeaways
- Dynamic Web TWAIN Service exposes local scanner hardware through REST APIs at
http://127.0.0.1:18622, enabling any language — including Java — to control TWAIN, WIA, eSCL, SANE, and ICA scanners without native bindings. - Using REST APIs eliminates the JRE 32-bit restriction that direct TWAIN API calls impose, because the service process handles the driver communication separately.
- The scanning workflow is three REST calls: list scanners (
GET /api/device/scanners), create a scan job (POST /api/device/scanners/jobs), and retrieve pages (GET /api/device/scanners/jobs/:id/next-page). - The approach works on Windows, macOS, and Linux with the same Java codebase.
Common Developer Questions
How do I scan documents in Java using TWAIN without 32-bit JRE?
Call the Dynamic Web TWAIN Service REST API from Java instead of calling the TWAIN driver directly. Because the service process owns the native scanner communication, the JavaFX app can stay on a normal modern JRE without the old 32-bit TWAIN restriction.
How do I build a cross-platform document scanning app in Java that supports TWAIN, WIA, and eSCL?
Use the same Java HTTP client logic against the service on Windows, macOS, and Linux, and let the service handle the protocol-specific details for TWAIN, WIA, eSCL, SANE, and ICA. The JavaFX UI only needs to manage options like resolution, duplex mode, and scan results.
How do I save scanned images as a multi-page PDF in JavaFX?
After collecting the scanned pages returned by the REST job, feed those images into the PDF export routine in the Java application and write the combined result to disk. The article’s desktop app couples scan acquisition with PDF export in the same JavaFX workflow.
This article is Part 3 in a 8-Part Series.
- Part 1 - How to Build a Document Scanning REST API in Node.js
- Part 2 - How to Scan Documents from TWAIN, WIA, and eSCL Scanners in a Flutter App
- Part 3 - How to Scan Documents in Java Using TWAIN, WIA, eSCL, and SANE via REST API
- Part 4 - Build a Cross-Platform Python Document Scanner with TWAIN, WIA, and SANE
- Part 5 - How to Build a Cross-Platform .NET C# Document Scanner with TWAIN, WIA, SANE, and eSCL Support
- Part 6 - How to Scan Documents from a Web Page Using the Dynamic Web TWAIN REST API
- Part 7 - Build a SwiftUI Remote Document Scanner for macOS and iOS Using the Dynamic Web TWAIN REST API
- Part 8 - Build a Web Document Scanner with JavaScript: File, Camera, and TWAIN Scanner Support
Prerequisites
- Get a 30-day free trial license for Dynamic Web TWAIN.
- You need to install Dynamic Web TWAIN Service on your device. You can find the download links in the following table:
Understand the Dynamic Web TWAIN REST API
Endpoint: http://127.0.0.1:18622 or https://127.0.0.1:18623. You can configure it by visiting http://127.0.0.1:18625/.
APIs:
-
List scanners.
HTTP method and URL:
GET /api/device/scannersSample response:
[
  {
    "name":"scanner name",
    "device":"detailed info of the scanner",
    "type": 16
  }
]
The following is a list of scanner types and their corresponding values.
16: TWAIN 32: WIA 64: TWAINX64 128: ICA 256: SANE 512: eSCL 1024: WIFIDIRECT 2048: WIATWAIN -
Create a document scanning job.
HTTP method and URL:
POST /api/device/scanners/jobsSample request body:
{
  "device":"detailed info of the scanner", #optional. Use the latest device by default
  "config":{ # Device configuration https://www.dynamsoft.com/web-twain/docs/info/api/Interfaces.html#DeviceConfiguration (optional)
    "IfShowUI":true, # show the UI of the scanner
    "Resolution":200,
    "IfFeederEnabled":false, # enable auto document feeder
    "IfDuplexEnabled":false # enable duplex document scanning
  },
  "caps":{ # Capabilities https://www.dynamsoft.com/web-twain/docs/info/api/Interfaces.html#capabilities (optional)
    "exception":"ignore",
    "capabilities":[
      {
        "capability":"", #pixel type
        "curValue":0 #0: black&white, 1: gray, 2: color
      }
    ]
  }
}
License is required in the request header:
DWT-PRODUCT-KEYResponse:
201 status code with the job ID as the response body
-
Retrieve a scanned document image.
HTTP method and URL:
GET /api/scanners/jobs/:jobid/next-pageResponse:
200 with the bytes of the image
-
Get the info of a scanning job.
HTTP method and URL:
GET /api/device/scanners/jobs/:jobid -
Delete a scanning job.
HTTP method and URL:
DELETE /api/device/scanners/jobs/:jobid
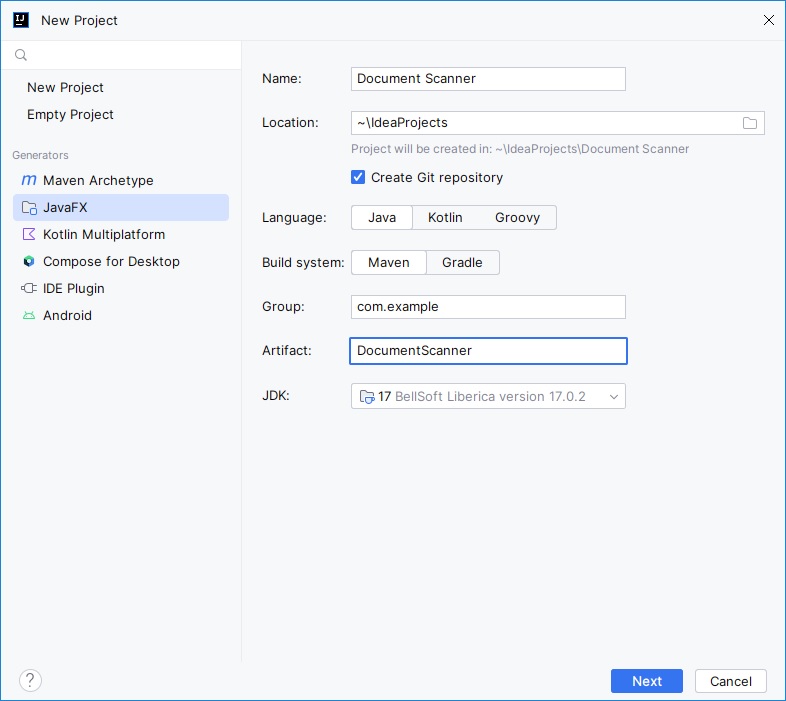
Step 1: Create a New JavaFX Project
Create a new JavaFX project using IntelliJ IDEA.
Step 2: Add Maven Dependencies
Add OKHttp as the HTTP library in pom.xml. OKHttp works for both desktop and Android platforms.
<dependency>
    <groupId>com.squareup.okhttp3</groupId>
    <artifactId>okhttp</artifactId>
    <version>4.11.0</version>
</dependency>
Add Jackson as the JSON library in pom.xml.
<dependency>
    <groupId>com.fasterxml.jackson.core</groupId>
    <artifactId>jackson-core</artifactId>
    <version>2.15.2</version>
</dependency>
<dependency>
    <groupId>com.fasterxml.jackson.core</groupId>
    <artifactId>jackson-databind</artifactId>
    <version>2.15.2</version>
</dependency>
Also, add PDFBox for saving the scanned document as a PDF file.
<dependency>
    <groupId>org.apache.pdfbox</groupId>
    <artifactId>pdfbox</artifactId>
    <version>3.0.0</version>
</dependency>
Step 3: Define Data Model Classes
-
Scanner.
public class Scanner { public String name; public int type; public String device; public Scanner(String name, int type, String device){ this.name = name; this.type = type; this.device = device; } } -
Device type constants.
public class DeviceType { public static final int TWAIN = 16; public static final int WIA = 32; public static final int TWAINX64 = 64; public static final int ICA = 128; public static final int SANE = 256; public static final int ESCL = 512; public static final int WIFIDIRECT = 1024; public static final int WIATWAIN = 2048; public static String getDisplayName(int type) throws Exception { if (type == TWAIN) { return "TWAIN"; }else if (type == WIA) { return "WIA"; }else if (type == TWAINX64) { return "TWAINX64"; }else if (type == ICA) { return "ICA"; }else if (type == SANE) { return "SANE"; }else if (type == ESCL) { return "ESCL"; }else if (type == WIFIDIRECT) { return "WIFIDIRECT"; }else if (type == WIATWAIN) { return "WIATWAIN"; }else{ throw new Exception("Invalid type"); } } } -
Device configuration.
public class DeviceConfiguration { public boolean IfShowUI = false; public int Resolution = 200; public boolean IfFeederEnabled = false; public boolean IfDuplexEnabled = false; } -
Capability setup for one scanner capability.
public class CapabilitySetup { public int capability; public Object curValue; public String exception = "ignore"; } -
Capabilities.
public class Capabilities {
    public String exception = "";
    public List<CapabilitySetup> capabilities = new ArrayList<CapabilitySetup>();
}
Step 4: Build the REST API Service Class
Create a service class that wraps the Dynamic Web TWAIN REST API calls.
-
Create a basic class with the following content.
public class DynamicWebTWAINService { private String endPoint = "http://127.0.0.1:18622"; private String license = ""; public DynamicWebTWAINService(){ } public DynamicWebTWAINService(String endPoint, String license){ this.endPoint = endPoint; this.license = license; } } -
Add a
getScannersmethod to get the list of scanners.public List<Scanner> getScanners() throws IOException, InterruptedException { OkHttpClient client = new OkHttpClient(); Request request = new Request.Builder() .url(endPoint+"/api/device/scanners") .build(); try (Response response = client.newCall(request).execute()) { String body = response.body().string(); List<Scanner> scanners = new ArrayList<Scanner>(); ObjectMapper objectMapper = new ObjectMapper(); List<Map<String,Object>> parsed = objectMapper.readValue(body,new TypeReference<List<Map<String,Object>>>() {}); for (Map<String,Object> item:parsed) { int type = (int) item.get("type"); String name = (String) item.get("name"); String device = (String) item.get("device"); Scanner scanner = new Scanner(name,type,device); scanners.add(scanner); } return scanners; } } -
Add a
createScanJobmethod to create a scanning job.public String createScanJob(Scanner scanner) throws Exception { return createScanJob(scanner,null,null); } public String createScanJob(Scanner scanner,DeviceConfiguration config,Capabilities capabilities) throws Exception { Map<String,Object> body = new HashMap<String,Object>(); body.put("device",scanner.device); if (config != null) { body.put("config",config); } if (capabilities != null) { body.put("caps",capabilities); } ObjectMapper objectMapper = new ObjectMapper(); String jsonBody = objectMapper.writeValueAsString(body); OkHttpClient client = new OkHttpClient.Builder() .connectTimeout(120, TimeUnit.SECONDS) .build(); RequestBody requestBody = RequestBody.create(jsonBody, JSON); Request request = new Request.Builder() .url(endPoint+"/api/device/scanners/jobs") .addHeader("DWT-PRODUCT-KEY", this.license) .post(requestBody) .build(); try (Response response = client.newCall(request).execute()) { if (response.code() == 201) { return response.body().string(); }else{ throw new Exception(response.body().string()); } } } -
Add a
nextDocumentmethod to get the document image.public byte[] nextDocument(String jobID) throws Exception { return getImage(jobID); } private byte[] getImage(String jobID) throws Exception { OkHttpClient client = new OkHttpClient.Builder() .connectTimeout(120, TimeUnit.SECONDS) .build(); Request request = new Request.Builder() .url(endPoint+"/api/device/scanners/jobs/"+jobID+"/next-page") .build(); String body = ""; try (Response response = client.newCall(request).execute()) { if (response.code() == 200) { return response.body().bytes(); }else{ return null; } } }
Step 5: Build the Document Scanning UI with JavaFX
Next, we can update the primary stage to make it work as a document scanner.
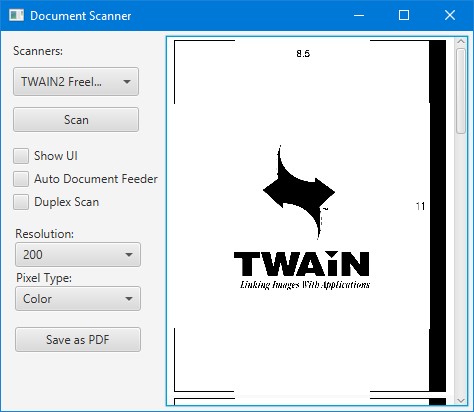
First, we can design the layout of the FXML file with SceneBuilder. On the left, there are controls to configure the scanning and on the right, there is a ListView for displaying the scanned images.
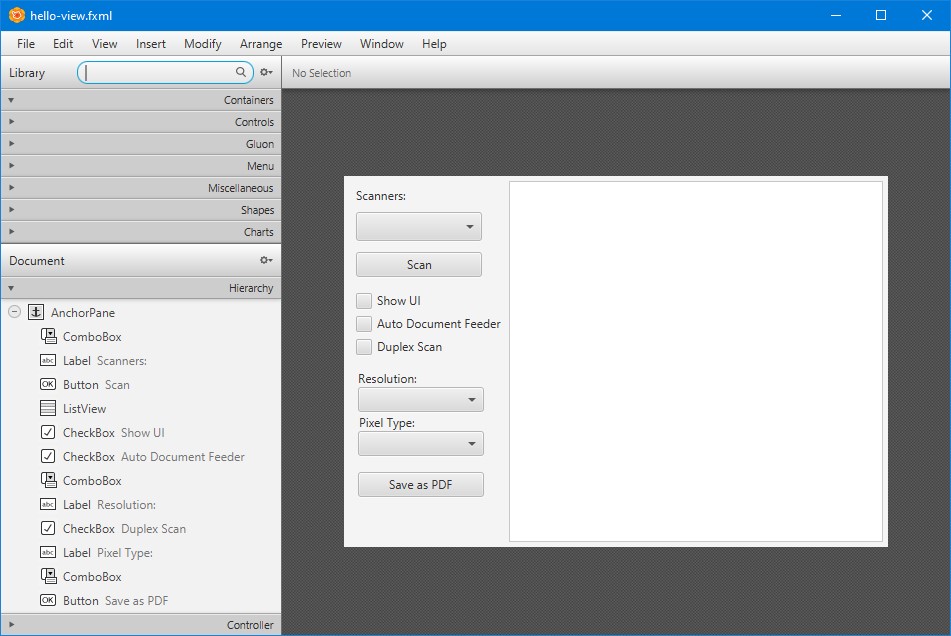
Then, in the controller, implement relevant events and initializations.
-
Load the lists of scanners, resolutions and pixel types in ComboBoxes in the initialization process.
public void initialize(){ this.loadResolutions(); this.loadPixelTypes(); this.loadScanners(); } private void loadResolutions(){ List<Integer> resolutions = new ArrayList<Integer>(); resolutions.add(100); resolutions.add(200); resolutions.add(300); resolutionComboBox.setItems(FXCollections.observableList(resolutions)); resolutionComboBox.getSelectionModel().select(1); } private void loadPixelTypes(){ List<String> pixelTypes = new ArrayList<String>(); pixelTypes.add("Black & White"); pixelTypes.add("Gray"); pixelTypes.add("Color"); pixelTypeComboBox.setItems(FXCollections.observableList(pixelTypes)); pixelTypeComboBox.getSelectionModel().select(0); } private void loadScanners() throws IOException, InterruptedException { scanners = service.getScanners(); List<String> names = new ArrayList<String>(); for (Scanner scanner:scanners) { try { names.add(scanner.name + " (" +DeviceType.getDisplayName(scanner.type)+ ")"); } catch (Exception e) { System.out.println(e.getMessage()); } } scannersComboBox.setItems(FXCollections.observableList(names)); if (names.size()>0) { scannersComboBox.getSelectionModel().select(0); } } -
Define a
DocumentImageclass for the cells of the ListView. The cell of the ListView will contain an ImageView.public class DocumentImage { public ImageView imageView; public byte[] image; public DocumentImage(ImageView imageView,byte[] image) { this.imageView = imageView; this.image = image; } } -
Update the ListView’s cell factory so that it displays an ImageView.
documentListView.setCellFactory(param -> new ListCell<DocumentImage>() { { prefWidthProperty().bind(documentListView.widthProperty().subtract(30)); setMaxWidth(Control.USE_PREF_SIZE); } @Override protected void updateItem(DocumentImage item, boolean empty) { super.updateItem(item, empty); if (empty) { setGraphic(null); } else { item.imageView.setFitWidth(documentListView.widthProperty().subtract(30).doubleValue()); setGraphic(item.imageView); } } }); -
Scan documents after the scan button is clicked. The images will be displayed in the ListView.
@FXML protected void onScanButtonClicked() { int selectedIndex = scannersComboBox.getSelectionModel().getSelectedIndex(); if (selectedIndex != -1) { progressStage.show(); Thread t = new Thread(() -> { Scanner scanner = scanners.get(selectedIndex); try { DeviceConfiguration config = new DeviceConfiguration(); config.IfShowUI = showUICheckBox.isSelected(); config.IfDuplexEnabled = duplexCheckBox.isSelected(); config.IfFeederEnabled = ADFCheckBox.isSelected(); config.Resolution = (int) resolutionComboBox.getSelectionModel().getSelectedItem(); Capabilities caps = new Capabilities(); caps.exception = "ignore"; caps.capabilities = new ArrayList<CapabilitySetup>(); CapabilitySetup pixelTypeSetup = new CapabilitySetup(); pixelTypeSetup.capability = 257; pixelTypeSetup.curValue = pixelTypeComboBox.getSelectionModel().getSelectedIndex(); caps.capabilities.add(pixelTypeSetup); String jobID = service.createScanJob(scanner,config,caps); System.out.println("ID: "+jobID); byte[] image = service.nextDocument(jobID); while (image != null){ loadImage(image); image = service.nextDocument(jobID); } } catch (Exception e) { System.out.println(e.getMessage()); } Platform.runLater(() -> { progressStage.close(); }); }); t.start(); } } private void loadImage(byte[] image){ Image img = new Image(new ByteArrayInputStream(image)); ImageView iv = new ImageView(); iv.setPreserveRatio(true); iv.setImage(img); DocumentImage di = new DocumentImage(iv,image); documentListView.getItems().add(di); } -
Listen to the changes of the width of the ListView. When the width changes, update the ImageViews’ size.
ChangeListener<Number> changeListener = new ChangeListener<Number>() { @Override public void changed(ObservableValue<? extends Number> observable, Number oldValue, Number newValue) { for (DocumentImage item:documentListView.getItems()) { item.imageView.setFitWidth(documentListView.widthProperty().subtract(30).doubleValue()); } } }; documentListView.widthProperty().addListener(changeListener); -
Add a context menu for the ListView for deleting selected document images.
ContextMenu contextMenu = new ContextMenu(); MenuItem deleteMenuItem = new MenuItem("Delete selected"); deleteMenuItem.setOnAction(e -> { var indices = documentListView.getSelectionModel().getSelectedIndices(); for (int i = indices.size() - 1; i >= 0; i--) { int index = indices.get(i); documentListView.getItems().remove(index); } }); contextMenu.getItems().add(deleteMenuItem); -
Use PDFBox to save the scanned document into a PDF file.
@FXML
protected void onSaveButtonClicked() throws IOException {
    FileChooser fileChooser = new FileChooser();
    fileChooser.setTitle("Open Resource File");
    File fileToSave = fileChooser.showSaveDialog(null);
    if (fileToSave != null) {
        PDDocument document = new PDDocument();
        int index = 0;
        for (DocumentImage di: documentListView.getItems()) {
            index = index + 1;
            ImageView imageView = di.imageView;
            PDRectangle rect = new PDRectangle((float) imageView.getImage().getWidth(),(float) imageView.getImage().getHeight());
            System.out.println(rect);
            PDPage page = new PDPage(rect);
            document.addPage(page);
            PDPageContentStream contentStream = new PDPageContentStream(document, page);
            PDImageXObject image
                    = PDImageXObject.createFromByteArray(document,di.image,String.valueOf(index));
            contentStream.drawImage(image, 0, 0);
            contentStream.close();
        }
        document.save(fileToSave.getAbsolutePath());
        document.close();
    }
}
All right, we have now finished writing the demo app.
Common Issues and Edge Cases
- Dynamic Web TWAIN Service not running: If the REST API calls fail with a connection error, ensure Dynamic Web TWAIN Service is installed and running. Visit
http://127.0.0.1:18625/to check the service status and configuration. - Scanner not detected: Some scanners only appear under specific protocols. Use the
typefield from the scanner list response to verify the protocol. On Linux, ensure SANE backends are installed (sudo apt install libsane). On macOS, ICA-compatible scanners may require updated drivers. - Timeout on large scans: High-resolution scans (300 DPI+) with duplex or ADF enabled can exceed default HTTP timeouts. The service class in this tutorial sets a 120-second connect timeout, but you may also need to increase the read timeout via
OkHttpClient.Builder().readTimeout().
Source Code
Get the complete sample project source code on GitHub
You can include the library in your project via Jitpack: https://jitpack.io/#tony-xlh/docscan4j