


Dynamsoft Codepool: SDK Tutorials and Sample Code for Developers
Featured Content
View More >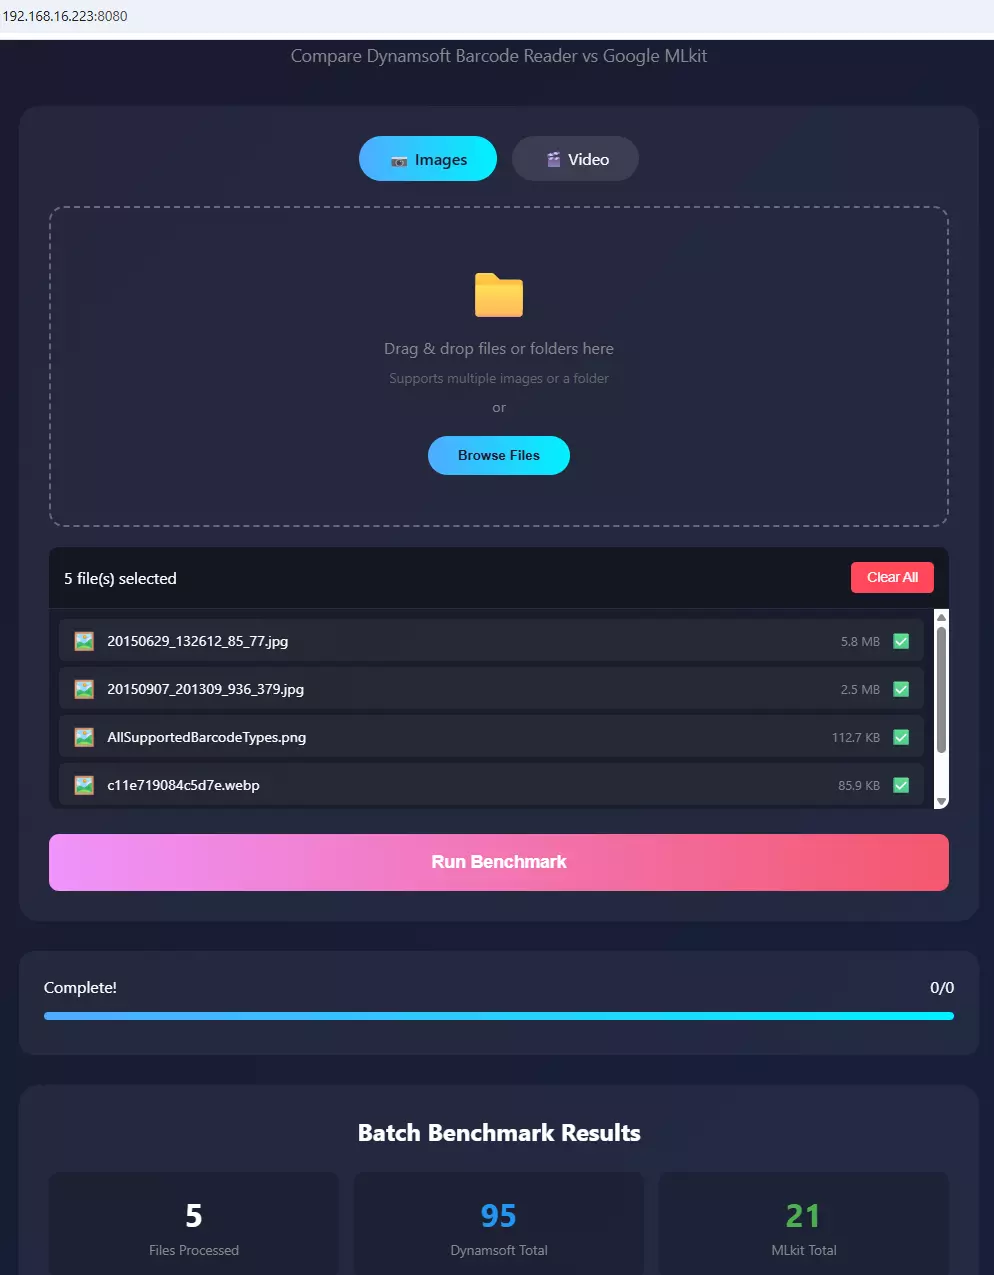
Dynamsoft Barcode Reader vs Google ML Kit: How to Choose the Right Android Barcode SDK for Accuracy-Critical Apps

1D Barcode Scanner Accuracy Benchmark: Dynamsoft vs. ZXing, ZBar, and Scandit on 3 Public Datasets
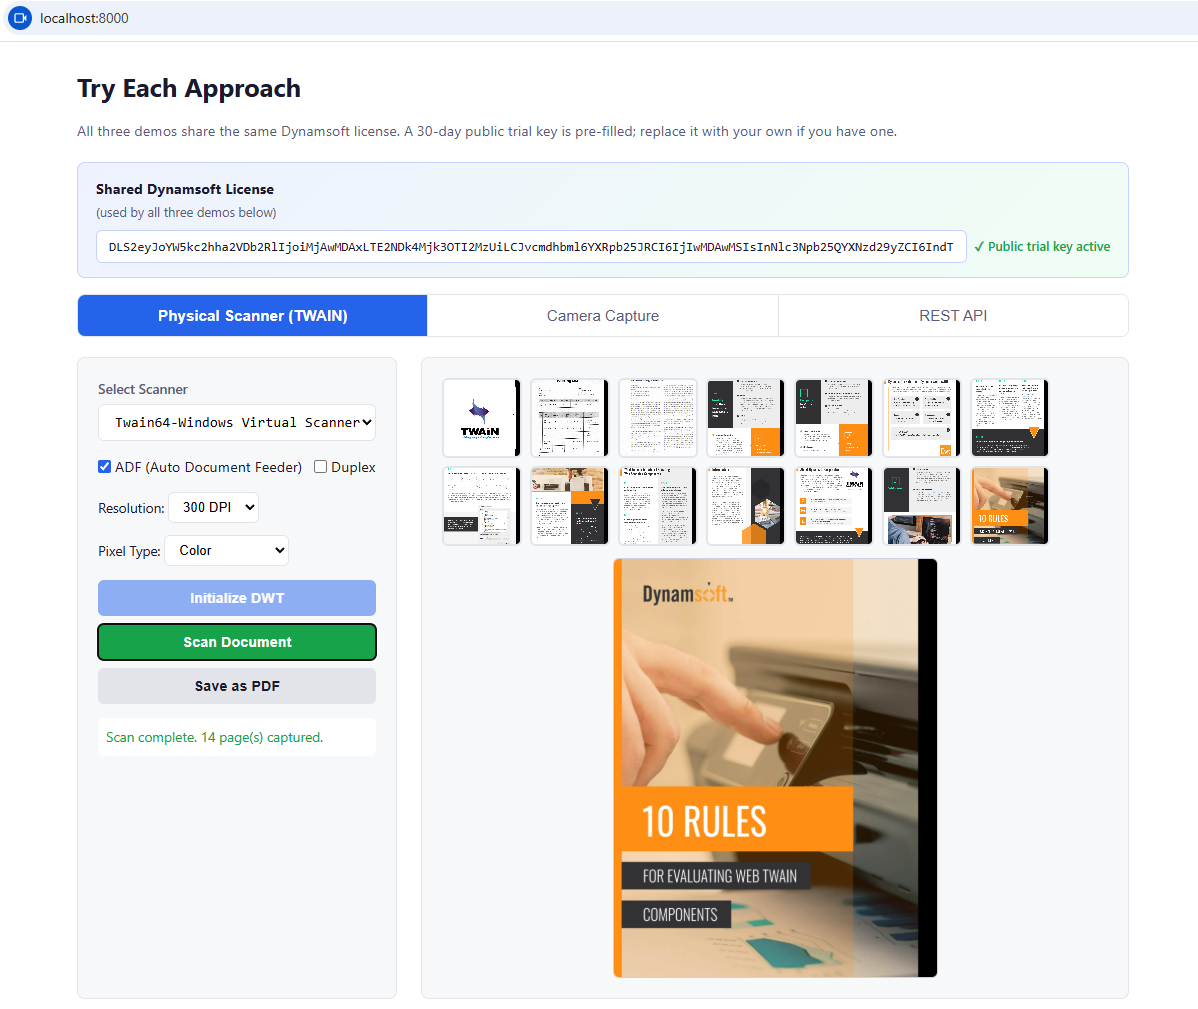
How to Choose a Document Capture Solution for Digitizing Paper Records
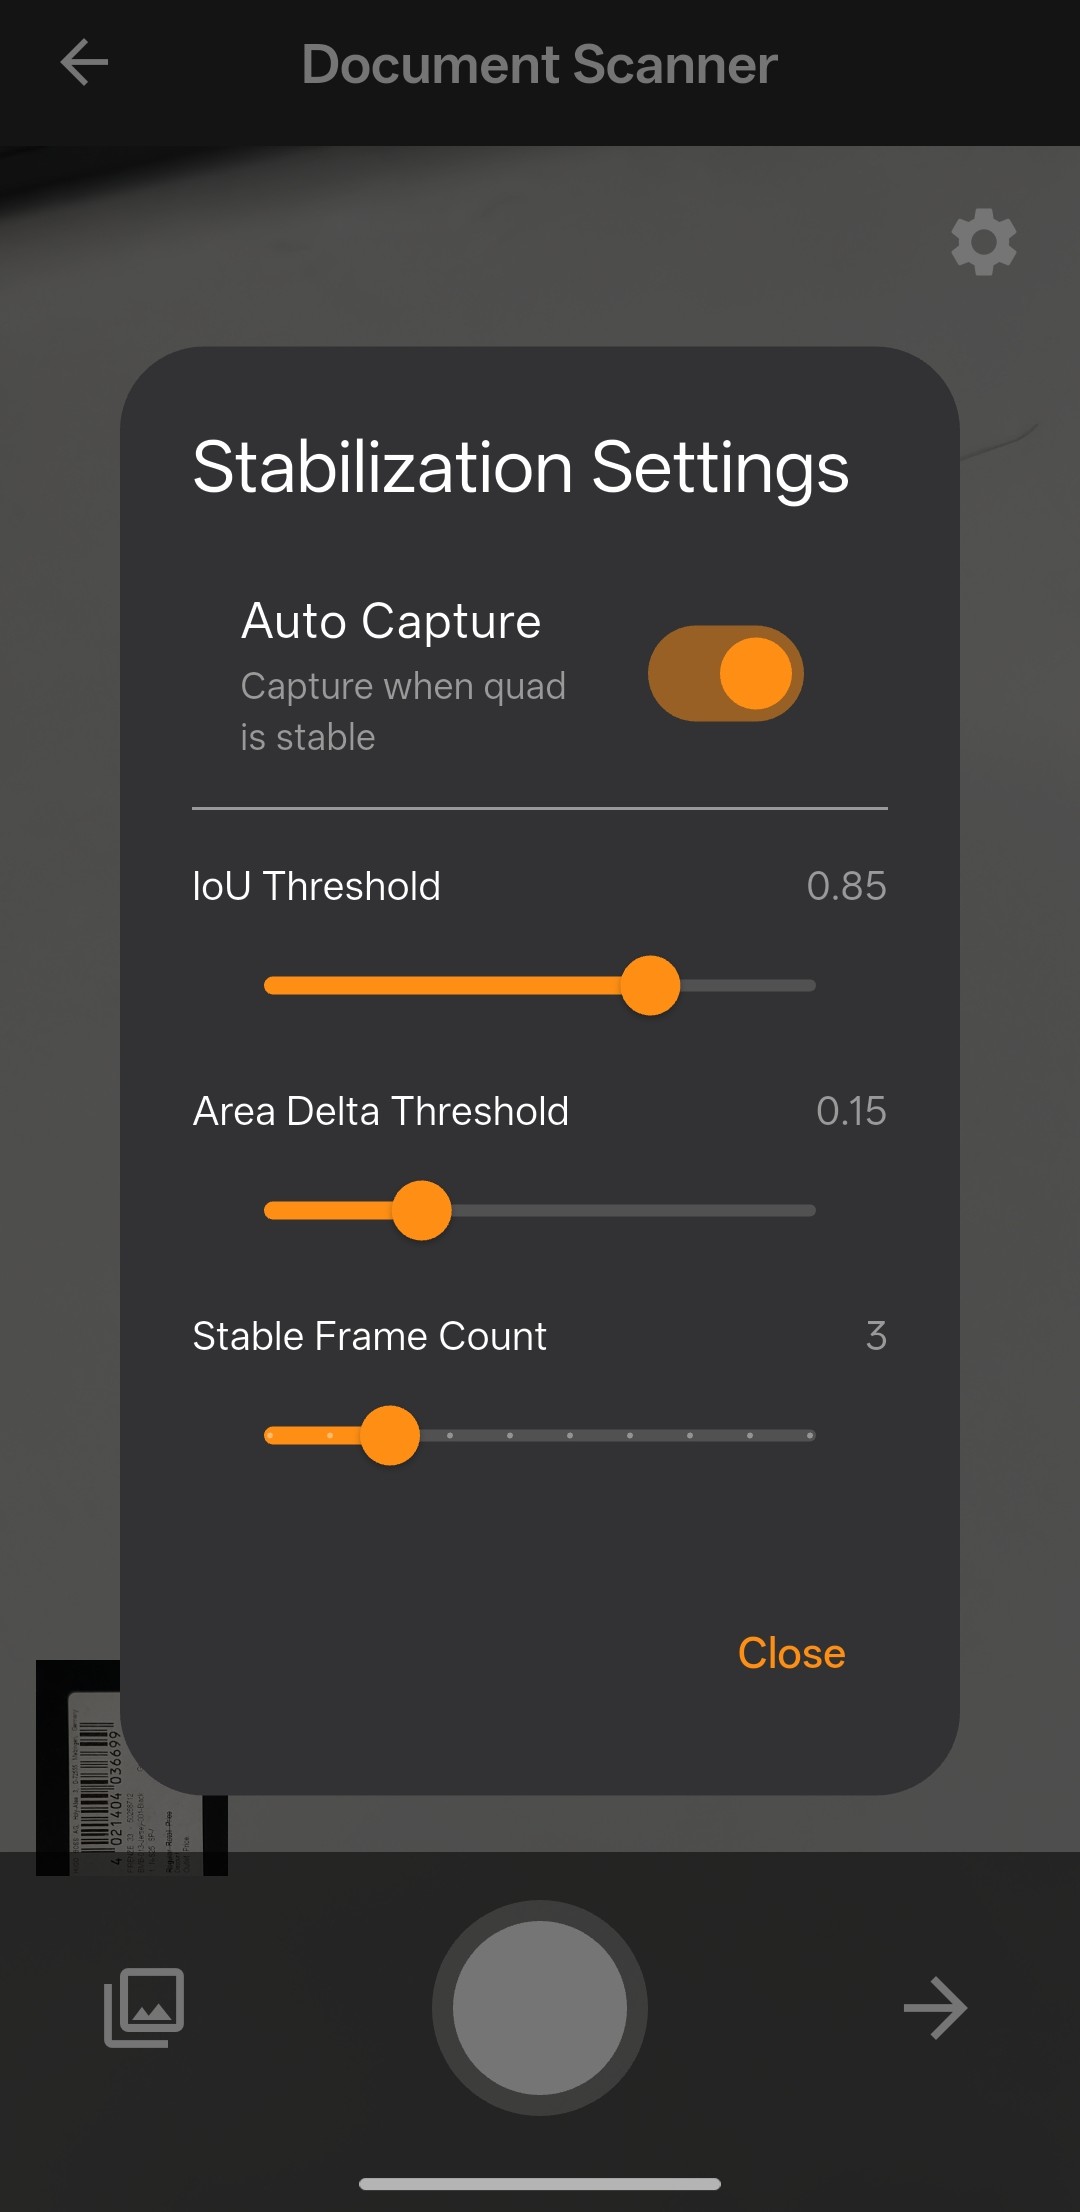
How to Build a Flutter Document Scanner App with Edge Detection, Editing, and PDF Export
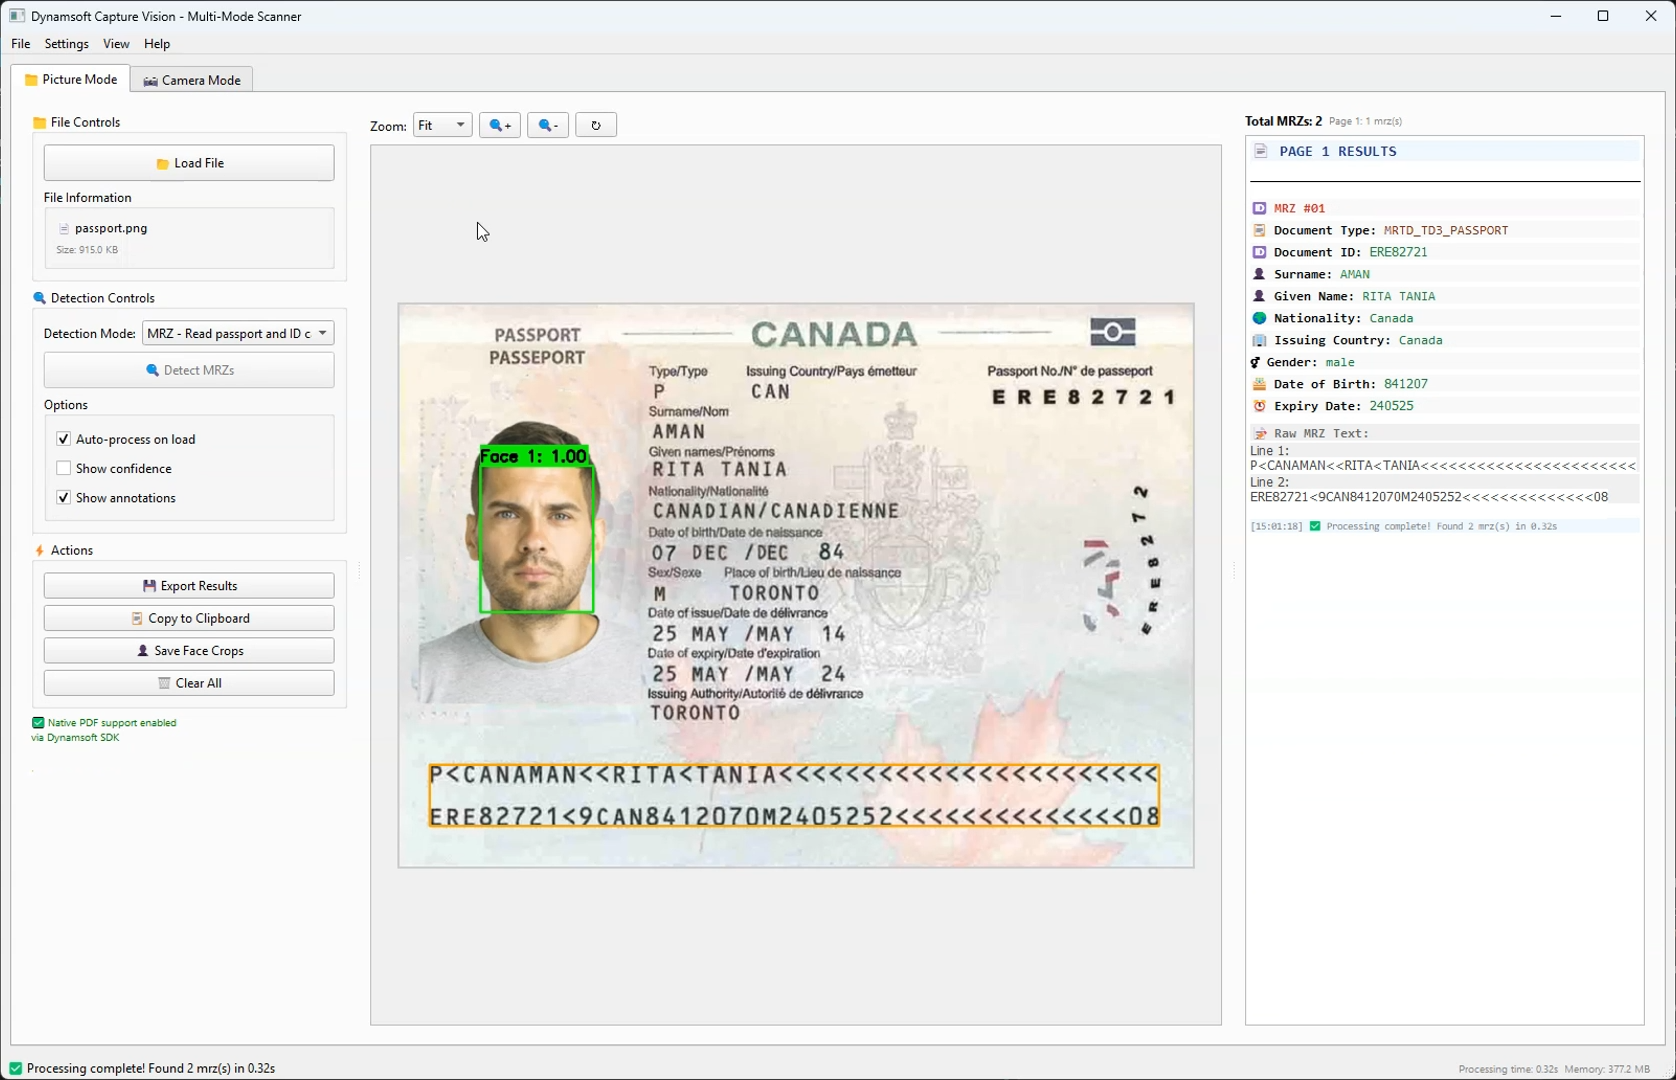
How to Build a Python Desktop App for Barcode, MRZ, and Document Scanning with AI-Assisted Development