


User Guide for the MRZ Scanner JavaScript Edition
This user guide walks you through integrating the MRZ Scanner JavaScript Edition SDK into a production web application. You’ll install the library via npm, self-host the SDK’s runtime resources from your own origin, render the parsed MRZ data alongside the cropped document and portrait images, and deploy the application from your own server.
If you want a single-file Hello World you can open from disk, see the Quick Start instead.
Upgrading an existing v3.x integration rather than starting fresh? Work through the Migration Guide (v3.x to v4.0) first, which covers the breaking changes in v4.0 with before/after code.
License
Trial License
Get started with a free 30-day trial license:
The trial license can be renewed twice via the customer portal (15 days each renewal), giving you 60 days total. Contact the Dynamsoft Support Team if you need more time.
The MRZ Scanner license includes licenses for Dynamsoft Label Recognizer, Dynamsoft Code Parser, and Dynamsoft Camera Enhancer, as the MRZ Scanner is built on these three products.
Full License
For a full license, please contact the Dynamsoft Sales Team.
Prerequisites
Visit the Introduction page to learn about MRZ document formats, the MRZ Scanner architecture, and system requirements.
You’ll need:
- Node.js
^24.0.0and npm^11.0.0to install the package and run the development server. - A trial or full license key (see License).
- A modern browser with
getUserMediasupport for camera scanning.
Including the Library
You can include the MRZ Scanner SDK in your application by installing it from npm or by building it from the source repository.
Just looking for a quick implementation? The Quick Start loads the SDK from a CDN with a single
<script>tag — no install steps required.
The recommended way to include the SDK is to install it as a project dependency:
npm i dynamsoft-mrz-scanner@4.0.0 -E
# or
yarn add dynamsoft-mrz-scanner@4.0.0 -E
This installs the MRZ Scanner package along with its two peer dependencies, dynamsoft-capture-vision-bundle and dynamsoft-capture-vision-data. Together they provide the JavaScript bundle, the WebAssembly engine, and the model and template data files that power MRZ recognition.
After installation, the layout under node_modules/ looks like:
node_modules/
├── dynamsoft-mrz-scanner/              # the library bundle and UI/template assets
├── dynamsoft-capture-vision-bundle/    # DCV engine (JS + WASM)
└── dynamsoft-capture-vision-data/      # DCV model, template, and parser data
The SDK’s runtime resources (UI templates, WebAssembly engine, model data) live inside
node_modules/, which isn’t served to the browser. Before launching the scanner you need to do two things: copy the three Dynamsoft folders into apublic/directory served at the same origin as your page, and setengineResourcePathson the scanner config to point at the stageddcvBundleanddcvDatalocations. SkippingengineResourcePathswhen installing via npm causes a resource-initialization error at launch. The next section covers both steps. See Resource Hosting for deployment variants.
For deeper customization or to track the latest changes, you can build the SDK from the source repository.
The MRZ Scanner is built on three Dynamsoft products: Dynamsoft Label Recognizer, Dynamsoft Code Parser, and Dynamsoft Camera Enhancer. Building from source gives you direct access to the views and helpers that wire those products together.
Follow these steps:
-
Clone the GitHub repository (or download a ZIP and extract it).
-
From the project root, install dependencies:
npm install -
Build the library bundles:
npm run buildThis produces the
dist/folder containing everything you need to include in your own application:dist/mrz-scanner.mjs(ESM),dist/mrz-scanner.cjs(CommonJS),dist/mrz-scanner.bundle.js(IIFE), and the type declarations indist/mrz-scanner.d.ts. Reference these directly from your project or publish them to your own registry. -
(Optional) To try out the samples that ship with the repository, start the bundled Vite dev server:
npm run devThe dev server serves the
samples/folder over HTTPS with a self-signed certificate, using thedist/you just built in step 3. Open the URL printed in the terminal output and navigate to a sample (for example,samples/demo/index.html).
Building a Production Sample
This section walks you through standing up the MRZ Scanner against an npm install with the SDK’s runtime resources hosted from your own origin. The scanner opens full-screen, recognizes an MRZ, and renders the parsed data and cropped images onto the page.
This walkthrough assumes you’ve installed the SDK via npm in a project at mrz-scanner-app/ and that the page is served from the project root. Adapt the paths to match your project layout.
If you don’t already have a project set up, create one now:
mkdir mrz-scanner-app
cd mrz-scanner-app
npm init -y
npm i dynamsoft-mrz-scanner@4.0.0 -E
This installs the SDK and its two peer dependencies under node_modules/. Next, create a public/ directory and copy the three Dynamsoft folders into it. At runtime the bundler (or any static server pointed at the project) serves public/ at /, which is exactly where the SDK looks for its UI/template assets and the DCV engine resources:
# macOS / Linux
mkdir public
cp -R node_modules/dynamsoft-mrz-scanner \
      node_modules/dynamsoft-capture-vision-bundle \
      node_modules/dynamsoft-capture-vision-data public/
# Windows PowerShell
New-Item -ItemType Directory public
Copy-Item -Recurse `
  node_modules/dynamsoft-mrz-scanner, `
  node_modules/dynamsoft-capture-vision-bundle, `
  node_modules/dynamsoft-capture-vision-data public/
The layout afterwards:
mrz-scanner-app/
├── node_modules/                          # still here — your dev server reads from it
├── public/
│   ├── dynamsoft-mrz-scanner/             # ← copied, served at /dynamsoft-mrz-scanner/
│   ├── dynamsoft-capture-vision-bundle/   # ← copied
│   └── dynamsoft-capture-vision-data/     # ← copied
└── package.json
Re-run the copy after every npm install that bumps the SDK or DCV (or script it into your build).
Step 1: Set Up the App Structure
Create a file named index.html at the project root. It loads the SDK from the dynamsoft-mrz-scanner/ folder you staged in public/ and provides a single <div> for the scan result:
<!doctype html>
<html lang="en">
  <head>
    <meta charset="utf-8" />
    <meta name="viewport" content="width=device-width, initial-scale=1.0" />
    <title>Dynamsoft MRZ Scanner</title>
    <script src="/dynamsoft-mrz-scanner/dist/mrz-scanner.bundle.js"></script>
  </head>

  <body>
    <h1>Dynamsoft MRZ Scanner</h1>
    <div id="results"></div>

    <script type="module">
      // The application code from the next steps goes here.
    </script>
  </body>
</html>
Once mrz-scanner.bundle.js is loaded, it exposes a global Dynamsoft namespace that holds the MRZScanner constructor, the EnumDocumentSide enum, and other helpers used below. The MRZ Scanner ships with a Ready-to-Use UI, so no scanner container element is required — once launched, the scanner takes over the page.
Step 2: Initialize the Scanner
Inside the <script type="module"> block, grab a reference to the results container and create the scanner instance:
const results = document.querySelector("#results");

const mrzscanner = new Dynamsoft.MRZScanner({
  license: "YOUR_LICENSE_KEY_HERE",
  engineResourcePaths: {
    dcvBundle: "/dynamsoft-capture-vision-bundle/dist/",
    dcvData: "/dynamsoft-capture-vision-data/",
  },
});
What’s going on here:
license— replaceYOUR_LICENSE_KEY_HEREwith your trial or full key (see License). An invalid license causes a launch error.engineResourcePaths— tells the SDK where to find the DCV engine bundle and model data files. These paths are required when installing via npm. The values above match thepublic/layout staged in the previous section, where the bundle lives at/dynamsoft-capture-vision-bundle/dist/and the data files live at/dynamsoft-capture-vision-data/. If you host the assets from a different path or CDN, see Resource Hosting.
Omitting
engineResourcePathswhen the SDK is installed via npm causes a resource-initialization error at launch. The SDK has no built-in default that points at a localpublic/directory, so it must be told where to look. The CDN distribution covered in the Quick Start is the only setup whereengineResourcePathscan be omitted.
For the full list of configuration options, see the MRZScannerConfig API.
Step 3: Launch the Scanner and Render the Result
Below the constructor, await launch() and use the result to populate the #results div:
const result = await mrzscanner.launch();
if (!result?.data) {
  results.textContent = "No MRZ scanned. Please try again.";
} else {
  const mrzSide = result.getDocumentImage(Dynamsoft.EnumDocumentSide.MRZ);
  const portraitSide = result.getDocumentImage(Dynamsoft.EnumDocumentSide.Opposite);
  const portrait = result.getPortraitImage();
  if (portraitSide?.toCanvas) results.appendChild(portraitSide.toCanvas());
  if (mrzSide?.toCanvas) results.appendChild(mrzSide.toCanvas());
  if (portrait?.toCanvas) results.appendChild(portrait.toCanvas());

  const pre = document.createElement("pre");
  pre.textContent = JSON.stringify(result.data, null, 2);
  results.appendChild(pre);
}
launch() opens the MRZScannerView, a full-screen container with a live camera feed, a guide frame, format selector, and toolbar buttons (including a built-in Load Image button for scanning a file instead of using the camera). When an MRZ is recognized, the promise resolves with an MRZResult. When the user cancels or no MRZ is detected, the promise still resolves but with result.data undefined, which the if branch handles by surfacing a short message.
Key APIs in use:
result.data— the parsed MRZ payload:firstName,lastName,sex,age,nationality,documentType,documentNumber,issuingState,dateOfBirth,dateOfExpiry,mrzText, andoptionalData1/optionalData2when present. Dates are returned as{ year, month, day }objects.result.getDocumentImage(side)— deskewed crop of the document for the given side.Dynamsoft.EnumDocumentSide.MRZis the side carrying the MRZ;EnumDocumentSide.Oppositeis the opposite side, populated only when multi-side scanning runs (see Multi-Side Scanning).result.getOriginalImage(side)— the full unmodified frame for the given side. Only populated whenreturnOriginalImage: trueis passed to the constructor (it defaults tofalse).result.getPortraitImage()— the portrait crop, regardless of which side it was found on.DSImageData.toCanvas()— converts the image into anHTMLCanvasElementready to append to the DOM.toBlob()is also available if you’d rather upload or store the image.
For a human-readable label table instead of raw JSON, iterate result.data and look up each key in Dynamsoft.MRZDataLabel (e.g. documentNumber → "Document Number").
Putting It All Together
The full index.html after all three steps:
<!doctype html>
<html lang="en">
  <head>
    <meta charset="utf-8" />
    <meta name="viewport" content="width=device-width, initial-scale=1.0" />
    <title>Dynamsoft MRZ Scanner</title>
    <script src="/dynamsoft-mrz-scanner/dist/mrz-scanner.bundle.js"></script>
  </head>

  <body>
    <h1>Dynamsoft MRZ Scanner</h1>
    <div id="results"></div>

    <script type="module">
      const results = document.querySelector("#results");

      const mrzscanner = new Dynamsoft.MRZScanner({
        license: "YOUR_LICENSE_KEY_HERE",
        engineResourcePaths: {
          dcvBundle: "/dynamsoft-capture-vision-bundle/dist/",
          dcvData: "/dynamsoft-capture-vision-data/",
        },
      });

      const result = await mrzscanner.launch();
      if (!result?.data) {
        results.textContent = "No MRZ scanned. Please try again.";
      } else {
        const mrzSide = result.getDocumentImage(Dynamsoft.EnumDocumentSide.MRZ);
        const portraitSide = result.getDocumentImage(Dynamsoft.EnumDocumentSide.Opposite);
        const portrait = result.getPortraitImage();
        if (portraitSide?.toCanvas) results.appendChild(portraitSide.toCanvas());
        if (mrzSide?.toCanvas) results.appendChild(mrzSide.toCanvas());
        if (portrait?.toCanvas) results.appendChild(portrait.toCanvas());

        const pre = document.createElement("pre");
        pre.textContent = JSON.stringify(result.data, null, 2);
        results.appendChild(pre);
      }
    </script>
  </body>
</html>
Drop in your license key, serve the file (see Local HTTPS via Vite for a one-command dev server), and you have a working integration.
The result view above is intentionally bare-bones: three appended canvases and a raw JSON dump, with no CSS applied. For a fully styled sample similar to the online demo, see the MRZ Scanner Demo under Code Gallery.
Multi-Side Scanning
Multi-side scanning is what produces a populated EnumDocumentSide.Opposite image on the result. It is on by default because returnPortraitImage defaults to true; setting returnPortraitImage: false disables it and getDocumentImage(Opposite) / getOriginalImage(Opposite) will always return null.
The flow when multi-side scanning is enabled:
- The user scans the MRZ side. This populates the primary images returned by
getOriginalImage(MRZ)andgetDocumentImage(MRZ). - The scanner inspects the same side for a portrait. If it finds one (e.g. a passport, where the MRZ and the portrait are on the same photo page), the portrait crop fills
getPortraitImage()and the scan ends.EnumDocumentSide.Oppositestaysnull. - If no portrait is found on the MRZ side (typical for TD1 / TD2 ID cards, where the portrait sits on the side opposite the MRZ), the UI prompts the user to flip the document after
flipDocumentTimeoutmilliseconds (default3000), captures the other side, and populatesgetOriginalImage(Opposite)andgetDocumentImage(Opposite)along with the portrait crop.
The API uses MRZ and Opposite rather than front/back because document layouts vary by country, and there’s no guarantee the MRZ is on the physical back or that the portrait is on the physical front. The scanner always captures the MRZ side first and labels it MRZ; whichever side the user flips to is labeled Opposite.
In practice:
| Document type | getDocumentImage(MRZ) |
getDocumentImage(Opposite) |
getPortraitImage() |
|---|---|---|---|
| Passports (TD3) | populated | null |
populated (from the same side) |
| ID cards (TD1 / TD2) | populated | populated | populated (from the Opposite side) |
Any document, with returnPortraitImage: false |
populated | null |
null |
The same matrix applies to getOriginalImage(side) when returnOriginalImage: true.
To customize the flip-document countdown duration, set scannerViewConfig.flipDocumentTimeout on the MRZScannerConfig. See the Customization Guide for the full list of multi-side-scanning options.
Lifecycle and Disposal
MRZScanner instances are stateful and hold references to the camera, the WebAssembly engine, and DOM containers. The SDK manages most of this for you:
launch()always disposes when it resolves. On success, failure, or cancellation, the camera, CV router, and DOM containers are torn down and the instance is marked uninitialized.launch()is re-entrant. Callinglaunch()again on the same instance re-initializes from scratch — useful for a re-scan flow.- Configuration is fixed at construction time. To change
license,mrzFormatType, thereturn*Imageflags,engineResourcePaths, orscannerViewConfig, construct a newMRZScannerinstance. dispose()is idempotent and only needs to be called explicitly when tearing down without launching again — for example, on SPA component unmount.
Understanding the MRZScannerView
When launch() is called without an image source, the MRZ Scanner opens the MRZScannerView in a full-screen container. The view is configured via MRZScannerViewConfig, which is nested under the scannerViewConfig field of MRZScannerConfig.
The view consists of these UI elements:
Core Scanning Interface:
-
Camera View — the camera viewfinder, occupying most of the screen.
-
Scan Guide Frame — an overlay that guides the user to position the MRZ document correctly for fast and accurate scanning. Enabled by default, and can be disabled via
MRZScannerViewConfig.enableScanRegion. When enabled, the scanner reads only the region inside the guide frame; when disabled, the entire camera frame is read.
-
Format Selector — allows the user to choose which MRZ formats to recognize. Available formats are configured via
MRZScannerConfig.mrzFormatType, while visibility is controlled viaMRZScannerViewConfig.showFormatSelector. To learn about MRZ formats, see the Introduction page.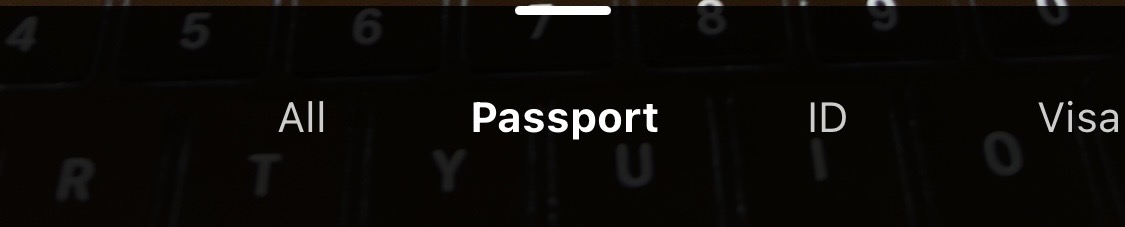
Camera Controls:
-
Resolution / Camera Select Dropdown — switch between available cameras or select different resolutions for the active camera.
-
Flash Button — toggles the camera flash when available. Only appears if the device and browser support camera flash.
Additional Options:
-
Load Image Button — scan an MRZ from an image file stored on the device. This button is part of the scanner UI and works inside an active camera session as an alternative to capturing from the live feed.
-
Sound Button — toggle audio feedback (beep) when an MRZ is recognized.
-
Close Scanner Button — closes the MRZ Scanner. The
launch()promise resolves with nodata, which your result-rendering code should treat as a cancellation.
To learn more about customizing the MRZScannerView and its UI elements — toolbar buttons, theme, on-screen messages, format selector labels, the multi-side scanning timeout, and more — see the Customization Guide.
Local HTTPS via Vite
The MRZ Scanner needs a secure context (HTTPS) for camera access and license validation. For development (especially when testing on a phone over the LAN), Vite combined with the @vitejs/plugin-basic-ssl plugin produces a self-signed certificate on the fly with no server setup.
Install Vite and the plugin in your project:
npm i -D vite @vitejs/plugin-basic-ssl
Create a vite.config.ts (or vite.config.js) at your project root:
import { defineConfig } from "vite";
import basicSsl from "@vitejs/plugin-basic-ssl";

export default defineConfig({
  plugins: [basicSsl()],
  server: {
    host: "0.0.0.0",
    headers: {
      // Enable SharedArrayBuffer so DCV can use the multi-threaded (pthread)
      // WASM variant for better performance.
      "Cross-Origin-Opener-Policy": "same-origin",
      "Cross-Origin-Embedder-Policy": "require-corp",
    },
  },
});
Then run:
npx vite
Vite prints a https://localhost:<port> URL plus the LAN-accessible URL bound by host: "0.0.0.0". Open the page, accept the self-signed certificate warning, and grant camera permission. The MRZ Scanner UI launches over HTTPS.
The COOP and COEP headers are not strictly required, but they enable
SharedArrayBuffer, which lets the DCV engine load the multi-threaded WebAssembly variant for noticeably faster MRZ recognition. If your application embeds third-party content that doesn’t set the matchingCross-Origin-Resource-Policyheader, omit the COOP/COEP block.
Self-signed certificates trigger a “Your connection is not private” warning on first visit. Click Advanced → Proceed to localhost (unsafe) to continue. Browsers do not persist this exception across full reinstalls or profile resets.
When you’re ready to ship the application to a real server, see Deployment below for the production hosting requirements.
Deployment
When you’re ready to ship your application to a production server, note that the MRZ Scanner is a static web SDK. Any server capable of serving HTML, JavaScript, WebAssembly, and JSON files works. The requirements below apply to that production server. For local development over HTTPS, see Local HTTPS via Vite above.
Secure Context (HTTPS)
Serve your application over HTTPS in production. This is required because:
- Camera Access — browsers only grant access to the camera video stream in a secure context.
- License Validation — the Dynamsoft License requires a secure context to function.
For development, some browsers (like Chrome) allow camera access on
http://127.0.0.1,http://localhost, orfile:///URLs as a developer convenience.
MIME Type for .wasm Files
Configure your server to send the correct Content-Type: application/wasm header for WebAssembly files. Configuration varies by server:
Resource Hosting
At build time, stage the three Dynamsoft folders (dynamsoft-mrz-scanner/, dynamsoft-capture-vision-bundle/, and dynamsoft-capture-vision-data/) into your project’s public/ directory so they’re served at the same origin as your HTML, at /. On your scanner config, engineResourcePaths.dcvBundle and engineResourcePaths.dcvData must point at the staged locations. The values shown in Step 2 above match this layout.
If you serve the folders from a different path or origin (a CDN under /static/dynamsoft/, for example), update engineResourcePaths to point at the actual locations:
new Dynamsoft.MRZScanner({
  license: "YOUR_LICENSE_KEY_HERE",
  engineResourcePaths: {
    dcvBundle: "https://cdn.example.com/static/dynamsoft/dynamsoft-capture-vision-bundle/dist/",
    dcvData:   "https://cdn.example.com/static/dynamsoft/dynamsoft-capture-vision-data/",
  },
});
Next Steps
- Customizing the MRZ Scanner — tailor the scanner UI, toolbar buttons, theme, on-screen messages, and multi-side scanning behavior.
- Setting up the MRZ Scanner for Static Images and PDFs — process image and PDF files as input instead of (or in addition to) the live camera feed.
- For framework-specific implementations (React, Angular, Vue), see the framework samples.