


Appearance
How to Customize Mobile Web Capture
Tip
Prerequisites: read the MWC User Guide before proceeding.
This guide expands on the Hello World sample from the MWC User Guide and explores the available customization options.
MobileWebCaptureConfig Overview
MobileWebCaptureConfig is the primary configuration object for customizing MWC. It includes the following properties:
license: the license key.container: the HTML container for the entire workflow. If not specified (like in the Hello World sample), one is created automatically.exportConfig: configures functions for handling document export operations.uploadToServer: specifies a function to upload a file to a server.downloadFromServer: specifies a function to download a document from the server.deleteFromServer: specifies a function to delete a document from the server.onUploadSuccess: specifies a function that is triggered when the upload operation succeeds.
showLibraryView: configures whether this MWC instance starts with theLibraryView.onClose: specifies a function that is triggered when the user closes this MWC instance.documentScannerConfig: configures the behavior of the built-inDocumentScannerinstance. See the details inDocumentScannerConfig.libraryViewConfig: configures the library View with the following properties:emptyContentConfig: specifies the content displayed in the library View when it is empty (no document).toolbarButtonsConfig: configures the buttons in the toolbar of the library View.
documentViewConfig: configures the document View with the following properties:emptyContentConfig: specifies the content displayed in the document View when it is empty (no page).toolbarButtonsConfig: configures the buttons in the toolbar of the document View.
pageViewConfig: configures the page View.toolbarButtonsConfig: configures the buttons in the toolbar of the page View.annotationToolbarLabelConfig: configures the labels of the annotation options.
transferViewConfig: configures the transfer View.toolbarButtonsConfig: configures the buttons in the toolbar of the transfer View.
historyViewConfig: configures the history View.emptyContentConfig: specifies the content displayed in the history View when it is empty (no uploads).toolbarButtonsConfig: configures the button in the toolbar of the history View.
ddvResourcePath: paths to extra resources such as.wasmengine files and CSS files.scanner: a custom scanner to capture pages with, in place of the built-in Mobile Document Scanner.
Note
emptyContentConfig and annotationToolbarLabelConfig are honored at runtime but are not yet in the TypeScript type of the per-View configuration objects, which currently narrows them to container and toolbarButtonsConfig. In a TypeScript project, cast the View config until the type is widened.
Overall UI and Workflow Customization
MWC automatically creates containers that fill the entire viewport for its Views if none are specified in the configuration. These Views come with a predefined workflow. The following demonstrates a few ways to customize the overall UI.
Specify the UI Container
When a container is assigned, the MWC UI is confined to that container element:
html
<div id="myMobileWebCapture" style="width: 80vw; height: 80vh;"></div>javascript
const mobileWebCapture = new Dynamsoft.MobileWebCapture({
	license: "YOUR_LICENSE_KEY_HERE", // Replace this with your actual license key
	container: document.getElementById("myMobileWebCapture"), // Use this container for the full workflow
});
(async () => {
	// Launch the Mobile Web Capture Instance
	const fileName = `New_Document_${Date.now().toString().slice(-5)}`;
	await mobileWebCapture.launch(fileName);
})();
Enable the LibraryView
By default, MWC starts with DocumentView, disabling LibraryView, so only one document is created and managed. Enabling LibraryView allows multiple documents.
Note
Launching without a document opens the LibraryView. Passing one anyway keeps the LibraryView enabled, and opens the DocumentView on that document.
javascript
const mobileWebCapture = new Dynamsoft.MobileWebCapture({
	license: "YOUR_LICENSE_KEY_HERE", // Replace this with your actual license key
	showLibraryView: true, // Enable LibraryView
});
(async () => {
	// Launch the Mobile Web Capture Instance
	await mobileWebCapture.launch(); // No need to specify a document name.
})();
On the LibraryView, the user can:
- New: create a new document.
- Capture: create a new document by capturing the first image for it.
- Import: create a new document by importing one or multiple images or PDF files.
The user can also enable the Upload feature. Check out Enable File Upload and Enable Upload History. When the Upload History feature is enabled, the user can:
- Uploads: view uploaded documents from this session, download, or delete them.
Start by Opening a Document
By default, MWC starts empty. However, you can specify a file to be opened as the initial document.
html
<input type="file" id="initialFile" accept="image/*,application/pdf" />javascript
const mobileWebCapture = new Dynamsoft.MobileWebCapture({
	license: "YOUR_LICENSE_KEY_HERE", // Replace this with your actual license key
});
let launched = false;
document.getElementById("initialFile").onchange = async function () {
	const files = Array.from(this.files || []);
	if (files.length) {
		// launch() throws while an instance is running, so dispose before reopening
		if (launched) await mobileWebCapture.dispose();
		// Launch the Mobile Web Capture instance with an initial file
		await mobileWebCapture.launch(files[0]);
		launched = true;
	}
};
Tip
The repository's /samples/scenarios/use-file-input.html is a runnable version of this, inside a sized container.
API Reference:
Scan Directly to Document
When capturing a document, it goes through three Views:
DocumentScannerViewDocumentCorrectionView(optional)DocumentResultView(optional)
The latter two Views can be skipped to speed up the process.
javascript
const mobileWebCapture = new Dynamsoft.MobileWebCapture({
	license: "YOUR_LICENSE_KEY_HERE", // Replace this with your actual license key
	documentScannerConfig: {
		showResultView: false,
		showCorrectionView: false,
	},
});
(async () => {
	// Launch the Mobile Web Capture Instance
	const fileName = `New_Document_${Date.now().toString().slice(-5)}`;
	await mobileWebCapture.launch(fileName);
})();
Enable File Upload
When exportConfig.uploadToServer is defined, an Upload button appears in both DocumentView and PageView.
Note
If LibraryView is enabled, the Upload button also appears there.
The following example demonstrates how to enable file upload and exit the Mobile Web Capture instance after a successful upload.
Tip
If you followed the steps in Build from Source and are still using the predefined Express server setup, the following upload code works correctly. See the server configuration details in /dev-server/index.js.
javascript
const uploadToServer = async (fileName, blob) => {
	const host = window.location.origin;
	// Create form data
	const formData = new FormData();
	formData.append("uploadFile", blob, fileName);
	// Upload file
	const response = await fetch(
		`${host}/upload`, // Change this to your actual upload URL
		{
			method: "POST",
			body: formData,
		},
	);
	if (response.status === 200) {
		// **IMPORTANT**: Returning { status: "success" } is required to trigger onUploadSuccess.
		return {
			status: "success",
		};
	} else {
		return {
			status: "failed",
		};
	}
};
const onUploadSuccess = async (fileName) => {
	console.log(`${fileName} uploaded successfully!`);
	return true; // Exit the Mobile Web Capture Instance
};
const mobileWebCapture = new Dynamsoft.MobileWebCapture({
	license: "YOUR_LICENSE_KEY_HERE", // Replace this with your actual license key
	exportConfig: {
		uploadToServer,
		onUploadSuccess,
	},
});
(async () => {
	// Launch the Mobile Web Capture Instance
	const fileName = `New_Document_${Date.now().toString().slice(-5)}`;
	await mobileWebCapture.launch(fileName);
})();
API Reference: ExportConfig
Important
The Upload feature is enabled simultaneously in DocumentView and PageView (and in LibraryView if it is enabled). If this is not intended, you can hide the Upload button in these Views. Read more:
Enable Upload History
When the File Upload feature is on and LibraryView is enabled, we can enable the Upload History feature in the LibraryView by defining all of the following:
exportConfig.uploadToServerexportConfig.downloadFromServerexportConfig.deleteFromServer
The following example demonstrates how to enable this feature.
Note
If you followed the steps in Build from Source and are still using the predefined Express server setup, the following code works correctly. See the server configuration details in /dev-server/index.js.
javascript
const host = window.location.origin;
const shortSessionID = Math.random().toString(36).substring(2, 12);
const uploadToServer = async (fileName, blob) => {
	const formData = new FormData();
	formData.append("uploadFile", blob, fileName);
	formData.append("fileName", fileName);
	formData.append("sessionID", shortSessionID);
	// Upload file
	const response = await fetch(
		`${host}/upload`, // Change this to your actual upload URL
		{
			method: "POST",
			body: formData,
		},
	);
	const responseText = await response.text();
	if (!responseText || !responseText.includes("UploadedFileName")) {
		throw new Error("Invalid server response");
	}
	const serverFileName = responseText.match(/UploadedFileName:(.+)_(\d+)_(.+)$/);
	if (!serverFileName) {
		throw new Error("Failed to parse server response");
	}
	const [, sessionID, uploadTime, realFileName] = serverFileName;
	const downloadUrl = `${host}/download?fileName=${encodeURIComponent(
		`${sessionID}_${uploadTime}_${realFileName}`,
	)}`;
	// NOTE: Ensure the object returned contains status, fileName, and downloadUrl
	return {
		status: "success",
		fileName: realFileName,
		downloadUrl,
		uploadTime,
	};
};
const deleteFromServer = async (doc) => {
	await fetch(
		`${host}/delete?fileName=${encodeURIComponent(
			`${shortSessionID}_${doc.uploadTime}_${doc.fileName}`,
		)}`,
		{
			method: "POST",
		},
	);
};
const downloadFromServer = async (doc) => {
	window.open(doc.downloadUrl);
};
const mobileWebCapture = new Dynamsoft.MobileWebCapture({
	license: "YOUR_LICENSE_KEY_HERE", // Replace this with your actual license key
	showLibraryView: true, // Enable LibraryView
	exportConfig: {
		uploadToServer,
		downloadFromServer,
		deleteFromServer,
	},
});
(async () => {
	// Launch the Mobile Web Capture Instance
	const fileName = `New_Document_${Date.now().toString().slice(-5)}`;
	await mobileWebCapture.launch(fileName);
})();
API Reference: UploadedDocument
View-Based Customization
DocumentView Configuration
Consider the following configuration interface used for customizing the DocumentView:
typescript
interface DocumentViewConfig {
	emptyContentConfig?: EmptyContentConfig;
	toolbarButtonsConfig?: DocumentToolbarButtonsConfig;
}
API Reference:
Example 1: Display a Message in an Empty Document
By default, the DocumentView displays the following when empty:
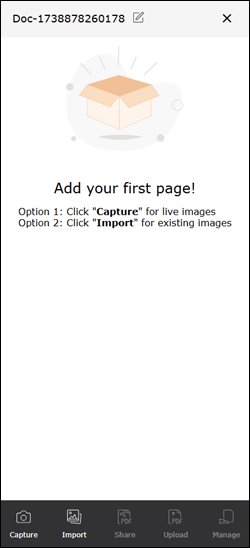
You can customize its appearance using the emptyContentConfig property.
html
<div id="customizedDocViewContent">Start Your Document!</div>javascript
const mobileWebCapture = new Dynamsoft.MobileWebCapture({
	license: "YOUR_LICENSE_KEY_HERE", // Replace this with your actual license key
	documentViewConfig: {
		emptyContentConfig: document.getElementById("customizedDocViewContent"),
	},
});
Example 2: Disable Upload in DocumentView
When exportConfig.uploadToServer is defined, the Upload button appears in both DocumentView and PageView. The following example demonstrates how to disable this feature by hiding it in DocumentView, ensuring that the Upload button only appears in PageView.
Tip
Read more in Enable File Upload.
javascript
const mobileWebCapture = new Dynamsoft.MobileWebCapture({
	license: "YOUR_LICENSE_KEY_HERE", // Replace this with your actual license key
	documentViewConfig: {
		toolbarButtonsConfig: {
			// Note that there are two upload buttons in DocumentView
			uploadDocument: {
				isHidden: true,
			},
			uploadImage: {
				isHidden: true,
			},
		},
	},
});
Example 3: Update the Button Icon
If you don't like a button's icon, you can customize it. The following example shows how to change the icon of the "Share Document" button:
javascript
const mobileWebCapture = new Dynamsoft.MobileWebCapture({
	license: "YOUR_LICENSE_KEY_HERE", // Replace this with your actual license key
	documentViewConfig: {
		toolbarButtonsConfig: {
			shareDocument: {
				icon: "path/to/new_icon.png", // Change to the actual path of the new icon
				label: "Custom Label",
			},
		},
	},
});
Every entry in a toolbarButtonsConfig takes the same shape — omitted properties keep the built-in default:
| Property | Type | Description |
|---|---|---|
icon | string | An inline SVG string, or a path or URL loaded into an <img> |
label | string | The text label displayed under the icon |
className | string | An extra CSS class on the button element, for styling beyond icon and label |
isHidden | boolean | Whether the button is hidden |
LibraryView Configuration
Consider the following configuration interface used for customizing the LibraryView:
typescript
interface LibraryViewConfig {
	emptyContentConfig?: EmptyContentConfig;
	toolbarButtonsConfig?: LibraryToolbarButtonsConfig;
}
API Reference:
Example 1: Display a Message in an Empty Library
By default, the LibraryView displays the following when empty:
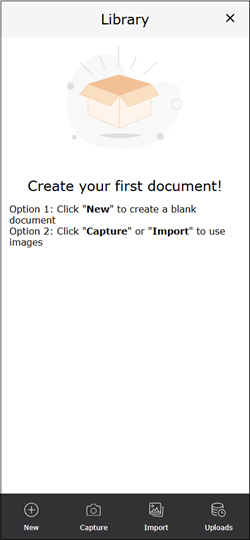
You can customize its appearance using the emptyContentConfig property.
html
<div id="customizedLibraryViewContent">Create Your First Document!</div>javascript
const mobileWebCapture = new Dynamsoft.MobileWebCapture({
	license: "YOUR_LICENSE_KEY_HERE", // Replace this with your actual license key
	showLibraryView: true, // Enable LibraryView
	libraryViewConfig: {
		emptyContentConfig: document.getElementById("customizedLibraryViewContent"),
	},
});
Example 2: Disable Upload in LibraryView
When exportConfig.uploadToServer is defined and showLibraryView is true, an Upload button appears in LibraryView. The following example demonstrates how to hide the button.
Note
Read more in Enable File Upload and Enable Upload History.
javascript
const mobileWebCapture = new Dynamsoft.MobileWebCapture({
	license: "YOUR_LICENSE_KEY_HERE", // Replace this with your actual license key
	showLibraryView: true, // Enable LibraryView
	libraryViewConfig: {
		toolbarButtonsConfig: {
			upload: {
				isHidden: true,
			},
		},
	},
});
PageView Configuration
Consider the following configuration interface used for customizing the PageView:
typescript
interface PageViewConfig {
	toolbarButtonsConfig?: PageViewToolbarButtonsConfig;
	annotationToolbarLabelConfig?: DDVAnnotationToolbarLabelConfig;
}
API Reference:
Example 1: Disable Upload in PageView
In this example, we demonstrate how to hide the Upload button in PageView even when exportConfig.uploadToServer is defined, ensuring that it only appears in DocumentView.
javascript
const mobileWebCapture = new Dynamsoft.MobileWebCapture({
	license: "YOUR_LICENSE_KEY_HERE", // Replace this with your actual license key
	pageViewConfig: {
		toolbarButtonsConfig: {
			upload: {
				isHidden: true,
			},
		},
	},
});
Example 2: Change the Labels of the Annotation Toolbar Buttons
You can customize the labels of the annotation toolbar buttons as follows:
javascript
const mobileWebCapture = new Dynamsoft.MobileWebCapture({
	license: "YOUR_LICENSE_KEY_HERE", // Replace this with your actual license key
	pageViewConfig: {
		annotationToolbarLabelConfig: {
			TextBoxAnnotation: "Input Text",
		},
	},
});
TransferView and HistoryView Configuration
The configuration follows similar patterns, so we won't cover them here for brevity. See TransferViewConfig and HistoryViewConfig in the API reference.
Plug In a Custom Scanner
MWC scans with Mobile Document Scanner by default. Any object satisfying the MWCScanner interface can be substituted — an MRZ scanner, a barcode-driven capture step, or your own camera UI. The example below passes an explicitly constructed DocumentScanner, which is what /samples/scenarios/custom-scanner.html does:
javascript
const documentScanner = new Dynamsoft.DocumentScanner({
	license: "YOUR_LICENSE_KEY_HERE",
});

const mobileWebCapture = new Dynamsoft.MobileWebCapture({
	license: "YOUR_LICENSE_KEY_HERE", // Replace this with your actual license key
	showLibraryView: true,
	scanner: documentScanner,
});
Th custom scanner requires initialize(), launch(), and dispose(). launch() must resolve with a result that carries imageData: true (note: not _imageData) and an _imageData object exposing toBlob(), which is how MWC gets the captured image.
Self-Hosting Resource Files
By default, MWC relies on a CDN for resources such as .wasm engine files. If you require a fully offline setup, follow these steps.
Important
These steps are based on Build from Source, meaning that all MWC source files must be available on your local machine.
Update the Resource Paths
The following code modifies how resource files are referenced:
Tip
In this case, we reference local resource files that are copied during the build process. See Modify the Build Script for details. However, you can also reference your own copies, such as files hosted on your own server. If you need assistance, feel free to contact us.
javascript
const mobileWebCapture = new Dynamsoft.MobileWebCapture({
	license: "YOUR_LICENSE_KEY_HERE", // Replace this with your actual license key
	ddvResourcePath: "./dist/libs/dynamsoft-document-viewer/dist/",
	documentScannerConfig: {
		scannerViewConfig: {
			// Copied from the MDS package by copy-libs, below
			cameraEnhancerUIPath: "./dist/libs/dynamsoft-document-scanner/dist/document-scanner.ui.xml",
		},
		engineResourcePaths: {
			std: "./dist/libs/dynamsoft-capture-vision-std/dist/",
			dip: "./dist/libs/dynamsoft-image-processing/dist/",
			core: "./dist/libs/dynamsoft-core/dist/",
			license: "./dist/libs/dynamsoft-license/dist/",
			cvr: "./dist/libs/dynamsoft-capture-vision-router/dist/",
			ddn: "./dist/libs/dynamsoft-document-normalizer/dist/",
		},
	},
});
Modify the Build Script
Update the scripts section in package.json to automatically copy the libraries during the build process:
json
"scripts": {
	"dev": "node dev-server/index.js",
	"build": "rollup -c && npm run copy-libs",
	"copy-libs": "npx mkdirp dist/libs && npx cpx \"node_modules/dynamsoft-*/**/*\" dist/libs/ --dereference",
	"build:production": "rollup -c --environment BUILD:production"
},
Build and Serve the Project
Once all dependencies are installed, build the project and start the local development server:
shell
npm run build
npm run dev
Once the server is running, open the application in a browser using the address printed in the terminal. All required files are now served locally, without relying on a CDN.
Important
Certain legacy web application servers may lack support for the
application/wasmmimetype for.wasmfiles. To address this, you have two options:To work properly, the SDK requires a few engine files, which are relatively large and may take quite a few seconds to download. We recommend that you set a longer cache time for these engine files, to maximize the performance of your web application:
Cache-Control: max-age=31536000Reference: Cache-Control.
Next Step
Start building your own mobile document capture and management solution with MWC! See the Framework Samples for complete Angular, React, and Vue projects, or browse the API Reference for the full configuration surface. If you encounter any technical issues or have suggestions, feel free to contact us.