


How to Use Blazor WebView in WinForms to Build a Document Scanning Desktop App
Since .NET 6 Preview 3, it is possible to host Blazor web applications in a WinForms/WPF app using the BlazorWebView control.
Behind BlazorWebView is WebView2, which uses Microsoft Edge as the rendering engine to display the web content in native apps. Developers can now adopt a hybrid app approach, utilizing both native and web technologies.
In the previous article, we’ve talked about Blazor Server and Blazor WebAssembly and how to use them to create a document scanning app with Dynamic Web TWAIN (DWT). In this article, we are going to demonstrate how to build a WinForms document scanning desktop app with Blazor.
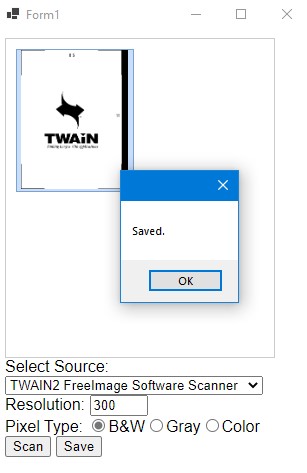
What you’ll build: A WinForms desktop app that hosts a Blazor UI via BlazorWebView, uses Dynamic Web TWAIN to scan documents from any TWAIN-compatible scanner, and saves the results as a multi-page PDF.
Key Takeaways
- Blazor WebView lets you embed a full Blazor web UI inside a WinForms desktop application using WebView2 as the rendering engine.
- Dynamic Web TWAIN provides a JavaScript API to acquire images from TWAIN scanners, configure scan options (resolution, pixel type), and save results as PDF.
- JavaScript interop (
IJSRuntime) bridges C# Razor components and the DWT JavaScript SDK, enabling scan/save workflows from Blazor event handlers. - This hybrid approach lets you combine the rich ecosystem of .NET desktop APIs (e.g.,
MessageBox) with web-based scanner integration.
Common Developer Questions
- How do I use Blazor WebView in WinForms for document scanning?
- Can I call Dynamic Web TWAIN JavaScript functions from a Blazor Razor component?
- How do I save scanned documents as PDF in a Blazor WinForms desktop app?
Prerequisites
- Visual Studio with .NET 6 or later
- A TWAIN-compatible scanner (or virtual scanner for testing)
- Get a 30-day free trial license for Dynamic Web TWAIN
Build a WinForms Document Scanning App with Blazor
Let’s do this in steps.
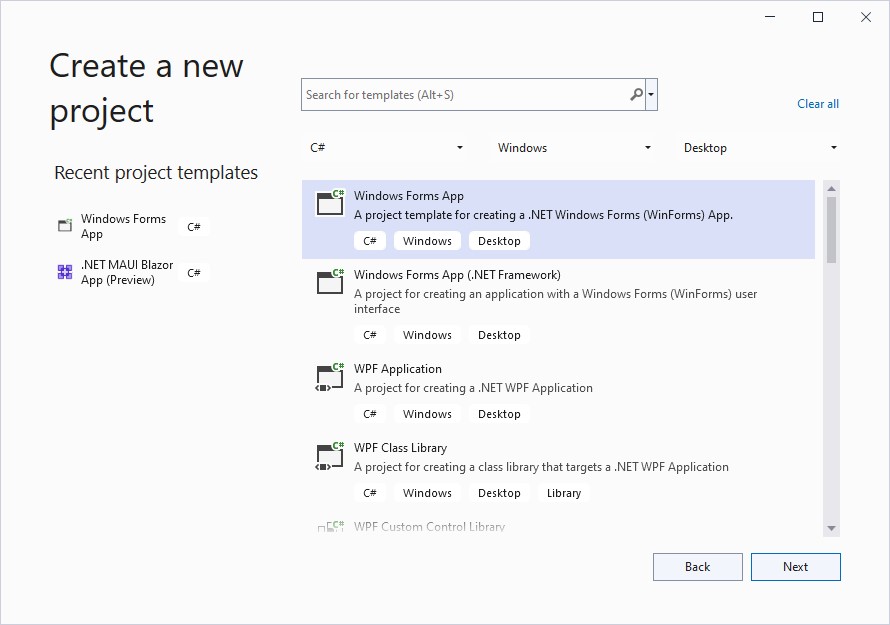
Step 1: Create a New WinForms Project
Open Visual Studio, create a new C# WinForms project:
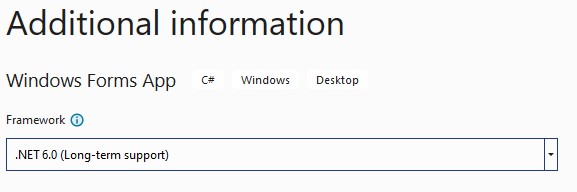
Choose .NET 6:
Step 2: Add Blazor WebView to the WinForms Project
-
Update the SDK used in the app’s project file to Microsoft.NET.Sdk.Razor.
- <Project Sdk="Microsoft.NET.Sdk"> + <Project Sdk="Microsoft.NET.Sdk.Razor"> -
Add a package reference to Microsoft.AspNetCore.Components.WebView.WindowsForms.
-
Create a new
wwwrootfolder with anindex.htmlfile and anapp.cssfile.HTML:
 <!DOCTYPE html>
 <html>

 <head>
     <meta charset="utf-8" />
     <meta name="viewport" content="width=device-width, initial-scale=1.0, maximum-scale=1.0, user-scalable=no" />
     <title>Blazor app</title>
     <base href="/" />
     <link href="{PROJECT NAME}.styles.css" rel="stylesheet" /> <!-- remember to change {PROJECT NAME} -->
     <link href="app.css" rel="stylesheet" />
 </head>

 <body>
     <div id="app"></div>

     <div id="blazor-error-ui">
         An unhandled error has occurred.
         <a href="" class="reload">Reload</a>
         <a class="dismiss">🗙</a>
     </div>

     <script src="_framework/blazor.webview.js"></script>
 </body>
 </html>
CSS:
html, body { font-family: 'Helvetica Neue', Helvetica, Arial, sans-serif; } .valid.modified:not([type=checkbox]) { outline: 1px solid #26b050; } .invalid { outline: 1px solid red; } .validation-message { color: red; } #blazor-error-ui { background: lightyellow; bottom: 0; box-shadow: 0 -1px 2px rgba(0, 0, 0, 0.2); display: none; left: 0; padding: 0.6rem 1.25rem 0.7rem 1.25rem; position: fixed; width: 100%; z-index: 1000; } #blazor-error-ui .dismiss { cursor: pointer; position: absolute; right: 0.75rem; top: 0.5rem; } -
Add a root Blazor component,
Counter.razor, to the project:@using Microsoft.AspNetCore.Components.Web <h1>Counter</h1> <p>The current count is: @currentCount</p> <button @onclick="IncrementCount">Count</button> @code { int currentCount = 0; void IncrementCount() { currentCount++; } } -
In
Form1, create aBlazorWebViewcontrol namedblazorusing Toolbox.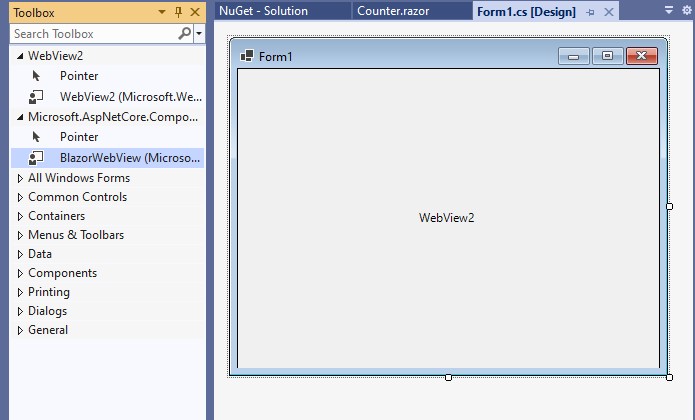
-
Setup the
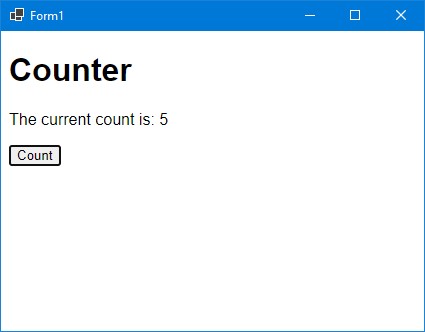
BlazorWebView.public Form1() { InitializeComponent(); var serviceCollection = new ServiceCollection(); serviceCollection.AddBlazorWebView(); blazor.Services = serviceCollection.BuildServiceProvider(); blazor.HostPage = "wwwroot/index.html"; blazor.RootComponents.Add<Counter>("#app"); }Now, we can run the app to have a test.
Step 3: Set Up the Dynamic Web TWAIN SDK
Let’s continue to add document scanning ability to the app. First, we need to set up Dynamic Web TWAIN in the project.
-
Download Dynamic Web TWAIN: Download Page.
-
Put the
Resourcesfolder inwwwroot. You can find the folder in the place likeC:\Program Files (x86)\Dynamsoft\Dynamic Web TWAIN SDK 17.2.5. -
Open
Resources\dynamsoft.webtwain.config.js. We can fill in our license key to use the SDK (apply for a license). Meanwhile, disableAutoLoadbecause we will load it manually.Dynamsoft.DWT.AutoLoad = false; Dynamsoft.DWT.ProductKey = '<your license key>'; -
Open
wwwroot/index.html, add the following:<script src="Resources/dynamsoft.webtwain.initiate.js"></script> <script src="Resources/dynamsoft.webtwain.config.js"></script>
To check whether the SDK is successfully added, we can do the following to have a test.
-
Add the following to
bodyofwwwroot/index.html:<script> window.getVersion = () => { return Dynamsoft.DWT.JSVersion; }; </script> -
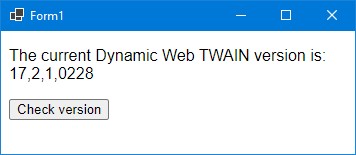
Modify
Counter.razorto check the DWT’s version. IJSRuntime is used for JavaScript interop:@using Microsoft.AspNetCore.Components.Web @using Microsoft.JSInterop @inject IJSRuntime JS @if (version != null) { <p>The current Dynamic Web TWAIN version is: @version</p> } <button @onclick="CheckDWTVersion">Check version</button> @code { string version; async void CheckDWTVersion() { version = await JS.InvokeAsync<string>("getVersion"); StateHasChanged(); } }
Step 4: Load Dynamic Web TWAIN and Bind the Document Viewer
Next, we need to create a DWT object and add a viewer which can be used to view scanned documents.
-
Create a new
DWT.jsfile and include it in theindex.html. We will write our JavaScript in it.<script src="DWT.js"></script> -
Add a
divfor viewer with its ID asdwtcontrolContainerin the razor file:<div id="dwtcontrolContainer"></div> -
Add the following to the
DWT.jsfile:var DWObject = null; function CreateDWT() { return new Promise(function (resolve, reject) { var success = function (obj) { DWObject = obj; DWObject.Viewer.bind(document.getElementById('dwtcontrolContainer')); DWObject.Viewer.width = 270; DWObject.Viewer.height = 320; DWObject.SetViewMode(2, 2); DWObject.Viewer.show(); resolve(true); }; var error = function (err) { resolve(false); }; Dynamsoft.DWT.CreateDWTObjectEx({ WebTwainId: 'dwtcontrol' }, success, error ); }) } -
In the razor file, call the above JavaScript to create the DWT object and bind the viewer when it is initialized.
 protected override async void OnInitialized()
 {
     await CreateDWT();
 }

 private async Task CreateDWT()
 {
     await JS.InvokeVoidAsync("CreateDWT");
 }
Run the app and we can see an empty viewer.
Step 5: Add a Scan Button to Acquire Documents
Next, we are going to scan documents.
-
Add a Scan Button in the razor file:
<button @onclick="Scan">Scan</button> @code { private async Task Scan() { await JS.InvokeVoidAsync("Scan"); } } -
Create a
Scanfunction inDWT.js:function Scan() { if (DWObject) { DWObject.SelectSource(function () { DWObject.OpenSource(); DWObject.AcquireImage(); }, function () { console.log("SelectSource failed!"); } ); } }
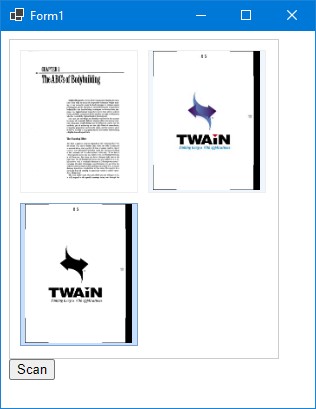
Now, we can scan documents in a Blazor app.
Step 6: Add Configurable Scan Options
In the above step, when users click the scan button, they have to select which scanner to use and select scanning options like resolution and color in a dialog.
We can pass those options manually.
Define a ScanOptions Class
Create a ScanOptions.cs file:
class ScanOptions
{
    public int SelectedIndex { get; set; }
    public int PixelType { get; set; }
    public int Resolution { get; set; }
}
Scan with Specified Options
Modify the Scan function in DWT.js to use the options:
function Scan(options) {
    return new Promise(function (resolve, reject) {
        if (DWObject) {

            DWObject.SelectSourceByIndex(options.selectedIndex);
            DWObject.CloseSource();
            DWObject.OpenSource();
            DWObject.IfShowUI = false;
            DWObject.PixelType = options.pixelType;
            DWObject.Resolution = options.resolution;

            var OnAcquireImageSuccess = function () {
                resolve(true);
            }
            var OnAcquireImageError = function () {
                resolve(false);
            }
            DWObject.AcquireImage(OnAcquireImageSuccess, OnAcquireImageError);
        } else {
            reject(false);
        }
    });
}
In the razor file, use the ScanOptions:
ScanOptions options = new ScanOptions();
options.PixelType = 0; //Black and White
options.Resolution = 300;
options.SelectedIndex = 0;
await JS.InvokeVoidAsync("Scan",options);
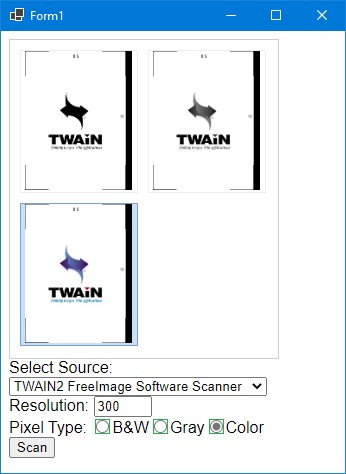
Add Options Controls
We can make those options configurable on the page. The EditForm component is used here.
@using Microsoft.AspNetCore.Components.Forms

<EditForm Model="scanOptions">
    Select Source:
    <InputSelect @bind-Value=scanOptions.SelectedIndex>
    @if (@scanners.Count>0)
    {
        for (int i = 0; i < scanners.Count; i++)
        {
            <option value="@i">@scanners[i]</option>
        }
    }
    </InputSelect>
    <br/>
    Resolution:
    <InputNumber style="width:50px;" @bind-Value=scanOptions.Resolution></InputNumber>
    <br/>
    Pixel Type:
    <InputRadioGroup @bind-Value=@scanOptions.PixelType>
        @foreach (DictionaryEntry option in pixelTypeOptions)
        {
            <InputRadio Value="option.Value" /> @option.Key
        }
    </InputRadioGroup>
</EditForm>
The form is bounded with the scanOptions variable.
@using System.Collections;
@using System.Collections.Specialized;
private List<string> scanners = new List<string>();
ListDictionary pixelTypeOptions = new ListDictionary();

private ScanOptions scanOptions = new ScanOptions() {
    PixelType = 0,
    SelectedIndex = 0,
    Resolution = 300,
};
protected override async void OnInitialized()
{
    pixelTypeOptions.Add( "B&W", 0 );
    pixelTypeOptions.Add( "Gray", 1 );
    pixelTypeOptions.Add( "Color", 2 );
    await CreateDWT();
}
The scanners list is loaded upon initialization.
In DWT.js:
function GetScannersList() {
    var scanners = [];
    if (DWObject) {
        var count = DWObject.SourceCount;
        for (var i = 0; i < count; i++) {
            scanners.push(DWObject.GetSourceNameItems(i));
        }
    }
    return scanners;
}
In the razor file:
protected override async void OnInitialized()
{
    await CreateDWT();
    scanners.AddRange(await JS.InvokeAsync<IEnumerable<string>>("GetScannersList"));
    StateHasChanged();
}
Step 7: Save Scanned Documents as PDF
After documents are scanned, we can then save them as a PDF file. Use the following code to achieve such a function.
In DWT.js:
function Save() {
    return new Promise(function (resolve, reject) {
        DWObject.IfShowFileDialog = true;
        // The path is selected in the dialog, therefore we only need the file name
        DWObject.SaveAllAsPDF("Sample.pdf",
            function () {
                console.log('Successful!');
                resolve(true);
            },
            function (errCode, errString) {
                resolve(false);
            }
        );
    });
}
In the razor file:
<button @onclick="Save">Save</button>
private async Task Save()
{
    Boolean success = await JS.InvokeAsync<Boolean>("Save");
    if (success)
    {
        MessageBox.Show("Saved.");
    }
    else
    {
        MessageBox.Show("Failed.");
    }
}
A WinForms MessageBox will be used to notify users whether the documents are saved successfully. In the Blazor app, we can use all the WinForms APIs and .NET libraries, which is convenient.
Common Issues and Edge Cases
- WebView2 runtime not installed: BlazorWebView requires the WebView2 Evergreen Runtime. If the target machine does not have Microsoft Edge (Chromium) or the runtime installed, the app will fail to load. Bundle the WebView2 fixed-version runtime or prompt users to install it.
- Dynamic Web TWAIN service not running: DWT relies on the Dynamsoft Service to communicate with local scanners. If the service is not installed or running,
CreateDWTObjectExwill fail silently. Check the service status before calling scan functions. - Scanner not detected in the source list: Some scanners require manufacturer-specific TWAIN drivers. If
GetScannersListreturns an empty list, verify that the correct TWAIN driver is installed and that the scanner is connected and powered on.