Content Aware Fill: Photoshop vs. Gimp
When asking UI designers the question “which raster graphics editor do you prefer”, probably most of the answers are Adobe Photoshop, which seems to be the professionals’ best choice. But as a developer, who only needs to do some simple image editing, I’d like to choose Gimp, which is totally free, open-source and available on Linux, Mac and Windows. Today, I’d like to share a trick I learned for Gimp.
Does Gimp Support Content Aware Fill?
During a meeting, our UI designer showed a Photoshop trick called content aware, which intelligently removed the foreground object with texture synthesis by one click. I was amazed, and wondering whether Gimp could make it too. After Googling, I found there is a Gimp plugin Resynthesizer, which was written by Dr Paul Harrison and released in 2003, 7 years ahead of Photoshop’s functionality in early 2010!
How to Use the Content Aware Functionality in Photoshop and Gimp?
In Photoshop, using content aware fill is pretty simple. You just need to select the object area, press shift+F5, and click OK.
Original:
Photoshop Content Aware:
By default, Gimp does not include the plugin Resynthesizer, and thus we have to install it manually:
- Download the Resynthesizer plugins for Windows.
- Extract the package, and copy all files to C:\Users\%USERNAME%.gimp-2.8\plug-ins.
- Load an image to Gimp, and Select the object area.
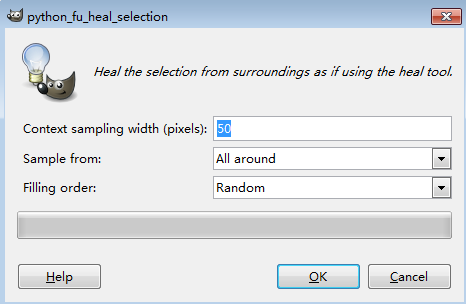
- Click Filters->Enhance->Heal selection…
- Set parameters and click OK.

Original:
Resynthesizer:
Amazing! Comparing to the final results, which one do you prefer?


