


How to Automate Document Scanning with Selenium and Headless Chrome in Python
Dynamic Web TWAIN is an SDK which makes it possible to scan documents in browsers. Selenium is a suite of tools for automating web browsers, like Firefox, Edge and Chrome. Primarily, it is for testing purposes, but it can also serve for other tasks.
In this article, we are going to combine the two to create a web app which can be used on any device to scan documents. We are going to use Python and Selenium to host and control a document scanning web page in headless Chrome and then provide HTTP API interfaces for a web app to use. The reason why we need to run it in headless mode is that we can run the app from the command line.
What you’ll build: A Python Flask server that runs a Dynamic Web TWAIN scanning page inside headless Chrome via Selenium, exposing HTTP API endpoints so any device on the network can trigger document scans and receive scanned images as base64.
Key Takeaways
- Selenium WebDriver can drive Dynamic Web TWAIN inside headless Chrome, enabling command-line and server-side document scanning without a visible browser window.
- A Python Flask app wraps the scanning logic into three HTTP endpoints — load the SDK, list connected scanners, and trigger a scan — making the scanner accessible from any device on the network.
execute_async_scriptis the correct Selenium method for interacting with Dynamic Web TWAIN because scanning is an asynchronous hardware operation that requires a callback.- This architecture is well suited for CI/CD integration testing of document-scanning workflows and for kiosk or headless server deployments.
Common Developer Questions
How do I scan documents from a headless Chrome browser using Selenium and Python?
Host a Dynamic Web TWAIN page with Flask, launch Chrome through Selenium in headless mode, and then execute JavaScript against that page to start scanning and collect the resulting image data. This tutorial uses Python as the orchestration layer while the actual scanner interaction still happens inside the browser page.
How can I expose a hardware document scanner over HTTP so any device can trigger a scan?
Wrap the Selenium-controlled scanning page in a Flask service and publish endpoints that load the page, enumerate scanners, and trigger acquisition on demand. That turns one locally attached scanner into a simple HTTP-driven service for other devices on the network.
Why does Selenium time out when calling Dynamic Web TWAIN scan functions, and how do I fix it with execute_async_script?
Dynamic Web TWAIN scanning is asynchronous, so a plain synchronous execute_script call can return too early or time out while the hardware operation is still running. The article solves that by using execute_async_script, which waits for the callback-driven scan flow to finish before returning data to Python.

Step 1: Create the Document Scanning Web Page
-
Download Dynamic Web TWAIN and then install it.
PS: For Linux, you need to manually install the Dynamic Web TWAIN Service (more about Dynamic Web TWAIN Service). For example, run the following to install it on Ubuntu/Debian.
dpkg -i Resources\dist\DynamsoftServiceSetup.deb - Create a new project folder and copy the
Resourcesfolder of Dynamic Web TWAIN into it. -
Edit
Resources/dynamsoft.webtwain.configto configure your own license and disableAutoLoadsince we will do this manually. You can apply for a trial license here.+ Dynamsoft.DWT.AutoLoad = false; - Dynamsoft.DWT.AutoLoad = true; Dynamsoft.DWT.ProductKey = 'LICENSE-KEY'; -
Create an HTML file named
DWT.htmlto load the library of Dynamic Web TWAIN.<!DOCTYPE html> <html> <head> <meta charset="utf-8" /> <meta name="viewport" content="width=device-width, initial-scale=1.0, maximum-scale=1.0, user-scalable=no" /> <title>Dynamic Web TWAIN</title> <script src="Resources/dynamsoft.webtwain.initiate.js"></script> <script src="Resources/dynamsoft.webtwain.config.js"></script> <script src="DWT.js"></script> </head> <body> <p>DWT</p> </body> </html> -
Create a
DWT.jsfile to load Dynamic Web TWAIN manually and scan documents. When the page is loaded, it will scan documents and then display the scanned image on the page.var DWObject = null; window.onload = function(){ CreateDWT(); } function CreateDWT() { var success = function (obj) { DWObject = obj; Scan(); }; var error = function (err) { console.log(err) }; Dynamsoft.DWT.CreateDWTObjectEx({ WebTwainId: 'dwtcontrol' }, success, error ); } function Scan() { if (DWObject) { DWObject.SelectSourceByIndex(0); DWObject.CloseSource(); DWObject.OpenSource(); DWObject.IfShowUI = true; var OnAcquireImageSuccess = function () { var success = function (result, indices, type) { var scannedImage = document.createElement("img"); scannedImage.src = "data:image/jpg;base64," + result.getData(0, result.getLength()); document.body.appendChild(scannedImage); }; var error = function (errorCode, errorString) { console.log(errorString); }; //1 is B&W, 8 is Gray, 24 is RGB if (DWObject.GetImageBitDepth(DWObject.CurrentImageIndexInBuffer) == 1) { DWObject.ConvertToGrayScale(DWObject.CurrentImageIndexInBuffer); } DWObject.ConvertToBase64( [DWObject.CurrentImageIndexInBuffer], Dynamsoft.DWT.EnumDWT_ImageType.IT_JPG, success, error ); } var OnAcquireImageError = function () { console.log("error"); } DWObject.AcquireImage(OnAcquireImageSuccess, OnAcquireImageError); } }
Step 2: Control the Scanning Page with Selenium in Headless Chrome
Next, we are going to use Python and Selenium to control the web page we just created.
Set Up the Python Environment
-
Install Selenium:
pip install selenium -
Install the Flask web framework for hosting the web page:
pip install flask -
Install Chrome and Download Chromedriver. Put the
chromedriver.exein the project folder.PS: If you are using Linux, you can just use snap to install Chromium which has Chromedriver packed.
Start the Flask HTTP Server
We have to start an HTTP server to host the document scanning web page first.
#coding=utf-8
from flask import Flask, request
app = Flask(__name__, static_url_path='/', static_folder='static')

if __name__ == '__main__':
    app.run(host='0.0.0.0')
All static files are moved into the static folder.
Run the Python file from command line:
python server.py
We can visit the app here: http://127.0.0.1:5000/DWT.html
Launch Chrome in Headless Mode
Next, start Chrome in headless mode.
from selenium import webdriver
import threading

browser = None
def start_chrome():
    chromedriver_path = 'chromedriver.exe' # You may have to change it for mac/Linux.
    chrome_options = webdriver.ChromeOptions()
    chrome_options.add_argument('headless')
    global browser
    browser = webdriver.Chrome(executable_path=chromedriver_path, options=chrome_options)

if __name__ == '__main__':
    threading.Thread(target=start_chrome, args=()).start()
    app.run(host='0.0.0.0')
Execute JavaScript from Python via Selenium
Now, we can execute JavaScript from Python to control the web page.
There are two methods in Selenium Python to do this: execute_script and execute_async_script.
The first one synchronously executes JavaScript and returns the result directly. Its usage is like this:
driver.execute_script('return document.title;')
The second one asynchronously executes JavaScript. It passes a callback as the last argument for the function which we can use to return the result.
script = "var callback = arguments[arguments.length - 1]; " \
         "window.setTimeout(function(){ callback('timeout') }, 3000);"
driver.execute_async_script(script)
We are going to use the two methods to interact with Dynamic Web TWAIN.
-
Initialize Dynamic Web TWAIN.
In Python, load the web page and then run the
CreateDWTfunction.DWT_created = False def create_DWT(): browser.get('http://127.0.0.1:5000/DWT.html') global DWT_created DWT_created = browser.execute_async_script(''' const cb = arguments[arguments.length - 1]; CreateDWT(cb); ''')JavaScript:
function CreateDWT(callback) { var success = function (obj) { DWObject = obj; callback(true); }; var error = function (err) { callback(false); }; Dynamsoft.DWT.CreateDWTObjectEx({ WebTwainId: 'dwtcontrol' }, success, error ); } -
Get the list of connected scanners.
Python:
scanners = browser.execute_script('''
                                    scanners = GetScannersList();
                                    return scanners;
                                    ''')
JavaScript:
function GetScannersList() { var scanners = []; var count = DWObject.SourceCount; for (var i = 0; i < count; i++) { scanners.push(DWObject.GetSourceNameItems(i)); } return scanners; } -
Scan a document.
Python:
resolution = '300'
selected_index = '0'
pixelType = '0' # 0: black and white, 1: gray, 2: color
js = '''
    const cb = arguments[arguments.length - 1];
    var options = {};
    options.showUI = false;
    options.resolution = '''+resolution+''';
    options.selectedIndex = '''+selected_index+''';
    options.pixelType = '''+pixelType+''';
    Scan(options,cb);
    '''
result = browser.execute_async_script(js);
JavaScript:
function Scan(options,callback) {
  if (DWObject) {
    DWObject.SelectSourceByIndex(options.selectedIndex);
    DWObject.CloseSource();
    DWObject.OpenSource();
    DWObject.IfShowUI = options.showUI;
    DWObject.PixelType = options.pixelType;
    DWObject.Resolution = options.resolution;

    var OnAcquireImageSuccess = function () {
      var success = function (result, indices, type) {
        DWObject.RemoveAllImages();
        callback(result.getData(0, result.getLength()));
      };

      var error = function (errorCode, errorString) {
        console.log(errorString);
        DWObject.RemoveAllImages();
        callback(false);
      };
      //1 is B&W, 8 is Gray, 24 is RGB
      if (DWObject.GetImageBitDepth(DWObject.CurrentImageIndexInBuffer) == 1) {
        DWObject.ConvertToGrayScale(DWObject.CurrentImageIndexInBuffer);
      }

      DWObject.ConvertToBase64(
        [DWObject.CurrentImageIndexInBuffer],
        Dynamsoft.DWT.EnumDWT_ImageType.IT_JPG,
        success,
        error
      );

    }
    var OnAcquireImageError = function () {
      callback(false);
    }
    DWObject.AcquireImage(OnAcquireImageSuccess, OnAcquireImageError);
  } else {
    callback(false);
  }
}
Expose Scanner Functions as HTTP API Endpoints
Next, let’s wrap the functions into HTTP API endpoints.
-
api/dwtpage/loadThis API checks whether Chrome has loaded the web page of the document scanning app and loads the page if it hasn’t.
@app.route('/api/dwtpage/load') def load(): if DWT_created == False: print("dwt loading") create_DWT() if DWT_created == True: return {"loaded":True} else: return {"loaded":False} else: return {"loaded":True} -
api/get_scanner_listThis API returns the list of scanners.
@app.route('/api/scanner/getlist') def get_scanner_list(): scanners = browser.execute_script(''' scanners = GetScannersList(); return scanners; ''') return {"scanners":scanners} -
api/scanThis API scans a document and returns the base64 result.
@app.route('/api/scan')
def scan():
    resolution = request.args.get('resolution', '300')
    selected_index = request.args.get('selectedIndex', '0')
    pixelType = request.args.get('pixelType', '0')
    js = '''
        const cb = arguments[arguments.length - 1];
        var options = {};
        options.showUI = false;
        options.resolution = '''+resolution+''';
        options.selectedIndex = '''+selected_index+''';
        options.pixelType = '''+pixelType+''';
        Scan(options,cb);
        '''
    print(js)
    result = browser.execute_async_script(js);
    print(result)
    if result != False:
        return {"success":True, "base64":result}
    else:
        return {"success":False}
Step 3: Build a Web App That Calls the Scanning API
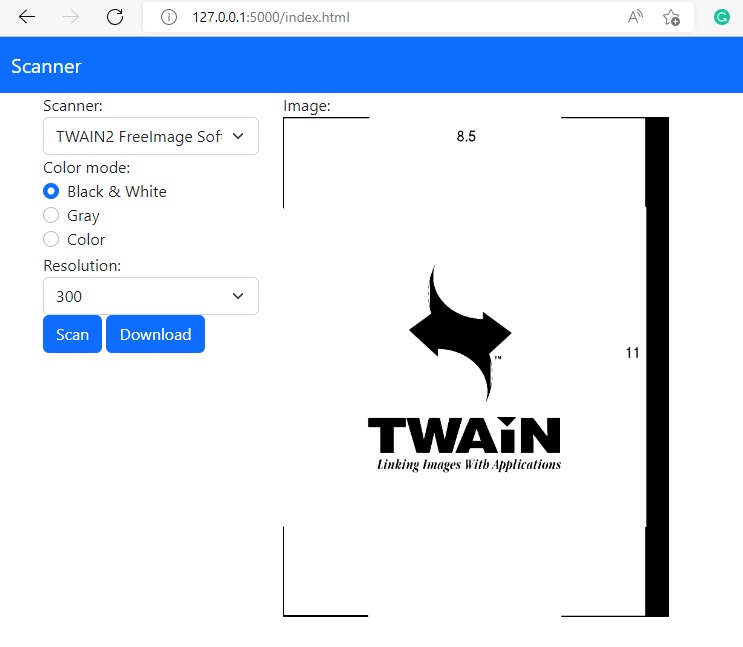
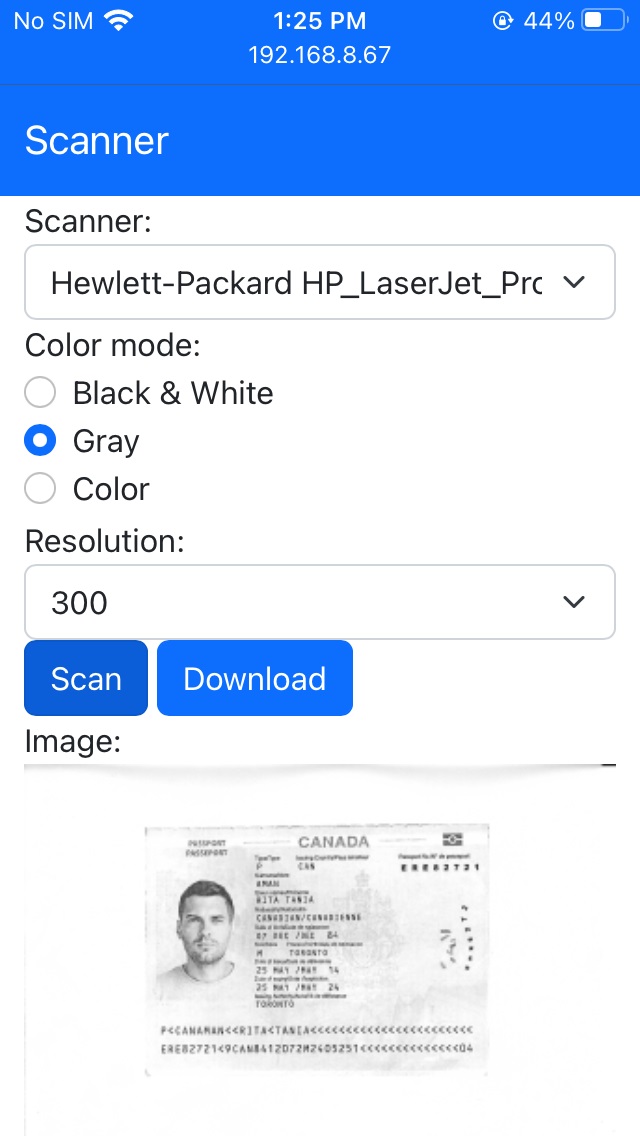
We can write a web app to call the scanning API endpoints. The final result looks like this:
On PC:
On iPhone:
Common Issues and Edge Cases
- ChromeDriver version mismatch: If Chrome updates automatically, ChromeDriver may fall out of sync and Selenium will throw a
SessionNotCreatedException. Pin your Chrome version or usewebdriver-manager(pip install webdriver-manager) to auto-download the matching driver. - Selenium timeout on scan:
execute_async_scripthas a default timeout of 30 seconds. Physical scanners can take longer depending on resolution and page count. Increase the timeout withbrowser.set_script_timeout(120)before calling the scan endpoint. - Dynamic Web TWAIN Service not running: On Linux servers, the Dynamsoft Service must be installed and running as a daemon. If the
CreateDWTObjectExcall returnsfalse, verify the service status withsystemctl status DynamsoftService.