


Read DotCode in a Browser: HTML5 JavaScript Tutorial
DotCode is two-dimensional (2D) matrix barcode mainly used in the tobacco industry with advantages like the ability to apply the barcode by high-speed industrial printers and other methods like laser engraving.
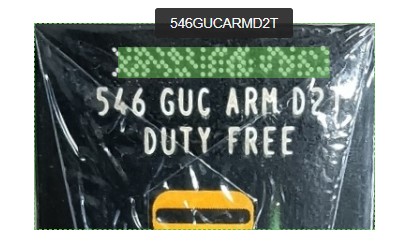
Below is a pack of cigarettes with a DotCode representing its unique identifier.

In this article, we are going to build an HTML page to scan DotCode using the JavaScript edition of Dynamsoft Barcode Reader.
What you’ll build: A browser-based DotCode scanner that reads barcodes live from a webcam or from a static image file, powered by Dynamsoft Barcode Reader’s JavaScript (WebAssembly) SDK.
Key Takeaways
- Dynamsoft Barcode Reader decodes DotCode directly in the browser via WebAssembly — no server-side processing required.
- DotCode requires the
LM_STATISTICS_MARKSlocalization mode and multi-block binarization tuning because it is a dot-matrix code, often printed inverted on cigarette packs. - The
CaptureVisionRouter+CameraEnhancerpipeline provides real-time frame capture, multi-frame result verification, and deduplication out of the box. - This implementation works on desktop and mobile browsers with camera access (Chrome, Edge, Safari).
Common Developer Questions
How do I scan DotCode barcodes from a webcam using JavaScript?
Create a browser page that opens the camera through CameraEnhancer, routes frames into CaptureVisionRouter, and loads a custom DotCode template before scanning starts. That template is the key piece that makes the webcam pipeline focus on DotCode rather than generic barcode settings.
Why is my DotCode scanner not detecting barcodes from cigarette packaging?
DotCode on cigarette packaging is often printed as inverted white-on-dark dots, which is harder for default barcode settings to localize. This sample addresses that by enabling inverted grayscale handling and using dot-matrix-friendly localization and binarization modes.
How do I configure Dynamsoft Barcode Reader to read inverted or dot-matrix barcodes in the browser?
Load a custom runtime template that sets LM_STATISTICS_MARKS, enables the DotCode format, and configures grayscale, deblur, and local block binarization modes for dot-matrix marks. Those settings are what make the browser reader handle inverted or industrially printed DotCode images.
Prerequisites
Get your trial key.
Step 1: Create the HTML Page Structure
Create a new HTML file with the following template:
<!DOCTYPE html>
<head>
  <meta charset="UTF-8">
  <meta name="viewport" content="width=device-width, initial-scale=1.0">
  <title>DotCode Scanner</title>
  <style>
  h2 {
    text-align: center;
  }

  #app {
    display: flex;
    flex-direction: column;
    align-items: center;
  }

  #cameraView {
    width: 100%;
    height: 60vh;
  }
  </style>
</head>
<html>
<body>
  <div id="app">
    <h2>DotCode Scanner</h2>
    <button id="startScanBtn">Start Scanning</button>
    <button id="readFromImageBtn">Read from an Image</button>
    <input id="fileInput" type="file" style="display:none;"/>
    <div id="status">Loading...</div>
    <div id="cameraView"></div>
    <div id="result"></div>
  </div>
</body>
</html>
Step 2: Add the Dynamsoft Barcode Reader Library
Include the Dynamsoft Barcode Reader bundle via CDN with the following script tag:
<script src="https://cdn.jsdelivr.net/npm/dynamsoft-barcode-reader-bundle@10.4.2000/dist/dbr.bundle.js"></script>
Step 3: Initialize Dynamsoft Barcode Reader
-
Initialize the license using the trial key obtained from the Prerequisites step.
Dynamsoft.License.LicenseManager.initLicense("LICENSE-KEY"); -
Load the WASM file.
Dynamsoft.Core.CoreModule.loadWasm(["dbr"]); -
Create an instance of Capture Vision Router to call Dynamsoft Barcode Reader.
let cvRouter = await Dynamsoft.CVR.CaptureVisionRouter.createInstance();
Step 4: Configure the DotCode Scanning Template
-
Create a new JSON file named
dotcode-template.jsonwith the following content. It contains the configuration to scan DotCode.{ "CaptureVisionTemplates": [ { "Name": "Dotcode", "ImageROIProcessingNameArray": [ "roi_read_dotcode" ], "Timeout": 700, "MaxParallelTasks":0 } ], "TargetROIDefOptions": [ { "Name": "roi_read_dotcode", "TaskSettingNameArray": [ "task_read_dotcode" ] } ], "BarcodeFormatSpecificationOptions": [ { "Name": "format_specification_read_dotcode", "BarcodeFormatIds": [ "BF_DOTCODE" ], "MirrorMode": "MM_BOTH" } ], "BarcodeReaderTaskSettingOptions": [ { "Name": "task_read_dotcode", "ExpectedBarcodesCount" : 1, "BarcodeFormatIds" : [ "BF_DOTCODE" ], "LocalizationModes": [ { "Mode" : "LM_STATISTICS_MARKS" } ], "DeblurModes": [ { "Mode": "DM_BASED_ON_LOC_BIN" }, { "Mode": "DM_THRESHOLD_BINARIZATION" }, { "Mode": "DM_DEEP_ANALYSIS" } ], "BarcodeFormatSpecificationNameArray": [ "format_specification_read_dotcode" ], "SectionImageParameterArray": [ { "Section": "ST_REGION_PREDETECTION", "ImageParameterName": "ip_read_dotcode" }, { "Section": "ST_BARCODE_LOCALIZATION", "ImageParameterName": "ip_read_dotcode" }, { "Section": "ST_BARCODE_DECODING", "ImageParameterName": "ip_read_dotcode" } ] } ], "ImageParameterOptions": [ { "Name": "ip_read_dotcode", "BinarizationModes": [ { "Mode": "BM_LOCAL_BLOCK", "BlockSizeX": 15, "BlockSizeY": 15, "EnableFillBinaryVacancy": 0, "ThresholdCompensation": 10 }, { "Mode": "BM_LOCAL_BLOCK", "BlockSizeX": 21, "BlockSizeY": 21, "EnableFillBinaryVacancy": 0, "ThresholdCompensation": 10, "MorphOperation":"Erode", "MorphOperationKernelSizeX":3, "MorphOperationKernelSizeY":3, "MorphShape":"Ellipse" }, { "Mode": "BM_LOCAL_BLOCK", "BlockSizeX": 35, "BlockSizeY": 35, "EnableFillBinaryVacancy": 0, "ThresholdCompensation": 10, "MorphOperation":"Erode", "MorphOperationKernelSizeX":3, "MorphOperationKernelSizeY":3, "MorphShape":"Ellipse" }, { "Mode": "BM_LOCAL_BLOCK", "BlockSizeX": 45, "BlockSizeY": 45, "EnableFillBinaryVacancy": 0, "ThresholdCompensation": 25, "MorphOperation":"Erode", "MorphOperationKernelSizeX":3, "MorphOperationKernelSizeY":3, "MorphShape":"Ellipse" } ], "GrayscaleEnhancementModes": [ { "Mode": "GEM_GENERAL" } ], "GrayscaleTransformationModes": [ { "Mode": "GTM_INVERTED" }, { "Mode": "GTM_ORIGINAL" } ] } ] }We can see that it is related to image processing. For example, the DotCode on cigarettes is often inverted, so we can set
GrayscaleTransformationModesto read the inverted image first. You can learn more about how Dynamsoft Barcode Reader handles DotCode on this page. -
Use the template file.
await cvRouter.initSettings("./dotcode-template.json"); -
Set up a scan region so that the barcode reader will only process a part of the frame. It can improve the success rate of barcode localization. The code to initialize Camera Enhancer is in the next part.
await cameraEnhancer.setScanRegion({
  x: 1,
  y: 40,
  width: 98,
  height: 20,
  isMeasuredInPercentage: true,
});
Step 5: Scan DotCode Live from the Camera
-
Initialize Camera Enhancer and bind its viewer to a container.
let cameraView = await Dynamsoft.DCE.CameraView.createInstance(); let cameraEnhancer = await Dynamsoft.DCE.CameraEnhancer.createInstance(cameraView); document.querySelector("#cameraView").append(cameraView.getUIElement()); -
Use Camera Enhancer as the input of the capture vision router so that it can fetch frames from the cameras for reading barcodes.
cvRouter.setInput(cameraEnhancer); -
Add a filter to enable multiple frames verification to make sure that the barcode result is correct and to avoid reading the same barcodes too quickly. (Optional)
let filter = new Dynamsoft.Utility.MultiFrameResultCrossFilter(); filter.enableResultCrossVerification("barcode", true); filter.enableResultDeduplication("barcode", true); await cvRouter.addResultFilter(filter); -
Add a result receiver to receive the scanning results.
cvRouter.addResultReceiver({ onDecodedBarcodesReceived: (result) => { displayResults(result); }}); function displayResults(result){ if (result.barcodeResultItems.length > 0) { let container = document.getElementById("result"); let item = result.barcodeResultItems[0]; container.innerText = `${item.formatString}: ${item.text}`; } } -
Start scanning after the scan button is clicked.
let templateName = "Dotcode"
await cameraEnhancer.open();
await cvRouter.startCapturing(templateName);
Step 6: Read DotCode from a Static Image
Apart from live scanning, we can also read DotCode in an image.
Add events for selecting an image file. After the image is selected, read the barcodes in it using the capture method.
document.getElementById("readFromImageBtn").addEventListener("click",function(){
  if (initialized) {
    document.getElementById("fileInput").click();
  }else{
    alert("Please wait for the initialization.");
  }
});
document.getElementById("fileInput").addEventListener("change",async function(){
  let files = document.getElementById("fileInput").files;
  if (files.length>0) {
    let file  = files[0];
    let result = await cvRouter.capture(file,templateName);
    displayResults(result);
  }
})
All right, we’ve finished the demo.
Common Issues & Edge Cases
- DotCode not detected on inverted (white-on-dark) prints: The default grayscale mode reads dark-on-white. Set
GrayscaleTransformationModesto includeGTM_INVERTED(already in the template above) to handle both orientations — cigarette packaging frequently uses inverted DotCode. - Low-resolution camera or blurry frames: DotCode modules are very small. The
DeblurModesarray in the template includesDM_DEEP_ANALYSISas a fallback, but ensure your camera resolution is at least 720p and that the barcode fills a reasonable portion of the scan region. - WASM load timeout on slow networks:
CoreModule.loadWasm(["dbr"])downloads several megabytes. Call it early (e.g., on page load) and show a loading indicator — do not callstartCapturinguntil the WASM is fully loaded and the router is ready.