How to Export and Import Java Documentation in Android Studio
When creating an Android library for distribution, besides the class package, source code and documentation are also needed in order to assist developers. Although Eclipse is convenient that you just need to right-click on the project and choose export to generate Javadoc and JAR file, more and more Android developer gets started to use Android Studio instead of Eclipse ADT. In this tutorial, l will show you how to pack and attach Java documentation and source code in Android Studio from scratch.
Building Android and Java Library with Gradle
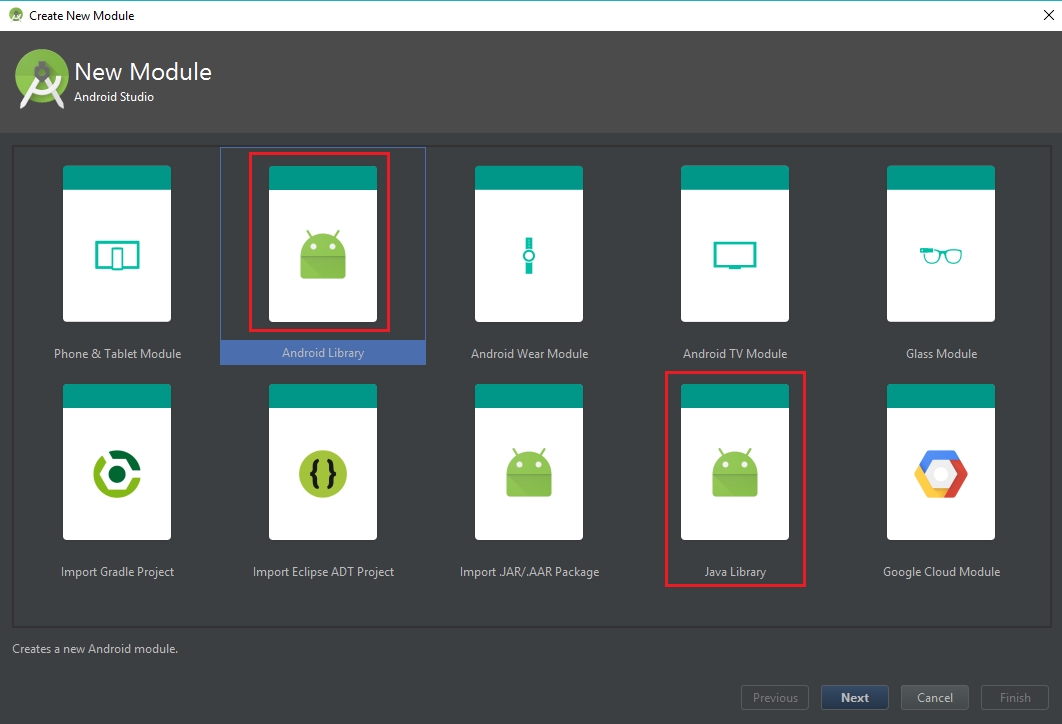
To create a library, open Android Studio and click File > New Module. There are two options: Android Library and Java Library:
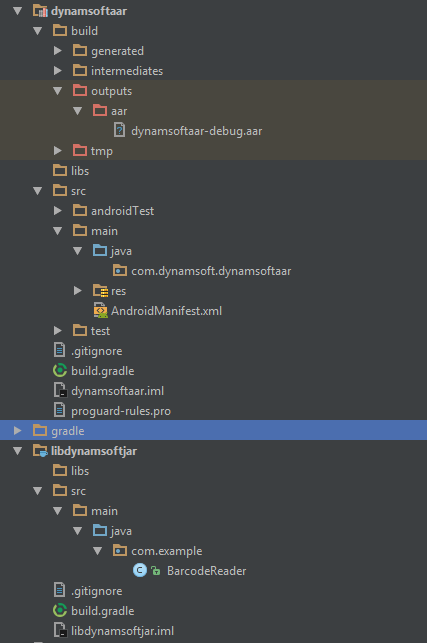
Android Library will generate AAR File whereas Java Library will generate JAR file. AAR includes more resource than JAR. Especially if you want to distribute both *.so and *.jar, AAR is a better choice. See the structure difference between the two modules:
You may have noticed that Android Studio can trigger auto-build for AAR but not for JAR. Android Studio integrates Gradle as the building tool. We need to take a further step to see how Gradle works.
Generating Java Documentation and Source Code in Android Studio
Javadoc
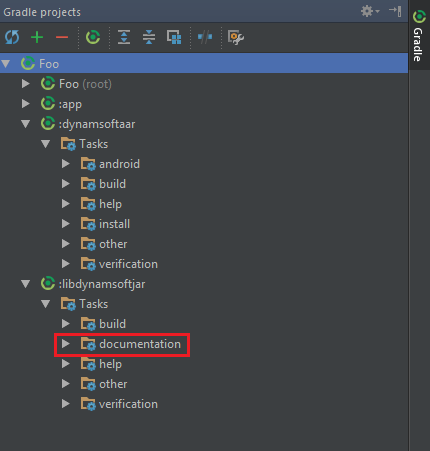
Open Gradle panel, you will see all available tasks:
The tasks are related to Gradle plugin and tasks written in build.gradle.
The plugin for Android:
apply plugin: 'com.android.library'
The plugin for Java:
apply plugin: 'java'
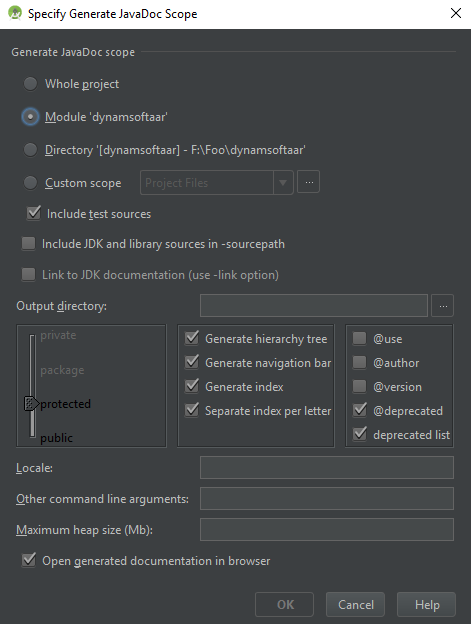
We can choose task build to generate AAR and JAR files. I’m using Gradle plugin for Android 2.2.0-alpha1, which does not support generating Java documentation. To generate Javadoc for AAR, select the library project and click menu Tools > Generate JavaDoc:
Specify the output directory to generate Java documentation.
What about source code?
Since there is no pre-built task for packaging source code, we can make sources.jar ourselves. Add the following code to the build.gradle files of JAR and AAR modules:
apply plugin: 'java'

task generateSources(type: Jar) {
    baseName = 'sources'
    from sourceSets.main.java.srcDirs
}
apply plugin: 'com.android.library'
task generateSources (type: Jar) {
    classifier = 'sources'
    from android.sourceSets.main.java.srcDirs
}

artifacts {
    archives generateSources
}
After triggering the task, sources.jar will be generated under build\libs.
How to Attach Javadoc to Dependent Libraries
JAR
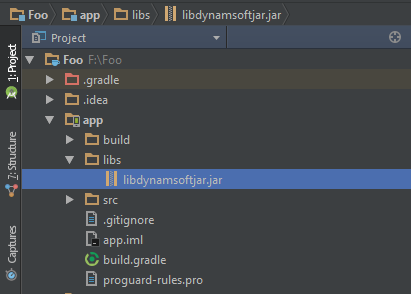
Copy the JAR file into folder libs.
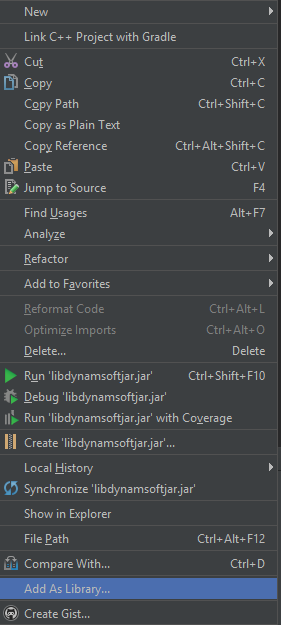
Right-click it to pop up the context menu, and then select Add As Library:
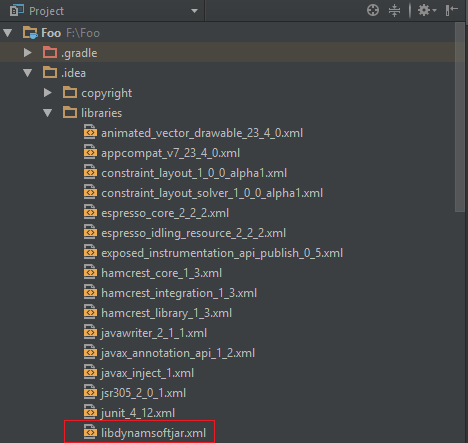
The library will be automatically added to build.gradle > dependencies. In the meantime, there is an XML file libdynamsoftjar.xml generated under {Project}.idea\libraries:
Here is the file content:
<component name="libraryTable">
  <library name="libdynamsoftjar">
    <CLASSES>
      <root url="jar://$PROJECT_DIR$/app/libs/libdynamsoftjar.jar!/" />
    </CLASSES>
    <JAVADOC />
    <SOURCES />
  </library>
</component>
Specify the paths of Javadoc and source code. Switch to Java code and press Ctrl + Q to see Java documentation.
AAR
The way of attaching Java documentation for AAR is similar.
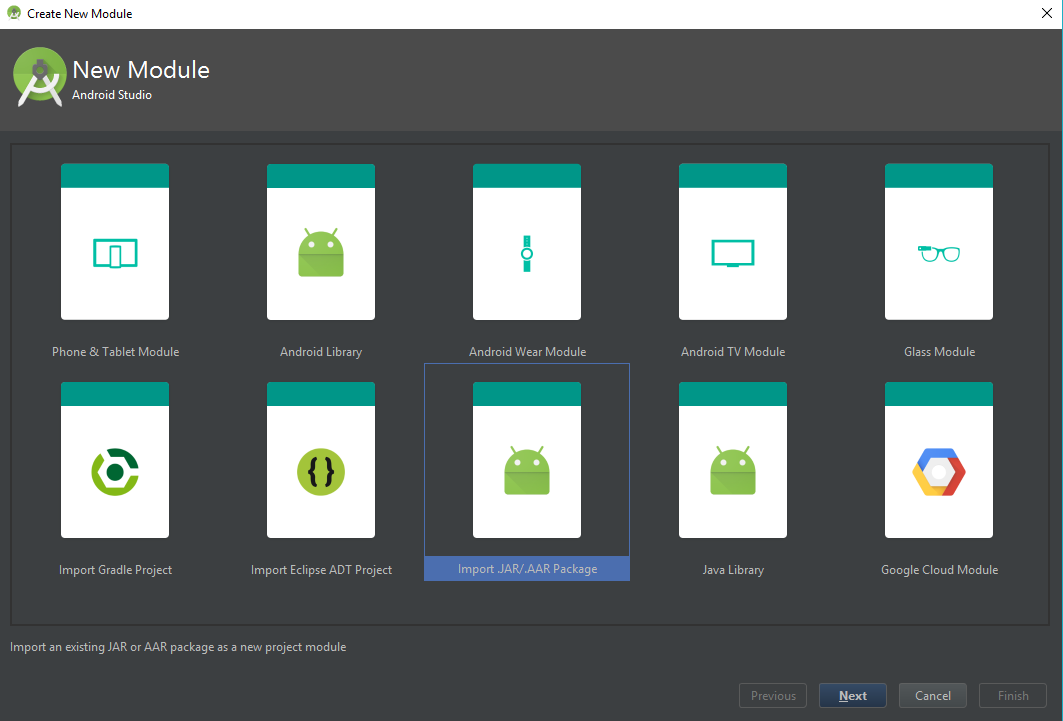
Create a new module to import AAR file:
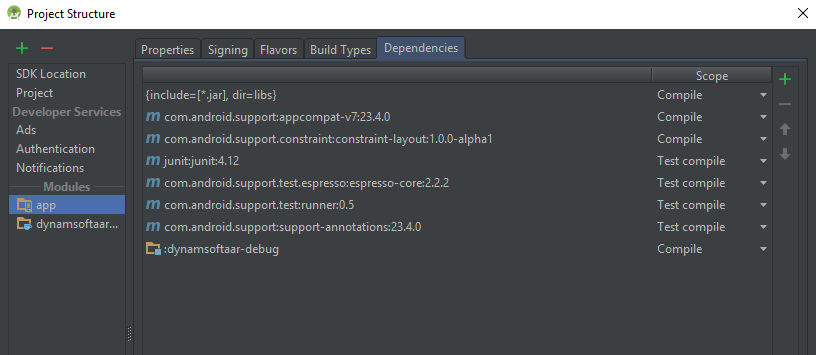
Assume its name is dynamsoftaar-debug.aar. Press Ctrl+Shift+Alt+S to open project setting. Add the dependent module:
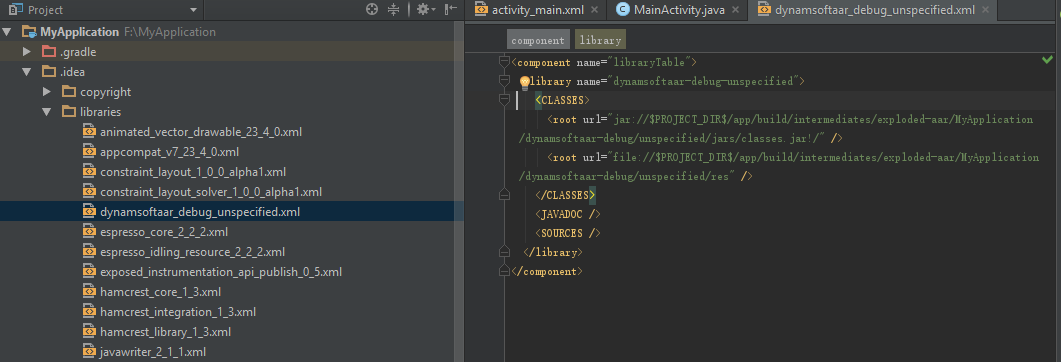
An XML file dynamsoftaar_debug_unspecified.xml will be automatically generated:
Edit the file to add the paths of Javadoc and sources.


