Ruby on Rails: Load, Scan and Upload Files with Dynamic Web TWAIN
Have you ever thought about how to create a Web document scanning application using Ruby on Rails? In this tutorial, we go through how to create a Rails project with Dynamic Web TWAIN (DWT) SDK for loading, scanning and uploading document files.
Installation
- Dynamic Web TWAIN 17.0
-
Ruby 2.5.1
sudo apt install ruby-full -
Sqlite3 3.22.0
sudo apt install sqlite -
Rails 6.1.3.2
gem install rails
Getting Started with a New Rails Project
Since Rails comes with generators, it is convenient to generate the skeleton of a Rails project:
rails new dwt
It takes a bit of time to download dependencies. Afterwards, we start the web server:
cd dwt
bin/rails server
=> Booting Puma
=> Rails 6.1.3.2 application starting in development
=> Run `bin/rails server --help` for more startup options
Puma starting in single mode...
* Puma version: 5.3.2 (ruby 2.5.1-p57) ("Sweetnighter")
*  Min threads: 5
*  Max threads: 5
*  Environment: development
*          PID: 25305
* Listening on http://127.0.0.1:3000
* Listening on http://[::1]:3000
Use Ctrl-C to stop
If there is no error, the default page should be loaded as you open http://localhost:3000 in a web browser.
Integrating Dynamic Web TWAIN into Ruby on Rails Project
To develop web document scanning and management applications, we choose Dynamic Web TWAIN - the world’s top document scanning SDK.
First, we copy Resources folder from < Dynamic Web TWAIN installation directory > to public folder.
Then we create a controller for rendering the homepage:
rails generate controller twainscanning home
The above command generates a app/views/twainscanning/home.html.erb file for embedding HTML5 code.
For implementing the basic document scanning function, we can refer to the hello world sample code provided by Dynamsoft. However, you may get the ActionController::InvalidAuthenticityToken exception error when you try to upload files. The workaround is to add CSRF token to the form sent by XMLHttpReqeust.
<head>
  <%= csrf_meta_tags %>
</head>

<script type="text/javascript">
    DWObject.SetHTTPFormField('authenticity_token', document.querySelector("meta[name='csrf-token']").getAttribute('content'));

    DWObject.HTTPUploadThroughPostEx(
      strHostIP,
      DWObject.CurrentImageIndexInBuffer,
      strActionPage,
      date.getTime() + ".jpg",
      1, // JPEG
      OnSuccess, OnFailure
    );
</script>
Here is the full client-side code:
<html>
<head>
  <title>DWT with Ruby</title>
  <script type="text/javascript" src="Resources/dynamsoft.webtwain.initiate.js"></script>
  <script type="text/javascript" src="Resources/dynamsoft.webtwain.config.js"></script>
  <%= csrf_meta_tags %>
</head>

<body>
  <div id="dwtcontrolContainer"></div>
  <input type="button" value="Load Image" onclick="btnLoad_onclick();" />
  <input type="button" value="Scan Image" onclick="AcquireImage();" />
  <input id="btnUpload" type="button" value="Upload Image" onclick="btnUpload_onclick()">

  <script type="text/javascript">
    Dynamsoft.WebTwainEnv.RegisterEvent('OnWebTwainReady', Dynamsoft_OnReady);
    var DWObject;
    function Dynamsoft_OnReady() {
      DWObject = Dynamsoft.WebTwainEnv.GetWebTwain('dwtcontrolContainer');
      DWObject.Width = 480;
      DWObject.Height = 640;
    }

    function btnLoad_onclick() {
      var OnSuccess = function() {};
      var OnFailure = function(errorCode, errorString) {};
      DWObject.IfShowFileDialog = true;
      DWObject.LoadImageEx("", EnumDWT_ImageType.IT_ALL, OnSuccess, OnFailure);
    }

    function AcquireImage() {
      if (DWObject) {
        DWObject.IfShowUI = false;
        DWObject.IfDisableSourceAfterAcquire = true;
        DWObject.SelectSource();
        DWObject.OpenSource();
        DWObject.AcquireImage();
      }
    }

    function btnUpload_onclick() {
      DWObject.HTTPPort = 3000;
      var CurrentPathName = unescape(location.pathname);
      var CurrentPath = CurrentPathName.substring(0, CurrentPathName.lastIndexOf("/") + 1);
      var strActionPage = CurrentPath + "upload/";
      var strHostIP = "localhost";
      var OnSuccess = function(httpResponse) {
        alert("Succesfully uploaded");
      };

      var OnFailure = function(errorCode, errorString, httpResponse) {
        alert(httpResponse);
      };

      var date = new Date();
      DWObject.SetHTTPFormField('authenticity_token', document.querySelector("meta[name='csrf-token']").getAttribute('content'));
      DWObject.HTTPUploadThroughPostEx(
        strHostIP,
        DWObject.CurrentImageIndexInBuffer,
        strActionPage,
        date.getTime() + ".jpg",
        1, // JPEG
        OnSuccess, OnFailure
      );
    }

  </script>
</body>
</html>
Now, we define the homepage and the upload action page in config/routes.rb file:
Rails.application.routes.draw do
  get 'twainscanning/home'
  root 'twainscanning#home'
  post 'upload/' => 'twainscanning#upload'
end
The following code in app/controller/twainscanning_controller.rb shows how to save the uploaded images on the server-side:
class TwainscanningController < ApplicationController
  def home
  end

  def upload
    uploaded_io = params[:RemoteFile]

    upload_dir = Rails.root.join('public', 'upload')
    unless Dir.exist?(upload_dir)
      Dir.mkdir(upload_dir)
    end

    File.open(Rails.root.join('public', 'upload', uploaded_io.original_filename), 'wb') do |file|
      file.write(uploaded_io.read)
    end
  end
end
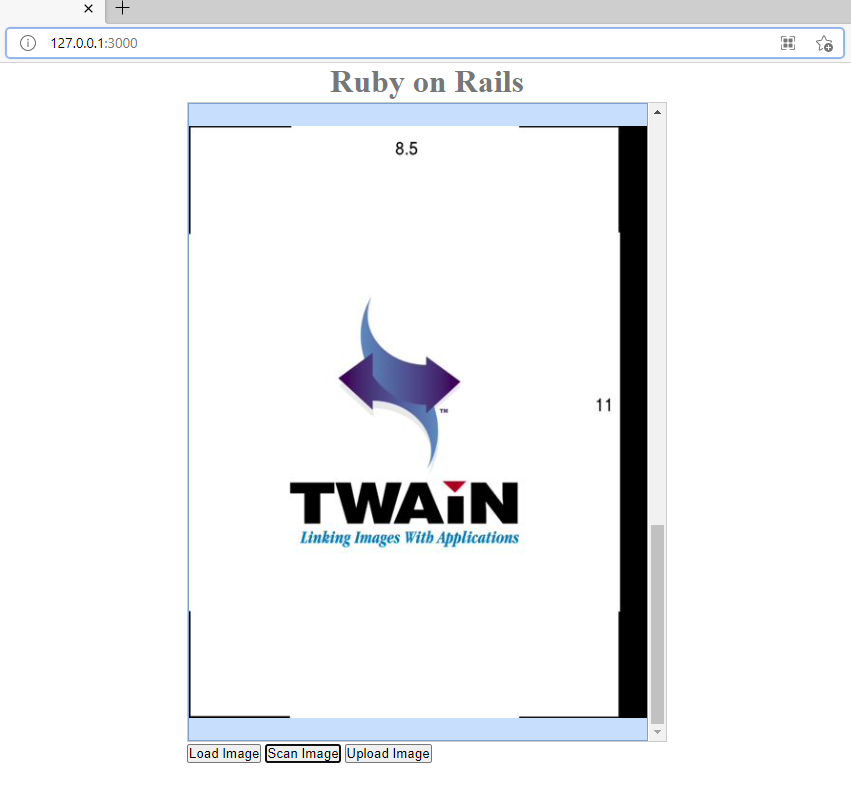
So far, the integration of Dynamic Web TWAIN is done. We can refresh the page to load, scan and upload image files:

Source Code
https://github.com/yushulx/web-twain-document-scan-management/tree/main/examples/ruby_rails


