How to customize viewer
Altough DDV has provided the default ViewerConfig for each type of viewer, developer can also customize it as needed.
ViewerConfig contains two parts of configuration, one is the configuration on the viewer style and the other is the configuration on the viewer properties.
Viewer Style
Customize styles while creating a viewer
Take the edit viewer as an example, according to the structure EditViewerConfig, there are three styles which can be configured, canvasStyle, pageStyle and quadSelectionStyle.
Use case
Customize pageStyle while creating an edit viewer.
- Step one: Create a
BaseStyleobject which meets the page style you want.const newPageStyle = { border: "2px dashed red", background: "grey", }; - Step two: Create the customized viewer config.
const newViewerConfig = { pageStyle: newPageStyle, }; - Step three: Configure the customized viewer config while creating the edit viewer.
 const editViewer = new Dynamsoft.DDV.EditViewer({
     container: "viewer",
     viewerConfig: newViewerConfig,
 });
Please notice that only the customized style will be modified, and the remaining styles will remain in their default state.
Update styles dynamically
Besides customize the initial viewer style, DDV also allows update the styles dynamically after the viewer is created by using getStyle() & updateStyle().
Use case
Update the CanvasStyle after the edit viewer is created.
const editViewer = new Dynamsoft.DDV.EditViewer({
    container: "viewer",
});

const newCanvasStyle = editViewer.getStyle("canvasStyle");
newCanvasStyle.border = "2px dashed green";
newCanvasStyle.background = "white";
newCanvasStyle.cursor = "pointer";

editViewer.updateStyle("canvasStyle", newCanvasStyle);
Viewer Properties
Some properties can also customized, for example, the values of minZoom and maxZoom can be customized for a edit viewer.
Use case
Customize the minZoom and maxZoom while creating an edit viewer.
const newViewerConfig = {
    minZoom: 0.1, // Set the minimum zoom value to 10%
    maxZoom: 32,  // Set the maximum zoom value to 3200%
};

const editViewer = new Dynamsoft.DDV.EditViewer({
    container: "viewer",
    viewerConfig: newViewerConfig,
});
Please notice that only the customized properties will be modified, and the remaining properties will remain in their default state.
Annotation related properties(Edit Viewer-specific)
The related properties of the drawn annotations are determined by the attributes annotationConfig provided when creating the Edit Viewer.
Default annotation style
Set a basic style for all annotation types uniformly,
const baseAnnotationStyle = {
    borderColor: "blue",
};

const newDefaultStyleConfig = {
    rectangle: { ...baseAnnotationStyle,},
    ellipse: { ...baseAnnotationStyle,},
    polygon: { ...baseAnnotationStyle,},
    polyline: { ...baseAnnotationStyle,},
    line: { ...baseAnnotationStyle,},
    ink: { ...baseAnnotationStyle,},
    textBox: { ...baseAnnotationStyle,},
};

const newAnnotationConfig = {
    defaultStyleConfig: newDefaultStyleConfig,
};

const defaultEditUi = Dynamsoft.DDV.getDefaultUiConfig("editViewer");

const editViewer = new Dynamsoft.DDV.EditViewer({
    container: "viewer",
    uiConfig: defaultEditUi,
    annotationConfig: newAnnotationConfig,
});
If you want to specify the default style for a certain annotation type, taking the rectangle annotation type as an example,
const baseAnnotationStyle = {
    borderColor: "blue",
};

const newDefaultStyleConfig = {
    rectangle: { borderColor: "green",},
    ellipse: { ...baseAnnotationStyle,},
    polygon: { ...baseAnnotationStyle,},
    polyline: { ...baseAnnotationStyle,},
    line: { ...baseAnnotationStyle,},
    ink: { ...baseAnnotationStyle,},
    textBox: { ...baseAnnotationStyle,},
};

const newAnnotationConfig = {
    defaultStyleConfig: newDefaultStyleConfig,

};

const defaultEditUi = Dynamsoft.DDV.getDefaultUiConfig("editViewer");

const editViewer = new Dynamsoft.DDV.EditViewer({
    container: "viewer",
    uiConfig: defaultEditUi,
    annotationConfig: newAnnotationConfig,
});
This way, the default style of the rectangle annotation will be based on the settings specified for rectangle, while the styles of other annotation types will still be based on the baseAnnotationStyle. Of course, it’s possible to specify default values for each type of annotation.
Ink creation delay
When creating an Ink annotation using Edit Viewer UI, intentional delay is applied to allow users to create a multi-stroke annotation. Strokes within a brief delay are considered part of the same annotation. Beyond the delay, strokes are treated as separate annotations.

The duration of this delay can be adjusted using the inkCreateDelay attribute, which defaults to 1000ms.
const newAnnotationConfig = {
    inkCreateDelay: 2000, // Set to 2000ms
};

const defaultEditUi = Dynamsoft.DDV.getDefaultUiConfig("editViewer");

const editViewer = new Dynamsoft.DDV.EditViewer({
    container: "viewer",
    uiConfig: defaultEditUi,
    annotationConfig: newAnnotationConfig,
});
Display the selected annotation on top of others
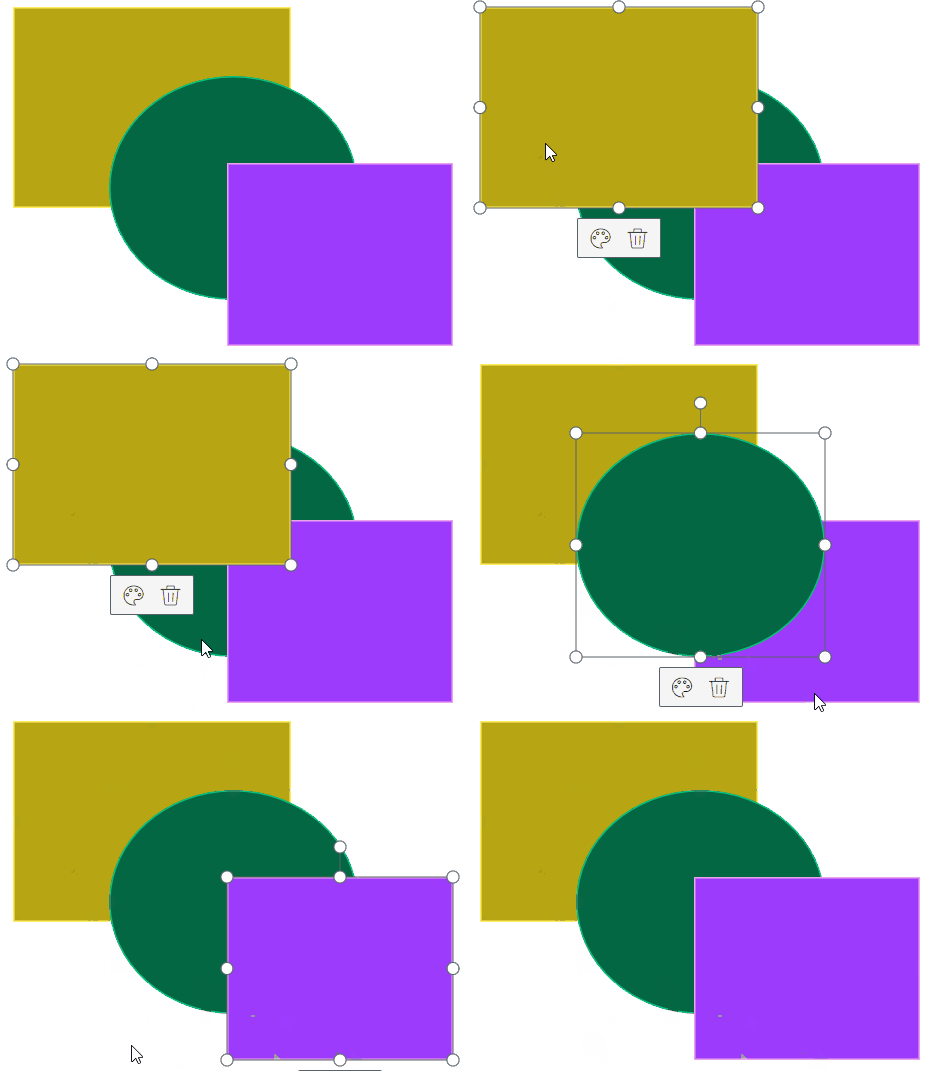
By default, when an annotation is selected, it remains displayed on its original layer.
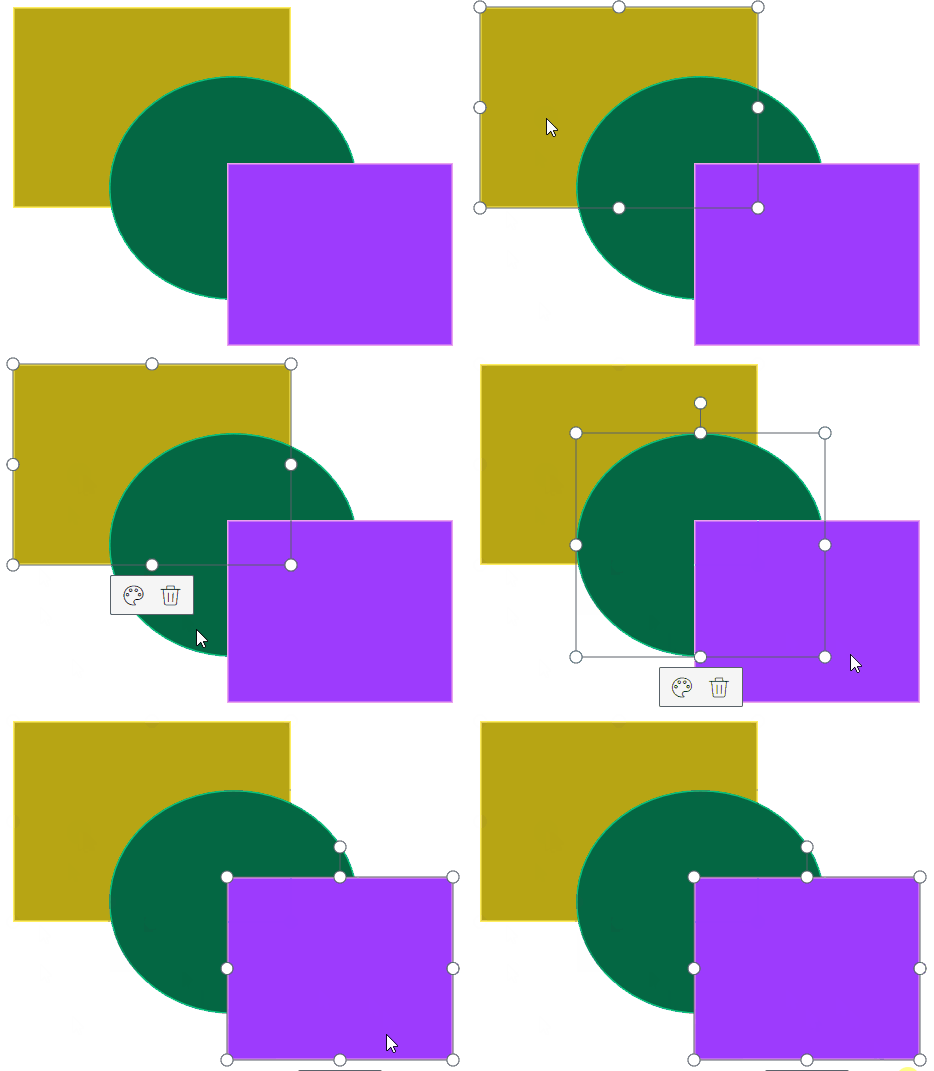
By setting showOnTopWhenSelected to true, you can configure the selected annotation to be displayed on top.
const newAnnotationConfig = {
    showOnTopWhenSelected: true,
};

const defaultEditUi = Dynamsoft.DDV.getDefaultUiConfig("editViewer");

const editViewer = new Dynamsoft.DDV.EditViewer({
    container: "viewer",
    uiConfig: defaultEditUi,
    annotationConfig: newAnnotationConfig,
});
Annotation selection style
Default annotation selection:
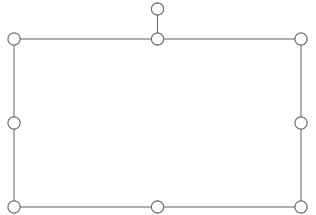
Customize the selection style of annotation configuring annotationSelectionStyle. For example,
const newAnnotationSelectionStyle = {
    border: "2px dashed red", // Customize the border of selection
};

const newAnnotationConfig = {
    annotationSelectionStyle: newAnnotationSelectionStyle,
};

const defaultEditUi = Dynamsoft.DDV.getDefaultUiConfig("editViewer");

const editViewer = new Dynamsoft.DDV.EditViewer({
    container: "viewer",
    uiConfig: defaultEditUi,
    annotationConfig: newAnnotationConfig,
});
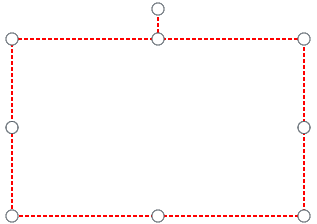
It’s worth noting that annotationSelectionStyle can also be customized dynamically using getStyle() & updateStyle() after the edit viewer is created.
Toolbar of annnotation
The toolbar for the annotation appears when it is selected.
Default toolbar: 
And currently, the customizable contents are as follows:
- Style of the toolbar, such as width, height, background and so on
- Palette button
- Delete button
It can be customized by the attribute toolbarConfig.
Use cases
-
Change the width, height and background of the toolbar
  const newToolbar = {
      style: {
          width: "100px",
          height: "50px",
          background: "silver",
      },
  };

  const newAnnotationConfig = {
      toolbarConfig: newToolbar,
  };

  const defaultEditUi = Dynamsoft.DDV.getDefaultUiConfig("editViewer");

  const editViewer = new Dynamsoft.DDV.EditViewer({
      container: "viewer",
      uiConfig: defaultEditUi,
      annotationConfig: newAnnotationConfig,
  });
-
Add tooltip to delete button
  const newToolbar = {
      deleteButton: {
          tooltip: "Delete Annotation",
      },
  };

  const newAnnotationConfig = {
      toolbarConfig: newToolbar,
  };

  const defaultEditUi = Dynamsoft.DDV.getDefaultUiConfig("editViewer");

  const editViewer = new Dynamsoft.DDV.EditViewer({
      container: "viewer",
      uiConfig: defaultEditUi,
      annotationConfig: newAnnotationConfig,
  });
-
Add display text to palette and delete buttons
In order to show the whole display text, the width of toolbar is also required to change.
  const newToolbar = {
      style: {
          width: "150px",
      },
      paletteButton: {
          displayText: "Edit",
      },
      deleteButton: {
          displayText: "Delete",
      },
  };

  const newAnnotationConfig = {
      toolbarConfig: newToolbar,
  };

  const defaultEditUi = Dynamsoft.DDV.getDefaultUiConfig("editViewer");

  const editViewer = new Dynamsoft.DDV.EditViewer({
      container: "viewer",
      uiConfig: defaultEditUi,
      annotationConfig: newAnnotationConfig,
  });
-
Hide delete button
  const newToolbar = {
      deleteButton: {
          style: {
              display: "none",
          },
      },
  };

  const newAnnotationConfig = {
      toolbarConfig: newToolbar,
  };

  const defaultEditUi = Dynamsoft.DDV.getDefaultUiConfig("editViewer");

  const editViewer = new Dynamsoft.DDV.EditViewer({
      container: "viewer",
      uiConfig: defaultEditUi,
      annotationConfig: newAnnotationConfig,
  });
-
Hide toolbar
const newToolbar = { style: { visibility: "hidden", }, }; const newAnnotationConfig = { toolbarConfig: newToolbar, }; const defaultEditUi = Dynamsoft.DDV.getDefaultUiConfig("editViewer"); const editViewer = new Dynamsoft.DDV.EditViewer({ container: "viewer", uiConfig: defaultEditUi, annotationConfig: newAnnotationConfig, }); -
Swap the order of palette button and delete button
By default, the palette button is positioned in front of the delete button. If you wish to swap the order of the two buttons, you can refer to the following code:
  const newToolbar = {
      paletteButton: {
          style:{
              order: 1,
          },
      },
      deleteButton: {
          style: {
              order: 0,
          },
      },
  };

  const newAnnotationConfig = {
      toolbarConfig: newToolbar,
  };

  const defaultEditUi = Dynamsoft.DDV.getDefaultUiConfig("editViewer");

  const editViewer = new Dynamsoft.DDV.EditViewer({
      container: "viewer",
      uiConfig: defaultEditUi,
      annotationConfig: newAnnotationConfig,
  });
Palette of annotation
Clicking on the relevant built-in elements or clicking the palette button on the toolbar will bring up the corresponding palette.
Default palette:
| Annotation relevant built-in elements | Initial palette before drawing | Clicking palette button on toolbar |
|---|---|---|
| Rectangle/Ellipse/Polygon | 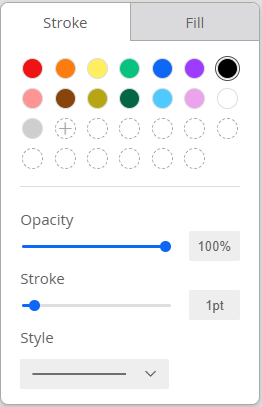 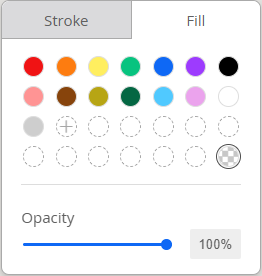 |
Same as initial palette |
| Line/Polyline | 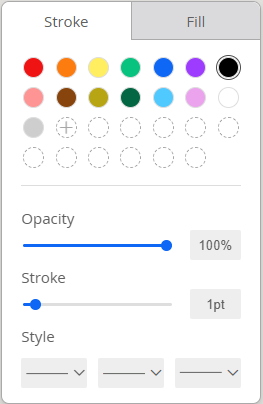 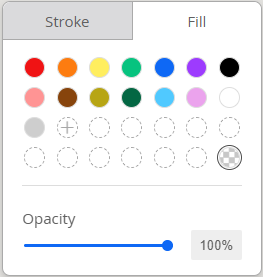 |
Same as initial palette |
| TextBox | 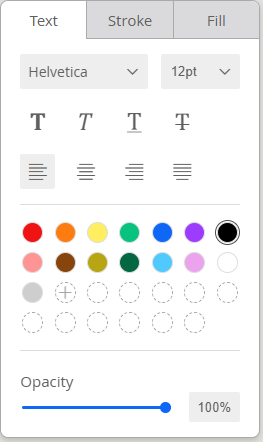 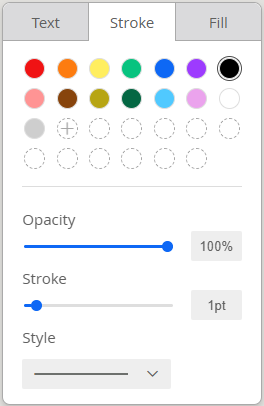 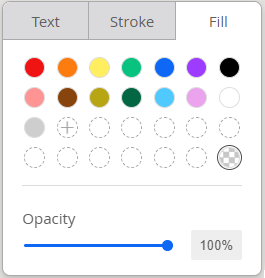 |
Same as initial palette |
| TextTypewriter | 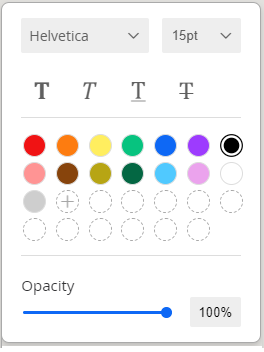 |
Same as initial palette |
| Stamp Icon | ||
| Highlight/Strikeout/Underline | 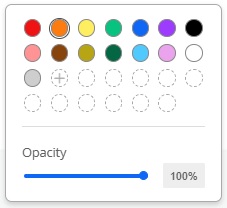 |
Same as initial palette |
| Image | N/A |  |
Currently, the customizable contents are as follows:
- Style of the palette, such as width, height, background and so on
- Color list on the palette
- Display text on the palette
It can be customized by the attribute paletteConfig.
Use cases
-
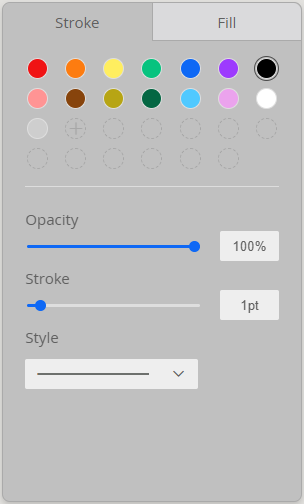
Change the width, height and background of the palette
  const newPalette = {
      style: {
          width: "300px",
          height: "500px",
          background: "silver",
      },
  };

  const newAnnotationConfig = {
      paletteConfig: newPalette,
  };

  const defaultEditUi = Dynamsoft.DDV.getDefaultUiConfig("editViewer");

  const editViewer = new Dynamsoft.DDV.EditViewer({
      container: "viewer",
      uiConfig: defaultEditUi,
      annotationConfig: newAnnotationConfig,
  });
-
Customize the color list
  const newColorList = ["red", "green", "#0000ff", "#ffff00" , "rgb(0, 0, 0)", "rgb(128, 128, 128)", "hsl(0, 0%, 100%)", "hsl(350, 100%, 88%)"];

  const newAnnotationConfig = {
      paletteConfig: {
          colorList: newColorList,
      },
  };

  const defaultEditUi = Dynamsoft.DDV.getDefaultUiConfig("editViewer");

  const editViewer = new Dynamsoft.DDV.EditViewer({
      container: "viewer",
      uiConfig: defaultEditUi,
      annotationConfig: newAnnotationConfig,
  });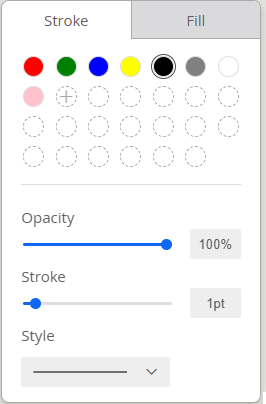
- The palette’s UI defaults to presenting 27 color circles for display. Consequently, only the first 27 values within the
colorListarray can be utilized and will appear in the UI in a sequential manner. The remaining values in the array will be disregarded. - If the number of values in the
colorListarray are less than 27, after applying the values configured in the array, the remaining color circles will be replaced by custom color circles. - Besides customizing the color list via programming, custom color circles can be set to a specified color by clicking on the circle via the user interface. Similarly, for color circles, the color can be modified by double-clicking on them through the user interface.
- Behind 27 the color circles and custom color circles in Fill tab, there is a no fill circle.
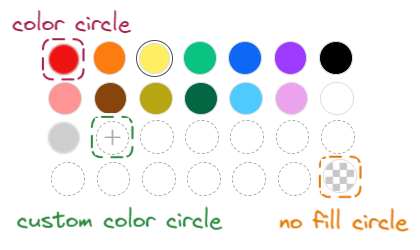
- The palette’s UI defaults to presenting 27 color circles for display. Consequently, only the first 27 values within the
-
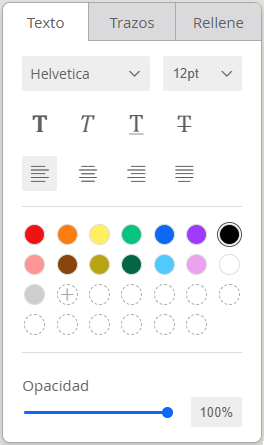
Change the display text on the palette to another language, such as Spanish
  const spanishText = {
      text: "Texto",
      stroke: "Trazos",
      fill: "Rellene",
      opacity: "Opacidad",
      style: "Estilo",
      standardBusiness: "NegocioEstándar",
  };

  const newAnnotationConfig = {
      paletteConfig: {
          labels: spanishText,
      },
  };

  const defaultEditUi = Dynamsoft.DDV.getDefaultUiConfig("editViewer");

  const editViewer = new Dynamsoft.DDV.EditViewer({
      container: "viewer",
      uiConfig: defaultEditUi,
      annotationConfig: newAnnotationConfig,
  });