


How to Build a Cross-Platform Document Scanner with Electron and Dynamic Web TWAIN
Electron is a framework for building cross-platform desktop applications with HTML, JavaScript, and CSS. Since Dynamic Web TWAIN is also a cross-platform JavaScript library for document scanning and management, we can combine Electron and Dynamic Web TWAIN to implement a desktop document scanning and management application for Windows, Linux, and macOS.
What you’ll build: A cross-platform desktop document scanning and management app using Electron and the Dynamic Web TWAIN SDK that can acquire images from TWAIN/eSCL scanners and save them as PDF, TIFF, or JPEG on Windows, Linux, and macOS.
Key Takeaways
- Electron combined with Dynamic Web TWAIN provides a single JavaScript codebase for desktop document scanning on Windows, Linux, and macOS.
- The Dynamic Web TWAIN SDK discovers TWAIN, TWAIN x64, and eSCL scanners via
GetDevicesAsyncand acquires images asynchronously withAcquireImageAsync. - The Electron app can be packaged with
asarand distributed using prebuilt Electron binaries — no native compilation required. - Scanned documents can be saved as multi-page PDF, multi-page TIFF, or single-page JPEG directly from the SDK’s built-in viewer.
Common Developer Questions
How do I build a cross-platform document scanner desktop app with Electron?
Start from electron-quick-start, load your HTML scanner page in the renderer, and initialize Dynamic Web TWAIN there just as you would in a browser app. Electron gives you the desktop shell, while DWT still handles device discovery, acquisition, and file export inside the web layer.
How do I integrate TWAIN scanning into an Electron application on Windows, Linux, and macOS?
Call GetDevicesAsync() with the TWAIN and eSCL device flags, populate a scanner selector from the returned device list, then run SelectDeviceAsync(), OpenSourceAsync(), and AcquireImageAsync() when the user starts scanning. That async pipeline keeps the renderer responsive across Windows, Linux, and macOS.
How do I save scanned documents as PDF or TIFF in an Electron app using Dynamic Web TWAIN?
Use the built-in save APIs on the active WebTwain object after pages are in the buffer. The same viewer state can be exported as multi-page PDF, multi-page TIFF, or individual JPEG without adding a separate native desktop file pipeline.
Prerequisites
- Get a 30-day free trial license for Dynamic Web TWAIN
Install Electron and the Dynamic Web TWAIN SDK
npm install -g electron
npm install dwt
References
Build a Desktop Document Scanner with Electron and Dynamic Web TWAIN
Step 1: Set Up an Electron Project from the Quick Start Template
Let’s get started with electron-quick-start:
git clone https://github.com/electron/electron-quick-start
cd electron-quick-start
npm install
npm start
Here is the basic structure of an Electron project:
app/

├── package.json

├── main.js

└── index.html
The main.js file is the entry point of Electron, defined in the package.json file:
"main": "main.js",
"scripts": {
    "start": "electron main.js"
},
The index.html file is loaded in the main.js file:
mainWindow.loadURL('file://' + __dirname + '/index.htm');
// or
mainWindow.loadFile('index.html');
Although the default code works fine, if you want to make the window bigger and resizable, you can change the code:
mainWindow = new BrowserWindow({ width: 1024, height: 1024, resizable: true });
Step 2: Include the Dynamic Web TWAIN JavaScript Library
To implement document scanning and document management, we just need to put some effort into the HTML5 code in index.html. There is no difference compared to building a web application.
The JavaScript library files of Dynamic Web TWAIN are located in the node_modules folder. We can include the library in the HTML file:
<head>
    <meta http-equiv="Content-Type" content="text/html; charset=utf-8" />
    <title>Document Scanner</title>
    <script src="node_modules/dwt/dist/dynamsoft.webtwain.min.js"></script>
</head>
To make the SDK work, you must set the product key and specify the path of the resources:
Dynamsoft.DWT.ProductKey = 'LICENSE-KEY';
Dynamsoft.DWT.ResourcesPath = "node_modules/dwt/dist/";
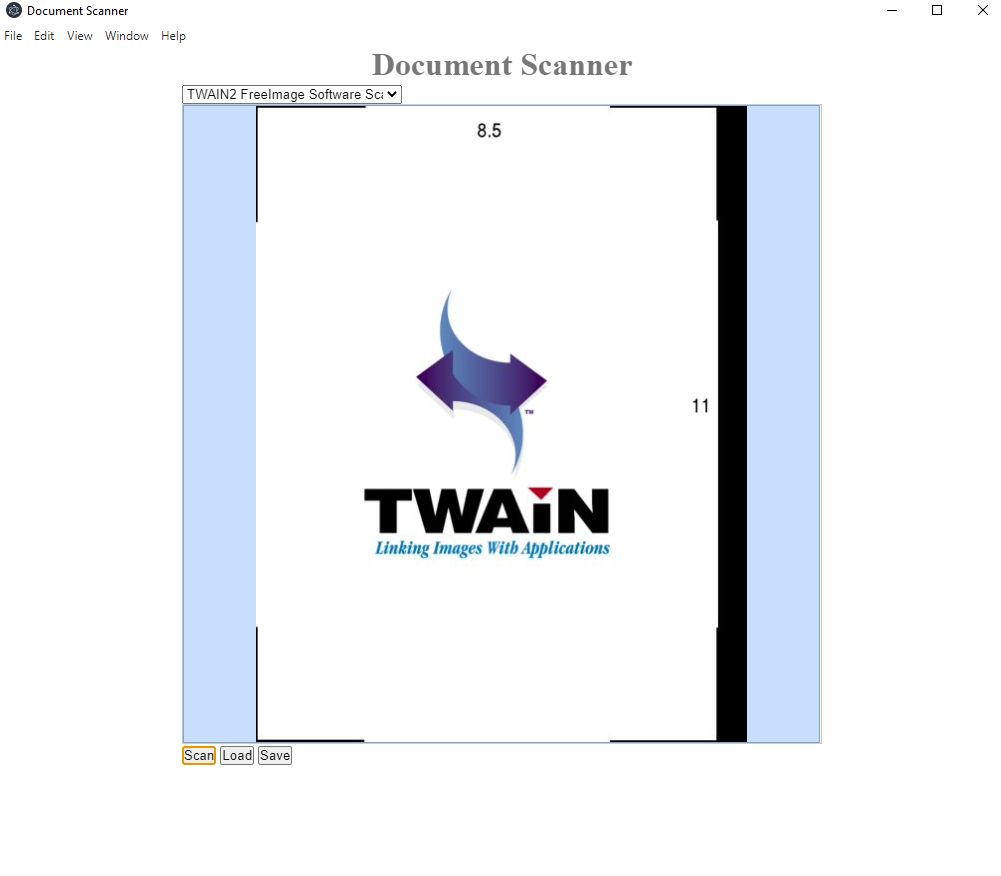
Step 3: Add Scanner Selection and Image Controls to the UI
Create a select element for selecting connected document scanners, a div element as the document image container, and three buttons for scanning, loading, and saving images:
<select size="1" id="source"></select>
<div id="dwtcontrolContainer"></div>
<input type="button" value="Scan" onclick="scanImage();" />
<input type="button" value="Load" onclick="loadImage();" />
<div class="row">
    <label style="font-size: x-large;">
        <input type="radio" value="jpg" name="ImageType" id="imgTypejpeg" />JPEG</label>
    <label style="font-size: x-large;">
        <input type="radio" value="tif" name="ImageType" id="imgTypetiff" />TIFF</label>
    <label style="font-size: x-large;">
        <input type="radio" value="pdf" name="ImageType" id="imgTypepdf" checked="checked" />PDF</label>
    <input type="button" value="Save" onclick="saveImage();" />
</div>
The radio buttons are used to select the image format for saving. The default format is PDF.
Step 4: Implement Document Scan, Load, and Save Functions
The following JavaScript code implementation includes the initialization of the Dynamic Web TWAIN object and the corresponding button events:
var dwtObject;

var selectSources = document.getElementById("source");

Dynamsoft.DWT.CreateDWTObjectEx({ "WebTwainId": "container" }, (obj) => {
    dwtObject = obj;

    dwtObject.Viewer.bind(document.getElementById("dwtcontrolContainer"));
    dwtObject.Viewer.width = 640;
    dwtObject.Viewer.height = 640;
    dwtObject.Viewer.show();
    onReady();
}, (errorString) => {
    console.log(errorString);
});

function onReady() {
    if (dwtObject) {
        dwtObject.IfShowUI = false;
        dwtObject.GetDevicesAsync(Dynamsoft.DWT.EnumDWT_DeviceType.TWAINSCANNER | Dynamsoft.DWT.EnumDWT_DeviceType.TWAINX64SCANNER | Dynamsoft.DWT.EnumDWT_DeviceType.ESCLSCANNER).then((sources) => {
            sourceList = sources;

            selectSources.options.length = 0;
            for (let i = 0; i < sources.length; i++) {
                let option = document.createElement("option");
                option.text = sources[i].displayName;
                option.value = i.toString();
                selectSources.add(option);
            }
        });
    }
}

function scanImage() {
    if (!dwtObject)
        return;

    if (selectSources) {
        var pixelTypeInputs = document.getElementsByName("PixelType");
        for (var i = 0; i < pixelTypeInputs.length; i++) {
            if ((pixelTypeInputs[i]).checked) {
                pixelType = (pixelTypeInputs[i]).value;
                break;
            }
        }
        dwtObject.SelectDeviceAsync(sourceList[selectSources.selectedIndex]).then(() => {
            return dwtObject.OpenSourceAsync()
        }).then(() => {
            return dwtObject.AcquireImageAsync({
                IfDisableSourceAfterAcquire: true
            })
        }).then(() => {
            if (dwtObject) {
                dwtObject.CloseSource();
            }

        }).catch(
            (e) => {
                console.error(e)
            }
        )
    } else {
        alert("No Source Available!");
    }
}

function loadImage() {
    if (!dwtObject) return;

    let onSuccess = function () { };
    let onFailure = function (errorCode, errorString) { };

    dwtObject.IfShowFileDialog = true;
    dwtObject.LoadImageEx("", Dynamsoft.DWT.EnumDWT_ImageType.IT_ALL, onSuccess, onFailure);
}

function saveImage() {
    if (dwtObject) {
        if ((document.getElementById("imgTypejpeg")).checked == true) {
            if (dwtObject.GetImageBitDepth(dwtObject.CurrentImageIndexInBuffer) == 1)
                dwtObject.ConvertToGrayScale(dwtObject.CurrentImageIndexInBuffer);
            dwtObject.SaveAsJPEG("DynamicWebTWAIN.jpg", dwtObject.CurrentImageIndexInBuffer);
        }
        else if ((document.getElementById("imgTypetiff")).checked == true)
            dwtObject.SaveAllAsMultiPageTIFF("DynamicWebTWAIN.tiff");
        else if ((document.getElementById("imgTypepdf")).checked == true)
            dwtObject.SaveAllAsPDF("DynamicWebTWAIN.pdf");
    }
}
Now save the changes and reload the UI. A simple desktop document scanning application is complete.
Package and Distribute the Electron Application
To package and distribute the Electron project:
-
Install asar to pack the application into an archive file:
npm install -g asar asar pack app app.asar -
Download the Electron prebuilt package and place app.asar into the
recoursesfolder.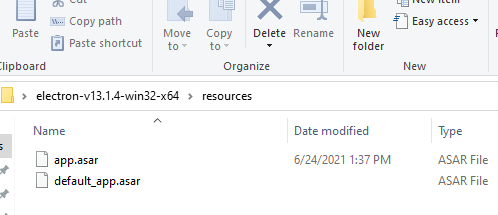
- Double-click
electron.exeto check whether your application runs successfully. - Compress the entire folder into a zip file for distribution.
Common Issues and Edge Cases
- Scanner not detected on Linux: Ensure the SANE backend is installed and your user has permission to access USB devices. Dynamic Web TWAIN relies on SANE for TWAIN-compatible scanning on Linux.
- Blank or black images after scanning: This usually happens when
IfDisableSourceAfterAcquireis not set or the scanner driver returns an incompatible pixel type. Verify your scanner driver is up to date and test with the default settings before customizing pixel type. asarpackaging breaks resource paths: After packing withasar, theResourcesPathfor Dynamic Web TWAIN must resolve correctly. Use__dirnameto build an absolute path, or extract thedwt/distfolder outside theasararchive so the SDK can locate its service files.
Frequently Asked Questions
How do I integrate TWAIN scanning into an Electron app?
Install the dwt npm package, include dynamsoft.webtwain.min.js in your HTML, set your license key and ResourcesPath, then call GetDevicesAsync to list scanners and AcquireImageAsync to capture pages. The full flow is identical to a browser-based Dynamic Web TWAIN integration.
Does Electron document scanning work on macOS and Linux?
Yes. Dynamic Web TWAIN supports TWAIN on Windows, ICA on macOS, and SANE/eSCL on Linux. The same Electron codebase runs on all three platforms without modification.
How do I save scanned documents as a multi-page PDF in Electron?
After scanning, call dwtObject.SaveAllAsPDF("output.pdf") to save every image in the buffer as a single multi-page PDF file. You can also use SaveAllAsMultiPageTIFF for TIFF output.