


How to Integrate a Barcode Scanner SDK into an iOS Swift App
Dynamsoft’s ready-to-use iOS barcode scanner framework adds live QR code and barcode scanning to a SwiftUI app through Swift Package Manager, and its open-source component can be customized to override default behavior such as automatic result return.
This article is Part 1 in a 1-Part Series.
What you’ll build: A SwiftUI iOS app that launches a single or multi-barcode scanner powered by Dynamsoft’s BarcodeScannerViewController, then customizes the open-source scanner component to capture results manually via a dedicated button.
Key Takeaways
- Dynamsoft’s ready-to-use
BarcodeScannerViewControllerlets you add live barcode scanning to a SwiftUI app with fewer than 20 lines of integration code. - The framework is distributed via Swift Package Manager (
https://github.com/Dynamsoft/barcode-reader-spm) and supports both single and multi-barcode scanning modes out of the box. - The component is fully open-source — you can clone the source, add it as a sub-project, and override internal behavior such as replacing automatic result return with a manual capture button.
- Supported barcode formats include QR Code, PDF417, DataMatrix, and all major 1D formats via Dynamsoft Barcode Reader v11.x on iPhone and iPad.
Common Developer Questions
How do I integrate a barcode scanner SDK into an iOS Swift app using Swift Package Manager?
Create a SwiftUI project in Xcode, add the package URL https://github.com/Dynamsoft/barcode-reader-spm through Add Package Dependencies, then import DynamsoftBarcodeReaderBundle and DynamsoftLicense in your view. From there, initialize BarcodeScannerConfig, set the license key and scanningMode, and present a wrapped BarcodeScannerViewController when the user taps the scan button.
How do I use BarcodeScannerViewController inside a SwiftUI view with UIViewControllerRepresentable?
Wrap BarcodeScannerViewController in a UIViewControllerRepresentable type such as BarcodeScannerView, then create the controller in makeUIViewController(context:) and assign both config and onScannedResult. That wrapper can be embedded in UIHostingController, while the callback updates the SwiftUI @State text and dismisses the presented scanner after .finished, .canceled, or .exception.
How do I customize the Dynamsoft iOS barcode scanner to return results manually instead of automatically?
Clone the open-source DynamsoftBarcodeReaderBundle project, add it to Xcode as a local sub-project, and replace the packaged framework dependency with the local framework target. Then change handleMultipleResult() so it stores DecodedBarcodesResult in temporaryResult, add a captureButton wired to onCaptureButtonTouchUp, and return temporaryResult?.items only when the user explicitly taps the button.
iOS Barcode Scanner Demo
Prerequisites
- Free trial license for Dynamsoft Barcode Reader.
- Ready-to-Use Barcode Scanner API documentation for iOS
Setting Up the iOS Project
- Create a new iOS project in Xcode and select SwiftUI as the user interface.
-
Click “File” -> “Add Package Dependencies…“ to add all required frameworks via Swift Package Manager. The package URL is
https://github.com/Dynamsoft/barcode-reader-spm.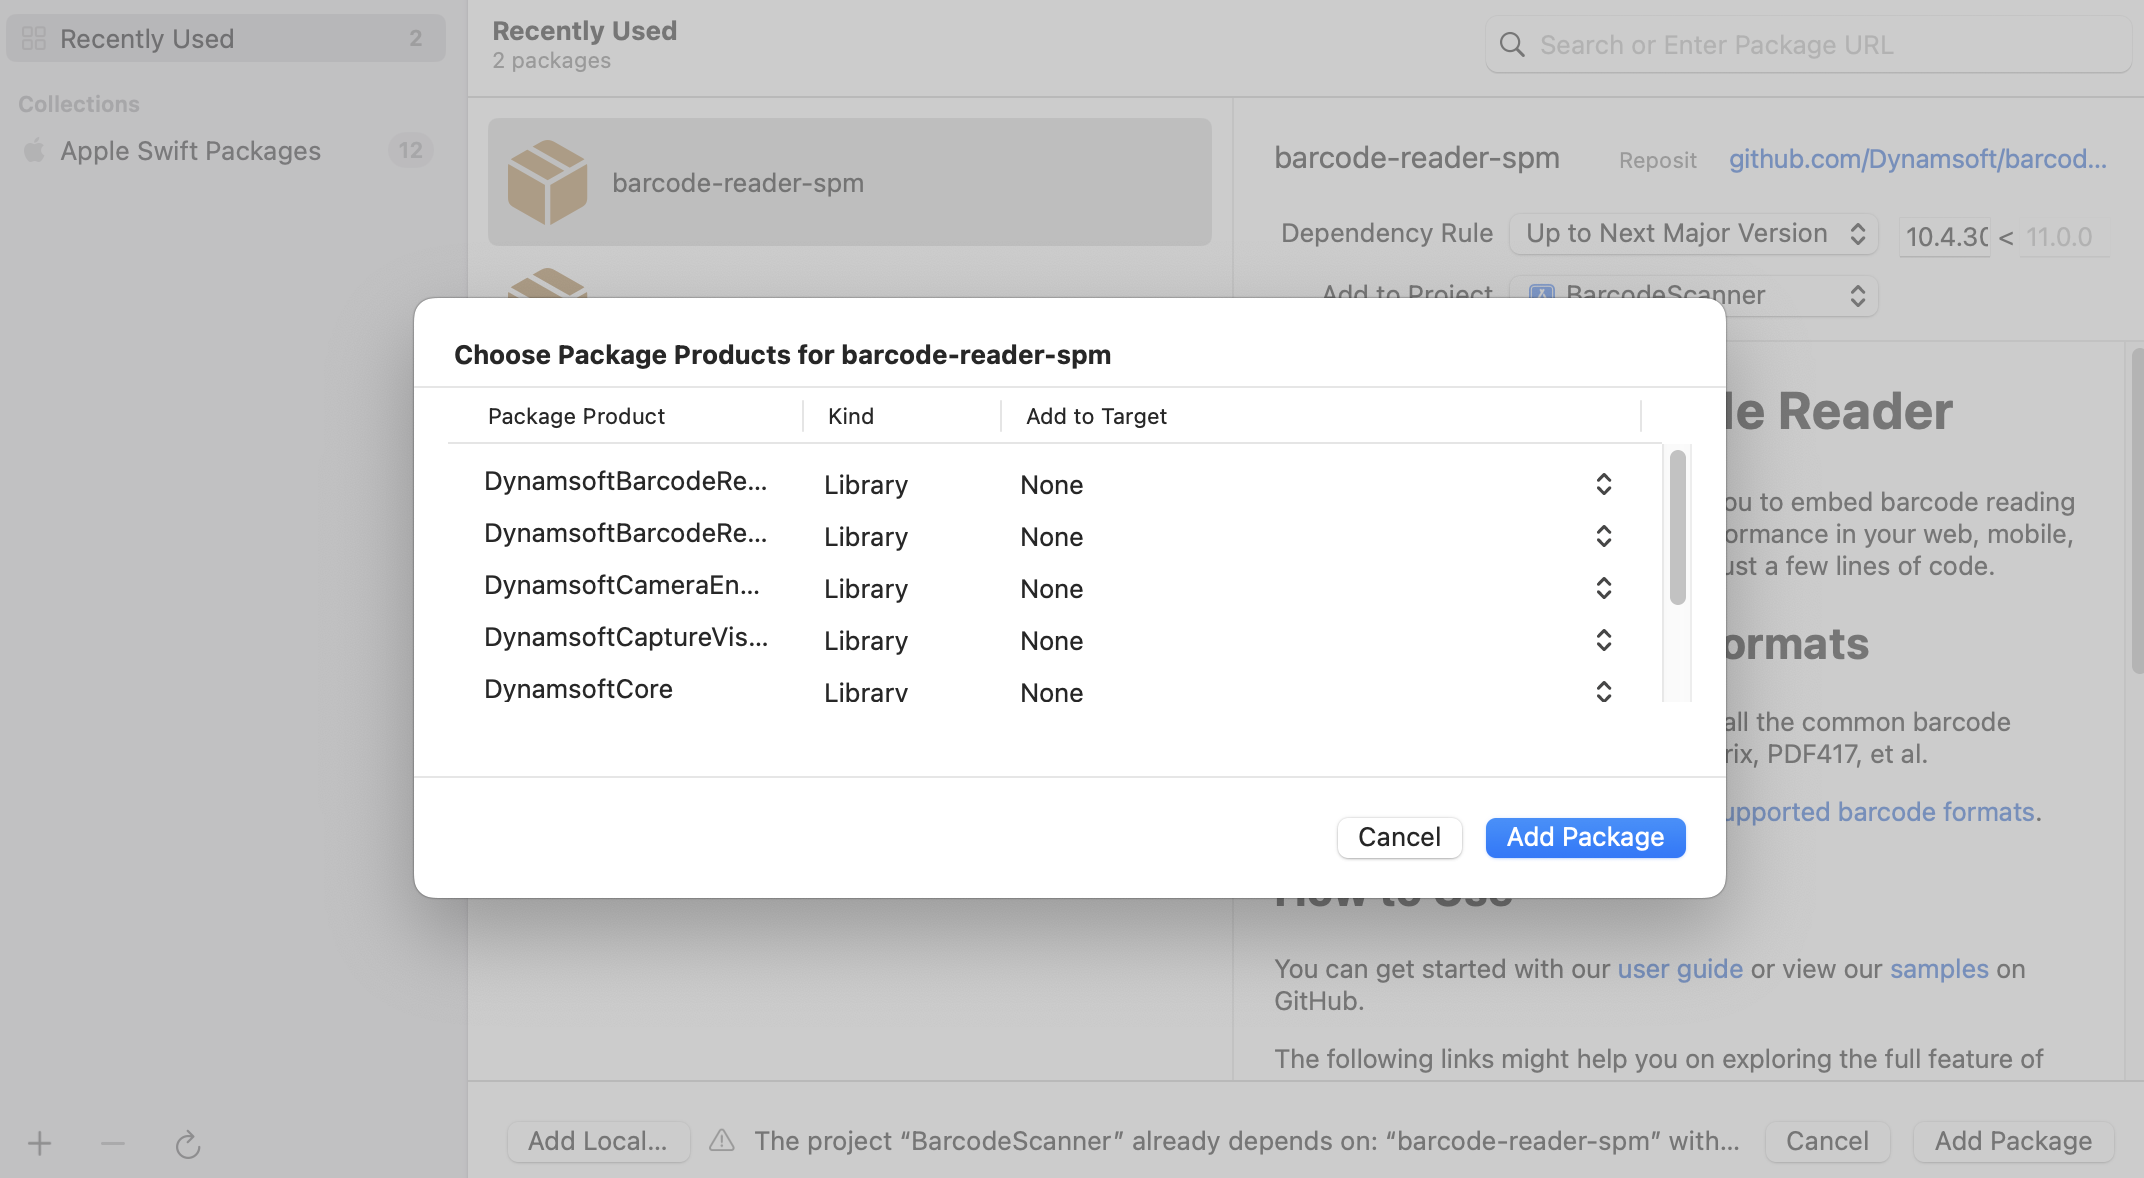
Implementing an iOS Barcode Scanner in Minutes
Create a Text view to display the barcode result and two buttons to launch the single barcode scanner and multi-barcode scanner.
import DynamsoftBarcodeReaderBundle
import DynamsoftLicense
import SwiftUI

struct ContentView: View {
    @State private var scanResult: String = "Scan results will appear here"

    var body: some View {
        VStack(spacing: 16) {
            ScrollView {
                Text(scanResult)
                    .font(.system(size: 20))
                    .padding(16)
                    .frame(maxWidth: .infinity, maxHeight: .infinity)
                    .background(Color.white)
                    .foregroundColor(.black)
                    .lineSpacing(4)
            }
            .background(Color.white)
            .cornerRadius(8)
            .shadow(radius: 2)

            Spacer()

            HStack(spacing: 8) {
                Button(action: {
                    presentBarcodeScanner(mode: .single)
                }) {
                    Text("Single Scan")
                        .font(.headline)
                        .foregroundColor(.white)
                        .padding()
                        .frame(maxWidth: .infinity)
                        .background(Color.blue)
                        .cornerRadius(8)
                }

                Button(action: {
                    presentBarcodeScanner(mode: .multiple)

                }) {
                    Text("Multi Scan")
                        .font(.headline)
                        .foregroundColor(.white)
                        .padding()
                        .frame(maxWidth: .infinity)
                        .background(Color.blue)
                        .cornerRadius(8)
                }
            }
        }
        .padding(16)
        .background(Color(UIColor.systemGroupedBackground))
    }
}
The SDK provides a UIKit-based view controller, BarcodeScannerViewController, which allows real-time barcode scanning with a camera preview. To integrate this view controller into a SwiftUI project, we need to create a UIViewControllerRepresentable wrapper:
struct BarcodeScannerView: UIViewControllerRepresentable {
    let config: BarcodeScannerConfig
    var onScannedResult: ((BarcodeScanResult) -> Void)?

    func makeUIViewController(context: Context) -> BarcodeScannerViewController {
        let vc = BarcodeScannerViewController()
        vc.config = config
        vc.onScannedResult = onScannedResult
        return vc
    }

    func updateUIViewController(_ uiViewController: BarcodeScannerViewController, context: Context)
    {}
}
Explanation:
BarcodeScannerConfigis a struct that defines the barcode scanner settings.BarcodeScanResultis a struct that stores the scanned barcode data.onScannedResultis a callback function that handles the scanned barcode result.
Now, we can launch the barcode scanner by clicking one of the buttons. Be sure to replace LICENSE-KEY with your own.
func presentBarcodeScanner(mode: ScanningMode) {
        let config = BarcodeScannerConfig()
        config.license = "LICENSE-KEY"
        config.scanningMode = mode

        var scannerView = BarcodeScannerView(config: config)
        scannerView.onScannedResult = { result in
            DispatchQueue.main.async {
                switch result.resultStatus {
                case .finished:
                    let items = result.barcodes

                    if items != nil && items!.count > 0 {
                        var index = 0
                        self.scanResult = ""
                        for item in items! {
                            if item.type == .barcode {
                                self.scanResult +=
                                    "Result \(index): \nFormat: \(item.formatString)\nText: \(item.text)\n\n"
                                index += 1
                            }
                        }
                    }

                case .canceled:
                    self.scanResult = "Scan canceled"
                case .exception:
                    self.scanResult = result.errorString ?? "Unknown error"
                @unknown default:
                    break
                }

                UIApplication.shared.windows.first?.rootViewController?.dismiss(
                    animated: true, completion: nil)
            }
        }

        UIApplication.shared.windows.first?.rootViewController?.present(
            UIHostingController(rootView: scannerView),
            animated: true,
            completion: nil
        )
    }
Customize the Open-Source Barcode Scanner Component
The barcode scanner component is open-source. You can access the source code in the GitHub repository.
The following steps demonstrate how to integrate the source code project into an iOS project and apply some customizations.
Step 1: Integrate the Source Code Project into Your iOS Project
- Clone the project from the GitHub repository.
-
Click “File” -> “Add Files” to add the cloned project as a sub-project.
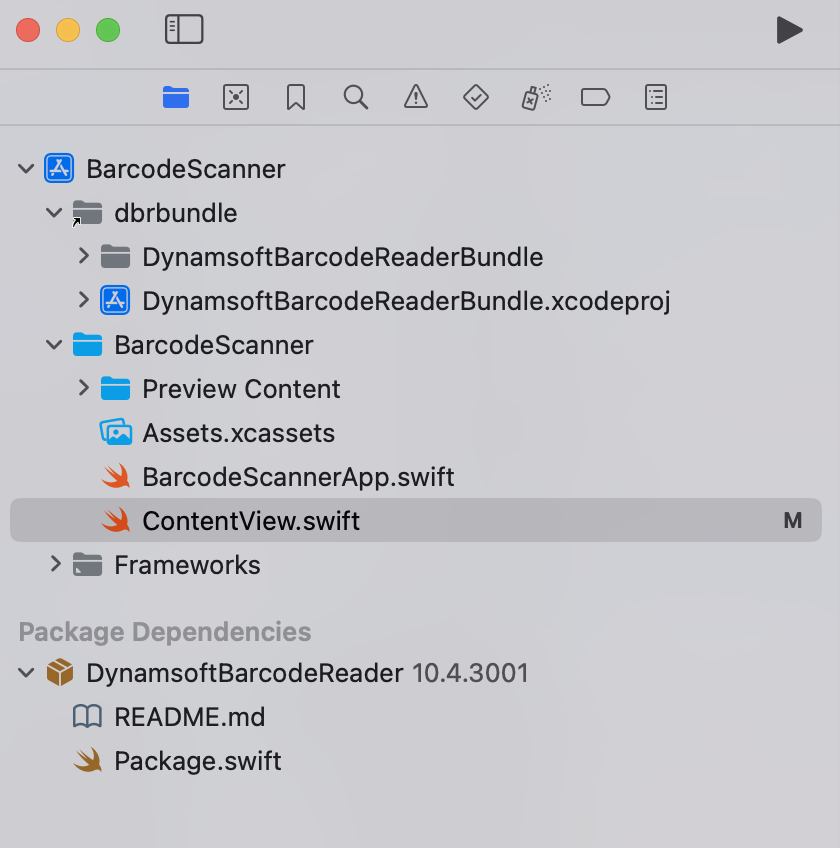
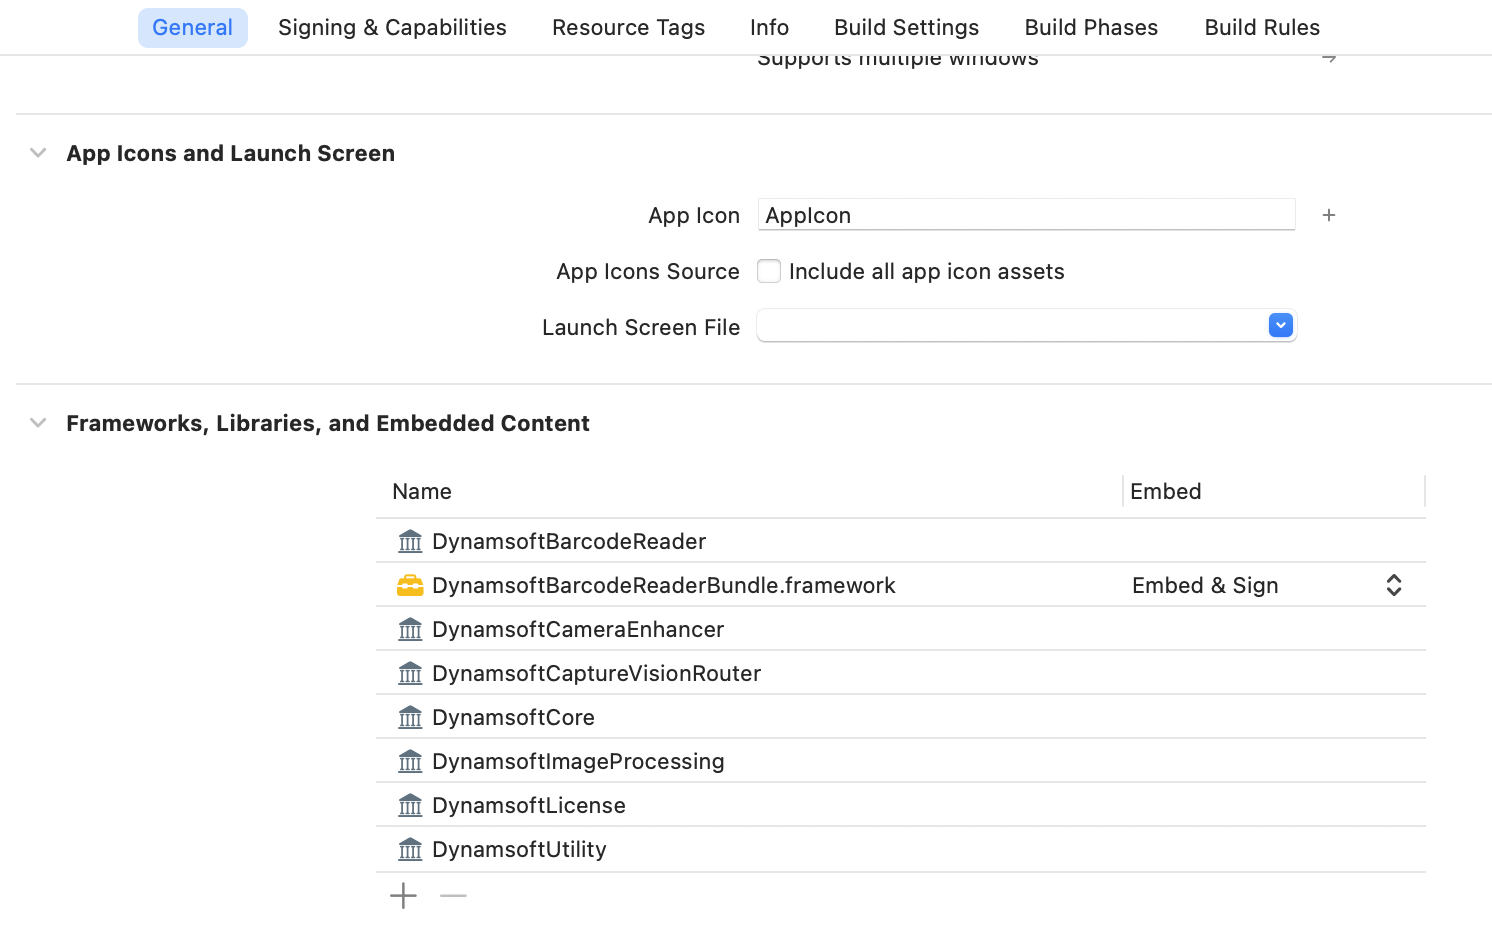
- Replace the dependent framework with the local project:
- Select the project target.
- Navigate to “General” -> “Frameworks, Libraries, and Embedded Content”.
- Remove the
DynamsoftBarcodeReaderBundleand addDynamsoftBarcodeReaderBundle.framework.
Step 2: Add a Capture Button to Manually Return Multiple Barcode Results
By default, the prebuilt multi-barcode scanner automatically returns results. To modify this behavior, we will change the logic in BarcodeScannerViewController.swift to allow manual result capture.
-
Modify
handleMultipleResult()to store the scanned results instead of returning them immediately:var temporaryResult: DecodedBarcodesResult? private func handleMultipleResult(_ result: DecodedBarcodesResult) { guard let items = result.items, items.count > 0 else { stableFrameCount = 1 return } temporaryResult = result // if items.count >= config.expectedBarcodesCount { // stop() // if config.isBeepEnabled { // Feedback.beep() // } // onScannedResult?(.init(resultStatus: .finished, barcodes: result.items)) // } else { // guard let resultitems = referenceItems else { // stableFrameCount = 1 // referenceItems = items // return // } // if isStable(items: items, resultitems: resultitems) { // stableFrameCount += 1 // if stableFrameCount >= config.maxConsecutiveStableFramesToExit { // stop() // if config.isBeepEnabled { // Feedback.beep() // } // onScannedResult?(.init(resultStatus: .finished, barcodes: result.items)) // } // } else { // stableFrameCount = 1 // referenceItems = items // } // } } -
Add a Capture button to trigger the result return manually:
lazy var captureButton: UIButton = { let bundle = Bundle(for: type(of: self)) let button = UIButton() let captureImage = UIImage(systemName: "camera.circle.fill") button.setImage(captureImage?.withRenderingMode(.alwaysOriginal), for: .normal) button.tintColor = .systemBlue button.setPreferredSymbolConfiguration( UIImage.SymbolConfiguration(pointSize: 40, weight: .regular, scale: .large), forImageIn: .normal ) button.addTarget(self, action: #selector(onCaptureButtonTouchUp), for: .touchUpInside) return button }() @objc func onCaptureButtonTouchUp() { if temporaryResult != nil { onScannedResult?(.init(resultStatus: .finished, barcodes: temporaryResult?.items)) } else { print("No results to capture.") } } -
Integrate the Capture button into the UI:
private func setupUI() { ... captureButton.isHidden = config.scanningMode == .single captureButton.translatesAutoresizingMaskIntoConstraints = false let stackView = UIStackView(arrangedSubviews: [torchButton, captureButton, cameraButton]) ... } -
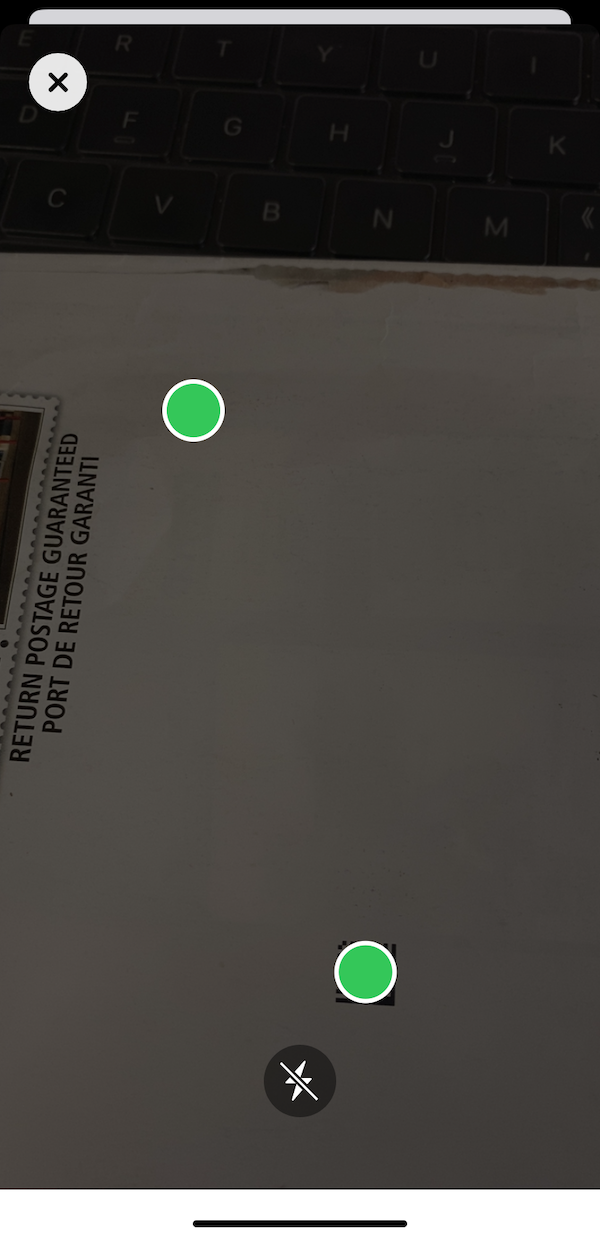
Re-run the project to see the changes:
Common Issues & Edge Cases
- “License key invalid” on first launch: Ensure you replace
"LICENSE-KEY"with a valid trial or production license key inpresentBarcodeScanner(mode:). An expired or missing key causes the scanner to immediately fireresult.resultStatus == .exceptionwith a descriptive error string. - Multi-scan returns no results after customization: After commenting out the auto-return logic in
handleMultipleResult,temporaryResultis only populated when at least one barcode enters the frame. If the user taps the capture button before any barcode is detected, nothing is returned — consider disabling the capture button untiltemporaryResult != nil. UIApplication.shared.windowsdeprecation on iOS 15+: The sample usesUIApplication.shared.windows.firstto present the scanner view controller. On iOS 15 and later, useUIApplication.shared.connectedScenesto obtain the activeUIWindowSceneand avoid the deprecation warning.