


How to Create a QR Code Scanner in Jetpack Compose
Jetpack Compose is Android’s recommended modern toolkit for building native UI. It simplifies and accelerates UI development on Android. In this article, we are going to create a QR code scanner to demonstrate how to use Dynamsoft Barcode Reader and Dynamsoft Camera Enhancer in Jetpack Compose.
What you’ll build: a Jetpack Compose app that renders a live camera preview in a Dynamsoft CameraView, decodes QR codes and other 1D and 2D barcodes in real time with the Dynamsoft Capture Vision engine (com.dynamsoft:barcodereaderbundle:11.6.2000), and shows the decoded format and text of the latest result on top of the preview.
Here is a video of the final result:
Key Takeaways
- With the Capture Vision API, live scanning is three steps: initialize the license with
LicenseManager.initLicense, create aCaptureVisionRouterand register aCapturedResultReceiver, then callstartCapturing(EnumPresetTemplate.PT_READ_BARCODES)once the camera view exists. - The modern
CameraEnhancerbinds directly to aCameraViewand aLifecycleOwner, so Compose apps no longer need afindActivity()helper to start the camera. - The
barcodereaderbundlemaven artifact (version 11.6.2000) ships Barcode Reader, Camera Enhancer, and the Capture Vision Router as one dependency. - Start capturing in
onResume()and stop it inonPause()so the camera and the processing pipeline release resources when the app goes to the background.
Common Developer Questions
How do I get the QR code text in a Jetpack Compose app?
Register a CapturedResultReceiver on the CaptureVisionRouter. Its onDecodedBarcodesReceived(DecodedBarcodesResult) callback provides BarcodeResultItem entries, and each item exposes the decoded text and formatString. Assign them to Compose state (barcodeTextResult) so the recomposition renders the latest result.
Which preset template should I use for live camera scanning?
EnumPresetTemplate.PT_READ_BARCODES reads all supported 1D and 2D barcode formats from every camera frame, so QR codes are decoded without any per-format configuration.
Do I need a separate Dynamsoft Camera Enhancer dependency?
No. Since version 11.x, the com.dynamsoft:barcodereaderbundle artifact includes the Capture Vision Router, Dynamsoft Barcode Reader, and Dynamsoft Camera Enhancer together. Add that single dependency plus the Dynamsoft maven repository to settings.gradle, as shown below.
Why is the camera preview black even though the permission dialog was granted?
If <uses-permission android:name="android.permission.CAMERA" /> is not declared in AndroidManifest.xml, the system rejects the runtime request even when a dialog is shown. Declare the permission in the manifest, as shown in the dependency step below.
Prerequisites
- Android Studio with the Android SDK (API level 21 or higher).
- An Android device or emulator with a camera.
- A Dynamsoft license key - the sample uses a time-limited trial key that requires a network connection on first use.
Get a 30-day free trial license
SDKs Used
- Dynamsoft Camera Enhancer. An SDK which makes it easy to use cameras on mobile platforms.
- Dynamsoft Barcode Reader. An SDK to read barcodes and QR codes with great performance.
Both of them are included in the barcodereaderbundle maven artifact along with the Capture Vision Router, which is the SDK we are going to use in this article.
New Project
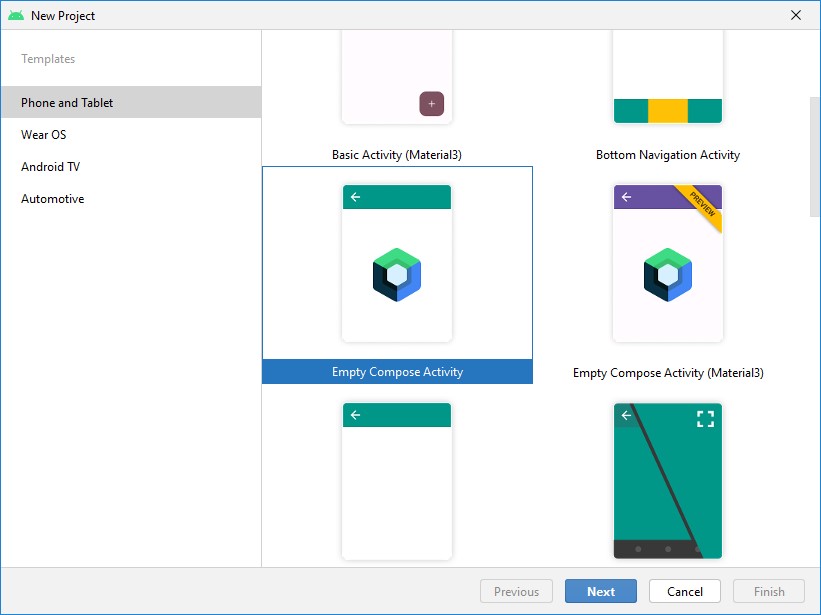
Open Android Studio and create a new project with an empty compose activity.
Add Dependencies
-
Open
settings.gradleto add Dynamsoft’s maven repository.dependencyResolutionManagement { repositoriesMode.set(RepositoriesMode.FAIL_ON_PROJECT_REPOS) repositories { google() mavenCentral() + maven { + url "https://download2.dynamsoft.com/maven/aar" + } } } -
Add Dynamsoft Barcode Reader to the module’s
build.gradle.implementation 'com.dynamsoft:barcodereaderbundle:11.6.2000' -
Add the camera permission to
AndroidManifest.xml.<uses-permission android:name="android.permission.CAMERA" />
Add Camera View
Dynamsoft Camera Enhancer provides a CameraView class for camera preview. We can add it to the content and make it occupies the entire screen.
class MainActivity : ComponentActivity() {
    private var barcodeTextResult by mutableStateOf("")
    private var mCameraEnhancer: CameraEnhancer? = null
    private lateinit var mRouter: CaptureVisionRouter

    override fun onCreate(savedInstanceState: Bundle?) {
        super.onCreate(savedInstanceState)
        setContent {
            QRCodeScannerTheme {
                //...
                if (hasCameraPermission) {
                    val cameraView = remember { CameraView(context) }

                    LaunchedEffect(cameraView) {
                        // Initialize the camera with the view and the lifecycle owner.
                        mCameraEnhancer = CameraEnhancer(cameraView, lifecycleOwner)
                        try {
                            mRouter.setInput(mCameraEnhancer)
                        } catch (e: CaptureVisionRouterException) {
                            e.printStackTrace()
                        }
                        cameraView.post {
                            startScanning()
                        }
                    }

                    // A surface container using the 'background' color from the theme
                    Surface(modifier = Modifier.fillMaxSize(), color = MaterialTheme.colors.background) {
                        AndroidView(
                            factory = { cameraView },
                            modifier = Modifier.fillMaxSize()
                        )
                        BarcodeText(text = barcodeTextResult)
                    }
                }
            }
        }
    }
}
Different from the earlier version which requires a findActivity() helper to initialize the camera, the CameraEnhancer now takes the CameraView and a LifecycleOwner (obtained with LocalLifecycleOwner.current in Compose) for initialization.
Request Camera Permission and Start the Camera
We have to request camera permission to use the camera.
-
Define a launcher to request permission and keep track of the granted state.
var hasCameraPermission by remember { mutableStateOf( ContextCompat.checkSelfPermission( context, Manifest.permission.CAMERA ) == PackageManager.PERMISSION_GRANTED ) } val launcher = rememberLauncherForActivityResult( contract = ActivityResultContracts.RequestPermission(), onResult = { granted -> hasCameraPermission = granted } ) -
The launcher is called when the app starts using
LaunchedEffect. TheAndroidViewis composed and the camera is started once the permission is granted.LaunchedEffect(key1 = true) { if (!hasCameraPermission) { launcher.launch(Manifest.permission.CAMERA) } }
Use Dynamsoft Barcode Reader to Read QR Codes
-
Set the license with the key you obtained in the prerequisites. The trial key is network-bound on first use. If the license is not set, the result will be masked.
private fun initLicense() {
    LicenseManager.initLicense(
        "LICENSE-KEY",
        this
    ) { isSuccess, error ->
        if (!isSuccess) {
            error?.printStackTrace()
        }else{
            Log.d("DBR","license initialized")
        }
    }
}
Call the function in
onCreate:override fun onCreate(savedInstanceState: Bundle?) { super.onCreate(savedInstanceState) initLicense() initCaptureVisionRouter() setContent { //... } } -
Create an instance of
CaptureVisionRouterand register a result receiver to get the decoded barcode results from the frames of the camera.private fun initCaptureVisionRouter() { // Create an instance of Dynamsoft Capture Vision Router. mRouter = CaptureVisionRouter(this) // Register a receiver to get the decoded barcode results from the frames of the camera. mRouter.addResultReceiver(object : CapturedResultReceiver { override fun onDecodedBarcodesReceived(result: DecodedBarcodesResult) { if (result.items.isNotEmpty()) { val item: BarcodeResultItem = result.items[0] runOnUiThread { barcodeTextResult = item.formatString + ": " + item.text } } } }) } -
Start capturing after the camera view is created and display the QR code result on the screen in a Text control above the camera view.
private fun startScanning() {
    val cameraEnhancer = mCameraEnhancer ?: return
    try {
        cameraEnhancer.open()
        mRouter.startCapturing(
            EnumPresetTemplate.PT_READ_BARCODES,
            object : CompletionListener {
                override fun onSuccess() {
                }

                override fun onFailure(errorCode: Int, errorString: String) {
                    Log.e("DBR", "startCapturing failed: $errorCode $errorString")
                }
            }
        )
    } catch (e: Exception) {
        e.printStackTrace()
    }
}

private fun stopScanning() {
    mCameraEnhancer?.close()
    if (::mRouter.isInitialized) {
        mRouter.stopCapturing()
    }
}

override fun onResume() {
    super.onResume()
    startScanning()
}

override fun onPause() {
    super.onPause()
    stopScanning()
}

@Composable
fun BarcodeText(text: String) {
    Text(
        text = text,
        color = Color.White,
        fontSize = 20.sp
    )
}
All right, we’ve now finished creating the QR code scanner in Jetpack Compose.
Common Issues & Edge Cases
- No results even though the preview is running. Make sure the license was initialized before
startCapturing()and that the device has a network connection on the first run, because the trial key is verified online. - The app stops decoding after the first result. When
stopScanning()is called inonPause(), capturing pauses; scanning resumes inonResume(). If you want continuous scanning, keep the camera permission granted and do not pause the activity. - Decoded text is masked. A masked result means the license is missing, expired, or invalid. Replace
LICENSE-KEYininitLicense()with a valid key.