


How to Integrate Document Scanning in a React Web App with Dynamic Web TWAIN
In today’s digital age, efficient document management is crucial for businesses and individuals alike. Integrating document scanning capabilities directly into web applications can significantly streamline workflows, allowing users to digitize and manage documents with ease. In this tutorial, we’ll explore how to leverage the power of the Dynamic Web TWAIN SDK to create a React-based document scanning web app. This guide will walk you through the process of setting up a React project, integrating the SDK, and implementing features that enable users to scan, upload, and manage documents all within a user-friendly web interface.

What you’ll build: A React web application that connects to TWAIN-compatible document scanners, acquires scanned pages in the browser, and lets users load and manage images and PDFs — all powered by the Dynamic Web TWAIN SDK.
Key Takeaways
- Dynamic Web TWAIN provides a JavaScript API that communicates with physical TWAIN scanners directly from a React web app, eliminating the need for desktop-only scanning software.
- The SDK ships platform-specific service binaries in
node_modules/dwt/dist; copying them to your Reactpublic/folder is the critical integration step. - Scanner discovery, image acquisition, and PDF loading are all handled through async methods (
GetDevicesAsync,AcquireImageAsync,LoadImageEx), keeping the UI responsive. - This approach works on Windows and macOS with any TWAIN-compatible scanner, making it suitable for enterprise document management workflows.
Common Developer Questions
How do I integrate document scanning in a React web application?
Install the dwt package, copy node_modules/dwt/dist into public/dwt-resources, then initialize the SDK with ResourcesPath, ProductKey, and a container inside a React component. This sample wires scanner discovery with GetDevicesAsync and adds scan and load actions so users can acquire pages or import image and PDF files directly in the browser.
How do I connect a TWAIN scanner to a browser-based React app?
The component queries TWAIN devices with GetDevicesAsync and stores the returned source list for the scanner dropdown. When users click Scan, it calls SelectDeviceAsync, OpenSourceAsync, and AcquireImageAsync, then closes the source after capture to keep the flow stable.
Why does Dynamic Web TWAIN require a local service, and how do I bundle its resources in React?
Browser code cannot talk to scanner drivers directly, so Dynamic Web TWAIN uses its local service to bridge between web APIs and TWAIN hardware. In this React setup, you must copy the SDK resources into public/dwt-resources and point ResourcesPath there so runtime files and addons load correctly.
Prerequisites
Step-by-Step: Build a React Document Scanner
In the following sections, we’ll first create the foundational structure of a React project and then seamlessly integrate the Dynamic Web TWAIN SDK to enable robust document scanning and management capabilities.
Step 1: Create a New React Project
To create a new React project, choose one of the following methods:
-
Using npm:
npm install -g create-react-app create-react-app document-scan -
Using npx:
npx create-react-app document-scan -
Using Yarn:
yarn create react-app document-scan
Step 2: Install and Integrate the Dynamic Web TWAIN SDK
First, install the required packages:
npm install dwt@latest
npm install @babel/core @babel/preset-env
npm i ncp -g
The Dynamic Web TWAIN SDK includes platform-specific service applications for scanner communication and JavaScript libraries, located in the node_modules/dwt/dist folder. Use ncp to copy these resources to the public folder of your React project:
ncp node_modules/dwt/dist public/dwt-resources
Next, create a React component in DynamsoftSDK.js:
import React from 'react';
import Dynamsoft from 'dwt';

export default class DWT extends React.Component {
    constructor(props) {
        super(props);
        this.state = {
            sourceList: [],
            scanners: [],
            currentScanner: "Looking for devices.."
        };
        this.selectRef = React.createRef();
    }
    DWObject = null;
    containerId = 'dwtcontrolContainer';
    width = "100%";
    height = "600";
    componentDidMount() {
        Dynamsoft.DWT.RegisterEvent('OnWebTwainReady', () => {
            this.DWObject = Dynamsoft.DWT.GetWebTwain(this.containerId);
            if (this.DWObject) {

                this.DWObject.GetDevicesAsync(Dynamsoft.DWT.EnumDWT_DeviceType.TWAINSCANNER | Dynamsoft.DWT.EnumDWT_DeviceType.TWAINX64SCANNER).then((sources) => {
                    const sourceNames = sources.map(source => source.displayName);
                    this.setState({ scanners: sourceNames, sourceList: sources });
                }).catch((error) => {
                    console.error("Error fetching devices:", error);
                });


            }
        });
        this.loadDWT();
    }
    loadDWT() {
        Dynamsoft.DWT.ResourcesPath = "dwt-resources";
        Dynamsoft.DWT.ProductKey = 'LICENSE-KEY';
        Dynamsoft.DWT.Containers = [{ ContainerId: this.containerId, Width: this.width, Height: this.height }];
        Dynamsoft.DWT.Load();
    }
    onSourceChange(value) {
        this.setState({ currentScanner: value });
    }

    getSelectedIndex = () => {
        const selectedIndex = this.selectRef.current.selectedIndex;
        console.log("Selected Index:", selectedIndex);
        return selectedIndex
    }
    acquireImage() {
        const selectedIndex = this.selectRef.current.selectedIndex;

        if (!this.state.sourceList || this.state.sourceList.length === 0) {
            alert("No scanner detected. Please connect a scanner and try again.");
            return;
        }

        this.DWObject.IfShowUI = false;
        this.DWObject.SelectDeviceAsync(this.state.sourceList[selectedIndex]).then(() => {

            return this.DWObject.OpenSourceAsync()

        }).then(() => {

            return this.DWObject.AcquireImageAsync({
                IfDisableSourceAfterAcquire: true
            })

        }).then(() => {

            if (this.DWObject) {

                this.DWObject.CloseSource();

            }

        })

            .catch(

                (e) => {

                    console.error(e)

                }

            )
    }
    loadImagesOrPDFs() {
        this.DWObject.IfShowFileDialog = true;
        this.DWObject.Addon.PDF.SetResolution(200);
        this.DWObject.Addon.PDF.SetConvertMode(1/*Dynamsoft.DWT.EnumDWT_ConvertMode.CM_RENDERALL*/);
        this.DWObject.LoadImageEx("", 5 /*Dynamsoft.DWT.EnumDWT_ImageType.IT_ALL*/,
            () => { },
            (errorCode, errorString) => alert(errorString));
    }
    render() {
        return (
            <div style={{ width: "30%", margin: "0 auto" }}>
                <select ref={this.selectRef} style={{ width: "100%" }} tabIndex="1" value={this.state.currentScanner} onChange={(e) => this.onSourceChange(e.target.value)}>
                    {
                        this.state.scanners.length > 0 ?
                            this.state.scanners.map((_name, _index) =>
                                <option value={_name} key={_index}>{_name}</option>
                            )
                            :
                            <option value="Looking for devices..">Looking for devices..</option>
                    }
                </select>
                <button tabIndex="2" style={{ marginRight: "4%", width: "48%" }}
                    onClick={() => this.acquireImage()}
                    disabled={this.state.scanners.length > 0 ? "" : "disabled"}
                >Scan</button>
                <button tabIndex="3" style={{ margin: "2% 0", width: "48%" }}
                    onClick={() => this.loadImagesOrPDFs()}
                    disabled={this.state.scanners.length > 0 ? "" : "disabled"}
                >Load</button>
                <div id={this.containerId}></div>
            </div >
        );
    }
}
Explanation
Dynamsoft.DWT.ResourcesPath: Specifies the path to the resources folder, located in the public directory.Dynamsoft.DWT.ProductKey: Your license key for the Dynamic Web TWAIN SDK.onSourceChange: Handles changes in the selected scanner.acquireImage: Manages the document scanning process.loadImagesOrPDFs: Allows users to load images or PDFs from the local file system.
Step 3: Wire the Scanner Component into App.js
Once your component is ready, integrate it into App.js:
import logo from './logo.svg';
import DWTLogo from './icon-dwt.svg';
import DynamsoftLogo from './logo-dynamsoft-white-159X39.svg';
import './App.css';
import DWT from './DynamsoftSDK';

function App() {
  return (
    <div className="App">
      <header className="App-header">
        <a href="https://www.dynamsoft.com/web-twain/overview/" target="_blank" rel="noopener noreferrer" ><img src={DWTLogo} className="dwt-logo" alt="Dynamic Web TWAIN Logo" /></a>
        <div style={{ width: "10px" }}></div>
        <a href="https://reactjs.org/" target="_blank" rel="noopener noreferrer" ><img src={logo} className="App-logo" alt="logo" /></a>
        <div style={{ width: "18%" }}></div>
        <a href="https://www.dynamsoft.com" target="_blank" rel="noopener noreferrer" ><img src={DynamsoftLogo} className="ds-logo" alt="Dynamsoft Logo" /></a>
      </header>
      <main className="App-main">
        <DWT
          productKey="LICENSE-KEY"
        />
      </main>
    </div>
  );
}

export default App;
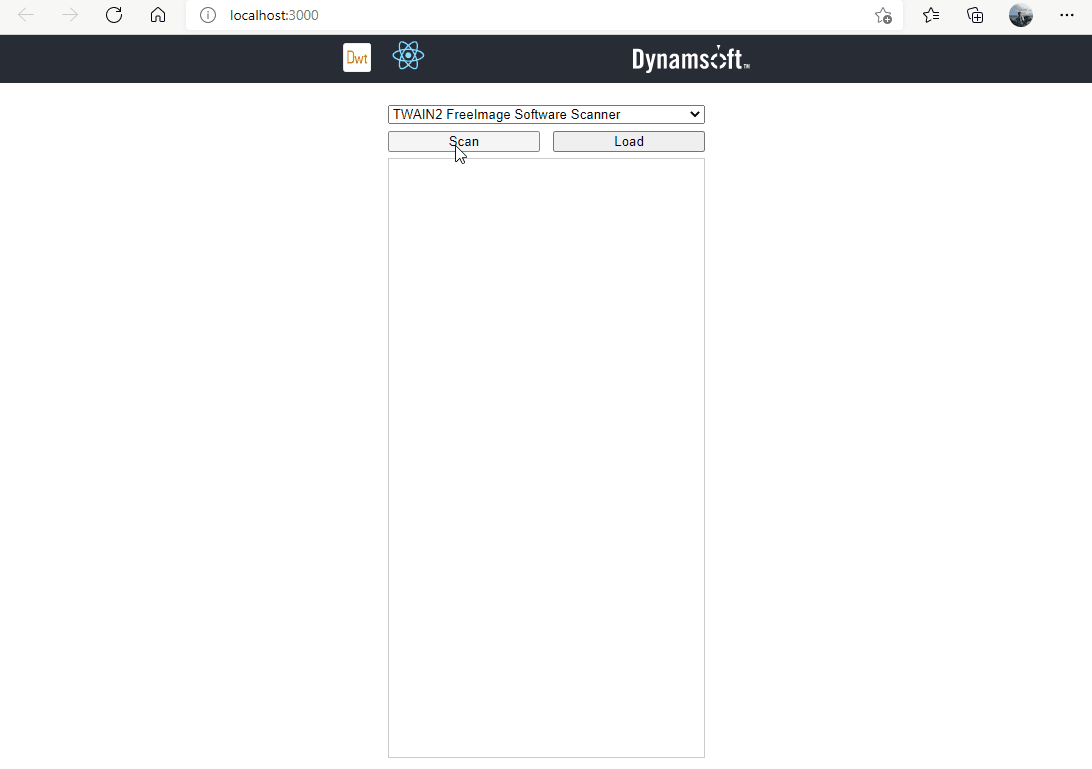
Step 4: Run the React Document Scanning App
Now that everything is set up, run the app with the following command:
npm start
This will launch the app in your default web browser, enabling document scanning and management directly within your React application.
Common Issues and Edge Cases
- “Dynamsoft Service not found” error on first load: The SDK requires a local service (Dynamsoft Service) to communicate with physical scanners. If the service is not installed, the SDK will prompt users to download it. During development, make sure the service is running before testing scanner acquisition.
- Resources path mismatch after build: If scanned images fail to load or the SDK silently fails to initialize, verify that
ncp node_modules/dwt/dist public/dwt-resourceswas run and thatDynamsoft.DWT.ResourcesPathpoints to the correct relative path ("dwt-resources"when served frompublic/). - Scanner not detected on macOS: macOS requires a TWAIN-compatible driver for your scanner model. If
GetDevicesAsyncreturns an empty list, confirm the driver is installed and the scanner appears in the system’s Image Capture utility.