


How to Build a Mobile Document Scanner and Wireless Print App with JavaScript
Using a phone to scan and print (copy) documents is ideal for convenience, portability, and quick tasks, making it a versatile and practical choice for many users. In this article, we are going to build a web app to scan and print a document on a mobile phone.
The following SDKs by Dynamsoft are used:
- Dynamsoft Document Viewer: it provides a set of viewers for document capturing, editing and saving as PDFs.
- Dynamsoft Document Normalizer: it provides the edge detection ability.
The web app can capture a document image, resize it, and make it black-white for printing.
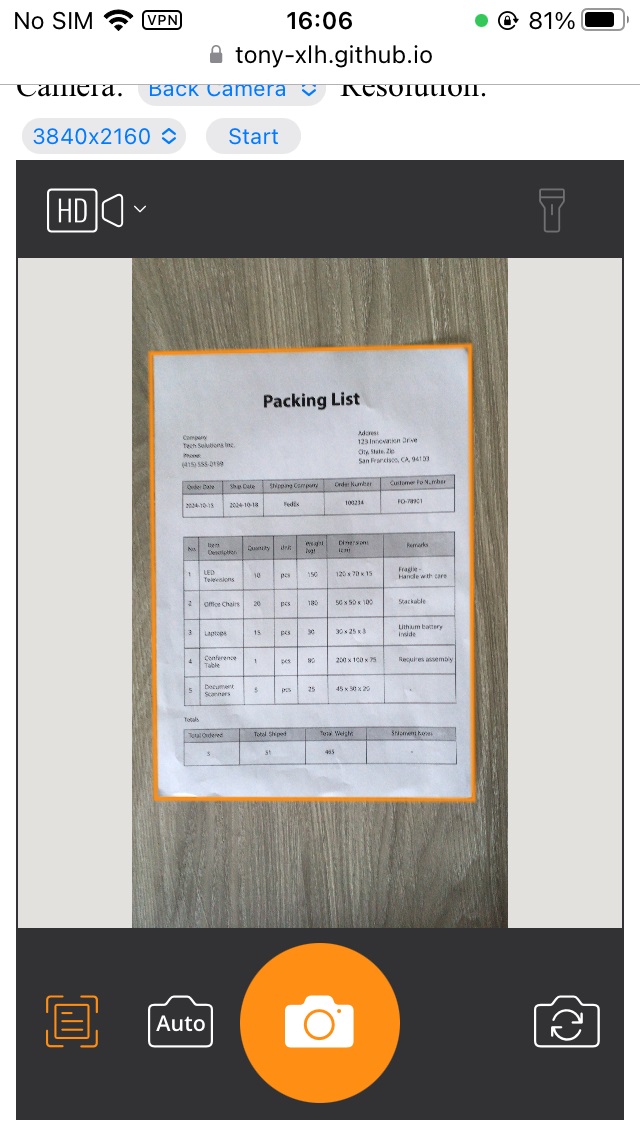
Capturing:
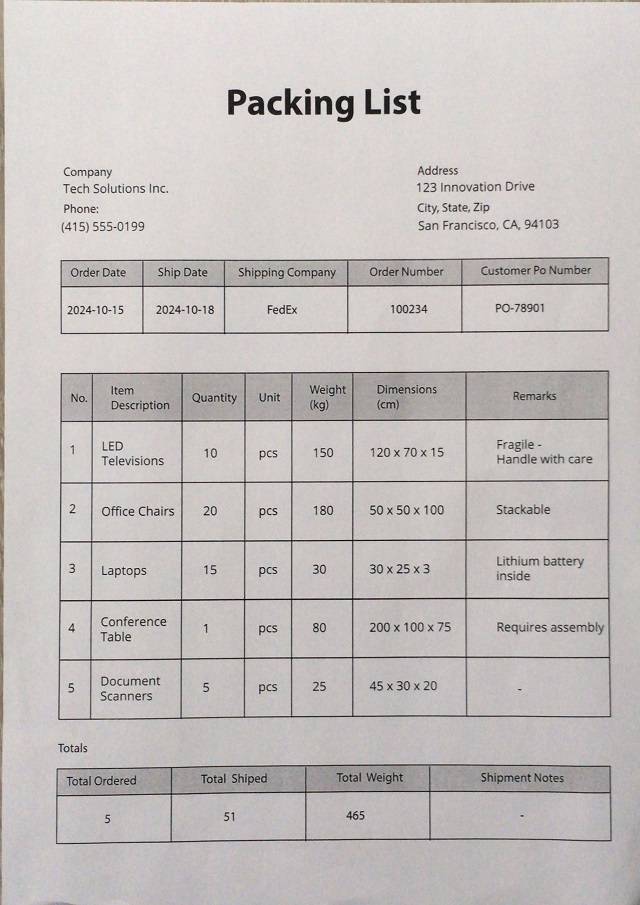
Scanned image (cropped):
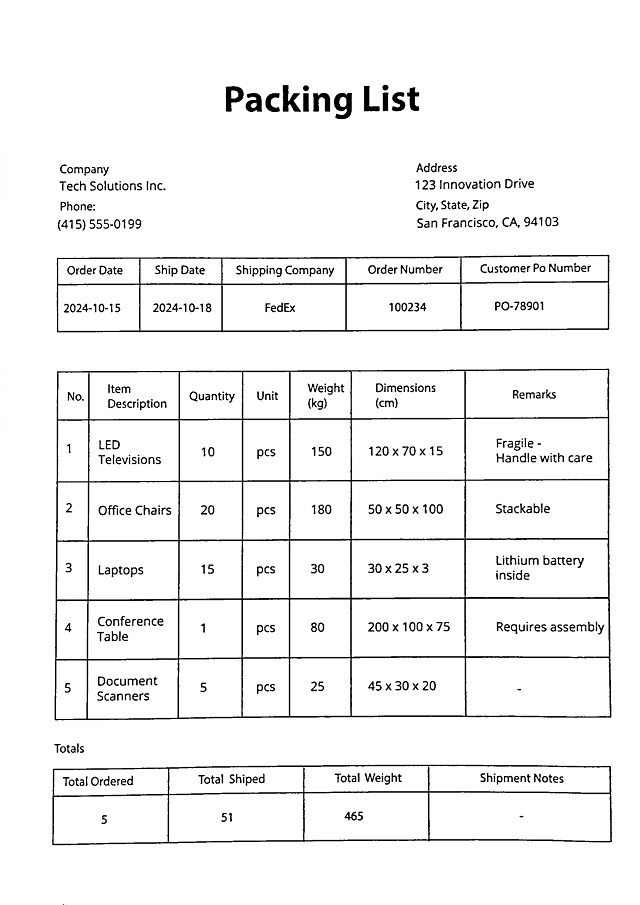
Black and white image for printing:
What you’ll build: A mobile web app that uses Dynamsoft Document Viewer and Document Normalizer to capture a document with a phone camera, auto-detect its edges, resize it to standard paper dimensions, apply a black-and-white filter, save it as a PDF, and send it to a wireless printer via AirPrint or Mopria.
Key Takeaways
- Dynamsoft Document Viewer’s three built-in viewers (Capture, Perspective, Edit) handle the complete scan-to-PDF workflow entirely in the browser — no server required.
- Dynamsoft Document Normalizer detects document boundaries in real time using the
DetectDocumentBoundaries_Defaulttemplate, enabling automatic edge cropping on mobile. - Scanned images can be resized to standard sizes (A4, Letter) or placed onto a blank page for small documents like business cards, using the HTML5 Canvas API.
- The resulting PDF can be sent directly to any AirPrint (iOS) or Mopria (Android) wireless printer from the mobile browser.
Common Developer Questions
How do I scan a document with a phone camera using JavaScript?
Use a browser-based capture viewer to open the phone camera, detect the document boundaries with Document Normalizer, and pass the result through perspective correction and edit viewers before saving. That gives you a full scan workflow in mobile JavaScript without a native app.
How do I resize a scanned document image to A4 or Letter size in the browser?
After scanning, draw the page onto an HTML5 canvas sized for the target paper dimensions and scale the document to fit that output area. The same canvas step can also place smaller originals such as business cards onto a printable blank page.
How do I print a PDF from a mobile browser using AirPrint or Mopria?
Generate the final PDF in the browser and hand it off to the device’s built-in print flow, which routes to AirPrint on iOS or Mopria-compatible printing on Android. The browser handles the wireless printer selection once the PDF is ready.
Prerequisites
Get your trial key.
Step 1: Create the HTML Scaffold
Create a new HTML with the following content.
<!DOCTYPE html>
<html>
<head>
  <title>Document Scanning via Camera</title>
  <meta name="viewport" content="width=device-width,initial-scale=1.0,maximum-scale=1.0,user-scalable=0" />
  <style>
    #container {
      max-width: 100%;
      height: 480px;
    }
  </style>
</head>
<body>
  <h2>Document Scanning via Camera</h2>
  <label>
    Camera:
    <select id="select-camera"></select>
  </label>
  <label>
    Resolution:
    <select id="select-resolution">
      <option value="640x480">640x480</option>
      <option value="1280x720">1280x720</option>
      <option value="1920x1080" selected>1920x1080</option>
      <option value="3840x2160">3840x2160</option>
    </select>
  </label>
  <button onclick="startScanning();">Start</button>
  <div id="container"></div>
  <script type="text/javascript">
  </script>
</body>
</html>
Step 2: Include Dependencies
-
Add Dynamsoft Document Viewer.
<script src="https://cdn.jsdelivr.net/npm/dynamsoft-document-viewer@latest/dist/ddv.js"></script> <link rel="stylesheet" href="https://cdn.jsdelivr.net/npm/dynamsoft-document-viewer@latest/dist/ddv.css"> -
Add Dynamsoft Document Normalizer by including the Capture Vision bundle.
<script src="https://cdn.jsdelivr.net/npm/dynamsoft-capture-vision-bundle@3.0.3001/dist/dcv.bundle.js"></script>
Step 3: Initialize the SDKs
Initialize the SDKs with a license.
async function init(){
  // Initialize license
  await Dynamsoft.License.LicenseManager.initLicense(
    "LICENSE-KEY",
    true
  );
  // Initialize DDN
  Dynamsoft.Core.CoreModule.loadWasm(["DDN"]);
  Dynamsoft.DDV.Core.loadWasm();
  // Initialize DDV
  await Dynamsoft.DDV.Core.init();
}
Step 4: Set Up the Document Scanning Viewers
Dynamsoft Document Viewer provides a set of viewers for document scanning.
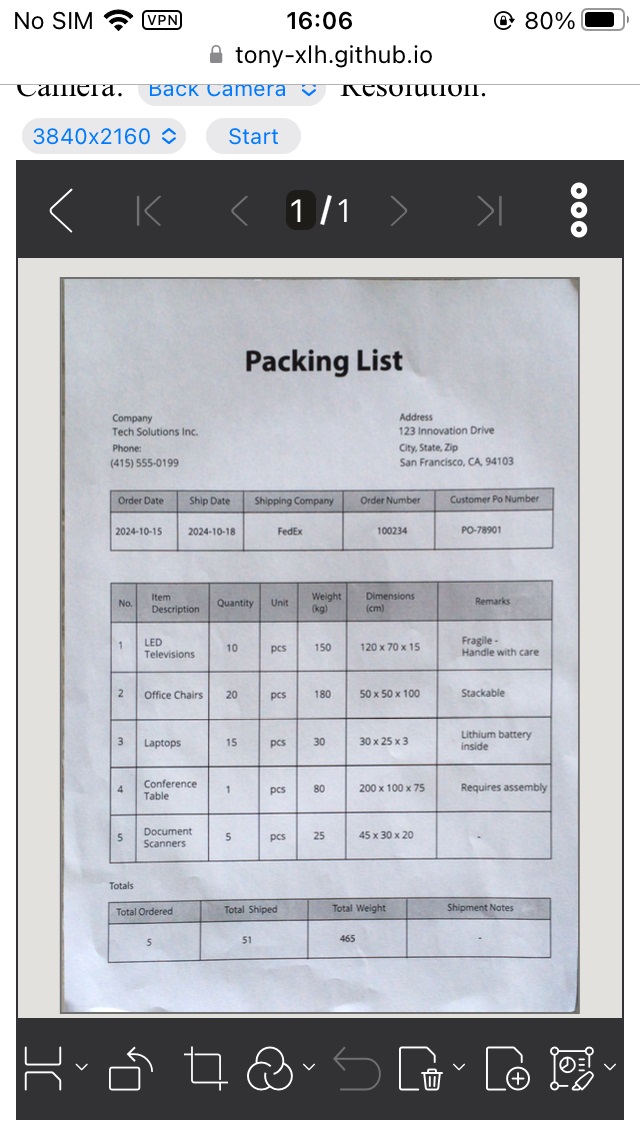
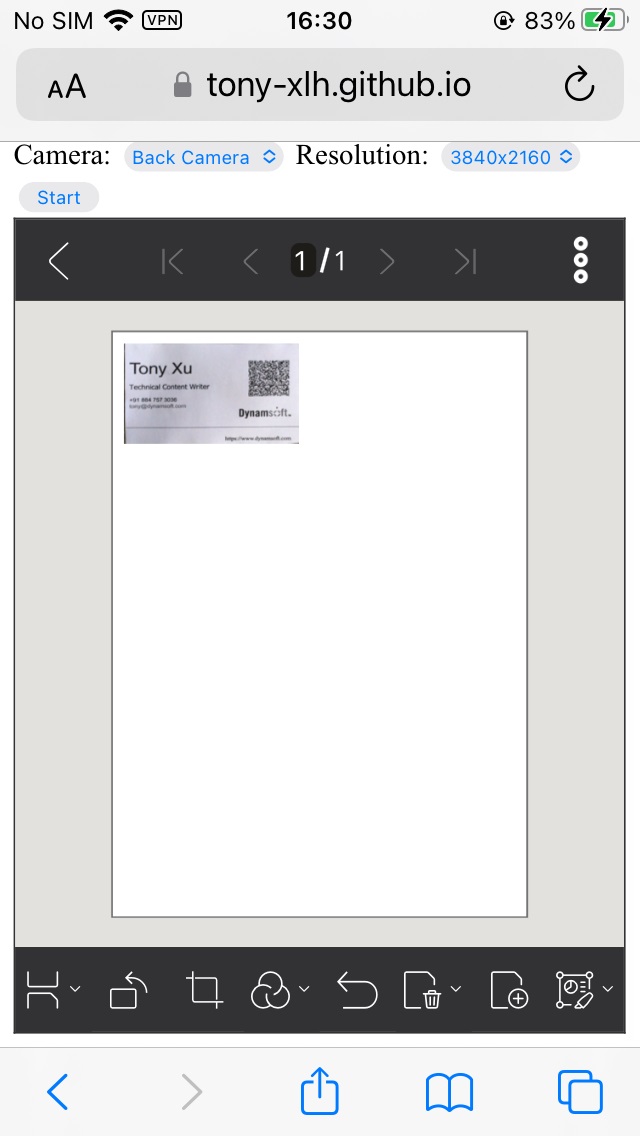
We are going to use its Capture Viewer to capture documents via the camera, its Perspective Viewer to adjust the detected boundaries and its Edit Viewer to view, edit and save the scanned documents.
Capture Viewer:
Perspective Viewer:

Edit Viewer:
The following is the code to set the viewers up.
-
Initialize Capture Viewer and bind it to the container.
let captureViewer = new Dynamsoft.DDV.CaptureViewer({ container: "container", uiConfig: captureViewerUiConfig, viewerConfig: { acceptedPolygonConfidence: 60, enableAutoDetect: false, } }); -
Initialize Perspective Viewer and bind it to the container.
let perspectiveViewer = new Dynamsoft.DDV.PerspectiveViewer({ container: "container", groupUid: captureViewer.groupUid, uiConfig: perspectiveUiConfig, viewerConfig: { scrollToLatest: true, } }); perspectiveViewer.hide(); -
Initialize Edit Viewer and bind it to the container.
editViewer = new Dynamsoft.DDV.EditViewer({ container: "container", groupUid: captureViewer.groupUid, uiConfig: editViewerUiConfig }); editViewer.hide(); -
Configure the UIs of the viewers using config objects.
const captureViewerUiConfig = { type: Dynamsoft.DDV.Elements.Layout, flexDirection: "column", children: [ { type: Dynamsoft.DDV.Elements.Layout, className: "ddv-capture-viewer-header-mobile", children: [ { type: "CameraResolution", className: "ddv-capture-viewer-resolution", }, Dynamsoft.DDV.Elements.Flashlight, ], }, Dynamsoft.DDV.Elements.MainView, { type: Dynamsoft.DDV.Elements.Layout, className: "ddv-capture-viewer-footer-mobile", children: [ Dynamsoft.DDV.Elements.AutoDetect, Dynamsoft.DDV.Elements.AutoCapture, { type: "Capture", className: "ddv-capture-viewer-captureButton", }, { // Bind click event to "ImagePreview" element // The event will be registered later. type: Dynamsoft.DDV.Elements.ImagePreview, events:{ click: "showPerspectiveViewer" } }, Dynamsoft.DDV.Elements.CameraConvert, ], }, ], }; const perspectiveUiConfig = { type: Dynamsoft.DDV.Elements.Layout, flexDirection: "column", children: [ { type: Dynamsoft.DDV.Elements.Layout, className: "ddv-perspective-viewer-header-mobile", children: [ { // Add a "Back" button in perspective viewer's header and bind the event to go back to capture viewer. // The event will be registered later. type: Dynamsoft.DDV.Elements.Button, className: "ddv-button-back", events:{ click: "backToCaptureViewer" } }, Dynamsoft.DDV.Elements.Pagination, { // Bind event for "PerspectiveAll" button to show the edit viewer // The event will be registered later. type: Dynamsoft.DDV.Elements.PerspectiveAll, events:{ click: "showEditViewer" } }, ], }, Dynamsoft.DDV.Elements.MainView, { type: Dynamsoft.DDV.Elements.Layout, className: "ddv-perspective-viewer-footer-mobile", children: [ Dynamsoft.DDV.Elements.FullQuad, Dynamsoft.DDV.Elements.RotateLeft, Dynamsoft.DDV.Elements.RotateRight, Dynamsoft.DDV.Elements.DeleteCurrent, Dynamsoft.DDV.Elements.DeleteAll, ], }, ], }; const editViewerUiConfig = { type: Dynamsoft.DDV.Elements.Layout, flexDirection: "column", className: "ddv-edit-viewer-mobile", children: [ { type: Dynamsoft.DDV.Elements.Layout, className: "ddv-edit-viewer-header-mobile", children: [ { // Add a "Back" buttom to header and bind click event to go back to the perspective viewer // The event will be registered later. type: Dynamsoft.DDV.Elements.Button, className: "ddv-button-back", events:{ click: "backToPerspectiveViewer" } }, Dynamsoft.DDV.Elements.Pagination, { type: Dynamsoft.DDV.Elements.Button, className: "ddv-button-menu", events:{ click: "menu" } } ], }, Dynamsoft.DDV.Elements.MainView, { type: Dynamsoft.DDV.Elements.Layout, className: "ddv-edit-viewer-footer-mobile", children: [ Dynamsoft.DDV.Elements.DisplayMode, Dynamsoft.DDV.Elements.RotateLeft, Dynamsoft.DDV.Elements.Crop, Dynamsoft.DDV.Elements.Filter, Dynamsoft.DDV.Elements.Undo, Dynamsoft.DDV.Elements.Delete, Dynamsoft.DDV.Elements.Load, Dynamsoft.DDV.Elements.AnnotationSet, ], }, ], }; -
Add a helper function to switch the viewers.
// Define a function to control the viewers' visibility const switchViewer = (c,p,e) => { captureViewer.hide(); perspectiveViewer.hide(); editViewer.hide(); if(c) { captureViewer.show(); } else { captureViewer.stop(); } if(p) perspectiveViewer.show(); if(e) editViewer.show(); }; -
Register events for the buttons defined to control the workflow.
// Register an event in `perspectiveViewer` to go back the capture viewer perspectiveViewer.on("backToCaptureViewer",() => { switchViewer(1,0,0); captureViewer.play().catch(err => {alert(err.message)}); }); // Register an event in `perspectiveViewer` to show the edit viewer perspectiveViewer.on("showEditViewer",() => { switchViewer(0,0,1) }); // Register an event in `editViewer` to go back to the perspective viewer editViewer.on("backToPerspectiveViewer",() => { switchViewer(0,1,0); }); -
Use Dynamsoft Document Normalizer for edge detection by defining the detection handler.
// Configure document boundaries function await initDocDetectModule(Dynamsoft.DDV, Dynamsoft.CVR); async function initDocDetectModule(DDV, CVR) { const router = await CVR.CaptureVisionRouter.createInstance(); class DDNNormalizeHandler extends DDV.DocumentDetect { async detect(image, config) { if (!router) { return Promise.resolve({ success: false }); }; let width = image.width; let height = image.height; let ratio = 1; let data; if (height > 720) { ratio = height / 720; height = 720; width = Math.floor(width / ratio); data = compress(image.data, image.width, image.height, width, height); } else { data = image.data.slice(0); } // Define DSImage according to the usage of DDN const DSImage = { bytes: new Uint8Array(data), width, height, stride: width * 4, //RGBA format: 10 // IPF_ABGR_8888 }; // Use DDN normalized module const results = await router.capture(DSImage, 'DetectDocumentBoundaries_Default'); // Filter the results and generate corresponding return values if (results.items.length <= 0) { return Promise.resolve({ success: false }); }; const quad = []; results.items[0].location.points.forEach((p) => { quad.push([p.x * ratio, p.y * ratio]); }); const detectResult = this.processDetectResult({ location: quad, width: image.width, height: image.height, config }); return Promise.resolve(detectResult); } } DDV.setProcessingHandler('documentBoundariesDetect', new DDNNormalizeHandler()) } //compress the video frames function compress( imageData, imageWidth, imageHeight, newWidth, newHeight, ) { let source = null; try { source = new Uint8ClampedArray(imageData); } catch (error) { source = new Uint8Array(imageData); } const scaleW = newWidth / imageWidth; const scaleH = newHeight / imageHeight; const targetSize = newWidth * newHeight * 4; const targetMemory = new ArrayBuffer(targetSize); let distData = null; try { distData = new Uint8ClampedArray(targetMemory, 0, targetSize); } catch (error) { distData = new Uint8Array(targetMemory, 0, targetSize); } const filter = (distCol, distRow) => { const srcCol = Math.min(imageWidth - 1, distCol / scaleW); const srcRow = Math.min(imageHeight - 1, distRow / scaleH); const intCol = Math.floor(srcCol); const intRow = Math.floor(srcRow); let distI = (distRow * newWidth) + distCol; let srcI = (intRow * imageWidth) + intCol; distI *= 4; srcI *= 4; for (let j = 0; j <= 3; j += 1) { distData[distI + j] = source[srcI + j]; } }; for (let col = 0; col < newWidth; col += 1) { for (let row = 0; row < newHeight; row += 1) { filter(col, row); } } return distData; } -
Start the document scanning workflow using a selected camera and a specified resolution.
async function startScanning(){
  let selectedCamera = cameras[document.getElementById("select-camera").selectedIndex];
  await captureViewer.selectCamera(selectedCamera.deviceId);
  let selectedResolution = document.getElementById("select-resolution").selectedOptions[0].value;
  let width = parseInt(selectedResolution.split("x")[0]);
  let height = parseInt(selectedResolution.split("x")[1]);
  captureViewer.play({
    resolution: [width,height],
  }).catch(err => {
    alert(err.message)
  });
}
Step 5: Resize the Scanned Image to Standard Paper Dimensions
The size of the scanned document image may not conform to the ratio of a standard like A4 (210 x 297 mm).
We can resize the image with canvas.
let pageWidth = 210; //mm
let pageHeight = 297; //mm
let DPI = 300;
let pageWidthPx = pageWidth * DPI / 25.4; //convert to pixel
let pageHeightPx = pageHeight * DPI / 25.4;
let docImageBlob = (await editViewer.currentDocument.getPageData(pageUid)).display.data;
let img = document.createElement("img");
img.onload = async function(){
  let resizedDocBlob = await resizeImage(img,docWidthPx,docHeightPx);
  await editViewer.currentDocument.updatePage(pageUid, resizedDocBlob);
};
img.src = URL.createObjectURL(docImageBlob);

function resizeImage(image, width, height) {
  return new Promise((resolve, reject) => {
    let canvas = document.createElement("canvas");
    canvas.width = width;
    canvas.height = height;
    let ctx = canvas.getContext("2d");
    ctx.drawImage(image, 0, 0, width, height);
    canvas.toBlob(blob => {
      resolve(blob);
    });
  });
}
In some cases, the scanned document is small, like a business card and we want to print it on a piece of A4 paper. Then, we can create an empty page first and then add the resized document image on it.
let docWidth = 89; //mm
let docHeight = 51; //mm
let pageWidth = 210; //mm
let pageHeight = 297; //mm
let DPI = 300;
let pageWidthPx = pageWidth * DPI / 25.4; //convert to pixel
let pageHeightPx = pageHeight * DPI / 25.4;
let docWidthPx = docWidth * DPI / 25.4;
let docHeightPx = docHeight * DPI / 25.4;
let pageBlob = await createEmptyPage(pageWidthPx,pageHeightPx);
let docImageBlob = (await editViewer.currentDocument.getPageData(pageUid)).display.data;
let img = document.createElement("img");
img.onload = async function(){
  let resizedDocBlob = await resizeImage(img,docWidthPx,docHeightPx);
  await editViewer.currentDocument.updatePage(pageUid, pageBlob);
  let newPageData = await editViewer.currentDocument.getPageData(pageUid);
  let ratio = newPageData.cropBox.width / newPageData.display.width;
  const rect = {
    x: 50,
    y: 50,
    width: docWidthPx * ratio,
    height: docHeightPx * ratio
  };
  const options = {
    x: rect.x,
    y: rect.y,
    width: rect.width,
    height: rect.height,
    stamp: resizedDocBlob
  };
  const stamp = await Dynamsoft.DDV.annotationManager.createAnnotation(pageUid, "stamp", options); //insert the document image as an annotation so that we can move it around
}
img.src = URL.createObjectURL(docImageBlob);

function createEmptyPage(width,height){
  return new Promise((resolve, reject) => {
    let canvas = document.createElement("canvas");
    canvas.width = width;
    canvas.height = height;
    let ctx = canvas.getContext("2d");
    ctx.fillStyle = "white";
    ctx.fillRect(0,0,width,height);
    canvas.toBlob(blob => {
      resolve(blob);
    });
  })
}
Step 6: Apply a Black-and-White Filter for Print-Ready Output
We have to whiten the image for printing. We can apply filters using Dynamsoft Document Viewer’s Edit Viewer.
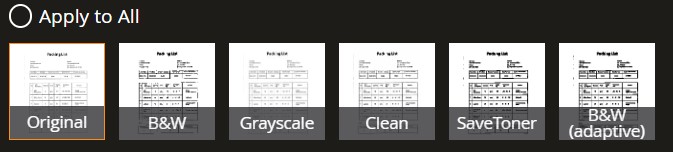
Here is the code to set up the image filter:
// Configure image filter feature which is in edit viewer
Dynamsoft.DDV.setProcessingHandler("imageFilter", new Dynamsoft.DDV.ImageFilter());
You can also define your own image filters. Check out this blog to learn more.
Step 7: Save the Document as PDF
Save the document as PDF with a specified page type:
HTML:
<label>
  Page Size:
  <select id="page-size-select">
    <option value="page/default">Default</option>
    <option value="page/a4">A4</option>
    <option value="page/a3">A3</option>
    <option value="page/letter">Letter</option>
  </select>
</label>
JavaScript:
async function downloadAsPDF(){
  let pageSize = document.getElementById("page-size-select").selectedOptions[0].value;
  const pdfSettings = {
    compression: "pdf/jpeg",
    pageType: pageSize
  };
  const blob = await editViewer.currentDocument.saveToPdf(pdfSettings);
  downloadBlob(blob,"document.pdf");
};

function downloadBlob(blob,filename){
  const url = URL.createObjectURL(blob);
  const a = document.createElement("a");
  a.href = url;
  a.download = filename;
  a.click();
}
Step 8: Print the Document via Wireless Printing
Print the PDF document using a connected printer.
On mobile phones, we mostly use wireless printing.
On iOS, we can use AirPrint.
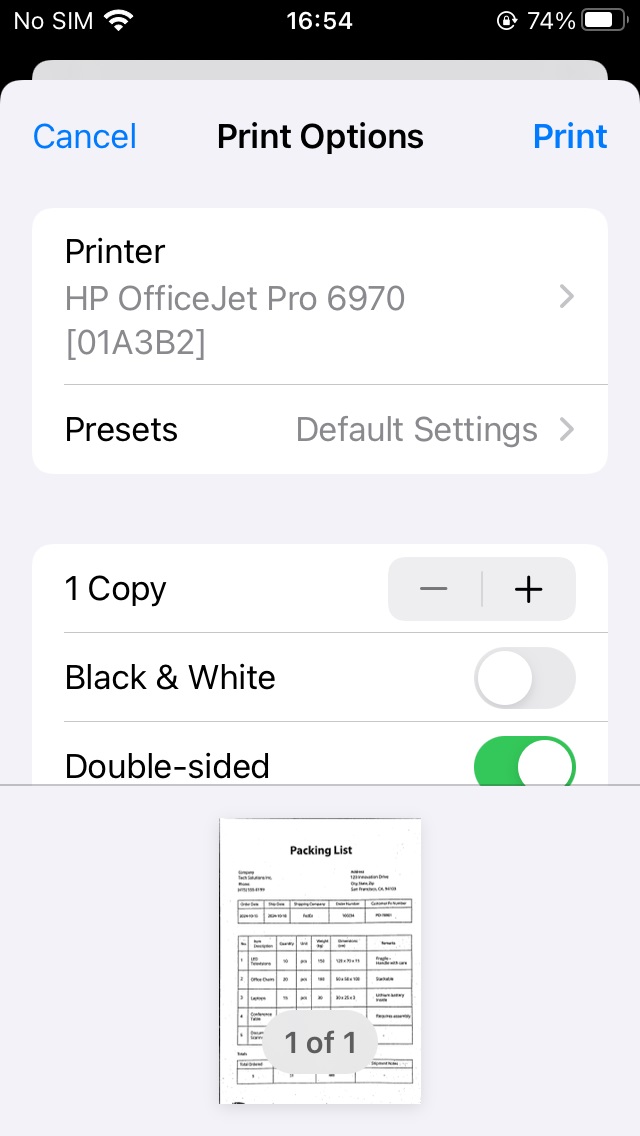
On Android, we can use Mopria.

Common Issues & Edge Cases
- Camera permission denied — If the browser blocks camera access,
captureViewer.play()will throw. Always wrap it in a.catch()handler and prompt the user to grant camera permission in their browser settings. - Edge detection fails on low-contrast documents — The
acceptedPolygonConfidencethreshold (set to60in the viewer config) may be too strict when the document and background colors are similar or lighting is poor. Lower the threshold or switch to manual detection mode in those conditions. - PDF page size mismatch — If the scanned image aspect ratio does not match the selected paper size, the PDF may contain white borders or clip the content. Call
resizeImage()to explicitly match pixel dimensions to the target paper standard before saving.
Source Code
Get the source code and have a try!
https://github.com/tony-xlh/scan-and-print-document-javascript/