Using Visual SourceSafe - VSS in Visual Studio 2005 & 2008
This article is a part of SourceSafe / VSS Tutorial
Navigation Links:
- Choosing SourceSafe as the SCC Provider in Visual Studio
- Adding Solution into Source Control of SourceSafe
- Performing SourceSafe Operations in Visual Studio
- Changing Source Control Binding
- Pending Checkins Window
- Viewing Source Control Message
Visual SourceSafe can be integrated into Visual Studio to source control solution files, project files and application configuration files. Using SourceSafe in Visual Studio allows us to source control the code directly in the Visual Studio IDE. When we try to modify a file source controlled by SourceSafe in Visual Studio, it will check out the file automatically (If you use the default setting Check out automatically for Checked-in item behavior On Edit in menu Tools -> Options -> Source Control -> Environment). We can then check in the modifications into the VSS Database.
Choosing SourceSafe as the SCC Provider in Visual Studio
To use SourceSafe to source control your files in Visual Studio, you need to select SourceSafe as your source control provider first. You can do that through the Visual Studio menu Tools -> Options -> Source Control.
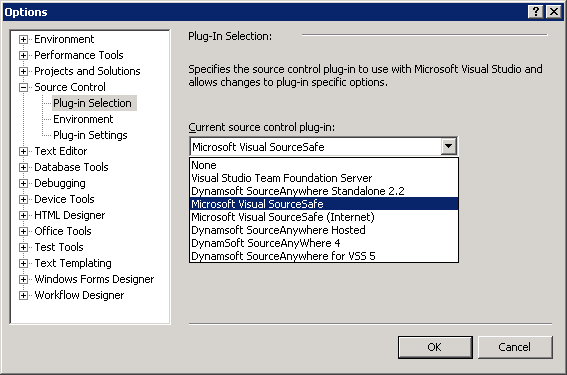 (Choose Source Control Provider)
Adding Solution into Source Control of SourceSafe
The files must be added into Source Control of SourceSafe before you can perform SourceSafe operations on them. To add a solution or project into VSS DB, right-click a solution/project file in Solution Explorer and click Add Solution to Source Control. In the following dialog boxes, enter your credentials and select a location for your project.
Performing SourceSafe Operations in Visual Studio
Now if you right-click an item in Solution Explorer or click menu File -> Source Control, you will see some additional SourceSafe functions, such as Get, Check Out/In, Undo Check Out, Compare etc.
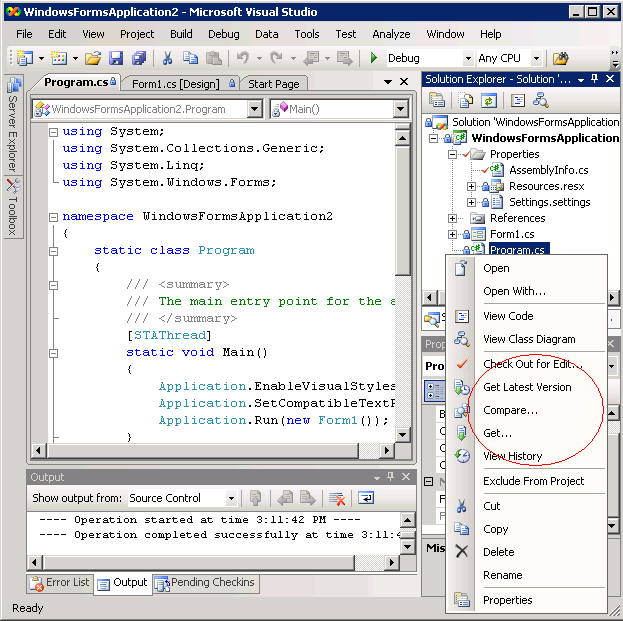 (Access SourceSafe functions through right mouse button)
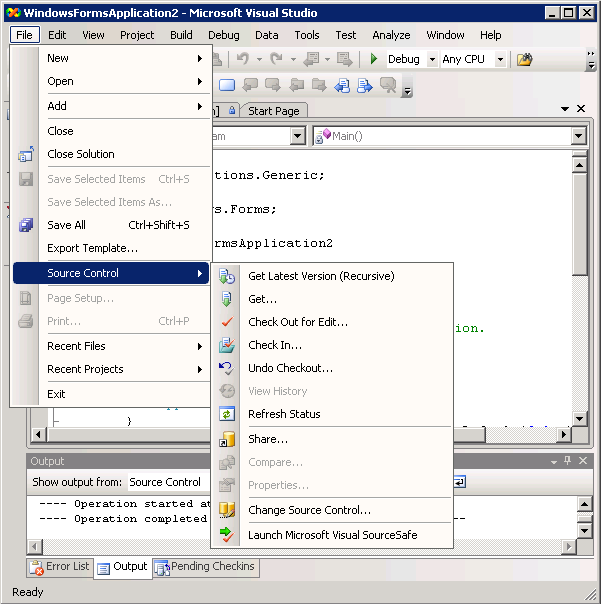 (Access SourceSafe functions through File menu)
View History To view the history information of an item, you can right-click the item and select View History. You can perform operations like Check Out, Get, Pin in the History Explorer.
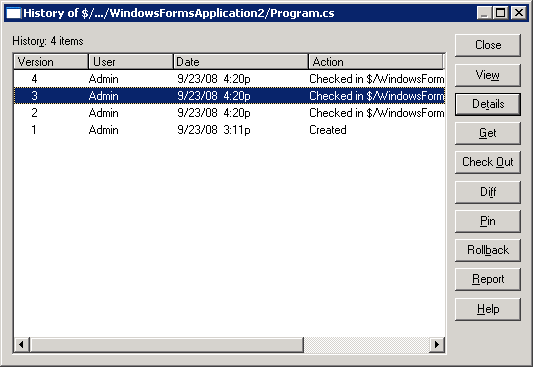 (History Explorer)
Changing Source Control Binding
If the project structure in SourceSafe is changed, or the project is moved to a new VSS DB, you will need to change the source control binding of the solution. Go to menu File -> Source Control -> Change Source Control, perform Unbind to removes the solution/project from source control and then perform Bind to associate the solution/project with the recent server folder or database.
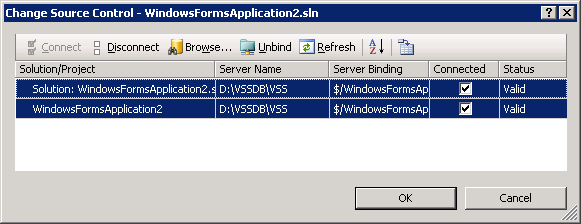 (Change source control binding)
Pending Checkins Window
Visual Studio provides a Pending Checkins Window which allows you to see all of the checked out files in the current solution. You can select items to check-in in the Pending Checkins window. To open it, click menu View -> Pending Checkins.
Viewing Source Control Message
In cases when source control operations failed for some reason, you may be confused at the vague error message prompted by Visual Studio. In this situation, you may take a look at the Output Window of Visual Studio. If it is not already open, you can click menu View -> Output to open the window, choose to view the output message of Source Control and you can find more detailed information there.
The SQL Server-based Source Control Software Designed to be a SourceSafe Replacement
The Fastest SourceSafe Remote Access Tool Recommeded by Microsoft
Links: Previous article ««: Next article »»: Switching Visual Studio projects from SourceSafe to other SCC providers SourceSafe How To series home page: VSS / SourceSafe Tutorial


