


How to Tag and Group Document Images in a JavaScript Web App
The Dynamic Web TWAIN SDK is renowned for its capabilities in document scanning, uploading, editing, and saving. In this article, we will explore the image tagging and grouping feature for document management applications. For instance, you can tag images with a date, project name, or customer name, enabling you to filter images by tags for swift retrieval.
What you’ll build: A browser-based document management app that scans or loads images and lets you assign custom metadata tags to group and filter them instantly, powered by the Dynamic Web TWAIN SDK.
Key Takeaways
- Dynamic Web TWAIN’s
TagImages()andFilterImagesByTag()APIs let you attach arbitrary string tags to scanned or loaded document images and filter the viewer by tag in one call. - The SDK supports both scanner acquisition (TWAIN/WIA/SANE) and local file loading, so the same tagging workflow works regardless of image source.
- Tagging is purely client-side — no server round-trip is needed to organize images by project, date, or customer name.
- This approach is ideal for document intake workflows where operators must categorize pages from mixed batches before uploading.
Common Developer Questions
How do I tag and group scanned document images in a JavaScript web app?
Load or scan the pages into Dynamic Web TWAIN, assign tag strings to the selected images, and then use those tags to group or filter what the user sees in the viewer. This makes mixed document batches much easier to organize before export or upload.
How do I filter images by metadata tags using Dynamic Web TWAIN?
Apply tags with TagImages() and then call FilterImagesByTag() with the target value to narrow the visible image set. The filtering happens in the client-side viewer, so operators can switch categories instantly.
How do I load images from a scanner or local file system and organize them with custom tags in the browser?
Use the same DWT buffer for both acquisition and file loading, then apply the tagging workflow after the images are present. Because the source abstraction is shared, scanner pages and uploaded files can be organized with the same tag logic.
Prerequisites
- Get a 30-day free trial license for Dynamic Web TWAIN.
-
npm install -g http-server
Install Dynamic Web TWAIN
- Full Package
-
Extract the package and copy the
Resourcesfolder to your project. -
Import the scripts in your HTML file:
 <script type="text/javascript" src="Resources/dynamsoft.webtwain.initiate.js"></script>
 <script type="text/javascript" src="Resources/dynamsoft.webtwain.config.js"></script>

 <script type="text/javascript">
     Dynamsoft.DWT.ResourcesPath = 'Resources/';
 </script>
-
-
-
Install the package:
npm install dwt -
Import the package in your HTML file:
 <script src="node_modules/dwt/dist/dynamsoft.webtwain.min.js"></script>

 <script type="text/javascript">
     Dynamsoft.DWT.ResourcesPath = 'node_modules/dwt/dist/';
 </script>
-
- CDN:
<script type="text/javascript" src="https://unpkg.com/dwt/dist/dynamsoft.webtwain.min.js"> </script>

<script type="text/javascript">
  Dynamsoft.DWT.ResourcesPath = 'https://unpkg.com/dwt/dist/';
</script>
Build the Image Tagging and Grouping Feature
-
In this example, we utilize a CDN for the Dynamic Web TWAIN library.
 <script type="text/javascript" src="https://unpkg.com/dwt/dist/dynamsoft.webtwain.min.js"> </script>

   <script type="text/javascript">
     Dynamsoft.DWT.ResourcesPath = 'https://unpkg.com/dwt/dist/';
   </script>
Upon first running the app, you’ll be prompted to install the
Dynamic Web TWAIN Servicefor Windows, Linux, or macOS. After the installation is complete, refresh your web page to proceed. -
Initialize the Dynamic Web TWAIN component with a valid license key and a designated div element.
 <div id="dwtcontrolContainer"></div>

 <script type="text/javascript">
     window.onload = function () {
         if (Dynamsoft) {
             Dynamsoft.DWT.AutoLoad = false;
             Dynamsoft.DWT.UseLocalService = true;
             Dynamsoft.DWT.Containers = [{ ContainerId: 'dwtcontrolContainer', Width: '640px', Height: '640px' }];
             Dynamsoft.DWT.RegisterEvent('OnWebTwainReady', Dynamsoft_OnReady);
             // https://www.dynamsoft.com/customer/license/trialLicense/?product=dcv&package=cross-platform
             Dynamsoft.DWT.ProductKey = 'LICENSE-KEY';
             Dynamsoft.DWT.ResourcesPath = 'https://unpkg.com/dwt/dist/';

             Dynamsoft.DWT.Load();
         }

     };
 </script>
The callback function Dynamsoft_OnReady is triggered once the Dynamic Web TWAIN component is fully loaded. Within this function, you can access the Dynamic Web TWAIN instance, set various parameters, and retrieve the list of devices to populate the dropdown list with the device names.
 function Dynamsoft_OnReady() {
     DWObject = Dynamsoft.DWT.GetWebTwain('dwtcontrolContainer');
     if (DWObject) {
         let view_select = document.getElementById('view');
         DWObject.SetDefaultTag('default');
         DWObject.IfShowUI = false;
         DWObject.Width = 480;
         DWObject.Height = 640;
         let count = DWObject.SourceCount;
         let select = document.getElementById("source");

         DWObject.GetDevicesAsync().then(function (devices) {
             for (var i = 0; i < devices.length; i++) { // Get how many sources are installed in the system
                 let option = document.createElement('option');
                 option.value = devices[i].displayName;
                 option.text = devices[i].displayName;
                 deviceList.push(devices[i]);
                 select.appendChild(option);
             }
         }).catch(function (exp) {
             alert(exp.message);
         });
     }
 }
Use the
SetDefaultTag()method to assign a default tag to the images and theGetDevicesAsync()method to asynchronously fetch the list of devices. The device information is stored in thedeviceListarray. -
Implement a select element to allow users to switch view modes.
 <select id="view" onchange="onViewChange()">
     <option value="1">1x1</option>
     <option value="2">2x2</option>
     <option value="3">3x3</option>
     <option value="4">4x4</option>
     <option value="5">5x5</option>
     <option value="6">6x6</option>
 </select>

 <script>
     function onViewChange() {
         if (!DWObject) return;

         let select = document.getElementById("view");
         DWObject.SetViewMode(parseInt(select.value), parseInt(select.value));
     }
 </script>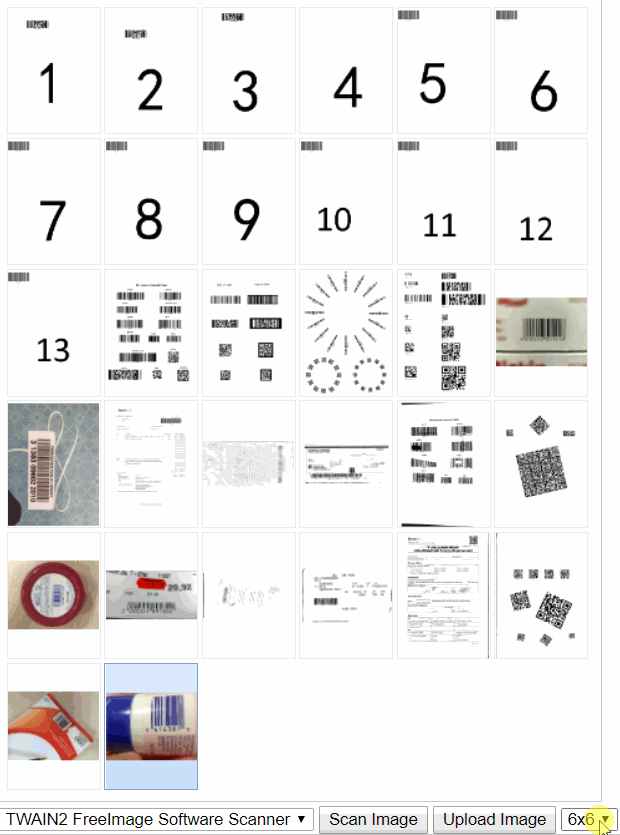
-
Enable the acquisition of images from a scanner or the loading of images from the local file system. All images will be showcased in the Dynamic Web TWAIN viewer.
<input type="button" value="Scan Image" onclick="scanImage()" /> <input id="btnUpload" type="button" value="Load Image" onclick="loadImage()"> <script> function scanImage() { if (!DWObject) return; var sources = document.getElementById('source'); if (sources) { DWObject.SelectDeviceAsync(deviceList[sources.selectedIndex]).then(function () { return DWObject.AcquireImageAsync({ IfShowUI: false, IfCloseSourceAfterAcquire: true }); }).catch(function (exp) { alert(exp.message); }); } } function loadImage() { if (!DWObject) return; let onSuccess = function () { }; let onFailure = function (errorCode, errorString) { }; DWObject.IfShowFileDialog = true; DWObject.LoadImageEx("", Dynamsoft.DWT.EnumDWT_ImageType.IT_ALL, onSuccess, onFailure); } </script> -
Add custom tags to selected images and filter images based on these tags.
<input type="button" value="Add Tag" onclick="addTag()" /> <select id="taglist" onchange="onTagChange()"> <option value="default">All</option> </select> <script> function addTag() { let tag = document.getElementById('tag'); if (!tag.value || tag.value === '') return; let select = document.getElementById("taglist"); if (!global_option_values[tag.value]) { let option = document.createElement('option'); option.value = tag.value; option.text = tag.value; select.insertBefore(option, select.childNodes[0]); select.value = option.value; global_option_values[tag.value] = tag.value; } else { select.value = global_option_values[tag.value]; } DWObject.TagImages(DWObject.SelectedImagesIndices, tag.value); DWObject.FilterImagesByTag(tag.value); } function onTagChange() { let select = document.getElementById("taglist"); DWObject.FilterImagesByTag(select.value); } </script> -
To run the app, use an HTTP server, then open your browser and navigate to
http://localhost:8080/.http-server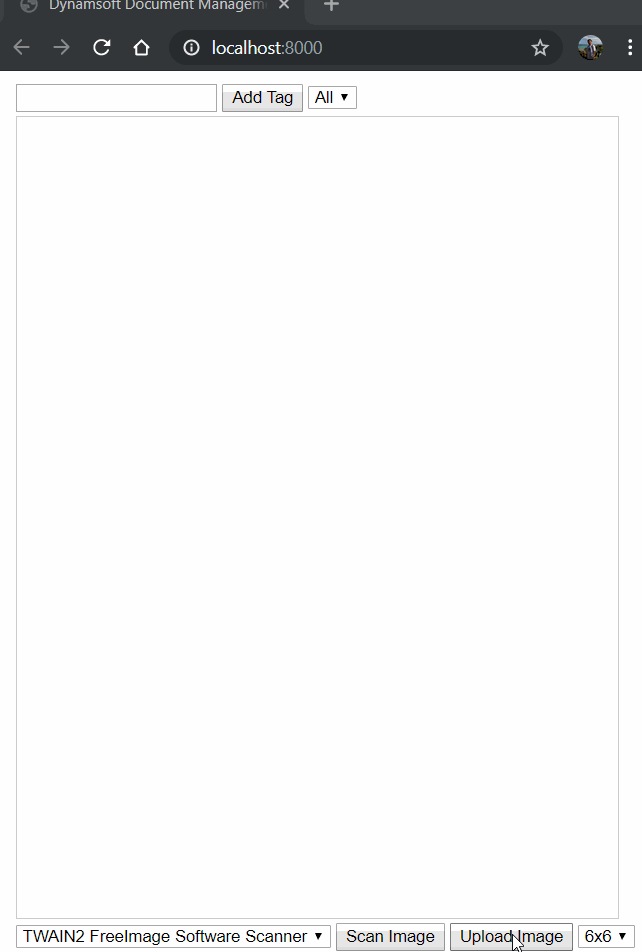
Common Issues and Edge Cases
- Dynamic Web TWAIN Service not detected: On first run, the browser prompts you to install the local service. If the prompt does not appear, verify that
ResourcesPathpoints to the correct location and that the service installer completed. Restarting the browser may also help. - Tags not persisting after page reload: Tag assignments from
TagImages()live in the current in-memory session. If you refresh the page, all tags are lost. To persist tags across sessions, save tag-to-image mappings to your server or tolocalStoragebefore the page unloads. FilterImagesByTag()shows no images: This happens when the tag string does not exactly match any tag previously assigned viaTagImages(). Tag matching is case-sensitive — ensure consistent casing when adding and filtering tags.