Building an Angular Document Viewer for Image Loading, Annotation, and PDF Export
In today’s digital landscape, web applications often need to handle sophisticated tasks like loading, viewing, and manipulating image files. This article will walk you through building an Angular web application that enables users to load and view image files, add annotations directly to those images, and seamlessly save the annotated images as PDF files. Leveraging the Dynamsoft Document Viewer SDK, you’ll see just how efficiently and quickly you can develop this powerful application.
This article is Part 5 in a 5-Part Series.
- Part 1 - How to Digitize Paper Documents in Angular Web Applications
- Part 2 - How to Build an Angular Barcode & QR Code Detection App: A Step-by-Step Guide
- Part 3 - How to Detect and Rectify Documents in Angular Web Applications
- Part 4 - Steps to Develop an Angular Passport MRZ Reader & Scanner
- Part 5 - Building an Angular Document Viewer for Image Loading, Annotation, and PDF Export
Angular Document PDF Viewer
Prerequisites
- Node.js
-
Angular CLI
npm install -g @angular/cli ng --version - Dynamsoft Capture Vision Trial License
Installing and Configuring Dynamsoft Document Viewer SDK
1. Clone the Existing Repository
Begin by cloning the repository that already integrates other Dynamsoft SDKs:
git clone https://github.com/yushulx/angular-barcode-mrz-document-scanner.git
cd angular-barcode-mrz-document-scanner
2. Install Dynamsoft Document Viewer SDK
Next, install the Dynamsoft Document Viewer SDK using npm:
npm install dynamsoft-document-viewer
3. Configure Assets in angular.json
To ensure the Document Viewer assets are correctly bundled, add the following configuration to the angular.json file:
{
  "glob": "**/*",
  "input": "./node_modules/dynamsoft-document-viewer/dist",
  "output": "assets/dynamsoft-document-viewer"
}
4. Import and Initialize the Document Viewer SDK
In src/app/product-list/product-list.component.ts, import and initialize the Document Viewer SDK with the following code:
import { DDV } from 'dynamsoft-document-viewer';

...
export class ProductListComponent {
  ...

  async activate(): Promise<void> {
    ...
    try {
      let licenseKey: string = this.inputText === '' ? this.placeholderText : this.inputText;
      await LicenseManager.initLicense(licenseKey, true);

      DDV.Core.engineResourcePath = getFullUrl('assets/dynamsoft-document-viewer/engine/');
      await DDV.Core.init();
      DDV.setProcessingHandler("imageFilter", new DDV.ImageFilter());
      ...
    } catch (error) {
      alert(error);
    }

  }
}
Resolving the Build Error Caused by index.d.ts in Dynamsoft Document Viewer SDK
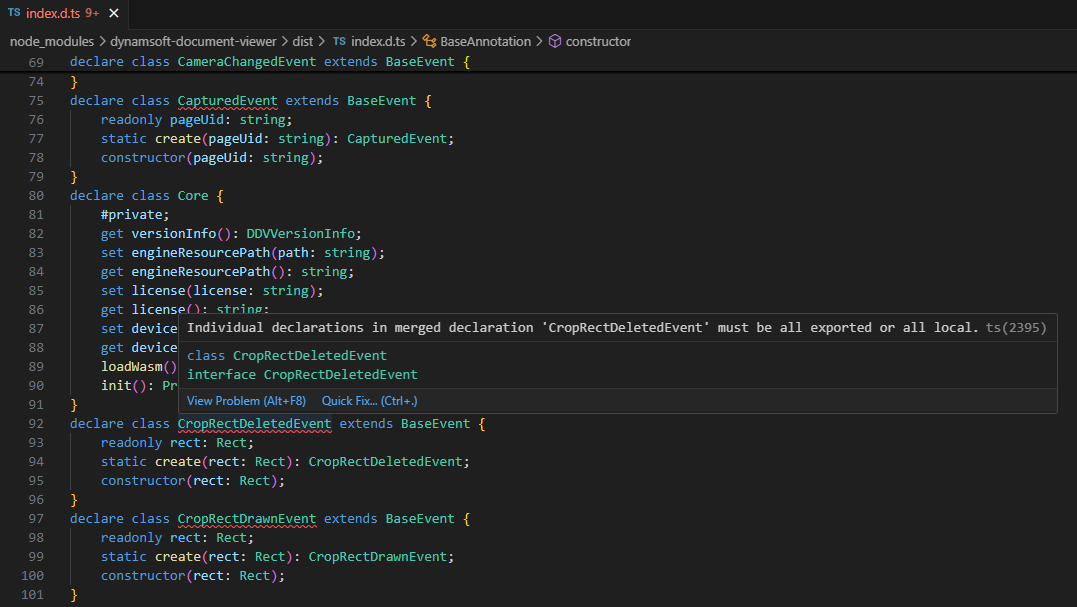
You may encounter the following TypeScript error during the build process:
TS2395: Individual declarations in merged declaration ‘xxx’ must be all exported or all local

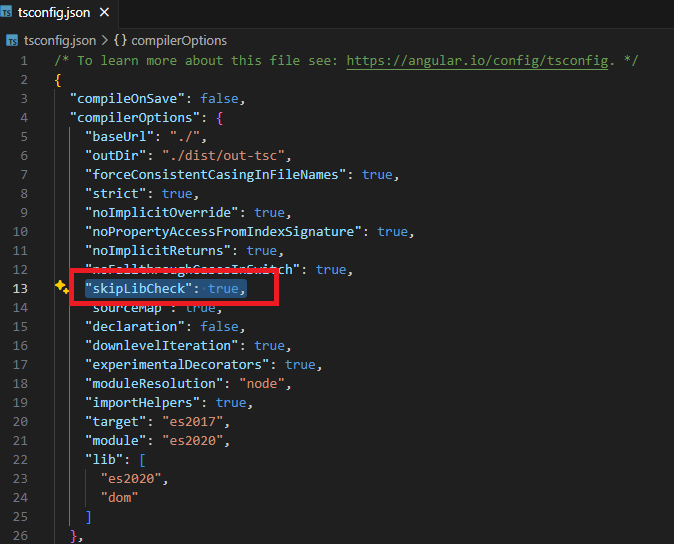
This error typically occurs due to type declaration conflicts within the SDK. You can resolve it by modifying your tsconfig.json file. Add the following configuration:
{
  "compilerOptions": {
    "skipLibCheck": true
  }
}

This setting instructs TypeScript to skip type checking of declaration files (.d.ts), which can help avoid conflicts like this in third-party libraries.
Creating an Angular Component for Document Viewer
1. Generate the Document Viewer Component
Start by creating a new Angular component for the Document Viewer with the following command:
ng generate component document-viewer
2. Update the products.ts File
Add a new item to the products.ts file to include the Document Viewer in your product list:
export interface Product {
  id: string;
  name: string;
  description: string;
}

export const products = [
  ...
  {
    id: 'document-viewer',
    name: 'Document Viewer',
    description: 'View, edit and save documents',
  },

];
3. Configure Routing for the Document Viewer
In the app-routing.module.ts file, add a new route to direct users to the DocumentViewerComponent:
...
import { DocumentViewerComponent } from './document-viewer/document-viewer.component';

const routes: Routes = [
  ...
  { path: 'document-viewer', component: DocumentViewerComponent }
];

@NgModule({
  imports: [RouterModule.forRoot(routes)],
  exports: [RouterModule]
})
export class AppRoutingModule { }
4. Run the Application
Now, start your Angular application to see the new Document Viewer component in action:
ng serve
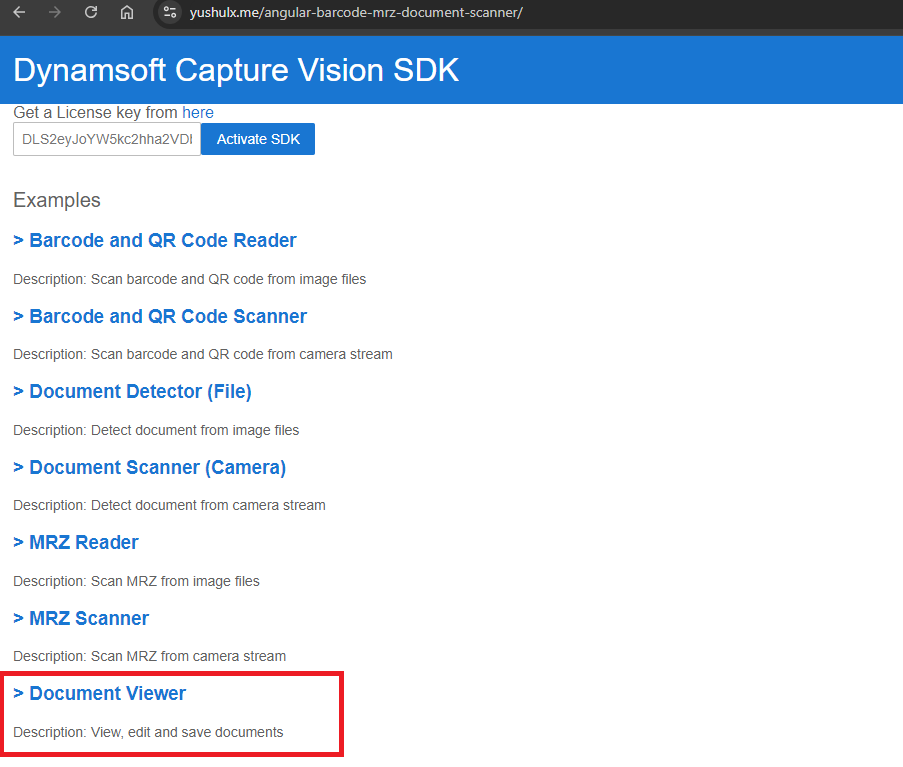
The new component will appear on the home page:

Image Loading, Annotation, and PDF Export in a Web Page
The Dynamsoft Document Viewer SDK provides both CSS and JavaScript files to facilitate UI and functionality. Follow the steps below to integrate image loading, annotation, and PDF export features into your web page.
1. Include CSS in index.html
Start by adding the necessary CSS file to your index.html to style the document viewer:
<!doctype html>
<html lang="en">

<head>
  <meta charset="utf-8">
  <title>MyApp</title>
  <base href="/">
  <meta name="viewport" content="width=device-width, initial-scale=1">
  <link rel="icon" type="image/x-icon" href="favicon.ico">
  <link rel="stylesheet" href="assets/dynamsoft-document-viewer/ddv.css">
</head>

<body>
  <app-root></app-root>
</body>

</html>
2. Create a Container in the Component Template
In document-viewer.component.html, add a <div> element that will serve as the container for the document viewer:
<div id="document_container"></div>
3. Apply CSS for Full-Screen Display
To ensure the document viewer displays full screen, add the following CSS to document-viewer.component.css:
#document_container {
    width: 100%;
    height: 100%;
    position: fixed;
    left: 0;
}
4. Initialize the Document Viewer in TypeScript**
Next, add the following TypeScript code to document-viewer.component.ts to initialize and configure the document viewer:
import { Component, OnInit } from '@angular/core';
import { DDV, EditViewer } from 'dynamsoft-document-viewer';

@Component({
  selector: 'app-document-viewer',
  templateUrl: './document-viewer.component.html',
  styleUrls: ['./document-viewer.component.css']
})
export class DocumentViewerComponent implements OnInit {
  editViewer?: EditViewer;

  constructor() {

  }

  ngOnInit(): void {
    const mytooltips = DDV.Elements.getTooltip();
    mytooltips.DisplayMode = "Display Mode";
    mytooltips.AnnotationSet = "Add Annotation";
    DDV.Elements.setTooltip(mytooltips);

    let config = DDV.getDefaultUiConfig("editViewer", { includeAnnotationSet: true });
    this.editViewer = new DDV.EditViewer({
      container: "document_container",
      uiConfig: config!,
    });

  }

}
Explanation
Tooltip Customization: DDV.Elements.getTooltip()andDDV.Elements.setTooltip()allow you to customize the tooltips displayed in the viewer. By default, tooltips are empty, so these methods enable you to define meaningful labels for UI elements.UI Configuration: DDV.getDefaultUiConfig()retrieves the default UI configuration for the viewer. SettingincludeAnnotationSettotrueenables annotation tools within the viewer.Viewer Initialization: new DDV.EditViewer()creates a new instance of theEditViewerclass, specifying the container element’s ID and applying the UI configuration.
5. Run the Application
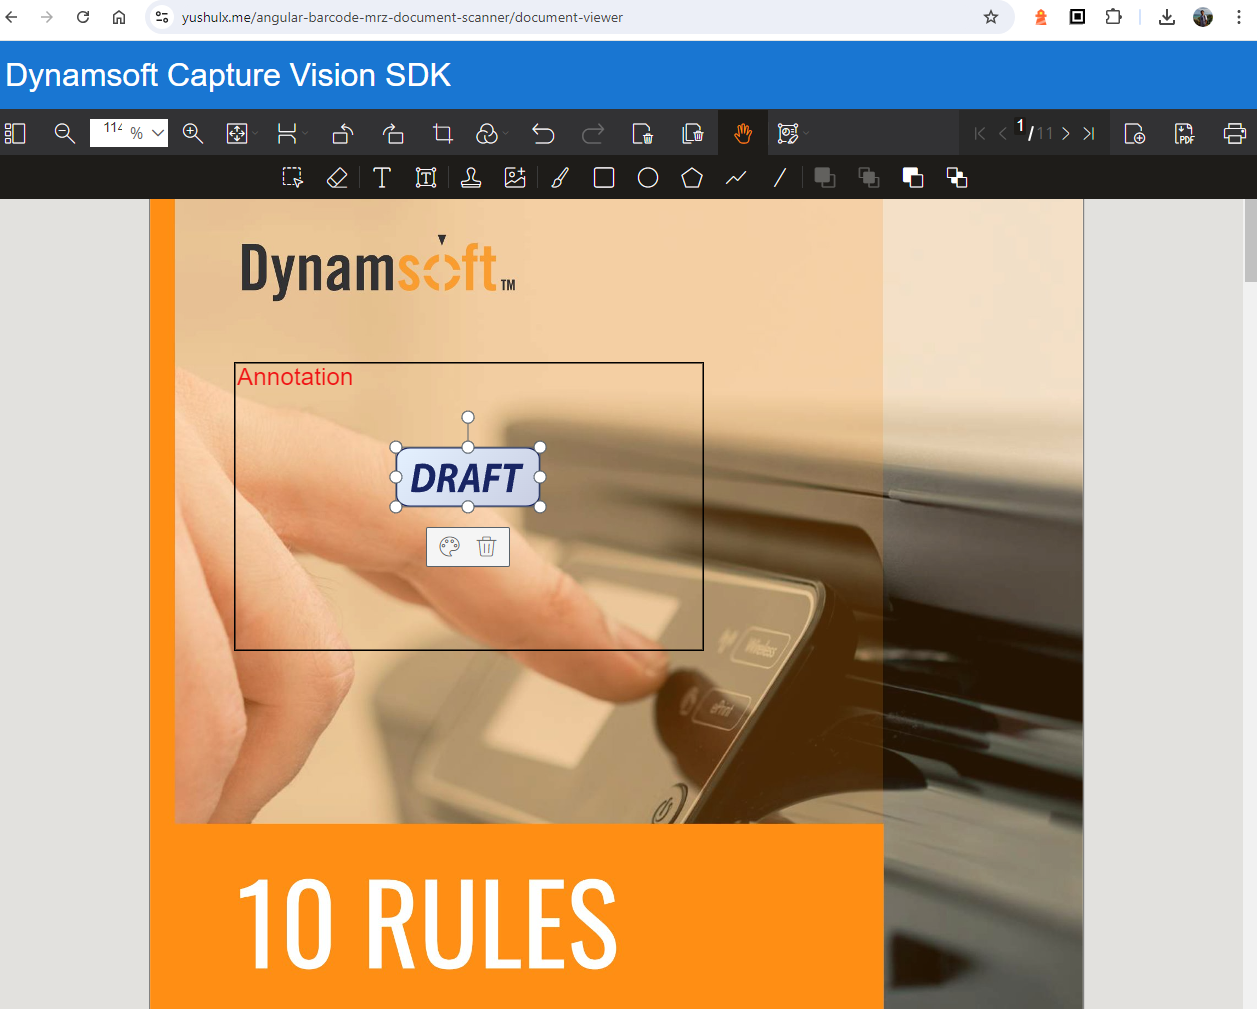
You now have a fully functional document viewer that supports loading and editing images (including PDF, PNG, JPEG, BMP, and TIFF formats), adding annotations, and saving the annotated images as PDF files.

Built-in Annotation Types
- Rectangle
- Ellipse
- Polygon
- Polyline
- Line
- Ink
- Text Box
- Text Typewriter
- Stamp
API Reference
For further customization of the document viewer, refer to the API documentation.
Source Code
https://github.com/yushulx/angular-barcode-mrz-document-scanner


