


Build a Barcode & QR Code Scanner Chrome Extension with Manifest V3 (Camera, PDF, Screenshot)
Barcode and QR code scanning is essential for many workflows—from inventory management and product research to accessing promotional content and document processing. While mobile apps dominate this space, a browser extension offers unique advantages: it’s always available during web browsing without app switching, can extract barcodes directly from web pages through right-click context menus, capture and decode screenshots of any visible content, and process files instantly without uploading to external services. This keeps your data private and eliminates the friction of taking photos with your phone when the information is already on your screen.
In this tutorial, we’ll build a feature-rich Chrome extension that demonstrates these capabilities by implementing five different input methods: camera scanning, screenshot capture with area selection, file uploads (including PDFs), drag-and-drop, and context menu integration for web images. We’ll use Dynamsoft Barcode Reader SDK for high-accuracy decoding and leverage modern Chrome Extension APIs including the Side Panel API for persistent UI, OAuth for secure authentication, and OffscreenCanvas for efficient image processing. By the end, you’ll have a complete understanding of building production-ready browser extensions with complex features.
What you’ll build: A production-ready Chrome extension (Manifest V3) that scans barcodes and QR codes from five input sources — live camera, screenshot area selection, uploaded images, multi-page PDFs, and right-click context menus — powered by the Dynamsoft Barcode Reader SDK.
Key Takeaways
- This tutorial demonstrates how to build a barcode scanner Chrome extension using Manifest V3, covering the Side Panel API, background service workers, and content script injection.
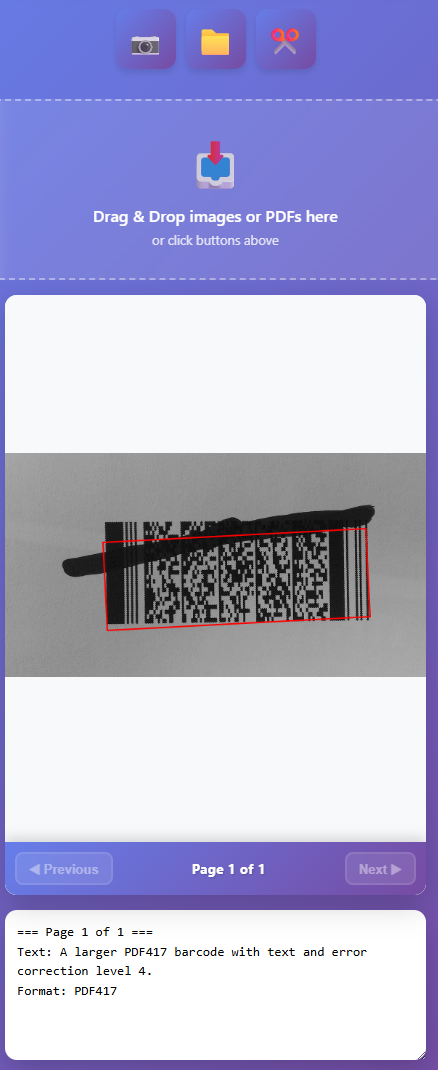
- Dynamsoft Barcode Reader’s WebAssembly engine decodes 20+ barcode formats (QR Code, PDF417, Data Matrix, and more) directly in the browser without sending data to a server.
- Camera access must run in a dedicated tab — Chrome side panels and popups do not reliably support
getUserMedia. - OAuth authentication via Google automatically provisions a 30-day trial license from the Dynamsoft portal, removing all manual registration steps.
Common Developer Questions
How do I build a barcode scanner Chrome extension with Manifest V3?
Use a Manifest V3 background service worker, a side panel for persistent UI, and dedicated handlers for file upload, screenshots, context menus, and live camera scanning. This architecture keeps the extension responsive while letting Dynamsoft’s WebAssembly reader decode data entirely in the browser.
How do I access the camera inside a Chrome extension without popup restrictions?
Open camera scanning in a dedicated tab instead of the popup or side panel, because getUserMedia support is unreliable in those compact extension surfaces. That is the pattern used here to keep live scanning stable across Chrome versions.
How do I use OffscreenCanvas to crop and process screenshots in a Chrome Extension service worker?
Capture the screenshot first, send the selected region coordinates to the background logic, then draw just that region onto an OffscreenCanvas before barcode decoding. This avoids rendering an unnecessary visible canvas and keeps screenshot processing lightweight.
This article is Part 3 in a 3-Part Series.
- Part 1 - How to Build a QR Code & Barcode Generator Chrome Extension in JavaScript (Manifest V3)
- Part 2 - Build a JavaScript MRZ Generator Chrome Extension: ICAO-Compliant Test Data with Canvas API
- Part 3 - Build a Barcode & QR Code Scanner Chrome Extension with Manifest V3 (Camera, PDF, Screenshot)
Demo Video: Chrome Extension for Scanning Barcodes & QR Codes

Extension Architecture and Features
Key Features:
- Camera scanning in a new tab
- Screenshot area selection with custom cursor
- File upload (images and multi-page PDFs)
- Right-click context menu on images
- Drag & drop support
- Modern side panel UI with settings
- Secure OAuth authentication
Tech Stack:
- Chrome Extension Manifest V3
- Dynamsoft Barcode Reader SDK
- Side Panel API (Chrome 114+)
- Content Scripts & Background Service Worker
Prerequisites
To follow this tutorial you need:
- Google Chrome 114 or later (for Side Panel API support)
- Basic familiarity with JavaScript and Chrome Extension development
- A Dynamsoft Barcode Reader license key
Get a 30-day free trial license for Dynamsoft Barcode Reader.
Step 1: Configure the Manifest V3 File
First, create a manifest.json file with the essential permissions:
{
    "manifest_version": 3,
    "name": "Barcode & QR Code Scanner",
    "version": "1.0.1",
    "description": "Scan barcodes and QR codes from images, PDFs, and camera using Dynamsoft SDK",
    "permissions": [
        "storage",
        "cookies",
        "activeTab",
        "tabs",
        "scripting",
        "sidePanel",
        "contextMenus"
    ],
    "host_permissions": [
        "<all_urls>"
    ],
    "side_panel": {
        "default_path": "index.html"
    },
    "background": {
        "service_worker": "background.js"
    },
    "content_security_policy": {
        "extension_pages": "script-src 'self' 'wasm-unsafe-eval'; object-src 'self'"
    }
}
Key Points:
sidePanel: Displays persistent UI alongside browsingscripting: For dynamic screenshot selector injectioncontextMenus: Right-click image scanningwasm-unsafe-eval: Required for Dynamsoft’s WebAssembly SDKhost_permissions: <all_urls>: Allows screenshot and context menu on all sites
Step 2: Build the Side Panel UI
Build the Side Panel HTML
Create index.html with a two-column layout:
<body>
    <div class="main-container">
        <!-- Left Column: Main Content -->
        <div class="main-content">
            <h1>Barcode Scanner</h1>

            <!-- License Status -->
            <div class="license-row">
                <span id="loginStatus">Please login</span>
                <button id="loginButton">
                    <svg><!-- Google icon --></svg>
                    Login with Google
                </button>
            </div>

            <!-- Action Buttons -->
            <div class="controls">
                <button id="scan" title="Scan with Camera">📷</button>
                <label for="file" class="file-label" title="Upload File">
                    📁
                    <input type="file" id="file" accept="image/*,application/pdf" />
                </label>
                <button id="screenshot" title="Capture Screenshot">✂️</button>
            </div>

            <!-- Drag & Drop Zone -->
            <div id="dropZone" class="drop-zone">
                <div class="drop-icon">📥</div>
                <div class="drop-text">Drag & Drop images or PDFs here</div>
            </div>

            <!-- Scanner Display -->
            <div id="divScanner">
                <div id="container"></div>
            </div>

            <!-- Results -->
            <textarea id="result" readonly></textarea>
        </div>

        <!-- Right Column: Sidebar -->
        <div class="right-sidebar">
            <button id="openSettings" class="sidebar-btn">⚙️</button>
            <button id="cartBtn" class="sidebar-btn">🛒</button>
            <div class="user-section">
                <div class="user-avatar">👤</div>
                <div class="user-name">Guest</div>
            </div>
        </div>
    </div>
</body>
Style the Layout with Flexbox
Key CSS for the side panel layout:
/* Main Container */
.main-container {
    display: flex;
    height: 100vh;
    width: 100%;
    overflow: hidden;
}

/* Main Content Area */
.main-content {
    flex: 1;
    display: flex;
    flex-direction: column;
    padding: 20px 15px;
    overflow-y: auto;
    min-width: 0;
}

/* Scanner - Fills Available Space */
#divScanner {
    flex: 1;
    min-height: 300px;
    max-height: 600px;
    border-radius: 12px;
    background: white;
}

/* Results - Fixed Height */
#result {
    height: 120px;
    flex-shrink: 0;
    resize: vertical;
}

/* Right Sidebar - Fixed Width */
.right-sidebar {
    width: 60px;
    background: rgba(255, 255, 255, 0.1);
    backdrop-filter: blur(10px);
    display: flex;
    flex-direction: column;
    align-items: center;
    padding: 20px 0;
}
Why This Works:
flex: 1on scanner makes it fill available spaceflex-shrink: 0on results prevents it from shrinking- Fixed sidebar width ensures consistent UI
overflow-y: autoallows scrolling when needed
Step 3: Implement OAuth Authentication and License Management
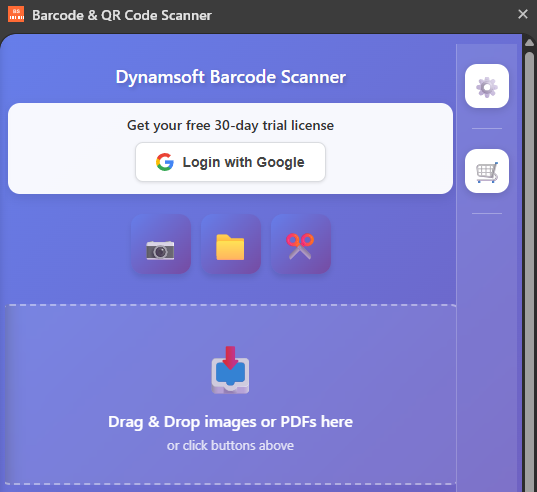
The Dynamsoft Barcode Reader SDK requires a license key to function. Rather than hardcoding a license or asking users to manually register, we implement a seamless OAuth flow using Google authentication. Users click a login button that opens Google’s OAuth consent screen, then upon successful authentication, they’re automatically logged into the Dynamsoft customer portal. This grants them a 30-day free trial license without any manual registration or form filling.
The authentication flow works as follows:
- User clicks “Login” → Extension opens Dynamsoft’s Google OAuth endpoint in a popup window
- User authenticates with Google → Dynamsoft portal validates and creates/logs into their account
- Portal sets authentication cookies (
DynamsoftToken,DynamsoftUser) in the browser - Extension reads these cookies and requests a trial license from Dynamsoft’s API
- License is kept in memory
- On subsequent visits, if valid cookies exist, the extension auto-requests a license without showing the login button
Handle Auth Requests in the Background Service Worker
The background script handles OAuth popup and cookie-based authentication:
// background.js
chrome.runtime.onMessage.addListener((request, sender, sendResponse) => {
    if (request.action === 'openAuthPopup') {
        const authUrl = `https://www.dynamsoft.com/api-common/Api/User/Login/Google?redirectUri=${encodeURIComponent(request.redirectUri)}`;

        chrome.windows.create({
            url: authUrl,
            type: 'popup',
            width: 600,
            height: 700
        }, (window) => {
            sendResponse({ windowId: window.id });
        });

        return true; // Async response
    }

    if (request.action === 'getCookie') {
        chrome.cookies.get({
            url: 'https://www.dynamsoft.com',
            name: request.cookieName
        }, (cookie) => {
            sendResponse({ cookie: cookie });
        });

        return true;
    }

    if (request.action === 'requestTrialLicense') {
        fetch('https://www.dynamsoft.com/api-portal/Api/Trial/RequestFromWeb', {
            method: 'POST',
            headers: {
                'Content-Type': 'application/json',
                'DynamsoftToken': request.token,
                'DynamsoftUser': request.userId
            },
            body: JSON.stringify({
                Email: request.email,
                SolutionId: 2,
                PackageId: 13,
                RequestSource: 7
            })
        })
        .then(response => response.json())
        .then(data => sendResponse({ success: true, data: data }))
        .catch(error => sendResponse({ success: false, error: error.message }));

        return true;
    }
});
Request a Trial License from the Side Panel
// app.js
async function getCookie(name) {
    return new Promise((resolve) => {
        chrome.runtime.sendMessage(
            { action: 'getCookie', cookieName: name },
            (response) => {
                resolve(response?.cookie?.value || null);
            }
        );
    });
}

// Check for existing auth on page load
(async function checkExistingAuth() {
    try {
        const token = await getCookie('DynamsoftToken');
        const userId = await getCookie('DynamsoftUser');

        if (token && userId) {
            // User is already logged in - hide login button
            loginButton.style.display = 'none';
            loginStatus.textContent = 'Restoring session...';

            // Request trial license directly
            await requestTrialLicense(
                decodeURIComponent(token),
                decodeURIComponent(userId)
            );
        }
    } catch (error) {
        console.log('No existing auth found:', error);
    }
})();

async function requestTrialLicense(token, userId) {
    loginStatus.textContent = 'Getting user info...';

    chrome.runtime.sendMessage(
        {
            action: 'getUserInfo',
            token: token,
            userId: userId
        },
        (userInfoResponse) => {
            const email = userInfoResponse.data.email;
            const firstName = userInfoResponse.data.firstName;

            // Update user name in sidebar
            userNameElement.textContent = firstName;

            // Request license
            chrome.runtime.sendMessage(
                {
                    action: 'requestTrialLicense',
                    token: token,
                    userId: userId,
                    email: email
                },
                async (response) => {
                    const licenseKey = response.data.data.licenseKey;

                    localStorage.setItem('dynamsoft_license_expiry',
                        response.data.data.expirationDate);

                    // Activate SDK
                    await activateSDK(licenseKey);

                    loginButton.style.display = 'none';
                    loginStatus.textContent = '✓ Licensed';
                }
            );
        }
    );
}
Security Best Practice:
- Store only expiration date for reference
- Request fresh license on each load using auth tokens
- Keep license in memory during session
Step 4: Open Camera Scanning in a Dedicated Tab
Due to Chrome extension limitations, camera access doesn’t work reliably in side panels or popups. The solution is to open a dedicated scanner page in a new tab where camera permissions work properly.
Validate the License Before Opening the Scanner
// app.js
document.getElementById("scan").addEventListener('click', async () => {
    // Check if license exists and is valid
    const storedExpiry = localStorage.getItem('dynamsoft_license_expiry');
    if (!licenseKey || !storedExpiry) {
        alert('⚠️ No valid license. Please login to get a trial license first.');
        return;
    }

    const expiryDate = new Date(storedExpiry);
    const now = new Date();
    if (expiryDate <= now) {
        alert('⚠️ Your license has expired. Please login again to renew your trial license.');
        loginStatus.textContent = '⚠️ License expired. Please login again.';
        loginButton.style.display = 'block';
        return;
    }

    // Open scanner in a new tab for proper camera access
    chrome.tabs.create({
        url: chrome.runtime.getURL('scanner.html')
    });
});
Build the Full-Screen Scanner Page
Create a dedicated scanner page with full-screen camera UI:
<!DOCTYPE html>
<html>
<head>
    <title>Barcode Scanner</title>
    <style>
        body {
            margin: 0;
            padding: 0;
            width: 100%;
            height: 100vh;
            display: flex;
            flex-direction: column;
        }

        #scanner-container {
            flex: 1;
            position: relative;
        }

        #results {
            padding: 20px;
            background: #f5f5f5;
            border-top: 2px solid #ddd;
            max-height: 200px;
            overflow-y: auto;
        }

        .barcode-result {
            margin: 10px 0;
            padding: 10px;
            background: white;
            border-radius: 5px;
        }
    </style>
</head>
<body>
    <div id="scanner-container"></div>
    <div id="results"></div>

    <script src="libs/dynamsoft-barcode-reader-bundle/dist/dbr.bundle.js"></script>
    <script>
        let scanner;

        async function initScanner() {
            // Get license from storage
            const result = await chrome.storage.local.get(['licenseKey']);
            const licenseKey = result.licenseKey;

            if (!licenseKey) {
                alert('No license found. Please login first.');
                window.close();
                return;
            }

            // Initialize scanner with camera
            scanner = await Dynamsoft.DBR.BarcodeScanner.createInstance();
            scanner.updateRuntimeSettings('speed');

            // Set up UI
            document.getElementById('scanner-container').appendChild(scanner.getUIElement());

            // Handle scan results
            scanner.onUniqueRead = (txt, result) => {
                const resultsDiv = document.getElementById('results');
                const resultElement = document.createElement('div');
                resultElement.className = 'barcode-result';
                resultElement.innerHTML = `
                    <strong>${result.barcodeFormatString}</strong><br>
                    ${result.barcodeText}
                `;
                resultsDiv.insertBefore(resultElement, resultsDiv.firstChild);
            };

            // Start scanning
            await scanner.show();
        }

        initScanner().catch(console.error);
    </script>
</body>
</html>
Key Points:
- Opens in new tab for proper camera permissions
- Full-screen scanning experience
- Real-time barcode detection with visual feedback
- Displays results in a scrollable list
- License validation before opening
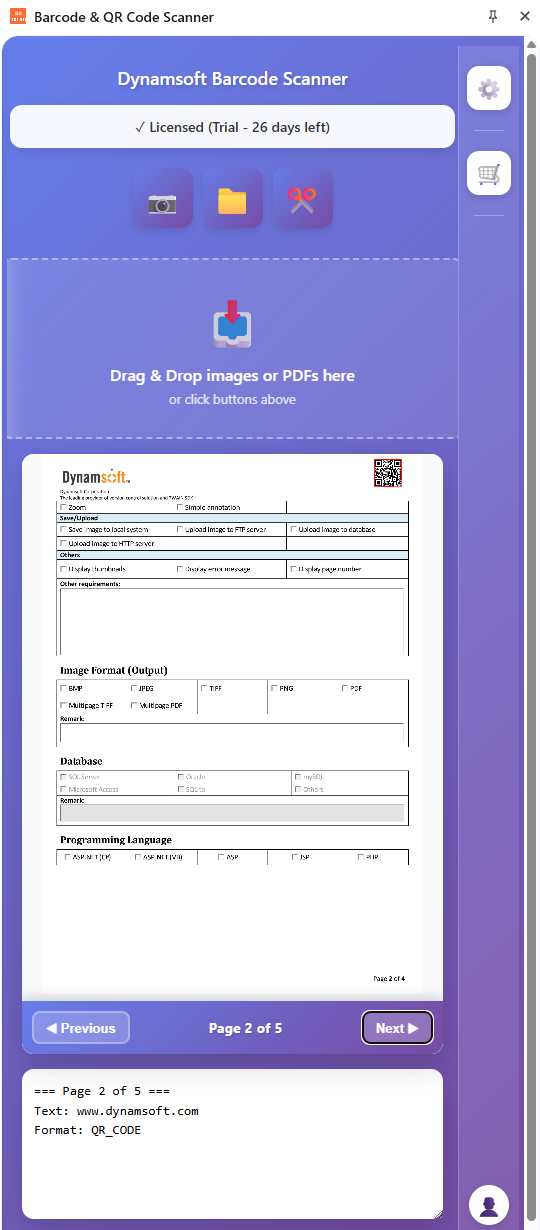
Step 5: Process File Uploads and Multi-Page PDFs
The file upload handler supports both single images and multi-page PDF documents, processing each page separately for barcode detection.
Decode Barcodes from Uploaded Images and PDFs
// app.js
document.getElementById("file").onchange = async function () {
    // Validate license
    const storedExpiry = localStorage.getItem('dynamsoft_license_expiry');
    if (!licenseKey || !storedExpiry) {
        alert('⚠️ No valid license. Please login to get a trial license first.');
        return;
    }

    const expiryDate = new Date(storedExpiry);
    const now = new Date();
    if (expiryDate <= now) {
        alert('⚠️ Your license has expired. Please login again to renew your trial license.');
        loginStatus.textContent = '⚠️ License expired. Please login again.';
        loginButton.style.display = 'block';
        return;
    }

    try {
        // Initialize barcode scanner
        if (barcodeScanner) {
            barcodeScanner.dispose();
        }
        barcodeScanner = new Dynamsoft.BarcodeScanner({
            license: licenseKey,
            scanMode: Dynamsoft.EnumScanMode.SM_MULTI_UNIQUE,
        });

        // Reset variables
        pdfPages = [];
        pageResults = [];
        currentPageIndex = 0;

        const files = Array.from(this.files || []);
        if (files.length) {
            toggleLoading(true);
            let fileToProcess = files[0];

            // Process the file and get all pages
            let pages = await processFile(fileToProcess);
            pdfPages = pages;
            pageResults = new Array(pages.length);

            // Process each page for barcodes
            for (let i = 0; i < pages.length; i++) {
                try {
                    let result = await barcodeScanner.decode(pages[i].blob);
                    pageResults[i] = result;
                } catch (error) {
                    console.error(`Error processing page ${i + 1}:`, error);
                    pageResults[i] = { items: [] };
                }
            }

            // Display results
            if (pages.length > 0) {
                imageContainer.style.display = "flex";
                displayPage(0);
                displayAllResults();
            }

            toggleLoading(false);
        }
    } catch (error) {
        console.error("Error processing file:", error);
        resultArea.value = `Error: ${error.message}`;
        toggleLoading(false);
    }
};
Convert PDF Pages to Images for Barcode Decoding
// app.js
async function processFile(fileToProcess) {
    return new Promise((resolve, reject) => {
        const reader = new FileReader();

        reader.onload = async function (e) {
            try {
                const blob = new Blob([e.target.result], { type: fileToProcess.type });

                if (fileToProcess.type !== "application/pdf") {
                    // Single image file
                    const url = URL.createObjectURL(blob);
                    resolve([{ blob, url }]);
                    return;
                }

                // PDF file - process all pages
                const source = {
                    fileData: blob,
                    renderOptions: {
                        renderAnnotations: "loadAnnotations"
                    }
                };

                currentDoc.deleteAllPages();
                await currentDoc.loadSource([source]);

                const settings = {
                    quality: 100,
                    saveAnnotation: false,
                };

                let pageCount = currentDoc.pages.length;
                let pages = [];

                // Convert each PDF page to JPEG
                for (let i = 0; i < pageCount; i++) {
                    const image = await currentDoc.saveToJpeg(i, settings);
                    const url = URL.createObjectURL(image);
                    pages.push({ blob: image, url });
                }

                resolve(pages);
            } catch (error) {
                reject(error);
            }
        };

        reader.onerror = reject;
        reader.readAsArrayBuffer(fileToProcess);
    });
}
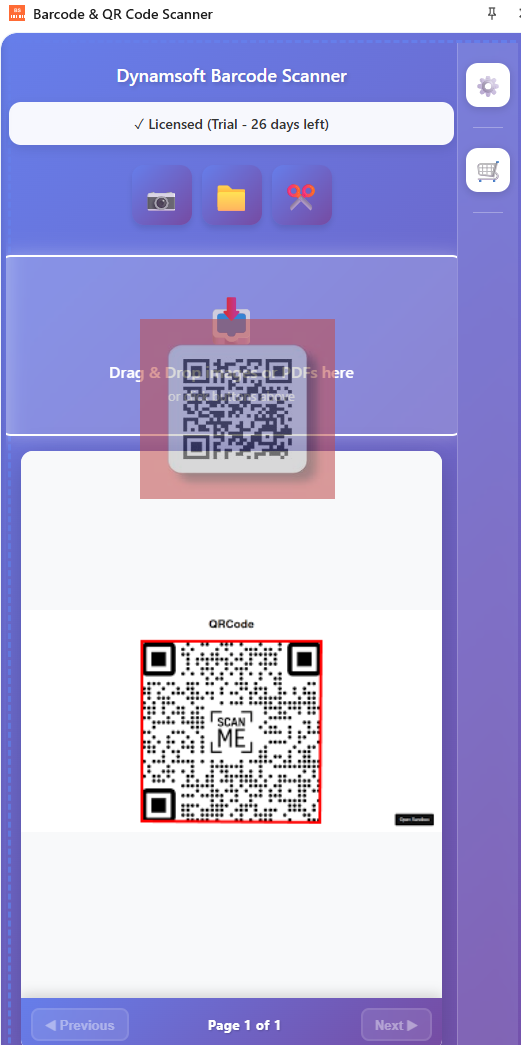
Navigate Pages and Display Highlighted Results
// app.js
function displayPage(pageIndex) {
    currentPageIndex = pageIndex;

    // Display image
    const ctx = imageCanvas.getContext('2d');
    const img = new Image();
    img.onload = () => {
        imageCanvas.width = img.width;
        imageCanvas.height = img.height;
        ctx.drawImage(img, 0, 0);

        // Draw barcode highlights
        if (pageResults[pageIndex] && pageResults[pageIndex].items) {
            pageResults[pageIndex].items.forEach(item => {
                if (item.location) {
                    ctx.strokeStyle = 'lime';
                    ctx.lineWidth = 3;
                    ctx.beginPath();
                    ctx.moveTo(item.location.x1, item.location.y1);
                    ctx.lineTo(item.location.x2, item.location.y2);
                    ctx.lineTo(item.location.x3, item.location.y3);
                    ctx.lineTo(item.location.x4, item.location.y4);
                    ctx.closePath();
                    ctx.stroke();
                }
            });
        }
    };
    img.src = pdfPages[pageIndex].url;

    // Update navigation
    pageInfo.textContent = `Page ${pageIndex + 1} of ${pdfPages.length}`;
    prevPageBtn.disabled = pageIndex === 0;
    nextPageBtn.disabled = pageIndex === pdfPages.length - 1;

    displayCurrentPageResults();
}

function displayCurrentPageResults() {
    resultArea.value = `=== Page ${currentPageIndex + 1} of ${pdfPages.length} ===\n`;
    if (pageResults[currentPageIndex] && pageResults[currentPageIndex].items.length > 0) {
        pageResults[currentPageIndex].items.forEach(item => {
            resultArea.value += "Text: " + item.text + "\n";
            resultArea.value += "Format: " + item.formatString + "\n\n";
        });
    } else {
        resultArea.value += "No barcodes found on this page.\n";
    }
}

// Navigation buttons
prevPageBtn.addEventListener('click', () => {
    if (currentPageIndex > 0) {
        displayPage(currentPageIndex - 1);
    }
});

nextPageBtn.addEventListener('click', () => {
    if (currentPageIndex < pdfPages.length - 1) {
        displayPage(currentPageIndex + 1);
    }
});
Key Features:
- Multi-page PDF support - Converts PDF pages to JPEG for processing
- Image file support - PNG, JPEG, GIF, BMP formats
- Page-by-page navigation - View and navigate through PDF pages
- Visual barcode highlighting - Draw boxes around detected barcodes
- Unified results display - Summary across all pages + page-specific results
- License validation - Checks expiry before processing
Step 6: Capture Screenshots with a Custom Area Selector
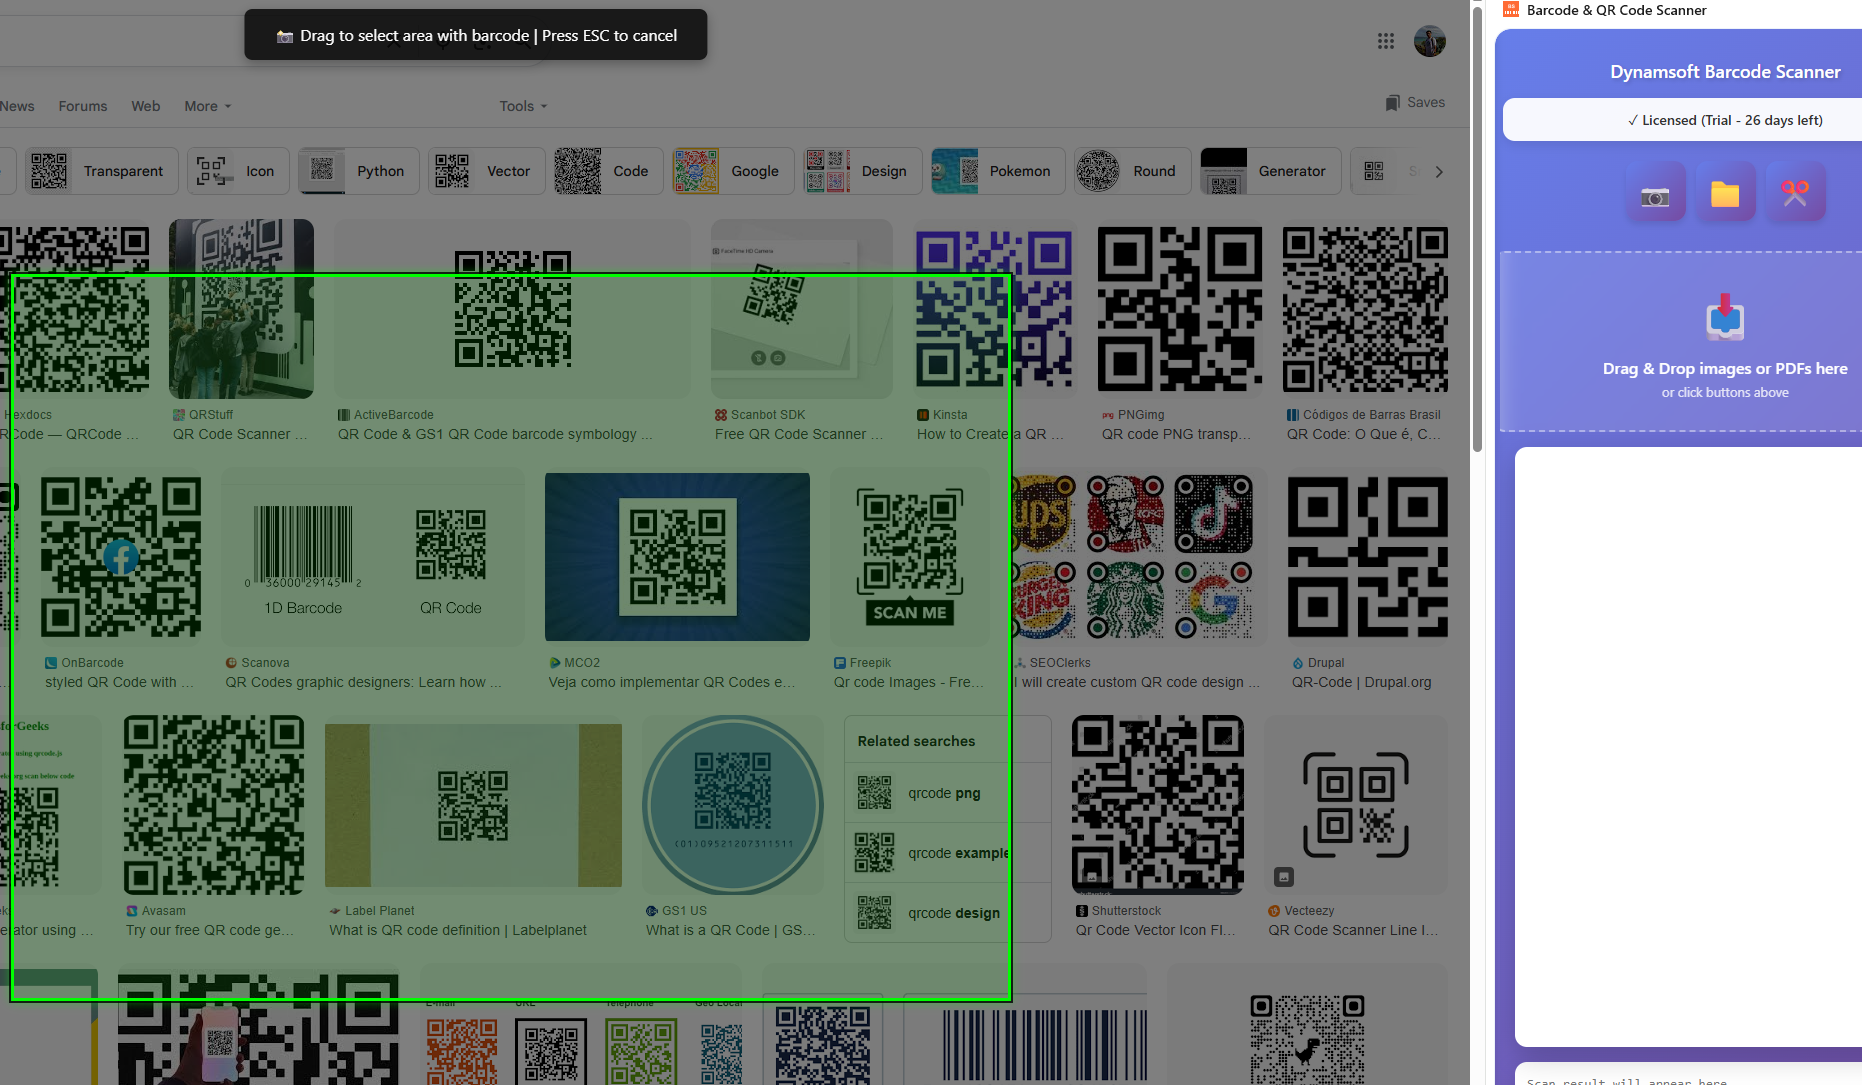
Inject the Screenshot Selector Script
When the user clicks the screenshot button, inject a content script that allows area selection:
// app.js - Screenshot button handler
screenshotBtn.addEventListener('click', async () => {
    try {
        const [tab] = await chrome.tabs.query({
            active: true,
            currentWindow: true
        });

        // Inject screenshot selector
        await chrome.scripting.executeScript({
            target: { tabId: tab.id },
            files: ['screenshot-selector.js']
        });
    } catch (error) {
        alert(`Error: ${error.message}`);
    }
});
Build the Drag-to-Select Overlay
Create screenshot-selector.js with drag-to-select functionality:
// screenshot-selector.js
(function() {
    // Create overlay
    const overlay = document.createElement('div');
    overlay.style.cssText = `
        position: fixed;
        top: 0;
        left: 0;
        width: 100%;
        height: 100%;
        background: rgba(0, 0, 0, 0.3);
        z-index: 999999;
        cursor: crosshair;
    `;

    // Custom green crosshair cursor
    const crosshairSVG = `data:image/svg+xml,${encodeURIComponent(`
        <svg xmlns="http://www.w3.org/2000/svg" width="32" height="32">
            <line x1="16" y1="0" x2="16" y2="32" stroke="lime" stroke-width="2"/>
            <line x1="0" y1="16" x2="32" y2="16" stroke="lime" stroke-width="2"/>
            <circle cx="16" cy="16" r="8" fill="none" stroke="white" stroke-width="2"/>
        </svg>
    `)}`;
    overlay.style.cursor = `url('${crosshairSVG}') 16 16, crosshair`;

    // Selection box
    const selectionBox = document.createElement('div');
    selectionBox.style.cssText = `
        position: fixed;
        border: 2px solid lime;
        background: rgba(0, 255, 0, 0.1);
        z-index: 1000000;
        display: none;
    `;

    let startX, startY, isSelecting = false;

    overlay.addEventListener('mousedown', (e) => {
        isSelecting = true;
        startX = e.clientX;
        startY = e.clientY;

        selectionBox.style.left = startX + 'px';
        selectionBox.style.top = startY + 'px';
        selectionBox.style.width = '0';
        selectionBox.style.height = '0';
        selectionBox.style.display = 'block';
    });

    overlay.addEventListener('mousemove', (e) => {
        if (!isSelecting) return;

        const width = Math.abs(e.clientX - startX);
        const height = Math.abs(e.clientY - startY);
        const left = Math.min(e.clientX, startX);
        const top = Math.min(e.clientY, startY);

        selectionBox.style.left = left + 'px';
        selectionBox.style.top = top + 'px';
        selectionBox.style.width = width + 'px';
        selectionBox.style.height = height + 'px';
    });

    overlay.addEventListener('mouseup', async (e) => {
        if (!isSelecting) return;

        const width = Math.abs(e.clientX - startX);
        const height = Math.abs(e.clientY - startY);

        if (width < 10 || height < 10) {
            cleanup();
            return;
        }

        // Hide UI before capture
        overlay.style.display = 'none';
        selectionBox.style.display = 'none';

        // Wait for UI to hide
        await new Promise(resolve => setTimeout(resolve, 50));

        // Send capture request to background
        chrome.runtime.sendMessage({
            action: 'captureScreenshot',
            selection: {
                left: Math.min(e.clientX, startX),
                top: Math.min(e.clientY, startY),
                width: width,
                height: height,
                devicePixelRatio: window.devicePixelRatio
            }
        });

        cleanup();
    });

    // ESC to cancel
    document.addEventListener('keydown', (e) => {
        if (e.key === 'Escape') {
            cleanup();
        }
    });

    function cleanup() {
        overlay.remove();
        selectionBox.remove();
    }

    document.body.appendChild(overlay);
    document.body.appendChild(selectionBox);
})();
Crop and Process Screenshots Using OffscreenCanvas
// background.js
chrome.runtime.onMessage.addListener((request, sender, sendResponse) => {
    if (request.action === 'captureScreenshot') {
        chrome.tabs.captureVisibleTab(null, { format: 'png' }, (dataUrl) => {
            // Use OffscreenCanvas for cropping in service worker
            fetch(dataUrl)
                .then(res => res.blob())
                .then(blob => createImageBitmap(blob))
                .then(bitmap => {
                    const canvas = new OffscreenCanvas(
                        request.selection.width * request.selection.devicePixelRatio,
                        request.selection.height * request.selection.devicePixelRatio
                    );
                    const ctx = canvas.getContext('2d');

                    // Crop to selection
                    ctx.drawImage(
                        bitmap,
                        request.selection.left * request.selection.devicePixelRatio,
                        request.selection.top * request.selection.devicePixelRatio,
                        request.selection.width * request.selection.devicePixelRatio,
                        request.selection.height * request.selection.devicePixelRatio,
                        0, 0,
                        request.selection.width * request.selection.devicePixelRatio,
                        request.selection.height * request.selection.devicePixelRatio
                    );

                    return canvas.convertToBlob({ type: 'image/png' });
                })
                .then(blob => {
                    const reader = new FileReader();
                    reader.onloadend = () => {
                        // Broadcast to side panel
                        chrome.runtime.sendMessage({
                            action: 'screenshotResult',
                            success: true,
                            dataUrl: reader.result
                        });
                    };
                    reader.readAsDataURL(blob);
                });
        });

        return true;
    }
});
Key Techniques:
- Custom SVG cursor for better visibility
- Drag-to-select with visual feedback
- Hide overlay before capture (prevents green tint)
- OffscreenCanvas for service worker compatibility
- Message broadcasting to side panel
Step 7: Add Right-Click Context Menu for Web Images
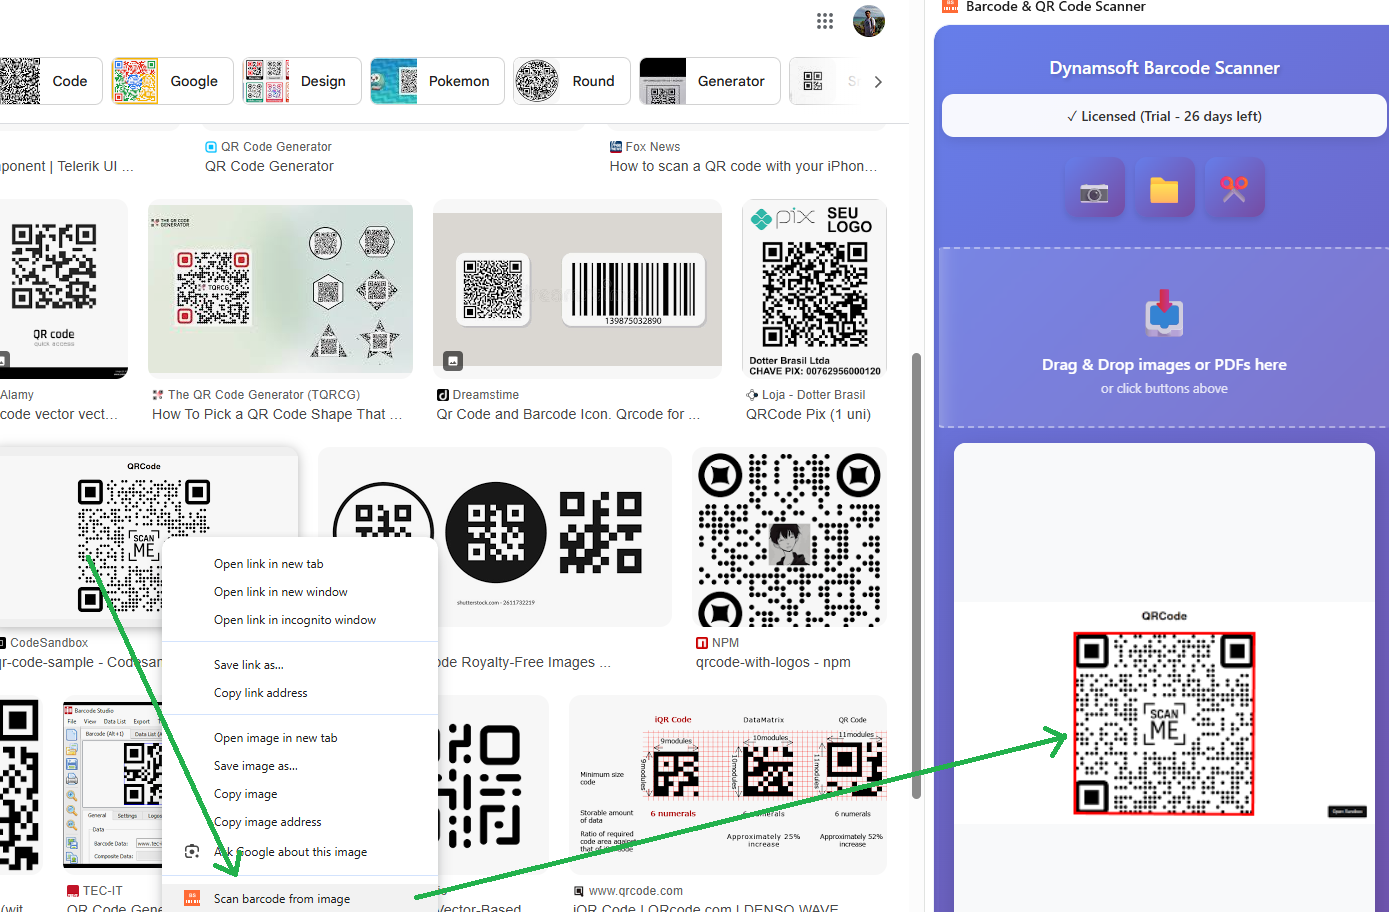
Register the Context Menu in the Background Worker
// background.js
chrome.runtime.onInstalled.addListener(() => {
    chrome.contextMenus.create({
        id: 'decodeImage',
        title: 'Scan barcode from image',
        contexts: ['image']
    });
});

chrome.contextMenus.onClicked.addListener((info, tab) => {
    if (info.menuItemId === 'decodeImage') {
        // Open side panel
        chrome.sidePanel.open({ windowId: tab.windowId });

        // Send image URL to side panel
        setTimeout(() => {
            chrome.runtime.sendMessage({
                action: 'decodeImageUrl',
                imageUrl: info.srcUrl
            });
        }, 500);
    }
});
Process Context Menu Requests in the Side Panel
// app.js
chrome.runtime.onMessage.addListener(async (request, sender, sendResponse) => {
    if (request.action === 'decodeImageUrl') {
        try {
            // Fetch the image
            const response = await fetch(request.imageUrl);
            const blob = await response.blob();
            const file = new File([blob], 'image.jpg', { type: blob.type });

            // Process with file input handler
            const fileInput = document.getElementById('file');
            const dataTransfer = new DataTransfer();
            dataTransfer.items.add(file);
            fileInput.files = dataTransfer.files;

            // Trigger change event
            fileInput.dispatchEvent(new Event('change', { bubbles: true }));
        } catch (error) {
            console.error('Error decoding image:', error);
        }
    }
});
Step 8: Add Drag & Drop File Input
Add the Drop Zone HTML
<div id="dropZone" class="drop-zone">
    <div class="drop-icon">📥</div>
    <div class="drop-text">Drag & Drop images or PDFs here</div>
    <div class="drop-subtext">or click buttons above</div>
</div>
Handle Drop Events and Validate File Types
// app.js
const dropZone = document.body;
const dropZoneElement = document.getElementById('dropZone');

[dropZone, dropZoneElement].forEach(element => {
    element.addEventListener('dragover', (e) => {
        e.preventDefault();
        e.stopPropagation();
        dropZoneElement.classList.add('drag-over');
    });

    element.addEventListener('dragleave', (e) => {
        e.preventDefault();
        e.stopPropagation();
        if (e.target === dropZone || e.target === dropZoneElement) {
            dropZoneElement.classList.remove('drag-over');
        }
    });

    element.addEventListener('drop', async (e) => {
        e.preventDefault();
        e.stopPropagation();
        dropZoneElement.classList.remove('drag-over');

        const files = e.dataTransfer.files;
        if (files.length > 0) {
            const file = files[0];

            // Validate file type
            const validTypes = ['image/png', 'image/jpeg', 'image/jpg',
                               'image/gif', 'image/bmp', 'application/pdf'];
            if (!validTypes.includes(file.type)) {
                alert('Please drop an image or PDF file');
                return;
            }

            // Process file
            const fileInput = document.getElementById('file');
            const dataTransfer = new DataTransfer();
            dataTransfer.items.add(file);
            fileInput.files = dataTransfer.files;

            fileInput.dispatchEvent(new Event('change', { bubbles: true }));
        }
    });
});
Style the Drop Zone with Visual Feedback
.drop-zone {
    padding: 30px 20px;
    margin: 15px 0;
    border: 2px dashed rgba(255, 255, 255, 0.4);
    border-radius: 12px;
    background: rgba(255, 255, 255, 0.1);
    transition: all 0.3s ease;
    cursor: pointer;
}

.drop-zone:hover {
    border-color: rgba(255, 255, 255, 0.6);
    background: rgba(255, 255, 255, 0.15);
}

.drop-zone.drag-over {
    border-color: #fff;
    border-style: solid;
    background: rgba(255, 255, 255, 0.2);
    box-shadow: 0 0 20px rgba(255, 255, 255, 0.3);
}
Security Best Practices for Manifest V3 Extensions
1. Use Background Script for CORS-Restricted APIs
// Side panel can't make CORS requests directly
// Use background script as proxy
chrome.runtime.sendMessage({
    action: 'requestTrialLicense',
    token: token,
    userId: userId,
    email: email
}, (response) => {
    // Process response
});
2. Validate All User Inputs
// Validate file types
const validTypes = ['image/png', 'image/jpeg', 'application/pdf'];
if (!validTypes.includes(file.type)) {
    alert('Invalid file type');
    return;
}

// Validate license expiration
const expiryDate = new Date(storedExpiry);
if (expiryDate <= new Date()) {
    alert('License expired');
    return;
}
3. Content Security Policy
{
    "content_security_policy": {
        "extension_pages": "script-src 'self' 'wasm-unsafe-eval'; object-src 'self'"
    }
}
'self': Only load scripts from extension'wasm-unsafe-eval': Required for WebAssembly (Dynamsoft SDK)- No
'unsafe-inline': Prevents XSS attacks
4. Minimal Permissions
Only request permissions you actually use:
{
    "host_permissions": ["<all_urls>"],
    "permissions": [
        "storage",      // Settings and expiry date
        "cookies",      // OAuth authentication
        "activeTab",    // Screenshot current tab
        "scripting",    // Inject screenshot selector
        "sidePanel",    // Display UI
        "contextMenus"  // Right-click images
    ]
}
Common Issues & Edge Cases
- Camera not working in side panel or popup: Chrome restricts
getUserMediain extension side panels and popups. Always open camera scanning in a new tab viachrome.tabs.create()— this is the only reliable way to get camera access in a Manifest V3 extension. - OffscreenCanvas API not available: If the service worker throws
OffscreenCanvas is not defined, verify you are running Chrome 69+ and that"offscreen"is not missing from the permissions if you use the Offscreen Documents API. The standardOffscreenCanvasconstructor works in service workers without additional permissions. - PDF pages decoded as empty (zero results): If Dynamsoft Document Viewer (DDV) fails to initialize — typically because the WASM bundle didn’t load —
processFile()resolves with zero pages silently. Check the browser console for WASM initialization errors and confirm theddv.bundle.jsscript is listed inweb_accessible_resourcesinsidemanifest.json.