


Convert Your Scanner to an IP Scanner with Raspberry Pi | Remote Document Scanning
Since version 16.1, Dynamic Web TWAIN (DWT) has added a remote scan feature. If there is a device running a background scanning service (Dynamic Web TWAIN Service), other devices can access it via an Intranet along with a proxy service to use scanners connected to that device, which makes it convenient to use mobile phones and tablets to scan documents.
Illustration of Remote Scan1:

The recently released Dynamic Web TWAIN v17 has added support for ARM Linux devices. The Dynamic Web TWAIN Service can now run on devices like Jetson Nano and Raspberry Pi.
Here we will go through how to set up remote document scanning on Raspberry Pi step by step.
This article is Part 2 in a 2-Part Series.

Install Dynamic Web TWAIN Service on Raspberry Pi
- Visit the online demo of DWT: https://demo.dynamsoft.com/web-twain/.
-
You will be prompted to download and install the Dynamic Web TWAIN Service.
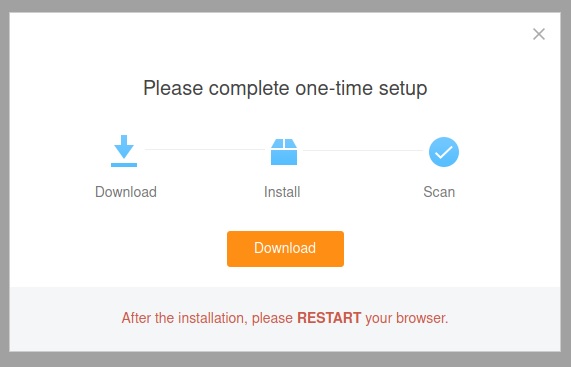
-
Install the downloaded deb file with the following line:
$ sudo dpkg -i DynamsoftServiceSetup-arm64.deb
Now you can scan documents from connected local scanners on Raspberry Pi.
We can visit http://127.0.0.1:18622/ to see if the Dynamic Web TWAIN Service is running or not. By default, the service is only accessible in the local network.
PS: Dynamic Web TWAIN Service is the core piece of DWT when running in Service mode. It handles the communication between the hardware (scanner, webcam, etc.) and the browser, manages the image buffer, and coordinates data between different modules. You can install Dynamic Web TWAIN Service on multiple devices and let a proxy service to manage all of them.2
Enable Remote Scan
To enable remote scan, we need to do two extra steps.
-
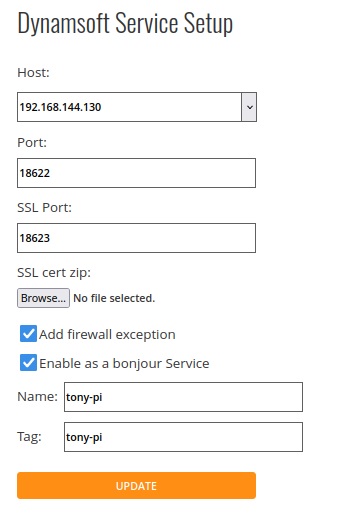
Configure Dynamic Web TWAIN Service so that it is accessible in a shared network like an Intranet.
-
Specify an IP in the config page so that we can access the service via that IP.
-
Enable Bonjour service so that it can be discovered automatically by a proxy service.
-
-
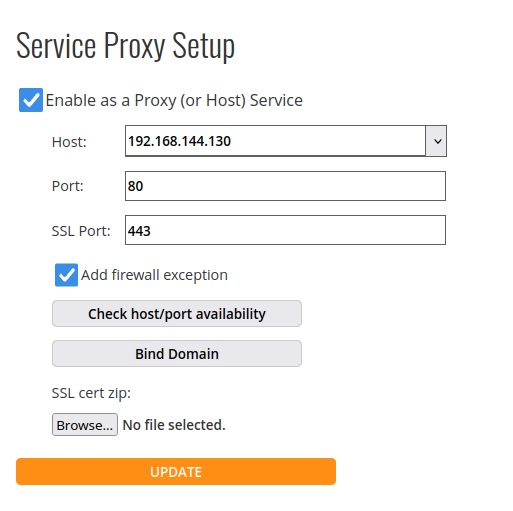
Install and enable the proxy service. The proxy service manages all Dynamic Web TWAIN Services and provides a universal interface for a web page to scan documents via these services.
-
Download the package of proxy service in the customer portal. Here, we need to download DynamsoftProxyServerSetup-arm64.deb for Raspberry Pi.
-
Install the package.
$ sudo dpkg -i DynamsoftProxyServerSetup-arm64.deb -
Go to the config page to enable the proxy service.
If you need to use HTTPS, please remember to bind a domain and load SSL certificates.
-
Writing a Web Page for Remote Document Scanning
Here are the brief steps of writing a web page to use remote scan.
- Create a new HTML file named
proxy.html. - Put the
Resourcesfolder along with the HTML file. You can find the folder in Dynamic Web TWAIN’s installers. - You can apply for a 30-day trial license here and set the key in
Resources\dynamsoft.webtwain.config.js. -
Include Dynamic Web TWAIN by adding the following in the
head.<script type="text/javascript" src="Resources/dynamsoft.webtwain.initiate.js"></script> <script type="text/javascript" src="Resources/dynamsoft.webtwain.config.js"></script> -
Add a container for the controls of Dynamic Web TWAIN.
<div id="dwtcontrolContainer" style="width: 350px; height: 380px;"></div> -
Dynamic Web TWAIN will be loaded automatically. We can register the events for Dynamic Web TWAIN to get the object of Dynamic Web TWAIN when it is ready.
let DWObject; Dynamsoft.DWT.RegisterEvent('OnWebTwainReady', Dynamsoft_OnReady); // Register OnWebTwainReady event. This event fires as soon as Dynamic Web TWAIN is initialized and ready to be used function Dynamsoft_OnReady() { DWObject = Dynamsoft.DWT.GetWebTwain('dwtcontrolContainer'); // Get the Dynamic Web TWAIN object that is embeded in the div with id 'dwtcontrolContainer' console.log("ready"); } -
List all the services that a proxy service can find.
let serverURL = "http://192.168.144.130" //update the URL based on your setup. let services = await Dynamsoft.DWT.FindDynamsoftServiceAsync(serverURL); -
Create a remote scan object using the first service.
let RemoteDWObject = await Dynamsoft.DWT.CreateRemoteScanObjectAsync(services[0]); -
List all the scanners the remote scan object can find.
let devices = await RemoteDWObject.getDevices(); -
Scan documents using the first scanner found by the remote scan object.
let device = devices[0];
await RemoteDWObject.selectDevice(device);
await RemoteDWObject.acquireImage({IfShowUI:false},DWObject);
Screenshot of the final result:

Source Code
You can find the remote scan demo’s source code here: https://github.com/tony-xlh/Dynamic-Web-TWAIN-samples/blob/main/DWT18/proxy.html.