


What's New in Dynamic Web TWAIN 18: Enhanced Remote Document Scanning
Remote Scan is a feature added in Dynamic Web TWAIN 16.2, which makes it possible to scan documents from physical document scanners to mobile devices.
To enable a scanner to be accessible over the Intranet, we need to run Dynamsoft Service on the desktop that has the scanner physically attached. Then, we can scan documents on other devices by communicating with that desktop.
Dynamic Web TWAIN 18 has improved Remote Scan in the following aspects:
- Enhanced Dynamsoft Service that can now advertise itself via mDNS/Bonjour to be discovered;
- Added a proxy service that manages all available Dynamsoft Services and eSCL scanners;
- Added the option of a domain binding service with SSL certificate auto management;

In the following part, we are going to illustrate how to use the new and improved Remote Scan in Dynamic Web TWAIN v18.
This article is Part 3 in a 3-Part Series.
Setup of Dynamsoft Service
Dynamsoft Service handles the communication between scanners and browsers, manages the image buffer, and coordinates data transfers between different modules. We need to install it first and make it discoverable for Remote Scan.
Dynamsoft Service could run on any desktops or laptops (Windows, macOS, or Linux) which has access to wired or wireless scanners. You can connect one or multiple scanners to each host machine.
- Install Dynamsoft Service. You can find the installers in the Dynamic Web TWAIN’s packages (download link).
-
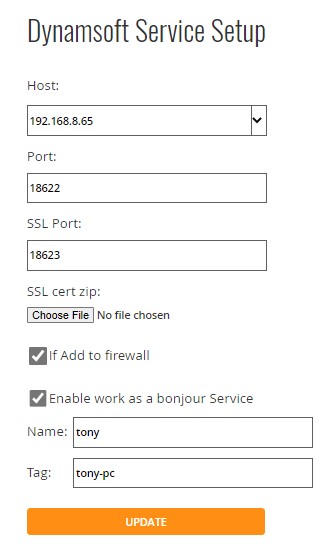
After installation, you can go to the configuration page to set up the service.
-
Specify an IP address for accessing the service via Intranet.
-
Enable Bonjour so that it is discoverable in the network.
-
Setup of Proxy Service
Proxy service can find all Dynamsoft Services installed on different devices. It provides a universal interface to scan documents. With the proxy service, we don’t need to interact with different Dynamsoft Services directly.
We recommend you set up the Proxy Service on a separate machine, i.e., other than the desktops used in the previous step.
-
Install the proxy package for Dynamsoft Service. You can find the installer in Dynamic Web TWAIN’s Remote Scan Docs and use administrator privilege to install it.
We provide installers for various platforms: Windows, Linux x64 (rpm, deb), macOS, Linux ARM64 or Linux MIPS64.
-
Go to the admin page to enable the proxy service.
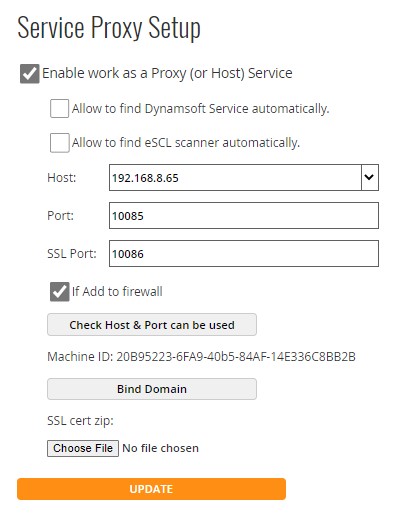
You can specify the host IP address and ports.
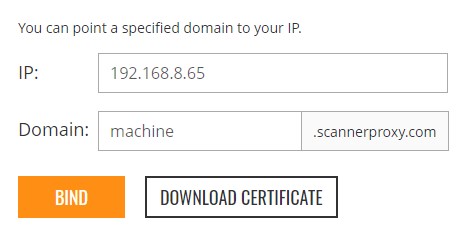
Please note that the certificates are necessary for the proxy service to start if you’ve specified the HTTPS port. For convenience, Dynamsoft allows to bind domains to a local IP address and provides valid SSL certificates for the domains. You can use this feature in the customer portal.
Remote Document Scanning
Now, we can try to create a web page to scan documents remotely.
Here are the brief steps of how to do this.
-
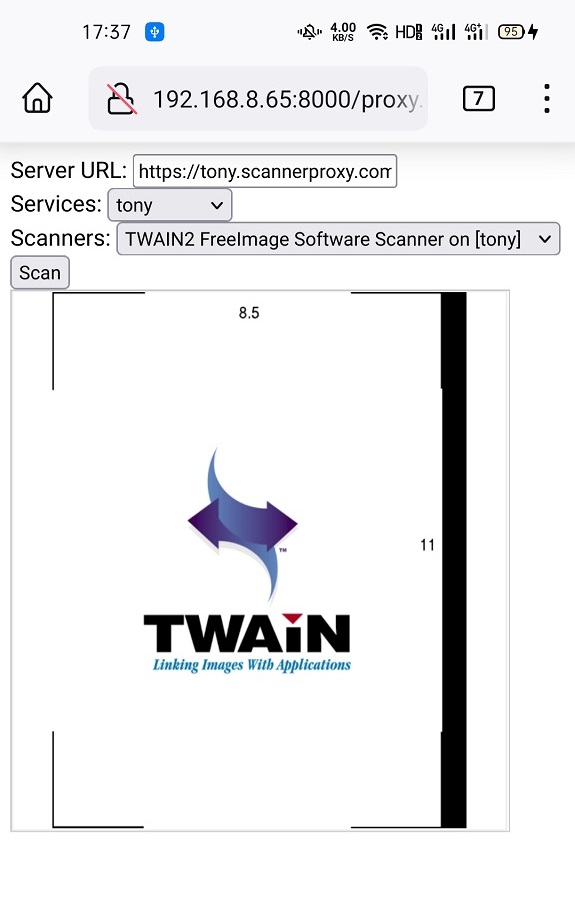
Create an object of Dynamic Web TWAIN for remote scanning and specify the proxy server’s URL
let serverURL = "https://<yourdomain>.scannerproxy.com:<port>/"; let RemoteDWObject = await Dynamsoft.DWT.CreateRemoteScanObjectAsync(serverURL); -
List all the available Dynamsoft services:
let services = await RemoteDWObject.getDynamsoftService(); -
Get all the scanner devices discovered by the first service:
let devices = await RemoteDWObject.getDevices({serviceInfo: services[0]}); -
Scan documents using the first scanner device:
let deviceConfiguration = {IfCloseSourceAfterAcquire:true, Resolution:100,IfShowUI:false}; // scanning configuration. Check out the docs to learn more: https://www.dynamsoft.com/web-twain/docs/info/api/WebTwain_Acquire.html#acquireimage
RemoteDWObject.acquireImage(devices[0], deviceConfiguration);
The scanned document will appear in the document viewer.
Explore Our Developer Hub for Guides, API References, and More.