How to Build a Java Desktop Document Scanner with WebView and TWAIN
Nowadays, web technologies have been used to create cross-platform apps. There are Capacitor for mobile development and Electron for desktop development.
We can also use web technologies in existing apps. For example, the popular Java IDE, IntelliJ IDEA, uses JCEF (Java Chromium Embedded Framework) to create plugins.
In this article, we are going to use web technologies to build a desktop document scanning app in Java using Dynamic Web TWAIN.
What you’ll build: A JavaFX desktop app that opens a WebView window for TWAIN-based document scanning and generates a QR code so mobile devices on the same network can download the scanned PDF.
Key Takeaways
- Java desktop apps can acquire documents from TWAIN, WIA, SANE, and ICA scanners by embedding Dynamic Web TWAIN inside a lightweight WebView.
- The Webview library reuses the OS-native web engine, so you do not need to bundle Chromium with your Java application.
- An embedded Jetty HTTP server serves the scanning page locally and enables intranet file sharing via QR code.
- This approach works on Windows, macOS, and Linux without platform-specific scanner driver code.
Common Developer Questions
How do I integrate a TWAIN document scanner into a Java desktop application?
Run an embedded Jetty server for local static files, then open the scan page in WebViewCLIClient from JavaFX. The page hosts Dynamic Web TWAIN and performs scanner actions through standard JavaScript APIs.
What is the easiest way to add WebView-based document scanning to a JavaFX app?
Use the Webview library so the app can reuse the OS-native web engine instead of bundling Chromium. That keeps the JavaFX host lightweight while still letting the embedded page run the full Dynamic Web TWAIN workflow.
How can I share scanned documents from a Java app to a mobile device over a local network?
After saving the PDF, generate a local-network download link in Java, encode it as a QR code with ZXing, and show it in a separate JavaFX window. A phone on the same network can scan that QR code and download the scanned document directly.
Note: If you do not want to use WebView, you can use the REST API provided since Dynamic Web TWAIN v18.4. Check out this blog to learn more.
Choose the Right WebView Library for Java
There are several libraries we can use to integrate web technologies in a Java app.
The built-in webview of JavaFX is based on webkit and is easy to use. It is also possible to embed it in a Swing component. But it lacks HTML5 features. As for JCEF, we need to bundle a native build of Chromium for every platform. JxBrowser also uses Chromium under the hood. As it is a commercial project, it may have better design and support.
The Webview library is a wrapper for various Webview implementations on Linux, macOS and Windows. As it can use the existing web engine in the operating system, we do not need to bundle Chromium in our app. It is written in C and has bindings for Java.
In this article, we are gonna use the Webview library.
Build the Java Document Scanner Step by Step
Let’s do this in steps.
Define the App Objective
To build a JavaFX desktop document scanning app using Dynamic Web TWAIN. The app will open a webview window for document scanning and provide a QR code for mobile devices to download the scanned document.
Set Up the Development Environment
We are going to use eclipse as the IDE and Liberica JDK 11 as the JDK. You can learn more about the setup in the previous barcode reader article. Get a 30-day free trial license for Dynamic Web TWAIN.
Create the Project and Add Dependencies
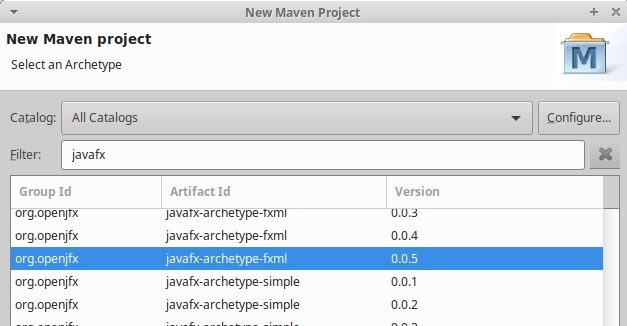
Go to File > New > Project > Maven, choose Maven project, use openjfx’s JavaFX FXML archetype.
Add JavaFX dependencies in pom.xml:
<dependency>
    <groupId>org.openjfx</groupId>
    <artifactId>javafx-controls</artifactId>
    <version>11</version>
</dependency>
<dependency>
    <groupId>org.openjfx</groupId>
    <artifactId>javafx-fxml</artifactId>
    <version>11</version>
</dependency>
<dependency>
    <groupId>org.openjfx</groupId>
    <artifactId>javafx-swing</artifactId>
    <version>11</version>
</dependency>
Download webview.jar and add it to the build path.
Build the HTML5 Document Scanning Page
In a previous article, we’ve built a simple document scanner. We are going to use it as the base and add extra functionalities to it (You can find the complete source code here and then put them in the root of the project).
-
Load scanners list. Dynamic Web TWAIN supports protocols like TWAIN/WIA for Windows, SANE for Linux and ICA for macOS to have access to wired or remote network scanners.
function Dynamsoft_OnReady() { DWObject = Dynamsoft.DWT.GetWebTwain('dwtcontrolContainer'); // Get the Dynamic Web TWAIN object that is embeded in the div with id 'dwtcontrolContainer' if (DWObject) { DWObject.Viewer.width="100%"; DWObject.Viewer.height="100%"; DWObject.SetViewMode(2, 2); loadScannersList(); } } function loadScannersList(){ var count = DWObject.SourceCount; // Get how many sources are installed in the system for (var i = 0; i < count; i++) { document.getElementById("source").options.add(new Option(DWObject.GetSourceNameItems(i), i)); // Add the sources in a drop-down list } } -
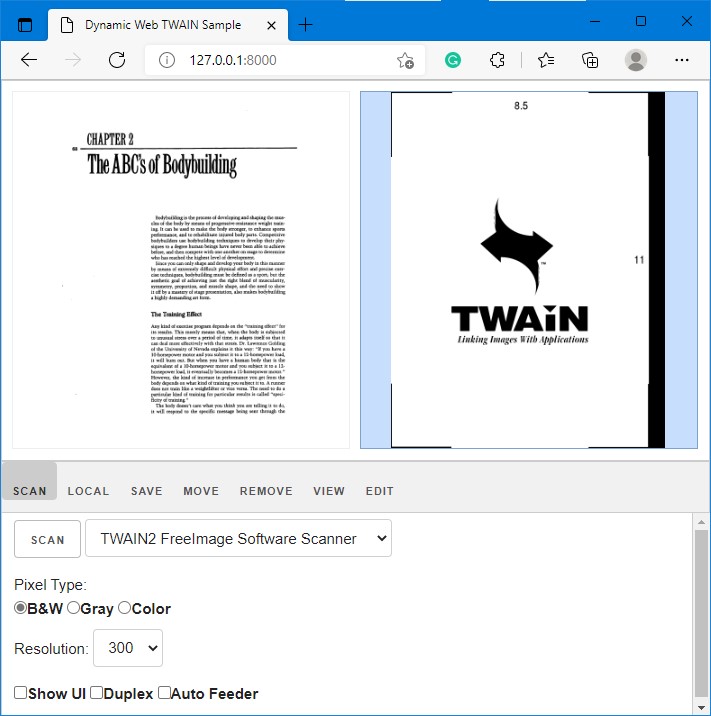
Scan the document and acquire the image. We can configure resolution, duplex scan, Automatic Document Feeder (ADF), or show the interactive configuration UI.
 function AcquireImage() {

     var pixelType,feederEnabled,duplexEnabled,showUI,resolution;
     //Pixel type
     if (document.getElementById("BW").checked)
         pixelType = Dynamsoft.DWT.EnumDWT_PixelType.TWPT_BW;
     else if (document.getElementById("Gray").checked)
         pixelType = Dynamsoft.DWT.EnumDWT_PixelType.TWPT_GRAY;
     else if (document.getElementById("RGB").checked)
         pixelType = Dynamsoft.DWT.EnumDWT_PixelType.TWPT_RGB;
     //If auto feeder
     if (document.getElementById("ADF").checked)
         feederEnabled = true;
     else
         feederEnabled = false;
     //If duplex
     if (document.getElementById("Duplex").checked)
         duplexEnabled = true;
     else
         duplexEnabled = false;
     //If show UI
     if (document.getElementById("ShowUI").checked)
         showUI = true;
     else
         showUI = false;
     //Resolution
     resolution = parseInt(document.getElementById("Resolution").value);


     if (DWObject) {

         var OnAcquireImageSuccess, OnAcquireImageFailure = function () {
             DWObject.CloseSource();
         };
         DWObject.SelectSourceByIndex(document.getElementById("source").selectedIndex);
         DWObject.CloseSource();
         DWObject.OpenSource();
         DWObject.PixelType=pixelType;
         DWObject.IfFeederEnabled = feederEnabled;
         DWObject.IfDuplexEnabled = duplexEnabled;
         DWObject.IfShowUI=showUI;
         DWObject.Resolution=resolution;

         if (document.getElementById("ADF").checked && DWObject.IfFeederEnabled == true)  // if paper is NOT loaded on the feeder
         {
             if (DWObject.IfFeederLoaded != true && DWObject.ErrorCode == 0) {
                 alert("No paper detected! Please load papers and try again!");
                 return;
             }
         }

         DWObject.IfDisableSourceAfterAcquire = true;    // Scanner source will be disabled/closed automatically after the scan.
         DWObject.AcquireImage(OnAcquireImageSuccess, OnAcquireImageFailure);
     }
 }
The corresponding HTML:
<div id="scan" class="tabcontent"> <input onclick="AcquireImage();" type="button" value="Scan"> <select size="1" id="source"></select> <div> <span>Pixel Type:</span> <div> <label for="BW"> <input name="PixelType" id="BW" type="radio">B&W </label> <label for="Gray"> <input name="PixelType" id="Gray" type="radio">Gray</label> <label for="RGB"> <input name="PixelType" id="RGB" type="radio" checked="checked">Color</label> </div> </div> <div> <span>Resolution:</span> <select id="Resolution" size="1"> <option value="100">100</option> <option value="150">150</option> <option value="200">200</option> <option value="300">300</option> </select> </div> <div> <label> <input id="ShowUI" type="checkbox">Show UI</label> <label> <input id="Duplex" type="checkbox">Duplex</label> <label> <input id="ADF" type="checkbox">Auto Feeder</label> </div> </div> -
Download Dynamic Web TWAIN. Put the
Resourcesfolder along with the HTML files. If it says a license is needed, you may need to apply for a license as well. -
You can open the HTML file to have a test.
Embed an HTTP Server with Jetty
To integrate Dynamic Web TWAIN in a Java desktop app, we need to embed an HTTP server. We are going to use Embedded Jetty to do this.
-
Add dependencies in
pom.xml:<dependency> <groupId>org.eclipse.jetty</groupId> <artifactId>jetty-servlet</artifactId> <version>11.0.8</version> </dependency> <dependency> <groupId>org.eclipse.jetty</groupId> <artifactId>jetty-server</artifactId> <version>11.0.8</version> </dependency> -
Create a new class called
EmbeddedServerwhich can work as a static files server:import org.eclipse.jetty.server.Server; import org.eclipse.jetty.server.handler.ResourceHandler; public class EmbeddedServer { private Server server; public EmbeddedServer() { server = new Server(8081); ResourceHandler resourceHandler = new ResourceHandler(); resourceHandler.setDirAllowed(true); resourceHandler.setResourceBase("."); server.setHandler(resourceHandler); } public void start() throws Exception { server.start(); } public void stop() throws Exception { server.stop(); } } -
Start the server when the app starts in the Main Application and close it when the user click the close window button:
 public class App extends Application {
     private static EmbeddedServer server;
     @Override
     public void start(Stage stage) throws IOException {
         stage.setScene(scene);
         stage.setTitle("Java Web TWAIN");
         stage.setOnCloseRequest(event -> {
             System.out.println("Stopping server and exit.");
             try {
               server.stop();
               System.exit(0);
             } catch (Exception e) {
               e.printStackTrace();
             }
         });
         stage.show();
         server = new EmbeddedServer();
         try {
             server.start();
         } catch (Exception e) {
             e.printStackTrace();
         }
     }

     public static void main(String[] args) {
         launch();
     }
 }
Start the app and we can now visit the web page at http://127.0.0.1:8081.
Launch the WebView Window
In PrimaryController.java, start the webview when users click the button which triggers the scanDocument method:
@FXML
private void scanDocuments() throws IOException {
    WebViewCLIClient client = (WebViewCLIClient)new WebViewCLIClient.Builder()
    .url("http://localhost:8081/index.html")
    .title("Document Scanner")
    .size(600, 600)
    .build();

    // Adding a load listener (fired whenever a page loads)
    client.addLoadListener(evt->{
        System.out.println("Loaded "+evt.getURL());
    });

    // Adding a message listener (fired whenever any js calls window.postMessageExt(msg))
    client.addMessageListener(evt->{
        String msg = evt.getMessage();
        System.out.println(msg);
    });
}
Generate a QR Code for Mobile Document Download
We are going to use the saving methods of Dynamic Web TWAIN to save the scanned document as a JPG, PNG or PDF file to the root of the project so that it is accessible via the Intranet and we can generate a QR code with its link for mobile devices to download.
-
Pass the project’s absolute path to the web page via URL parameters.
private void scanDocuments() throws IOException { File directory = new File(""); String dirPath = directory.getAbsolutePath(); WebViewCLIClient client = (WebViewCLIClient)new WebViewCLIClient.Builder() .url("http://localhost:8081/index.html?outputDir="+dirPath) //added .title("Document Scanner") .size(600, 600) .build(); } -
Parse the URL in the HTML side:
var path = getQueryVariable("outputDir") + "//"; function getQueryVariable(variable) { var query = window.location.search.substring(1); var vars = query.split("&"); for (var i=0;i<vars.length;i++) { var pair = vars[i].split("="); if(pair[0] == variable){return pair[1];} } return ""; } -
Save the file to the absolute path and post a message to the Java program:
function SaveFile(showDialog, filename) { DWObject.SaveAllAsPDF(path, function() { OnFileSaved(path); }, function(errCode, errString) { console.log(errString); }); } function OnFileSaved(path){ var msg = {}; msg["msg"] = "download"; msg["content"] = path; window.postMessageExt(msg); } -
In the Java program, receive the message in the event listener:
@FXML @SuppressWarnings("unchecked") private void scanDocuments() throws IOException { // Adding a message listener (fired whenever any js calls window.postMessageExt(msg)) client.addMessageListener(evt->{ String msg = evt.getMessage(); if (msg.equals("") || msg.equals("Fin")) { return; } // The message is a list of arguments like "[arg1, arg2]". Use jackson to parse it. ObjectMapper mapper = new ObjectMapper(); try { List<Object> params = mapper.readValue(msg, List.class); Map<String,String> msgMap = (Map<String,String>) params.get(0); handleMessages(msgMap); } catch (JsonMappingException e) { // TODO Auto-generated catch block e.printStackTrace(); } catch (JsonProcessingException e) { // TODO Auto-generated catch block e.printStackTrace(); } }); } -
In the Java program, create a QR code stage to generate and display the QR code.
-
Create a
qrcode.fxmllayout file under the fxml folder of the package.<Pane maxHeight="-Infinity" maxWidth="-Infinity" minHeight="-Infinity" minWidth="-Infinity" prefHeight="450.0" prefWidth="400.0" xmlns="http://javafx.com/javafx/8" xmlns:fx="http://javafx.com/fxml/1" fx:controller="com.xulihang.webtwain.QRCodeController"> <children> <ImageView fx:id="qrcodeImageView" fitHeight="400.0" fitWidth="400.0" pickOnBounds="true" preserveRatio="true" /> <Button layoutX="14.0" layoutY="411.0" mnemonicParsing="false" onMouseClicked="#deleteAndCloseButton_MouseClicked" text="Delete and close" /> </children> </Pane> -
Create the corresponding controller which generates and displays the QR code:
 public class QRCodeController {

     @FXML private ImageView qrcodeImageView;
     public File file;
     public void generateQRCode(String link, File outputFile) {
         file = outputFile;
         try {
             BitMatrix matrix = new MultiFormatWriter().encode(
                     link,
                     BarcodeFormat.QR_CODE, 400, 400);
             BufferedImage bi = MatrixToImageWriter.toBufferedImage(matrix);
             Image img = SwingFXUtils.toFXImage(bi, null);
             qrcodeImageView.setImage(img);
             qrcodeImageView.setFitWidth(400);
             qrcodeImageView.setFitHeight(400);
         } catch (WriterException e) {
             e.printStackTrace();
         }
     }

     @FXML
     private void deleteAndCloseButton_MouseClicked(Event e) {
         file.delete();
         Stage stage = (Stage) qrcodeImageView.getScene().getWindow();
         stage.close();
     }
 }
Here, ZXing is used to generate the QR code. We need to add its dependencies in
pom.xml.<dependency> <groupId>com.google.zxing</groupId> <artifactId>core</artifactId> <version>3.4.1</version> </dependency> <dependency> <groupId>com.google.zxing</groupId> <artifactId>javase</artifactId> <version>3.4.1</version> </dependency> -
Start the QR code stage when a download message is received.
 private void handleMessages(Map<String,String> msgMap) {
     String msg = msgMap.get("msg");
     if (msg.equals("download")) {
         String path = msgMap.get("content");
         File outputFile = new File(path);
         if (outputFile.exists()) {
             System.out.println("Exists "+path);
             //https://stackoverflow.com/questions/9481865/getting-the-ip-address-of-the-current-machine-using-java
             try(final DatagramSocket socket = new DatagramSocket()){
                 socket.connect(InetAddress.getByName("8.8.8.8"), 10002);
                 String ip = socket.getLocalAddress().getHostAddress();
                 String link = "http://" + ip + ":8081/" + outputFile.getName();

                 Platform.runLater(new Runnable() {
                     @Override
                     public void run() {
                         try {
                             Stage newWindow = new Stage();
                             newWindow.setTitle(link);
                             FXMLLoader loader = new FXMLLoader(getClass().getResource("/com/xulihang/webtwain/fxml/qrcode.fxml"));
                             newWindow.setScene(new Scene(loader.load()));
                             newWindow.setAlwaysOnTop(true);
                             newWindow.show();
                             QRCodeController controller = (QRCodeController) loader.getController();
                             controller.generateQRCode(link, outputFile);
                         } catch (IOException e) {
                             e.printStackTrace();
                         }
                     }
                 });

             } catch (Exception e) {
               // TODO Auto-generated catch block
               e.printStackTrace();
             }
         }
     }
 }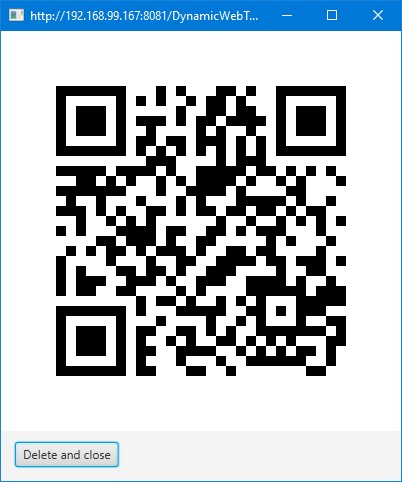
-
All right, we’ve completed the Java desktop document scanning app.
Common Issues and Edge Cases
- Dynamic Web TWAIN Service not installed: The app requires the Dynamsoft Service running locally to communicate with scanners. If the service is missing, intercept the callback and prompt users to download it (see the Appendix below).
- No scanner detected or “No paper detected” error: Verify that the scanner is powered on, connected, and that the correct TWAIN/WIA/SANE driver is installed. When using the Automatic Document Feeder (ADF), ensure paper is loaded before calling
AcquireImage. - WebView fails to load the page on Linux: The Webview library relies on WebKitGTK on Linux. Install
libwebkit2gtk-4.0-devif the WebView window shows a blank page or crashes on startup.
Source Code
Get the complete sample project source code on GitHub
Appendix
Handle Missing Dynamic Web TWAIN Service Installation
Dynamic Web TWAIN Service has to be installed to interact with scanners.
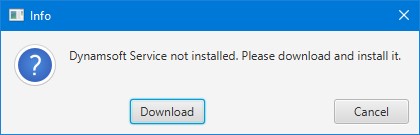
If users have not installed Dynamic Web TWAIN Service, they may encounter the following dialog.
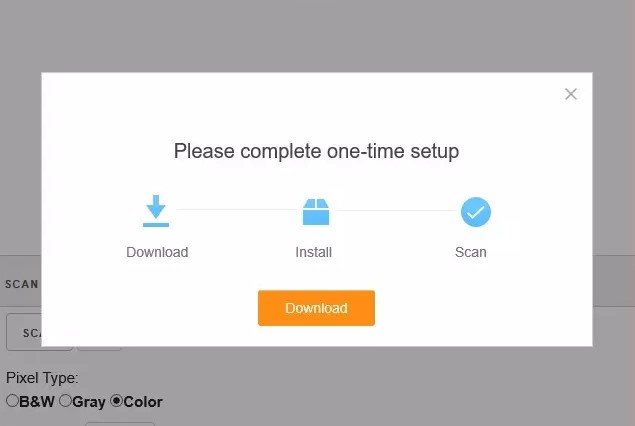
We can modify its default behavior so that it will show a dialog and direct users to download it.
-
Modify
Resources/dynamsoft.webtwain.install.jsas the following so that the web page will send a message to the Java program if the service is not installed:Dynamsoft.OnWebTwainNotFoundOnWindowsCallback = function (ProductName, InstallerUrl, bHTML5, bIE, bSafari, bSSL, strIEVersion) { - var _this = Dynamsoft, objUrl = { 'default': InstallerUrl }; - _this._show_install_dialog(ProductName, objUrl, bHTML5, Dynamsoft.DWT.EnumDWT_PlatformType.enumWindow, bIE, bSafari, bSSL, strIEVersion); + var msg = {}; + msg["msg"] = "service not installed" + window.postMessageExt(msg); }; -
In the Java program, handle the message.
 private void handleMessages(Map<String,String> msgMap) {
     String msg = msgMap.get("msg");
     System.out.println(msg);
     if (msg.equals("service not installed")) {
         Platform.runLater(new Runnable() {
             @Override
             public void run() {
               handleServiceUninstalled();
             }
         });
     }
 }

 private void handleServiceUninstalled() {
     Alert alert = new Alert(AlertType.CONFIRMATION);
     alert.setTitle("Info");
     alert.setHeaderText(null);
     alert.setContentText("Dynamic Web TWAIN Service not installed. Please download and install it.");

     ButtonType downloadBtn = new ButtonType("Download");
     ButtonType cancelBtn = new ButtonType("Cancel", ButtonData.CANCEL_CLOSE);

     alert.getButtonTypes().setAll(downloadBtn, cancelBtn);

     Optional<ButtonType> result = alert.showAndWait();
     if (result.get() == downloadBtn){
         App.hostServices.showDocument("https://download2.dynamsoft.com/Demo/DWT/DWTResources/dist/DynamsoftServiceSetup.msi"); // use the system's browser to open the link
     }
 }