


Thanks for Downloading Dynamic Web TWAIN 30-Day Trial!
Your download will start shortly. If your download does not begin, click here to retry.
Scanning Images
The main use case for DWT is to acquire images from a document scanner (the image source). We will demonstrate its functions by building a web application using DWT.
Initialize the Environment
To start off, create the Hello World web application and load DWT into the environment.
Create a Web Application
Create a HelloWorld.html file anywhere and copy the Resources folder to the same location. You can typically find the Resources folder inside the following locations depending on your platform:
- Windows:
C:\Program Files (x86)\Dynamsoft\Dynamic Web TWAIN SDK {Version Number}\ - Linux: Within the decompressed file
Dynamic Web TWAIN SDK {Version Number}/ - MacOS:
/Applications/Dynamsoft/Dynamic Web TWAIN SDK {Version Number}/
Include the DWT Scripts
Include the library scripts in the <head> element of HelloWorld.html:
<script src="Resources/dynamsoft.webtwain.initiate.js"></script>
<script src="Resources/dynamsoft.webtwain.config.js"></script>
Initialize the DWT Environment
Now that the web application includes the script libraries, we may begin implementing image scanning using DWT.
Add this <div> in the <body> element:
<div id="dwtcontrolContainer"></div>
dwtcontrolContaineris the defaultidfor thedivin the default DWT resources, and any of the Dynamsoft-provided demos. If you would like to use a differentidfor thisdiv, you will need to changeDynamsoft.DWT.Containersin the filedynamsoft.webtwain.config.jsto match.
DWT has an event registration API, Dynamsoft.DWT.RegisterEvent, that we can use here to retrieve the initialized WebTwain object only when DWT is fully initialized. This WebTwain object is the entrypoint to most APIs in DWT.
Include the following in the head element of HelloWorld.html:
<script type="text/javascript">
    var DWTObject;

    Dynamsoft.DWT.RegisterEvent("OnWebTwainReady", function () {
        DWTObject = Dynamsoft.DWT.GetWebTwain("dwtcontrolContainer");
    });
</script>
The next step is to use the DWT API to acquire an image from a scanner.
Add Simple Scanning Functionality
Create an HTML Scan Button
Add this element in the HTML body to create a scanning button:
<input type="button" value="Scan" onclick="AcquireImage();" />
Initiate a Scan from an Image Source
Define the following function to handle scans, and add it in the script element created during initialization:
function AcquireImage() {
    if (DWTObject) {
        DWTObject.SelectSourceAsync().then(
            function () {
                return DWTObject.AcquireImageAsync(
                    { IfCloseSourceAfterAcquire: true }
                );
            }
        ).catch(function (exp) {
            alert(exp.message);
        });
    }
}
Review the Code
At this point, HelloWorld.html should look like this:
<html>
    <head>
        <script src="Resources/dynamsoft.webtwain.initiate.js"></script>
        <script src="Resources/dynamsoft.webtwain.config.js"></script>
    </head>

    <body>
        <input type="button" value="Scan" onclick="AcquireImage();" />
        <div id="dwtcontrolContainer"></div>

        <script type="text/javascript">
            var DWTObject;

            Dynamsoft.DWT.RegisterEvent("OnWebTwainReady", function () {
                DWTObject = Dynamsoft.DWT.GetWebTwain("dwtcontrolContainer");
            });

            function AcquireImage() {
                if (DWTObject) {
                    DWTObject.SelectSourceAsync()
                        .then(function () {
                            return DWTObject.AcquireImageAsync({
                                IfCloseSourceAfterAcquire: true,
                            });
                        })
                        .catch(function (exp) {
                            alert(exp.message);
                        });
                }
            }
        </script>
    </body>
</html>
APIs used:
RegisterEvent()OnWebTwainReadyGetWebTwain()SelectSourceAsync()AcquireImageAsync()IfCloseSourceAfterAcquire
Run the Application
Open the Page in Your Browser
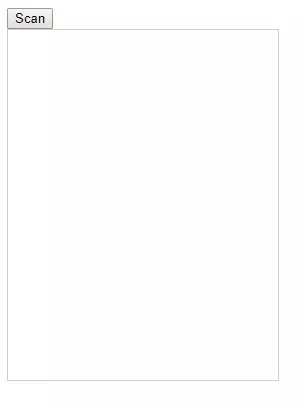
Simply double click on HelloWorld.html in your file viewer, or right click on the HTML file and select a browser to open it with. In your browser, you should see a page with a scan button and an empty preview box.
Note: if you see a license notice, please make sure you have a valid license. Open
dynamsoft.webtwain.config.jsand ensure that you have a license defined atDynamsoft.DWT.ProductKey. If you need further assistance, please contact Dynamsoft Support.
Press the Scan Button
After pressing the Scan button, you will be presented with the Select Source dialog. Select your scanner and press the Select button.

Only TWAIN, WIA, ICA, or SANE compliant devices are listed in the Select Source dialog. If your connected scanner does not show up in the list, please confirm that the proper driver is installed. If you are using Windows and do not have a physical scanner on hand, you may install the TWAIN Virtual Scanner - a scanner simulator developed by the TWAIN Working Group for testing purposes. This guide uses the TWAIN Virtual Scanner for reproducibility.
Initiate a Scan from the Scanner UI
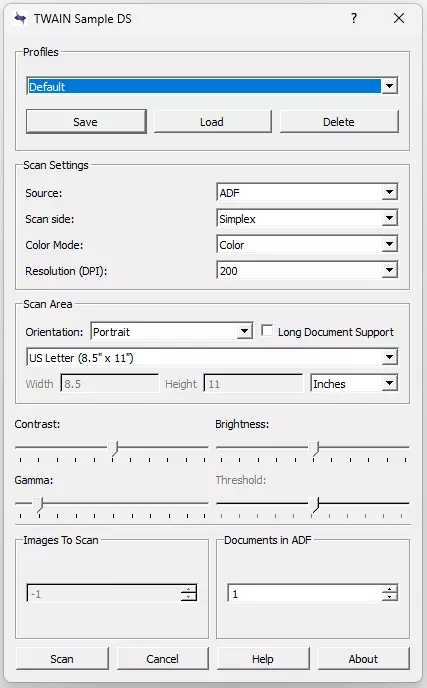
You will be presented with your scanner’s built-in interface after selecting the scanner. Initiate a scan from this dialog. Your scanner’s interface may differ from the provided screenshot:
View the Scanned Image
After the scanner finishes scanning, the viewer will display the acquired images:
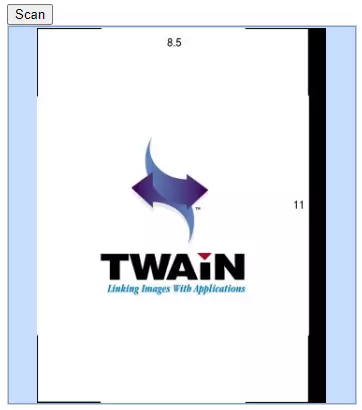
You have just scanned an image using an image scanner controlled by a web application!
Next Article
The next article in this series will demonstrate uploading images to the server.