


How to Implement TWAIN Document Scanning in a .NET Blazor WebAssembly App
Need to scan paper documents directly from a .NET Blazor WebAssembly app? Dynamic Web TWAIN is a JavaScript-based document scanning SDK that supports TWAIN, WIA, SANE, ICA, and eSCL scanner protocols across Windows, macOS, and Linux. This tutorial shows you how to connect a Blazor WebAssembly app to physical scanners (HP, Canon, Epson, and more) via C# JavaScript Interop, scan pages, and export them to PDF — all in about 10 minutes.
This article is Part 5 in a 5-Part Series.
- Part 1 - How to Scan and Digitize Documents in Blazor WebAssembly with C# and .NET
- Part 2 - Build a Blazor WebAssembly Barcode and QR Code Scanner with Dynamsoft
- Part 3 - How to Build a Blazor WebAssembly PDF Annotation Viewer with Dynamsoft
- Part 4 - Build a C# Blazor WebAssembly Passport MRZ Scanner with Dynamsoft
- Part 5 - How to Implement TWAIN Document Scanning in a .NET Blazor WebAssembly App
What you’ll build: A .NET Blazor WebAssembly app that connects to physical scanners (HP, Canon, Epson, and more) via TWAIN, WIA, SANE, ICA, and eSCL protocols using Dynamic Web TWAIN, with scan-to-PDF export — completable in about 10 minutes using the full source code on GitHub.
Key Takeaways
- Dynamic Web TWAIN enables Blazor WebAssembly apps to acquire images from TWAIN, WIA, SANE, ICA, and eSCL-compatible scanners on Windows, macOS, and Linux.
- The SDK communicates with scanner hardware via a locally installed service; Blazor calls it through JavaScript Interop (
IJSRuntime). - Scanner configuration (resolution, duplex, pixel type) is passed as a serialized JSON object from C# to JavaScript, keeping the Blazor component clean and protocol-agnostic.
- Scanned documents can be exported directly to PDF, TIFF, or JPEG without a browser download prompt, making it suitable for enterprise document workflows.
Common Developer Questions
How do I implement TWAIN document scanning in a .NET Blazor WebAssembly app?
Implement TWAIN document scanning in Blazor WebAssembly by loading the Dynamic Web TWAIN SDK, initializing it with a license key, creating a Razor component with a viewer container, and calling the SDK’s scanner APIs through C# JavaScript Interop.
How do I call Dynamic Web TWAIN from C# using JavaScript Interop in Blazor?
Call Dynamic Web TWAIN from C# by injecting IJSRuntime and using InvokeAsync or InvokeVoidAsync to call JavaScript functions in wwwroot/jsInterop.js that wrap the SDK’s scanner, device, and save APIs.
Why does the Dynamic Web TWAIN Service fail to install from a CDN?
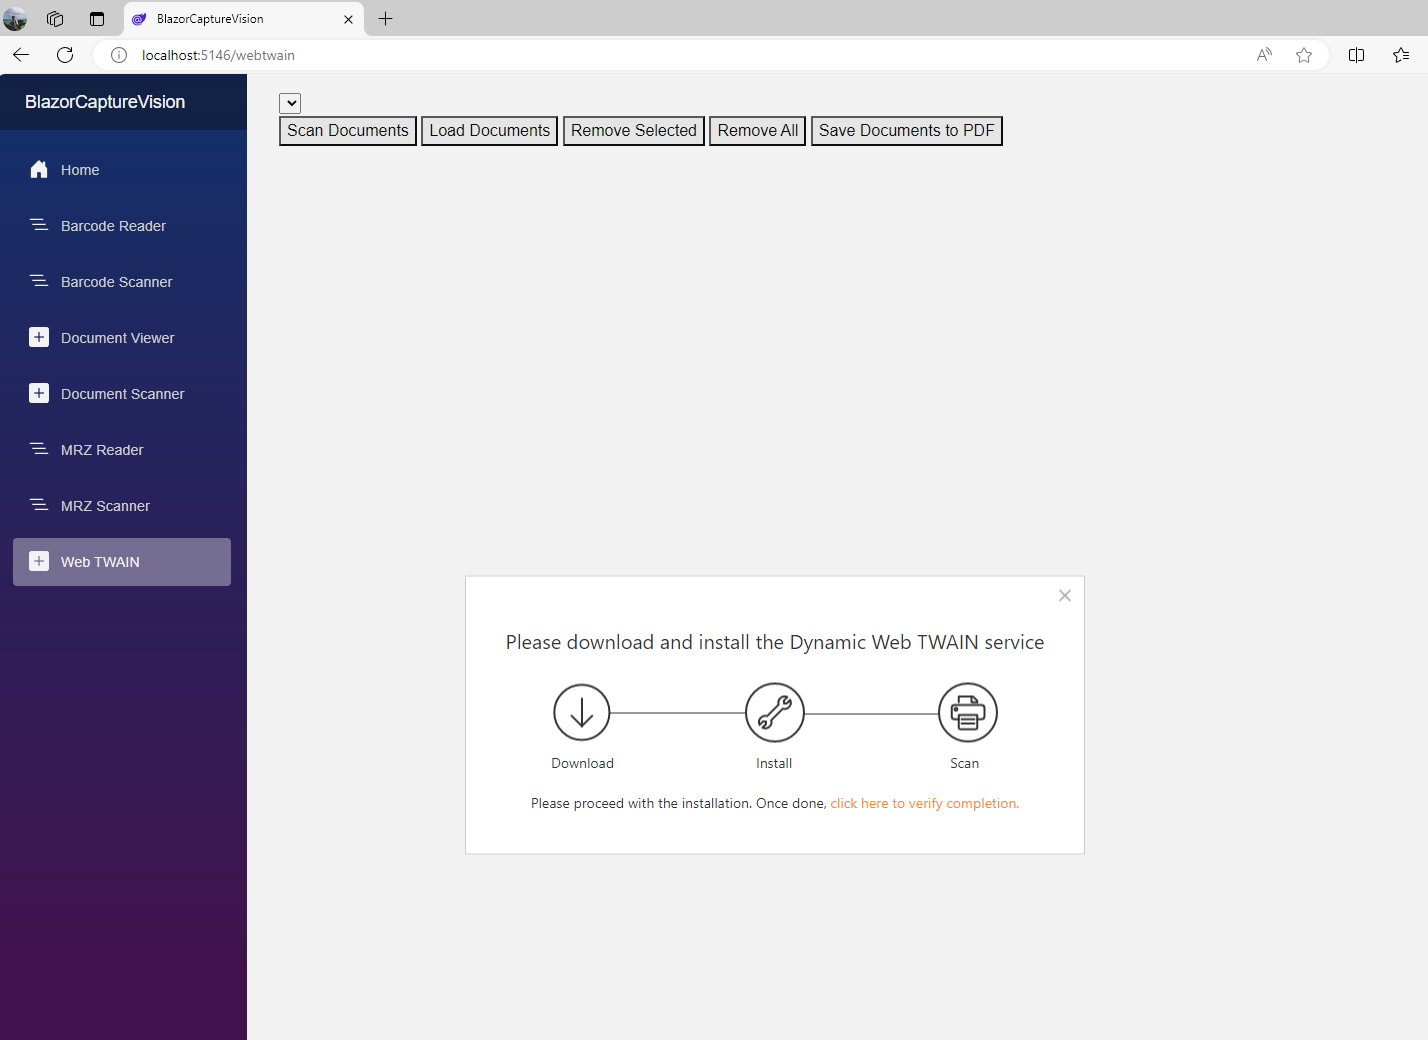
The Dynamic Web TWAIN Service installer exceeds jsDelivr’s size limit, so serving it through jsDelivr fails. Host the installer directly on your own server or use unpkg/self-host instead. When users access the app for the first time, the browser prompts them to install the local service if it is not already present.
Can I scan to PDF from a Blazor app using TWAIN, WIA, SANE, or eSCL scanners?
Yes. Blazor WebAssembly can scan to PDF from TWAIN, WIA, SANE, ICA, and eSCL scanners by calling Dynamic Web TWAIN’s SaveAllAsPDF method through JavaScript Interop after acquiring images with the appropriate device type flags.
Blazor TWAIN Document Scanning Demo
Try the Online Demo
https://yushulx.me/blazor-barcode-mrz-document-scanner/
Prerequisites
-
Dynamic Web TWAIN
This package is essential for integrating scanning capabilities into your web application. It includes:
- Cross-Platform JavaScript Libraries: Compatible with Windows, macOS, and Linux.
-
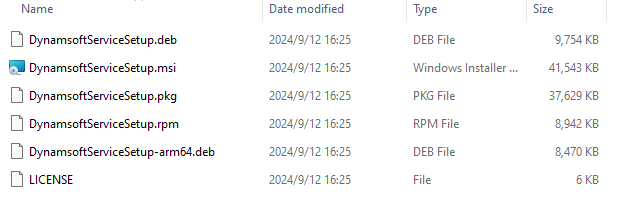
Platform-Specific Service Installers: Facilitates communication between the web app and scanner hardware.
You can install Dynamic Web TWAIN via npm.
Important Note:
-
Installation Prompt: When users access your document scanning app for the first time, they will be prompted to install the Dynamic Web TWAIN Service.
-
CDN Limitations: The service installer exceeds jsDelivr’s size limits, leading to failed downloads if attempted through this method. Instead, host the service installer on your server or use the unpkg website to download the installer.
-
Dynamsoft Capture Vision Trial License
To utilize the full capabilities of the Dynamic Web TWAIN SDK, obtain a 30-day free trial license.
Step 1: Set Up Dynamic Web TWAIN in Your Blazor WebAssembly Project
Integrating Dynamic Web TWAIN into your Blazor WebAssembly application enables robust document scanning capabilities across multiple platforms. Follow the steps below to set up Dynamic Web TWAIN effectively:
- Create a New Blazor WebAssembly Project: Scaffold a new Blazor WebAssembly project using Visual Studio.
-
Download Dynamic Web TWAIN: Install the Dynamic Web TWAIN package via npm.
npm install dwt -
Integrate Dynamic Web TWAIN into the Blazor Project: Copy the
distfolder from thenode_modules/dwtdirectory to thewwwrootfolder in the Blazor project, and then include the JavaScript file in theindex.htmlfile.<script src="dist/dynamsoft.webtwain.min.js"></script> -
Create a JavaScript File for C# Interop: To facilitate communication between Blazor (C#) and JavaScript, create a
jsInterop.jsfile in thewwwrootdirectory and include it in yourindex.html:<script src="dist/dynamsoft.webtwain.min.js"></script> <script src="jsInterop.js"></script> - Configure Resource Paths and License Key: In the
wwwroot/jsInterop.jsfile, define asetLicensefunction to configure the resource path and license key for Dynamic Web TWAIN:window.jsFunctions = { setLicense: async function setLicense(license) { if (isInitialized) return true; try { Dynamsoft.DWT.ResourcesPath = "dist"; Dynamsoft.DWT.ProductKey = license; isInitialized = true; } catch (e) { alert(e); return false; } return true; }, ... }; -
Create an EditForm for License Input: In
Pages/Home.razor, add the following HTML and C# code to allow users to activate the SDK with a valid license key:@page "/" @inject IJSRuntime JSRuntime <PageTitle>Home</PageTitle> <p>Click <a href="https://www.dynamsoft.com/customer/license/trialLicense/?product=dcv&package=cross-platform" target="_blank">here</a> to obtain a Dynamsoft Capture Vision Trial License.</p> <EditForm Model="@this"> <InputText @bind-Value="LicenseKey" placeholder="Enter your license key" /> <button type="button" class="btn btn-primary" @onclick="SetLicenseKey">Activate the SDK</button> </EditForm> @code { Boolean initialized = false; private string LicenseKey = "LICENSE-KEY"; private async Task SetLicenseKey() { initialized = await JSRuntime.InvokeAsync<Boolean>("jsFunctions.setLicense", LicenseKey); StateHasChanged(); } }
Step 2: Implement TWAIN Document Scanning in Blazor WebAssembly
The following steps outline how to implement document scanning functionality in a Blazor WebAssembly application using Dynamic Web TWAIN:
-
Create a Razor Component: Add a new Razor component named
WebTwain.razorto thePagesdirectory and reference it in theLayout/NavMenu.razorfile.<div class="nav-item px-3"> <NavLink class="nav-link" href="webtwain"> <span class="bi bi-plus-square-fill-nav-menu" aria-hidden="true"></span> Web TWAIN </NavLink> </div> -
Initialize a Document Container: In the
WebTwain.razorfile, create a container to display scanned documents:@page "/webtwain" @inject IJSRuntime JSRuntime @using System.Text.Json; <div id="@containerId"></div> @code { private string containerId = "document-container"; private int containerWidth = 800; private int containerHeight = 800; protected override async Task OnAfterRenderAsync(bool firstRender) { if (firstRender) { await JSRuntime.InvokeVoidAsync("jsFunctions.initWebTwain", containerId, containerWidth, containerHeight); ... } } }Explanation:
@page "/webtwain"directive defines the route for this component.-
initWebTwainis a JavaScript function that initializes the Web TWAIN container with a specified ID and dimensions.initWebTwain: async function (containerId, width, height) { if (!isInitialized) { alert("Please set the license first."); return; } try { await new Promise((resolve, reject) => { Dynamsoft.DWT.CreateDWTObjectEx({ "WebTwainId": containerId }, (obj) => { dwtObject = obj; dwtObject.Viewer.bind(document.getElementById(containerId)); dwtObject.Viewer.width = width; dwtObject.Viewer.height = height; dwtObject.Viewer.show(); resolve(); }, (errorString) => { console.log(errorString); resolve(); }); }); } catch (e) { alert(e); } },
-
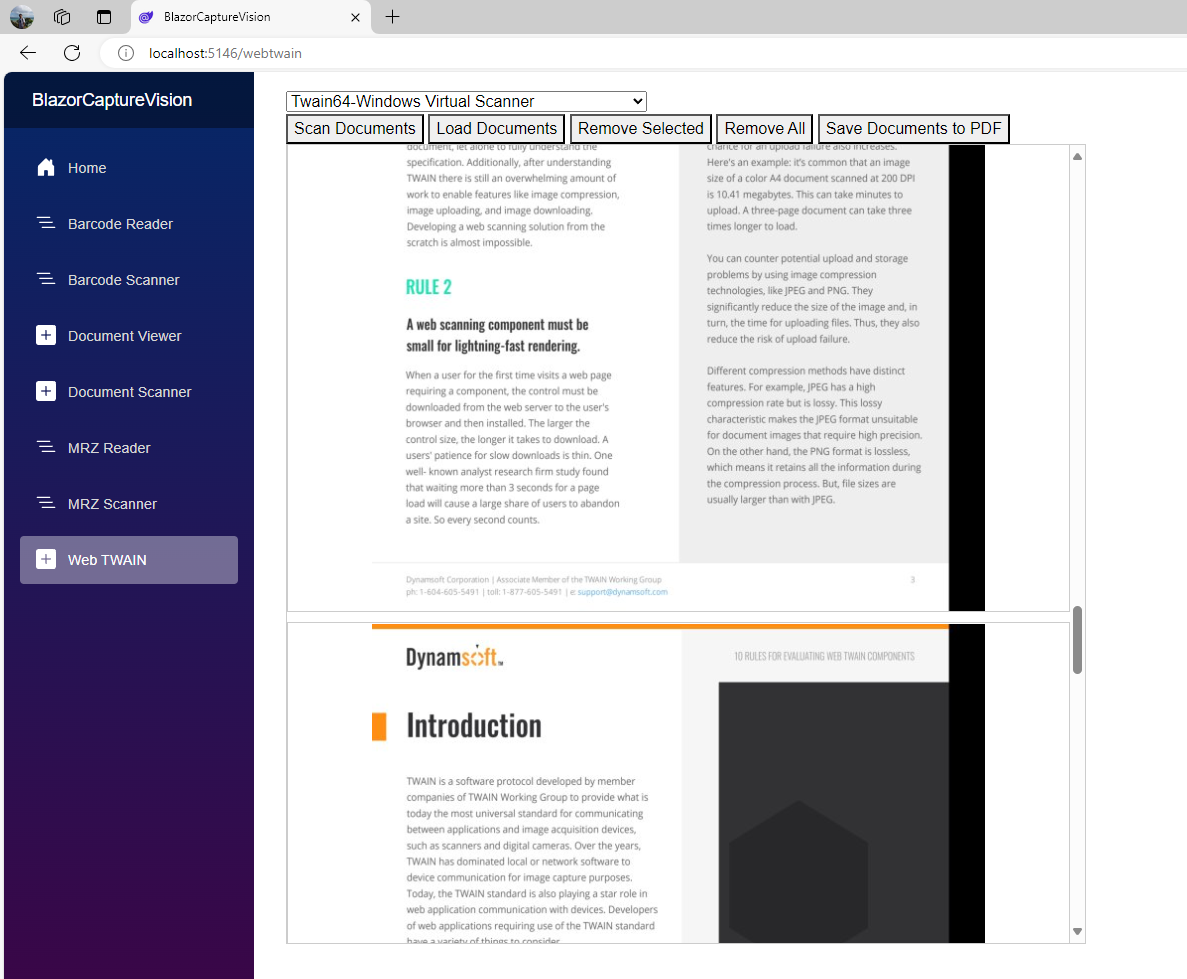
List Available Scanners: Add a dropdown to list the available scanners connected to the computer:
<select id="@selectId"></select> @code { protected override async Task OnAfterRenderAsync(bool firstRender) { if (firstRender) { await JSRuntime.InvokeVoidAsync("jsFunctions.initWebTwain", containerId, containerWidth, containerHeight); await JSRuntime.InvokeVoidAsync("jsFunctions.getDevices", selectId); } } }Explanation:
-
getDevicesis a JavaScript function that retrieves the available scanners and populates the select element with the scanner names.getDevices: async function (selectId) { await new Promise((resolve, reject) => { if (!dwtObject) { resolve(); return; } dwtObject.GetDevicesAsync(Dynamsoft.DWT.EnumDWT_DeviceType.TWAINSCANNER | Dynamsoft.DWT.EnumDWT_DeviceType.TWAINX64SCANNER | Dynamsoft.DWT.EnumDWT_DeviceType.ESCLSCANNER).then((sources) => { sourceList = sources; selectSources = document.getElementById(selectId); for (let i = 0; i < sources.length; i++) { let option = document.createElement("option"); option.text = sources[i].displayName; option.value = i.toString(); selectSources.add(option); } resolve(); }); }); },
-
-
Scan Documents from a Selected Scanner: Add a button to initiate the document scanning process:
<button @onclick="AcquireImage">Scan Documents</button> @code { public async Task AcquireImage() { var deviceConfiguration = new { IfShowUI = false, PixelType = Utils.PixelType.TWPT_RGB, Resolution = 300, IfFeederEnabled = true, IfDuplexEnabled = false, IfDisableSourceAfterAcquire = true, IfGetImageInfo = true, IfGetExtImageInfo = true, extendedImageInfoQueryLevel = 0 }; var jsonString = JsonSerializer.Serialize(deviceConfiguration); await JSRuntime.InvokeVoidAsync("jsFunctions.acquireImage", jsonString); } }Explanation:
deviceConfigurationis a C# object that specifies the scanning settings.-
acquireImageis a JavaScript function that triggers the document scanning process with the specified settings.acquireImage: async function (jsonString) { await new Promise((resolve, reject) => { if (!dwtObject || sourceList.length == 0) { resolve(); return; } if (selectSources) { dwtObject.SelectDeviceAsync(sourceList[selectSources.selectedIndex]).then(() => { return dwtObject.OpenSourceAsync() }).then(() => { return dwtObject.AcquireImageAsync(JSON.parse(jsonString)) }).then(() => { if (dwtObject) { dwtObject.CloseSource(); } resolve(); }).catch( (e) => { console.error(e); resolve(); } ) } else { resolve(); } }); },
-
Remove a Selected Document: Add a button to remove a selected document from the container:
<button @onclick="RemoveSelected">Remove Selected</button> @code { public async Task RemoveSelected() { await JSRuntime.InvokeVoidAsync("jsFunctions.removeSelected"); } }Explanation:
-
removeSelectedis a JavaScript function that removes the selected document from the container.removeSelected: async function () { await new Promise((resolve, reject) => { if (!dwtObject) { resolve(); return; } dwtObject.RemoveImage(dwtObject.CurrentImageIndexInBuffer); resolve(); }); },
-
-
Save Documents to a PDF File: Add a button that allows users to save the scanned documents as JPEG, TIFF, or PDF format. The file will be generated directly by the Dynamic Web TWAIN Service and saved to the local file system without triggering a browser download prompt.
<button @onclick="Save">Save Documents to PDF</button> @code { public async Task Save() { await JSRuntime.InvokeVoidAsync("jsFunctions.save", Utils.ImageType.PDF, "test"); } }Explanation:
-
saveis a JavaScript function that requests the Dynamic Web TWAIN Service to save the scanned documents as a PDF file.save: async function (type, name) { await new Promise((resolve, reject) => { if (!dwtObject) { resolve(); return; } if (type == 0) { if (dwtObject.GetImageBitDepth(dwtObject.CurrentImageIndexInBuffer) == 1) dwtObject.ConvertToGrayScale(dwtObject.CurrentImageIndexInBuffer); dwtObject.SaveAsJPEG(name + ".jpg", dwtObject.CurrentImageIndexInBuffer); } else if (type == 1) dwtObject.SaveAllAsMultiPageTIFF(name + ".tiff"); else if (type == 2) { dwtObject.SaveAllAsPDF(name + ".pdf"); } alert("Save successfully!"); resolve(); }); }
-
-
Run and Test the Application: Launch the Blazor app and test the scanning functionality. Ensure that a compatible scanner (HP, Canon, Epson, etc.) is connected.
Common Issues & Edge Cases
- Dynamic Web TWAIN Service not detected: If the browser cannot connect to the local service, users see an installation prompt. This is expected on first run. Make sure your server hosts the installer directly — do not serve it through jsDelivr, as it exceeds the CDN’s size limit. Use unpkg or self-host instead.
- Scanner not listed in the dropdown: Ensure the scanner driver is installed on the OS and the device is powered on before calling
GetDevicesAsync. On Linux, SANE must be installed; on macOS, ICA is used automatically. TWAIN 32-bit scanners require theTWAINSCANNER(notTWAINX64SCANNER) flag. - PDF save creates an empty file: Calling
SaveAllAsPDFrequires at least one image in the buffer. Guard against an empty buffer by checkingdwtObject.HowManyImagesInBuffer > 0before invoking the save function.