


Build a Cross-Platform SwiftUI Document Scanner for macOS and iOS
Previously, we created a cross-platform SwiftUI project, a 1D/2D barcode scanner app, for macOS and iOS using the Dynamsoft Capture Vision SDK. In this tutorial, we will continue to explore the functionalities of the Capture Vision SDK by building a document scanner app for macOS and iOS using SwiftUI. Utilizing the existing barcode SwiftUI project can expedite the development process.
What you’ll build: A cross-platform SwiftUI document scanner app that detects document edges in real time and produces a perspective-corrected image, running on both macOS and iOS with the Dynamsoft Capture Vision SDK.
Key Takeaways
- A single SwiftUI codebase can deliver real-time document edge detection and perspective correction on both macOS and iOS using Dynamsoft Capture Vision SDK.
- On macOS, the C++
CaptureAPI processes raw pixel buffers and returnsCNormalizedImageResultItemobjects with four corner points and a normalized image. - On iOS, switching to
PresetTemplate.detectAndNormalizeDocumentis the only change needed to move from barcode scanning to document scanning. - The normalized output image requires a 90-degree rotation on iOS before it renders correctly in a SwiftUI
Imageview.
Common Developer Questions
How do I build a cross-platform SwiftUI document scanner for macOS and iOS?
Start from a shared SwiftUI project, keep the platform-specific camera bridge thin, and use the same Dynamsoft document-detection workflow on both targets. Most of the scanning logic can remain shared while only the preview and image-conversion details differ by platform.
How do I detect document edges and normalize a scanned image with Dynamsoft SDK in Swift?
Run the document-detection template through the Capture Vision router, read the returned corner points and normalized image result, and display that output in the SwiftUI interface. The SDK handles both boundary detection and perspective correction for you.
Why does the captured document image appear rotated in SwiftUI on iOS?
The normalized output on iOS can arrive with a different orientation than the SwiftUI image view expects, so the app rotates the final image before display. Without that correction, the saved or previewed document can appear 90 degrees off.
This article is Part 5 in a 6-Part Series.
- Part 1 - How to Build an iOS QR Code and Barcode Scanner with SwiftUI on Apple Silicon
- Part 2 - Build an iOS Passport and ID MRZ Scanner with SwiftUI and Dynamsoft Capture Vision
- Part 3 - Build a macOS Barcode Scanner with SwiftUI and a C++ Barcode SDK
- Part 4 - Build a SwiftUI Barcode Scanner for iOS and macOS with Dynamsoft Capture Vision
- Part 5 - Build a Cross-Platform SwiftUI Document Scanner for macOS and iOS
- Part 6 - How to Build a macOS Framework Wrapping C++ in Objective-C++ for Swift Barcode Scanning
Demo: Real-Time iOS Document Scanning
Prerequisites
- Get a 30-day free trial license for the Dynamsoft Capture Vision SDK.
- capture-vision-spm: The Swift Package Manager (SPM) for the Dynamsoft Capture Vision SDK.
- Barcode Scanner SwiftUI Project: Use the existing SwiftUI project for barcode scanning as the foundation.
Step 1: Configure the Document Detection Template on macOS
- Import the Barcode Scanner Project into Xcode.
- Open the
template.hfile in Xcode. - Replace the string with the configuration from the
DDN-PresetTemplates.jsonfile. The JSON file is extracted from the Dynamsoft Capture Vision bundle for Python.
Step 2: Retrieve Document Edges and Normalized Image on macOS
After setting the document detection template, the Capture Vision Router object can return the document edges and the normalized image. The following code snippet demonstrates how to obtain the document edges and normalized image in the captureImageWithData method:
- Call the C++ method
Capturewith the image buffer address, width, height, stride, and pixel format to detect documents:CImageData *imageStruct = new CImageData(stride * height, (unsigned char *)baseAddress, width, height, stride, sdkPixelFormat); CCapturedResult *result = cvr->Capture(imageStruct, ""); - Retrieve the detection results, which is an array of
CNormalizedImageResultItemobjects:CNormalizedImagesResult *documentResult = result->GetNormalizedImagesResult(); int documentResultItemCount = documentResult->GetItemsCount(); for (int j = 0; j < documentResultItemCount; j++) { const CNormalizedImageResultItem *documentResultItem = documentResult->GetItem(j); } - Get the normalized image data and the four points of the document edges:
const CImageData *imageData = documentResultItem->GetImageData(); const unsigned char *bytes = imageData->GetBytes(); unsigned long size = imageData->GetBytesLength(); int width = imageData->GetWidth(); int height = imageData->GetHeight(); int stride = imageData->GetStride(); ImagePixelFormat format = imageData->GetImagePixelFormat(); NSImage *image = [self convertToNSImageWithBytes:bytes size:size width:width height:height stride:stride format:format]; CPoint *points = documentResultItem->GetLocation().points; -
Convert
const unsigned char *to anNSImageobject.- (NSImage *)convertToNSImageWithBytes:(const unsigned char *)bytes size:(unsigned long)size width:(int)width height:(int)height stride:(int)stride format:(ImagePixelFormat)format { NSBitmapFormat bitmapFormat = 0; int bitsPerPixel = 0; int samplesPerPixel = 0; switch (format) { case IPF_RGB_888: bitmapFormat = 0; bitsPerPixel = 24; samplesPerPixel = 3; break; case IPF_ARGB_8888: bitmapFormat = NSBitmapFormatAlphaFirst; bitsPerPixel = 32; samplesPerPixel = 4; break; case IPF_GRAYSCALED: bitmapFormat = 0; bitsPerPixel = 8; samplesPerPixel = 1; break; default: NSLog(@"Unsupported pixel format"); return nil; } NSBitmapImageRep *imageRep = [[NSBitmapImageRep alloc] initWithBitmapDataPlanes:NULL pixelsWide:width pixelsHigh:height bitsPerSample:8 samplesPerPixel:samplesPerPixel hasAlpha:(samplesPerPixel == 4) isPlanar:NO colorSpaceName:NSCalibratedRGBColorSpace bitmapFormat:bitmapFormat bytesPerRow:stride bitsPerPixel:bitsPerPixel]; if (!imageRep) { NSLog(@"Failed to create NSBitmapImageRep."); return nil; } memcpy([imageRep bitmapData], bytes, size); NSImage *image = [[NSImage alloc] initWithSize:NSMakeSize(width, height)]; [image addRepresentation:imageRep]; return image; } - Wrap the coordinates and image data in a dictionary and return it to the SwiftUI view.
 NSMutableArray *documentArray = [NSMutableArray array];

 NSDictionary *documentData = @{
   @"points" : @[
     @{@"x" : @(points[0][0]), @"y" : @(height - points[0][1])},
     @{@"x" : @(points[1][0]), @"y" : @(height - points[1][1])},
     @{@"x" : @(points[2][0]), @"y" : @(height - points[2][1])},
     @{@"x" : @(points[3][0]), @"y" : @(height - points[3][1])}
   ],
   @"image" : image
 };
Step 3: Detect and Normalize Documents on iOS
To support document detection on iOS, first, add the DynamsoftDocumentNormalizer package:
#if os(iOS)
    import UIKit
    import CoreGraphics
    import DynamsoftCameraEnhancer
    import DynamsoftCaptureVisionRouter
    import DynamsoftLicense
    import DynamsoftCodeParser
    import DynamsoftLabelRecognizer
    import DynamsoftDocumentNormalizer
    typealias ViewController = UIViewController
    typealias ImageType = UIImage
#elseif os(macOS)
    import Cocoa
    typealias ViewController = NSViewController
    typealias ImageType = NSImage
#endif
Then, invoke the capture method with the document detection template:
let result = cvr.captureFromBuffer(imageData, templateName: PresetTemplate.detectAndNormalizeDocument.rawValue)
var documentArray: [[String: Any]] = []
if let items = result.items, items.count > 0 {
  print("Decoded document Count: \(items.count)")

  for item in items {
      if item.type == .normalizedImage,
          let documentItem = item as? NormalizedImageResultItem
      {

          do {
              let image = try documentItem.imageData?.toUIImage()
              let points = documentItem.location.points

              let pointArray: [[String: CGFloat]] = points.compactMap { point in
                  guard let cgPoint = point as? CGPoint else { return nil }
                  return ["x": cgPoint.x, "y": cgPoint.y]
              }

              let rotatedImage = image!.rotate(byDegrees: 90)

              let documentData: [String: Any] = [
                  "image": rotatedImage!,
                  "points": pointArray,
              ]

              documentArray.append(documentData)
          } catch {
              print("Failed to convert image data to UIImage: \(error)")
          }

      }
  }
}
Explanation
- The
toUIImage()method converts the image data to aUIImageobject. - To display the document image correctly, call
rotate(byDegrees: 90)to rotate the image by 90 degrees.
Step 4: Display the Normalized Document in SwiftUI
Once a normalized document is returned by the Dynamsoft Capture Vision SDK, it can be displayed within a SwiftUI view.
-
Create a
ImageViewer.swiftfile, which contains anImageViewerstruct for displaying the document image:import SwiftUI struct ImageViewer: View { var image: ImageType @Binding var isShowingImage: Bool var body: some View { VStack { imageView .resizable() .scaledToFit() .onTapGesture { isShowingImage = false } } .edgesIgnoringSafeArea(.all) .toolbar { ToolbarItem(placement: .automatic) { Button("Back") { isShowingImage = false } } } .navigationTitle("Photo") .padding() } var imageView: Image { #if os(iOS) return Image(uiImage: image) #elseif os(macOS) return Image(nsImage: image) #endif } }For macOS, the image type is
NSImage, while for iOS, it isUIImage. -
Add a button and the
ImageViewerinto theContentView. Observe theimagestate to display theImageViewer:import SwiftUI struct ContentView: View { @State private var image: ImageType? @State private var shouldCapturePhoto = false @State private var isShowingImage = false var body: some View { ZStack { if isShowingImage, let capturedImage = image { ImageViewer(image: capturedImage, isShowingImage: $isShowingImage) } else { CameraView(image: $image, shouldCapturePhoto: $shouldCapturePhoto) .edgesIgnoringSafeArea(.all) VStack { Spacer() Button(action: { shouldCapturePhoto = true }) { Circle() .fill(Color.white) .frame(width: 70, height: 70) .overlay( Circle() .stroke(Color.black.opacity(0.8), lineWidth: 2) ) .shadow(radius: 10) } .padding(.bottom, 40) } } }.onAppear { } #if os(iOS) .onChange(of: image) { _ in if image != nil { isShowingImage = true } } #elseif os(macOS) .onChange(of: image) { if image != nil { isShowingImage = true } } #endif } } -
In
CameraView.swift, register theonImageCapturedevent to update theimageandshouldCapturePhotostate:import AVFoundation import SwiftUI #if os(iOS) struct CameraView: UIViewControllerRepresentable { @Binding var image: ImageType? @Binding var shouldCapturePhoto: Bool ... func makeUIViewController(context: Context) -> CameraViewController { let cameraViewController = CameraViewController() cameraViewController.onImageCaptured = { capturedImage in DispatchQueue.main.async { self.image = capturedImage self.shouldCapturePhoto = false } } context.coordinator.cameraViewController = cameraViewController return cameraViewController } func updateUIViewController(_ uiViewController: CameraViewController, context: Context) { if shouldCapturePhoto { uiViewController.capturePhoto() } } ... } #elseif os(macOS) struct CameraView: NSViewControllerRepresentable { @Binding var image: ImageType? @Binding var shouldCapturePhoto: Bool ... func makeNSViewController(context: Context) -> CameraViewController { let cameraViewController = CameraViewController() cameraViewController.onImageCaptured = { capturedImage in DispatchQueue.main.async { self.image = capturedImage self.shouldCapturePhoto = false } } context.coordinator.cameraViewController = cameraViewController return cameraViewController } func updateNSViewController(_ nsViewController: CameraViewController, context: Context) { if shouldCapturePhoto { nsViewController.capturePhoto() } } ... } #endif -
Trigger the
onImageCapturedevent in theCameraViewController.swiftwhen a document is detected:class CameraViewController: ViewController, AVCapturePhotoCaptureDelegate, AVCaptureVideoDataOutputSampleBufferDelegate { ... var onImageCaptured: ((ImageType) -> Void)? var isCaptureEnabled = false func capturePhoto() { isCaptureEnabled = true } func processCameraFrame(_ pixelBuffer: CVPixelBuffer) { ... #if os(iOS) DispatchQueue.main.async { [weak self] in guard let self = self else { return } self.overlayView.documentData = documentArray self.overlayView.setNeedsDisplay() if isCaptureEnabled && documentArray.count > 0 { onImageCaptured?(documentArray[0]["image"] as! ImageType) isCaptureEnabled = false } } #elseif os(macOS) DispatchQueue.main.async { [weak self] in guard let self = self else { return } self.overlayView.documentData = documentArray self.overlayView.setNeedsDisplay(self.overlayView.bounds) if isCaptureEnabled && documentArray.count > 0 { onImageCaptured?(documentArray[0]["image"] as! ImageType) isCaptureEnabled = false } } #endif } }
Step 5: Run the Document Scanner on iOS and macOS
- Select a target device in Xcode and run the document scanner app.
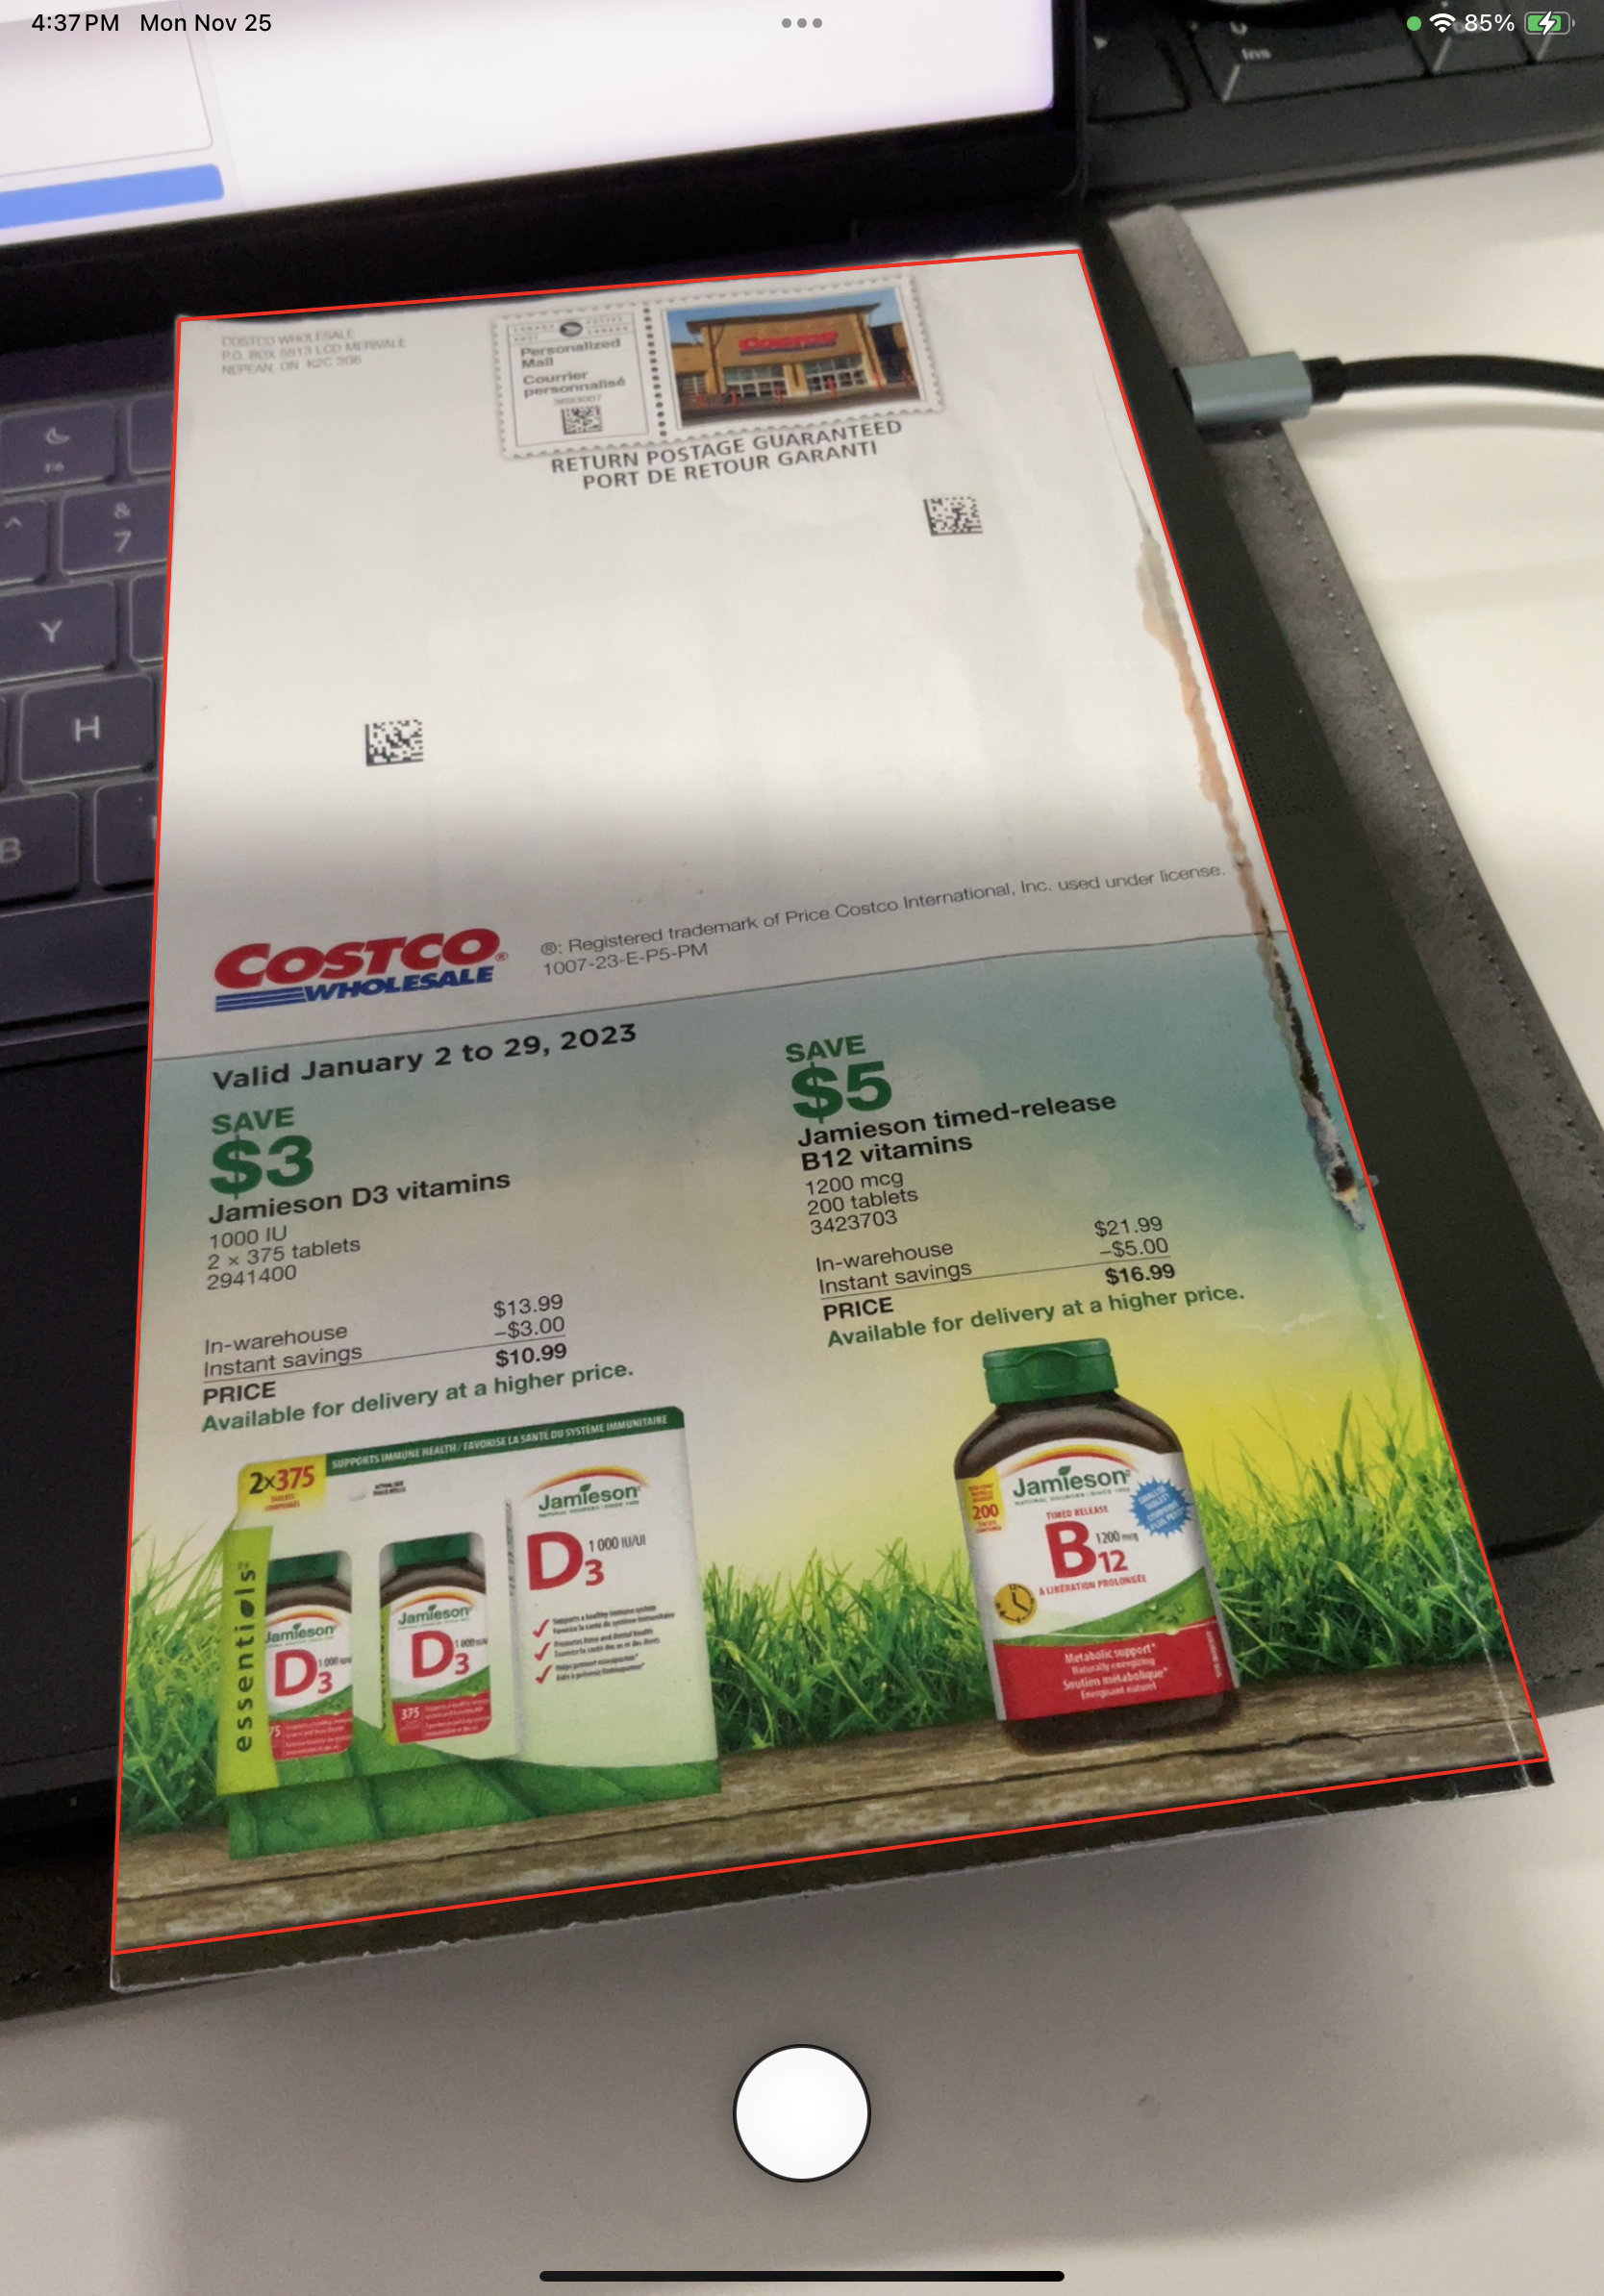
-
Detect document edges in real-time using the camera preview:
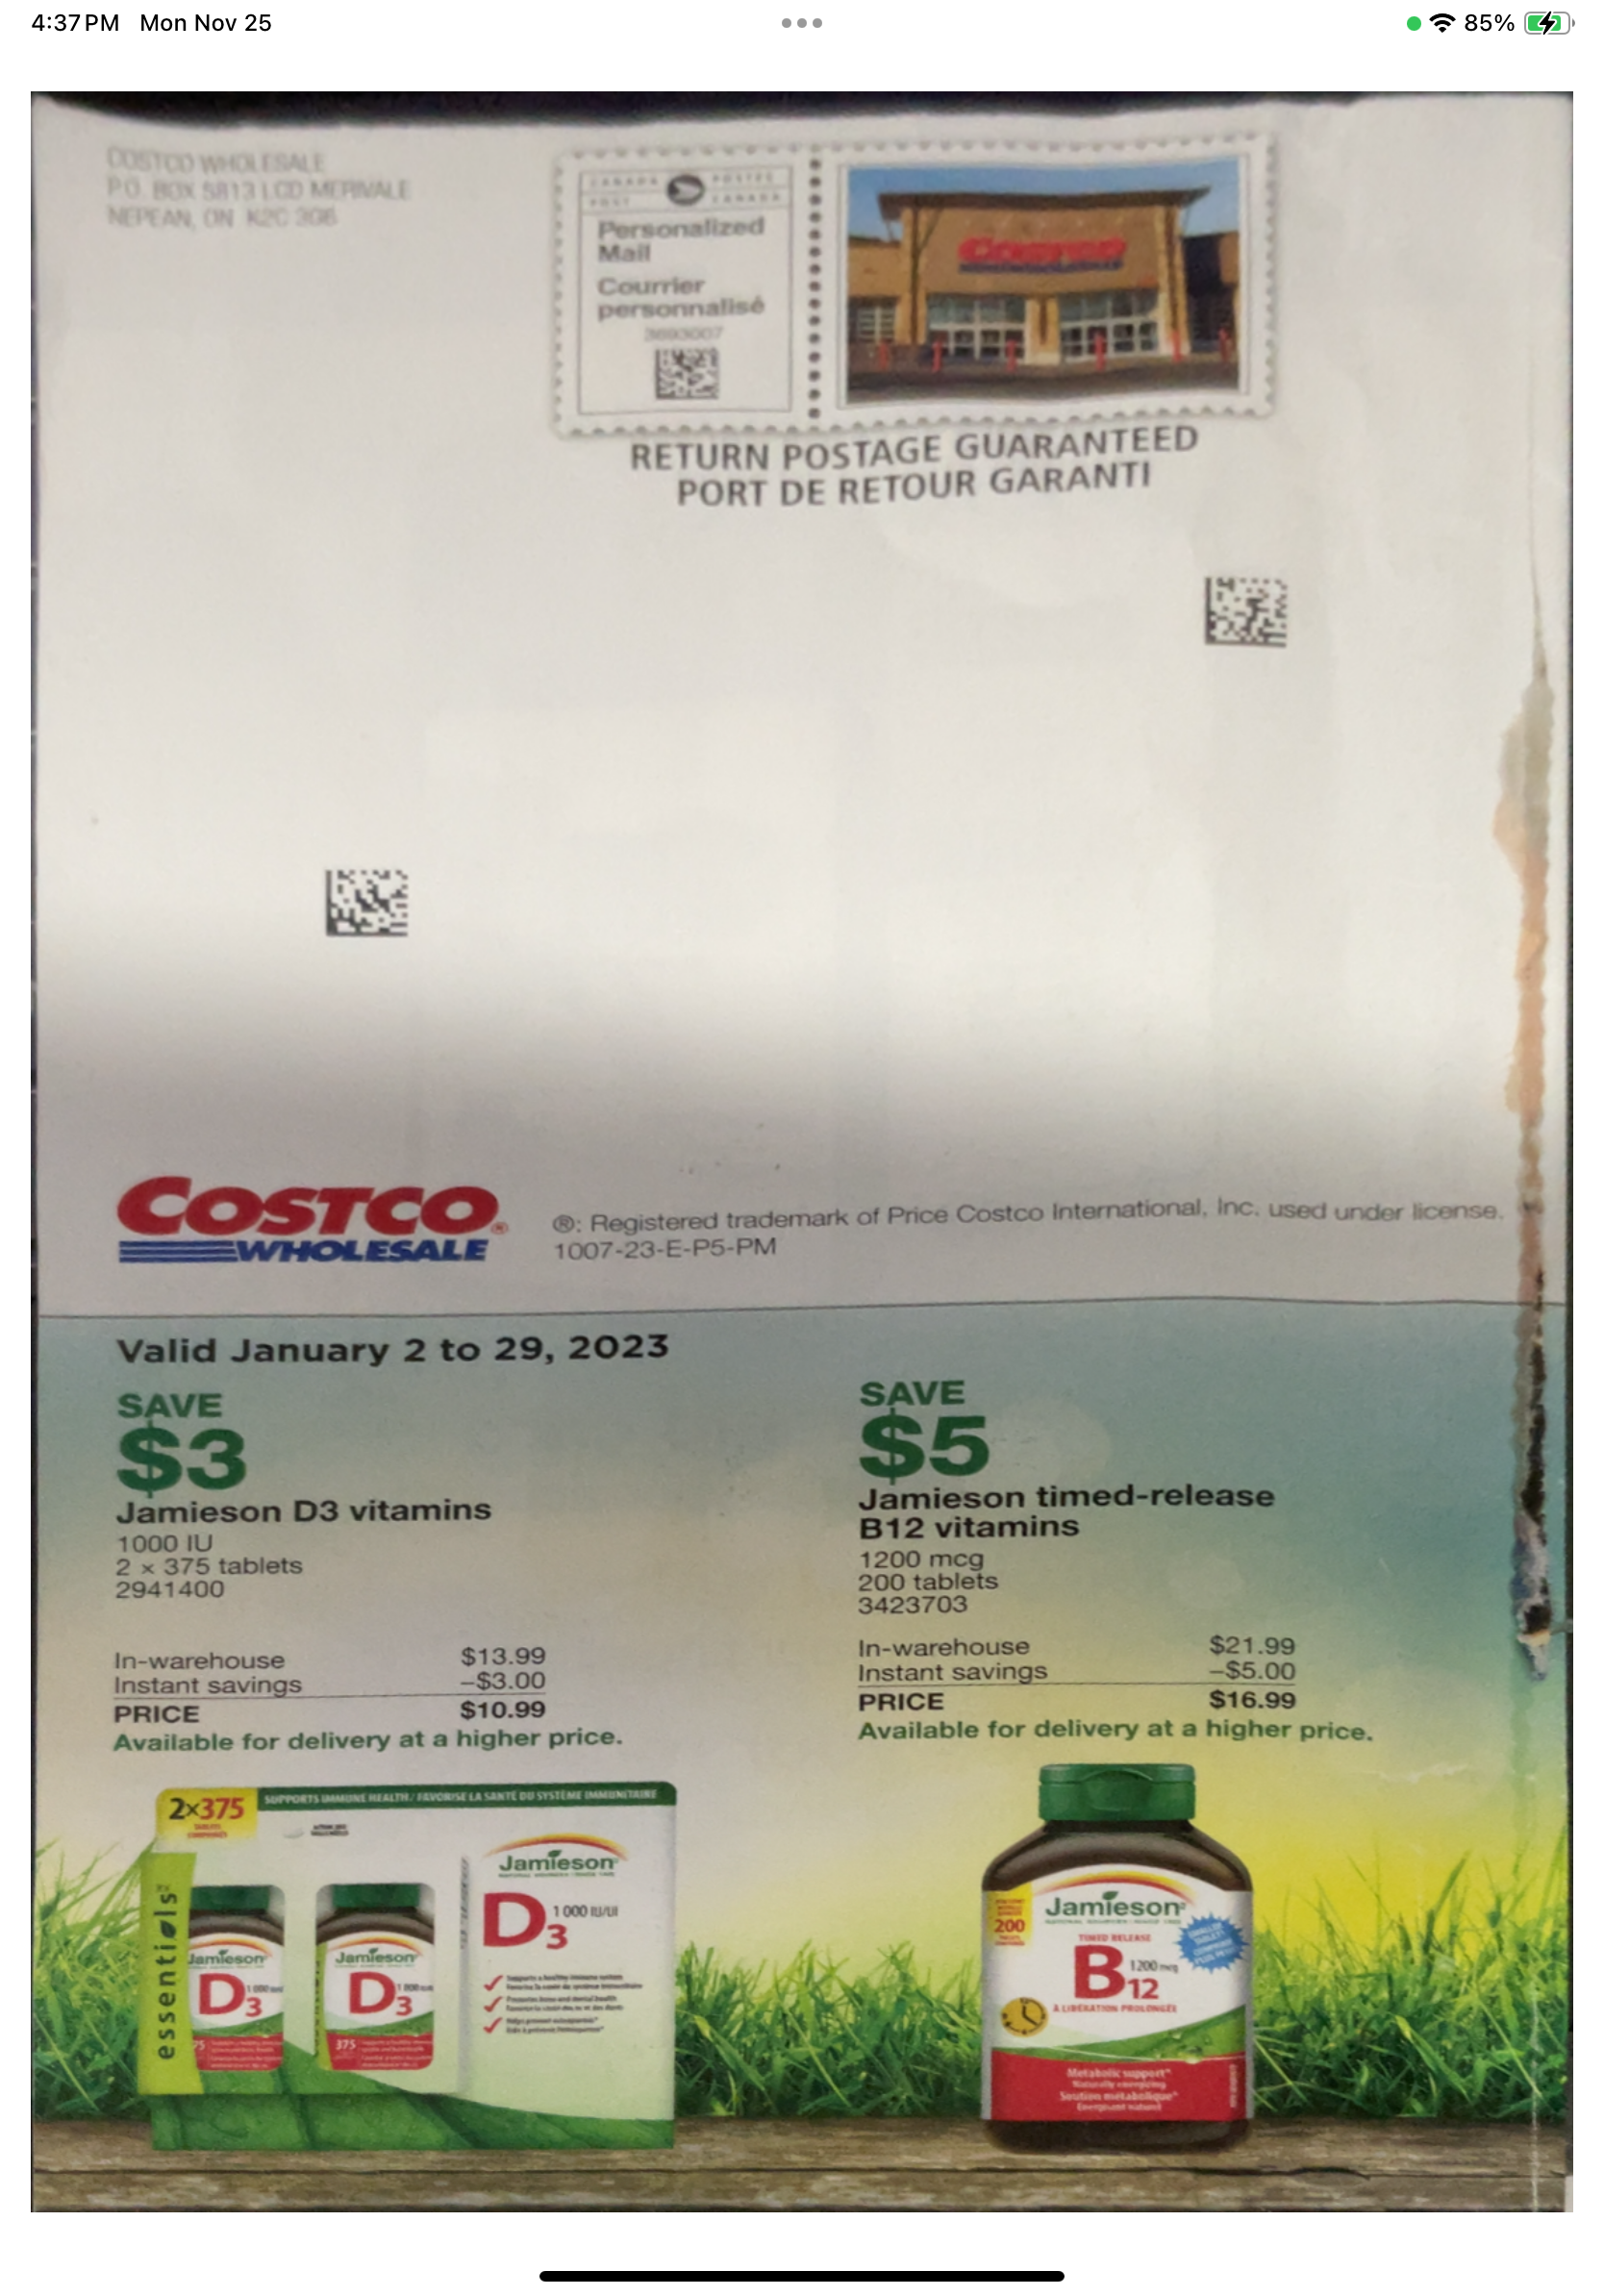
-
Press the button to rectify the document:
Common Issues & Edge Cases
- Normalized image appears rotated on iOS. The camera buffer orientation differs between macOS and iOS. On iOS, call
rotate(byDegrees: 90)on the result image before displaying it in a SwiftUI view. - Document edges not detected in low-light conditions. Ensure sufficient lighting on the document. Detection accuracy drops when contrast between the document and its background is low.
captureFromBufferreturns zero items. Verify that the correct preset template (PresetTemplate.detectAndNormalizeDocument) is being used and that the license key is valid and not expired.