


How to Dockerize a Python Barcode Reader for ARM64 and ARM32 Devices
Among the Python barcode SDKs available, only a few support ARM32 and ARM64 architectures. The Dynamsoft Barcode Reader stands out as the premier commercial SDK offering robust 1D and 2D barcode recognition for ARM32 and ARM64 devices. This article guides you through creating ARM32 and ARM64 emulated environments on Windows, enabling seamless barcode scanning implementation with the Dynamsoft Python Barcode SDK.
This article is Part 6 in a 7-Part Series.
- Part 1 - Build a Python GUI Barcode Scanner on Raspberry Pi with Qt PySide6
- Part 2 - How to Build a Cross-Platform GUI Python Barcode and QR Code Reader with PySide6 and Qt Designer
- Part 3 - How to Read QR Codes from Screen Capture in Python with Qt and Dynamsoft Barcode SDK
- Part 4 - How to Integrate a Barcode Scanner in a Django Web App with Python
- Part 5 - How to Build a Python Flet Chat App with Barcode Scanning and Gemini AI
- Part 6 - How to Dockerize a Python Barcode Reader for ARM64 and ARM32 Devices
- Part 7 - ZXing vs ZBar vs Dynamsoft: Python Barcode Reader Comparison with Accuracy and Speed Benchmarks
What you’ll build: A complete Docker-based development environment for running Python barcode and QR code recognition on ARM32 (Raspberry Pi) and ARM64 (Jetson Nano) architectures using the Dynamsoft Barcode Reader SDK.
Key Takeaways
- Dynamsoft Barcode Reader is one of the few Python barcode SDKs that natively supports ARM32 and ARM64 architectures inside Docker containers.
- You can emulate ARM32/ARM64 environments on Windows using QEMU and Docker, eliminating the need for physical Raspberry Pi or Jetson Nano hardware during development.
- Use
--cpuset-cpusto simulate limited CPU cores in Docker and benchmark barcode decoding performance under constrained hardware conditions. - The PIL-based decoding workflow is recommended over OpenCV on ARM32 due to the lack of pre-built OpenCV wheels for that architecture.
Common Developer Questions
- How do I run a Python barcode scanner in a Docker container on ARM64?
- Can I emulate Raspberry Pi ARM32 architecture on Windows for barcode SDK testing?
- How do I limit Docker container CPU to simulate embedded device performance?
Set Up the Dynamsoft Python Barcode SDK
To get started, you can easily install the Dynamsoft Python Barcode SDK via pip:
pip install dbr
The SDK is compatible with Python 3.6 and above.
Supported Platforms
- Windows (x64)
- Linux (x64, ARM32, and ARM64)
- macOS (x64 and ARM64)
License Key Activation
After installation, you will need a license key to activate the SDK. Get a 30-day free trial license for Dynamsoft Barcode Reader.
from dynamsoft_capture_vision_bundle import *
error_code, error_message = LicenseManager.init_license(
            "LICENSE-KEY")
Run a Quick Barcode Scan
Here’s a simple example to get you up and running quickly:
from dynamsoft_capture_vision_bundle import *

license_key = "Input your own license"
image = r"Please input your own image path"

error_code, error_message = LicenseManager.init_license(
            "LICENSE-KEY")

cvr_instance = CaptureVisionRouter()

try:
   result = cvr_instance.capture(image, EnumPresetTemplate.PT_READ_BARCODES.value)

   if result.get_error_code() != EnumErrorCode.EC_OK:
            print("Error:", result.get_error_code(),
                result.get_error_string())
    else:
        items = result.get_items()
        print('Found {} barcodes.'.format(len(items)))
        for item in items:
            format_type = item.get_format_string()
            text = item.get_text()
            print("Barcode Format:", format_type)
            print("Barcode Text:", text)
            print("-------------")
except BarcodeReaderError as bre:
   print(bre)
Additional Resources
- Sample Code: Explore more examples on GitHub at Dynamsoft Barcode Reader Python Samples
- Online API Documentation: Visit the official documentation
- Visual Studio Code Extension: Enhance your development experience with the Dynamsoft Barcode Reader extension for Visual Studio Code.
Why Use Docker to Emulate ARM32 and ARM64 Architectures
Creating a Python barcode scanning application for ARM32 or ARM64 devices, such as Raspberry Pi or Jetson Nano, is made easier with emulated environments. These environments allow you to develop and test your code without the immediate need for physical ARM hardware, providing a flexible and convenient development workflow.
Build Docker ARM32 and ARM64 Images with Dynamsoft Barcode SDK
To emulate different CPU architectures such as ARM on a Windows machine, you can leverage QEMU, a popular open-source emulator. Additionally, multiarch/qemu-user-static is a Docker image that integrates with QEMU, enabling emulation of different CPU architectures within Docker containers.
Follow these steps to create Docker ARM32 and ARM64 images with Dynamsoft Barcode SDK on Windows:
- Install Docker Desktop for Windows: Start by installing Docker Desktop on your Windows machine.
-
Set Up QEMU for Cross-Platform Emulation: Install qemu-user-static:
docker run --rm --privileged multiarch/qemu-user-static:register --reset -
Create Dockerfiles for ARM32 and ARM64: Write Dockerfiles that use ARM32 or ARM64 base images and install necessary tools like CMake, Dynamsoft Barcode Reader, OpenCV, and Pillow.
DockerfileArm32
 FROM arm32v7/python
 RUN apt-get update && apt-get install -y cmake libgl1-mesa-glx
 RUN pip install dbr opencv-python pillow
DockerfileArm64
FROM arm64v8/python RUN apt-get update && apt-get install -y cmake libgl1-mesa-glx RUN pip install dbr opencv-python pillowNote: The
opencv-pythonpackage might take a long time to build on ARM32 as there is no pre-built wheel available. Consider usingpillowas an alternative for image processing. -
Build Docker Images for ARM Architectures: Build the Docker images for ARM32 and ARM64:
 docker build --platform linux/arm64 -f DockerfileArm64 -t <IMAGE-NAME> .
 docker build --platform linux/arm/v7 -f DockerfileArm32 -t <IMAGE-NAME> .
With these steps, you have successfully created Docker ARM32 and ARM64 images containing the Dynamsoft Python Barcode SDK. You can now proceed to write and run a barcode reader script within these containers.
Run Python Barcode Recognition in ARM Docker Containers
Single-board computers like Raspberry Pi and Jetson Nano often lack high-end hardware, which may impact barcode decoding speed for large images. A typical use case involves capturing low-resolution images (e.g., 640x480) from a USB camera and decoding QR codes in real-time.
Here’s how to simulate this process:
Capture Barcode Images from a USB Camera
Use the following Python script to capture frames from a USB camera and save them:
import cv2
from dynamsoft_capture_vision_bundle import *
import numpy as np
capture = cv2.VideoCapture(0)

if not capture.isOpened():
    print("Cannot open camera")
    exit()

error_code, error_message = LicenseManager.init_license(
        "DLS2eyJoYW5kc2hha2VDb2RlIjoiMjAwMDAxLTE2NDk4Mjk3OTI2MzUiLCJvcmdhbml6YXRpb25JRCI6IjIwMDAwMSIsInNlc3Npb25QYXNzd29yZCI6IndTcGR6Vm05WDJrcEQ5YUoifQ==")
if error_code != EnumErrorCode.EC_OK and error_code != EnumErrorCode.EC_LICENSE_CACHE_USED:
    print("License initialization failed: ErrorCode:",
            error_code, ", ErrorString:", error_message)
else:
    cvr_instance = CaptureVisionRouter()
    index = 0
    while True:
        ret, frame = capture.read()

        if cv2.waitKey(1) == ord('q'):
            break

        result = cvr_instance.capture(
                frame, EnumPresetTemplate.PT_READ_BARCODES.value)

        if result.get_error_code() != EnumErrorCode.EC_OK:
                print("Error:", result.get_error_code(),
                      result.get_error_string())
        else:
            items = result.get_items()
            print('Found {} barcodes.'.format(len(items)))
            for item in items:
                format_type = item.get_format_string()
                text = item.get_text()
                print("Barcode Format:", format_type)
                print("Barcode Text:", text)

                location = item.get_location()
                x1 = location.points[0].x
                y1 = location.points[0].y
                x2 = location.points[1].x
                y2 = location.points[1].y
                x3 = location.points[2].x
                y3 = location.points[2].y
                x4 = location.points[3].x
                y4 = location.points[3].y
                print("Location Points:")
                print("({}, {})".format(x1, y1))
                print("({}, {})".format(x2, y2))
                print("({}, {})".format(x3, y3))
                print("({}, {})".format(x4, y4))
                print("-------------------------------------------------")

                pts = np.array([(x1, y1), (x2, y2), (x3, y3), (x4, y4)], np.int32)
                pts = pts.reshape((-1, 1, 2))
                cv2.drawContours(frame, [pts], 0, (0, 255, 0), 2)

                cv2.putText(frame, text, (x1, y1 - 10),
                                cv2.FONT_HERSHEY_SIMPLEX, 0.5, (0, 0, 255), 2)

            cv2.imshow(
                "Original Image with Detected Barcodes", frame)

            if len(items) > 0:
                cv2.imwrite('detected_' + str(index) + '.png', frame)
                index += 1
            if c == 30:
                break

    cv2.destroyAllWindows()
Decode Captured Barcode Images with PIL
Next, use the following script to read the saved images using PIL and decode them with Dynamsoft Barcode Reader:
import os
import time
from PIL import Image
from dynamsoft_capture_vision_bundle import *
import numpy as np
def main():
    error_code, error_message = LicenseManager.init_license(
            "LICENSE-KEY")
    if error_code != EnumErrorCode.EC_OK and error_code != EnumErrorCode.EC_LICENSE_CACHE_USED:
        print("License initialization failed: ErrorCode:",
                error_code, ", ErrorString:", error_message)

    # read file list
    folder = '../../../images'
    target_dir = os.path.join(os.getcwd(), folder)
    print(target_dir)
    cvr_instance = CaptureVisionRouter()

    if os.path.exists(target_dir):
        filelist = os.listdir(target_dir)

        index = 0
        while index < len(filelist):
            file = filelist[index]
            filapath = os.path.join(target_dir, file)

            index += 1

            if os.path.isfile(filapath):

                with Image.open(filapath) as im:
                    try:
                        start_time = time.time()
                        img_array = np.array(im)
                        result = cvr_instance.capture(img_array, EnumPresetTemplate.PT_READ_BARCODES.value)
                        elapsed_time = time.time() - start_time
                        print(file + ", elapsed time: " + str(round(elapsed_time *
                                                                    1000)) + "ms, " + ' results: ' + str(len(result.get_items())))

                        if result.get_error_code() != EnumErrorCode.EC_OK:
                                print("Error:", result.get_error_code(),
                                    result.get_error_string())
                        else:
                            items = result.get_items()
                            print('Found {} barcodes.'.format(len(items)))
                            for item in items:
                                format_type = item.get_format_string()
                                text = item.get_text()
                                print("Barcode Format:", format_type)
                                print("Barcode Text:", text)


                        print("-------------------------------------------------")

                    except Exception as err:
                        print(err)

                print('-------------------------------------')


if __name__ == '__main__':
    main()
Run the Barcode Script Inside the Docker Container
Mount the current folder to the Docker container and run the script:
docker run --platform linux/arm64 -it --rm -v ${pwd}:/usr/src/myapp -w /usr/src/myapp <IMAGE-NAME> python pillow_test.py
docker run --platform linux/arm/v7 -it --rm -v ${pwd}:/usr/src/myapp -w /usr/src/myapp <IMAGE-NAME> python pillow_test.py
Limit CPU Resources to Simulate Embedded Hardware
One critical factor to consider when running barcode decoding tasks in Docker containers is the impact of CPU resources on performance.
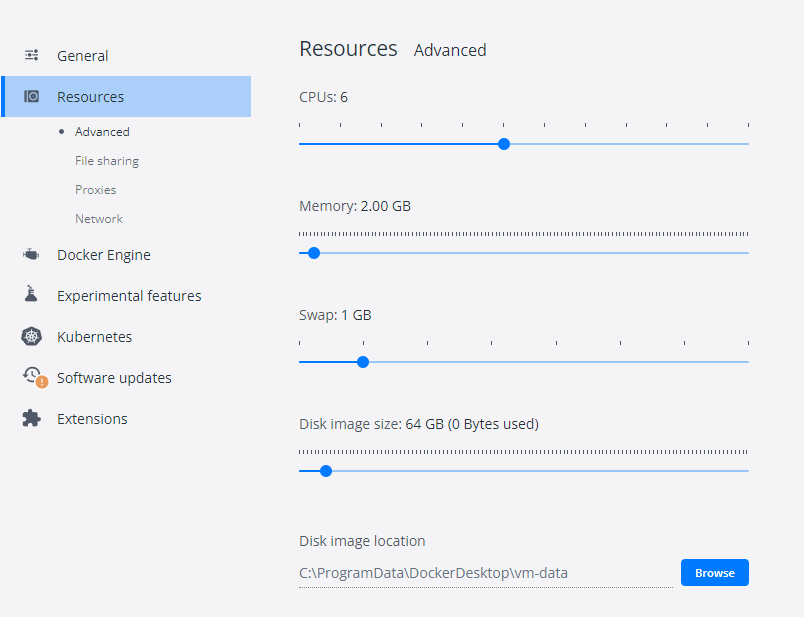
By default, Docker containers have unrestricted access to the host machine’s CPU cycles, which means they can use as many CPU resources as needed.
However, if you want to control and test the performance of your application under specific conditions, Docker allows you to limit the number of CPU cores available to a container using the –cpuset-cpus option. This can be useful for simulating scenarios where your application runs on hardware with limited processing power.
For instance, you can restrict the container to use only two CPU cores and observe how this affects the decoding speed:
docker run --cpuset-cpus="0,1" --platform linux/arm64 -it --rm -v ${pwd}:/usr/src/myapp -w /usr/src/myapp yushulx/dbr-arm64:1.0 python pillow_test.py
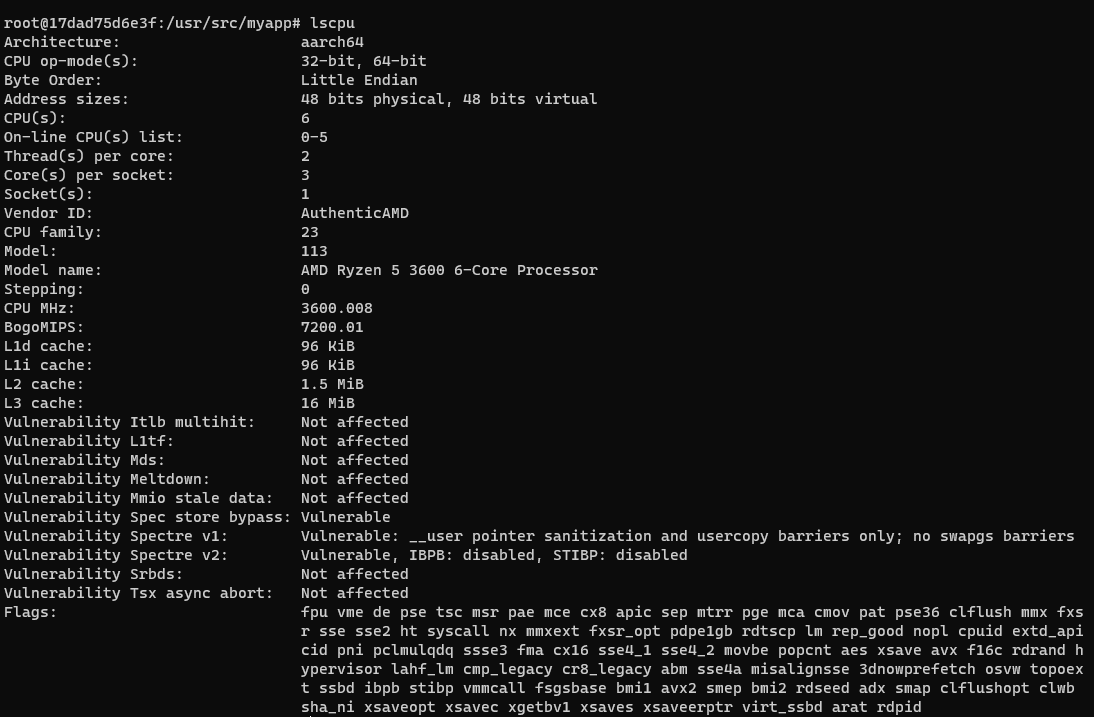
To verify the number of CPU cores available to the container, you can use the nproc command:
docker run --cpuset-cpus="0,1" --platform linux/arm64 -it --rm -v ${pwd}:/usr/src/myapp -w /usr/src/myapp yushulx/dbr-arm64:1.0 nproc
2
In this example, the command should return 2, confirming that the container is limited to two CPU cores.
Emulate Raspberry Pi Hardware with DockerPi
For a more realistic emulation, use dockerpi to simulate different Raspberry Pi models:
docker run -it lukechilds/dockerpi pi2

pi@raspberrypi:~$ lscpu
Architecture:        armv7l
Byte Order:          Little Endian
CPU(s):              4
On-line CPU(s) list: 0-3
Thread(s) per core:  1
Core(s) per socket:  4
Socket(s):           1
Vendor ID:           ARM
Model:               5
Model name:          Cortex-A7
Stepping:            r0p5
CPU max MHz:         700.0000
CPU min MHz:         700.0000
BogoMIPS:            125.00
Flags:               half thumb fastmult vfp edsp neon vfpv3 tls vfpv4 idiva idivt vfpd32 lpae evtstrm

docker run -it lukechilds/dockerpi pi3

pi@raspberrypi:~$ lscpu
Architecture:        aarch64
Byte Order:          Little Endian
CPU(s):              4
On-line CPU(s) list: 0-3
Thread(s) per core:  1
Core(s) per socket:  4
Socket(s):           1
Vendor ID:           ARM
Model:               4
Model name:          Cortex-A53
Stepping:            r0p4
CPU max MHz:         700.0000
CPU min MHz:         700.0000
BogoMIPS:            125.00
Flags:               fp asimd evtstrm aes pmull sha1 sha2 crc32 cpuid
Common Issues and Edge Cases
- OpenCV fails to install on ARM32: There is no pre-built
opencv-pythonwheel forarmv7l. The build from source can take over an hour. Usepillowfor image loading instead, or cross-compile the wheel on a faster machine. - QEMU emulation is significantly slower than native hardware: Barcode decoding times under QEMU can be 5–10x slower than on real ARM devices. Use emulated environments for functional testing only — benchmark on actual hardware for production performance data.
- Docker
--platformflag not recognized: Ensure Docker Desktop has experimental features enabled and that you have rundocker run --rm --privileged multiarch/qemu-user-static:register --resetto register QEMU interpreters before building cross-platform images.
Source Code
https://github.com/yushulx/python-barcode-qrcode-sdk/tree/main/examples/official/arm32_arm64