


Thanks for Downloading Dynamic Web TWAIN 30-Day Trial!
Your download will start shortly. If your download does not begin, click here to retry.
Document Saving
How to Deploy an Upload Server Using Node.js
Dynamic Web TWAIN is a client-side JavaScript SDK. However, it does need to interact with the server when performing operations like uploading and downloading. This article introduces how to deploy an upload server using backend Node.js code.
Please select your frontend language:
This article assumes that you have downloaded and unzipped this sample: DynamicWebTWAIN-JavaScript.zip. After unzipping it, the directory structure is shown in the image below.
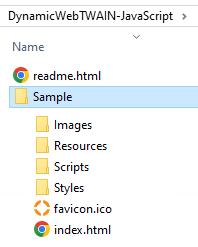
Note: The "Sample" directory mentioned in the steps below refers to the "Sample" directory shown in the image.
Prerequisite:
Please ensure that Node.js is installed. The recommended version is v20.13.1.
Steps:
Download the server-side Node.js code, unzip it. Under the "Upload" folder, there is a file "server.js". This is the backend page that accepts the uploaded data.
Run the server-side project
Open your terminal or Command Prompt and execute the following three commands to start the project:
1). Navigate to the server-side Sample directory:
cd [path]/Upload2). Install the dependencies:
npm install3). Run the application:
npm startModify the client-side upload function In
{path}\Sample\Scripts\online_demo_operation.js, modify the "URL" parameter of HTTPUpload() to match the actual path of the upload server you deployed. The "URL" parameter accepts both absolute and relative paths.Refer to the following code snippet:
function Upload() {
  if (DWTObject && DWTObject.HowManyImagesInBuffer > 0) {
    //Path to the server-side script. You can adjust it according to the actual path of the upload server you deployed.
    var strUrl = "http://localhost:2020/Upload";
    var imgAry = [DWTObject.CurrentImageIndexInBuffer];
    DWTObject.HTTPUpload(
      strUrl,
      imgAry,
      Dynamsoft.DWT.EnumDWT_ImageType.IT_PNG,
      Dynamsoft.DWT.EnumDWT_UploadDataFormat.Binary,
      "WebTWAINImage.png",
      onUploadSuccess,
      onUploadFailure);
  } else {
    alert("There is no image in buffer.");
  }
}

function onUploadSuccess() {
  alert("Upload successful");
}

function onUploadFailure(errorCode, errorString, sHttpResponse) {
  alert(sHttpResponse.length > 0 ? sHttpResponse : errorString);
}
Copy the "Sample" directory to the web server.
Navigate to
http://{server-path}/Sample/index.htmlin your browser to access the sample.
This article assumes that you have downloaded and unzipped this sample: DynamicWebTWAIN-Angular.zip. After unzipping it, the directory structure is shown in the image below.
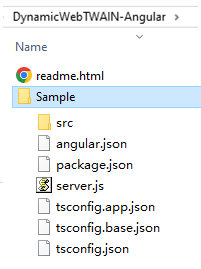
Note: The "Sample" directory mentioned in the steps below refers to the "Sample" directory shown in the image.
Prerequisite:
Please ensure that Node.js is installed. The recommended version is v20.13.1.
Steps:
Download the server-side Node.js code, unzip it. Under the "Upload" folder, there is a file "server.js". This is the backend page that accepts the uploaded data.
Run the server-side project
Open your terminal or Command Prompt and execute the following three commands to start the project:
1). Navigate to the server-side Sample directory:
cd [path]/Upload2). Install the dependencies:
npm install3). Run the application:
npm startModify the client-side upload function In
{path}\Sample\src\app\components\tools\dwtService.ts, modify the "URL" parameter of HTTPUpload() to match the actual path of the upload server you deployed. The "URL" parameter accepts both absolute and relative paths.Refer to the following code snippet:
Upload(): Promise<any> {
  return new Promise((res, rej) => {
    if (this._dwtObject && this._dwtObject.HowManyImagesInBuffer > 0) {
      //Path to the server-side script. You can adjust it according to the actual path of the upload server you deployed.
      let strUrl = "http://localhost:2020/Upload";
      let imgAry = [this._dwtObject.CurrentImageIndexInBuffer];
      this._dwtObject.HTTPUpload(
        strUrl,
        imgAry,
        Dynamsoft.DWT.EnumDWT_ImageType.IT_PNG,
        Dynamsoft.DWT.EnumDWT_UploadDataFormat.Binary,
        "WebTWAINImage.png",
        ()=>{
          res();
        }, (errCode, errString, responseStr) => {
          rej({
            code: errCode,
            message: errString
          });
        });
     } else {
      rej({
        code: -1,
        message: "There is no image in buffer."
      });
    }
  }
}
Run the client-side project
Open your terminal or Command Prompt and execute the following three commands to start the project:
1). Navigate to the Sample directory:
cd [path]/Sample2). Install the dependencies:
npm install3). Run the application:
npm startNavigate to
http://localhost:4200in your browser to launch the sample.
This article assumes that you have downloaded and unzipped this sample: DynamicWebTWAIN-React-JavaScript.zip. After unzipping it, the directory structure is shown in the image below.
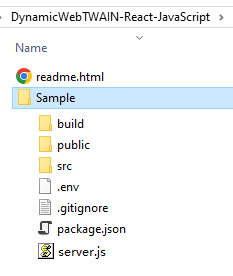
Note: The "Sample" directory mentioned in the steps below refers to the "Sample" directory shown in the image.
Prerequisite:
Please ensure that Node.js is installed. The recommended version is v20.13.1.
Steps:
Download the server-side Node.js code, unzip it. Under the "Upload" folder, there is a file "server.js". This is the backend page that accepts the uploaded data.
Run the server-side project
Open your terminal or Command Prompt and execute the following three commands to start the project:
1). Navigate to the server-side Sample directory:
cd [path]/Upload2). Install the dependencies:
npm install3). Run the application:
npm startModify the client-side upload function In
{path}\Sample\src\components\tools\dwtService.js, modify the "URL" parameter of HTTPUpload() to match the actual path of the upload server you deployed. The "URL" parameter accepts both absolute and relative paths.Refer to the following code snippet:
Upload() {
  return new Promise((res, rej) => {
    if (this._dwtObject && this._dwtObject.HowManyImagesInBuffer > 0) {
      //Path to the server-side script. You can adjust it according to the actual path of the upload server you deployed.
      let strUrl = "http://localhost:2020/Upload";
      let imgAry = [this._dwtObject.CurrentImageIndexInBuffer];
      this._dwtObject.HTTPUpload(
        strUrl,
        imgAry,
        Dynamsoft.DWT.EnumDWT_ImageType.IT_PNG,
        Dynamsoft.DWT.EnumDWT_UploadDataFormat.Binary,
        "WebTWAINImage.png",
        ()=>{
          res();
        }, (errCode, errString, responseStr) => {
          rej({
            code: errCode,
            message: errString
          });
        });
     } else {
      rej({
        code: -1,
        message: "There is no image in buffer."
      });
    }
  }
}
Run the client-side project
Open your terminal or Command Prompt and execute the following three commands to start the project:
1). Navigate to the Sample directory:
cd [path]/Sample2). Install the dependencies:
npm install3). Run the application:
npm startNavigate to
http://localhost:4200in your browser to launch the sample.
This article assumes that you have downloaded and unzipped this sample: DynamicWebTWAIN-React-TypeScript.zip. After unzipping it, the directory structure is shown in the image below.
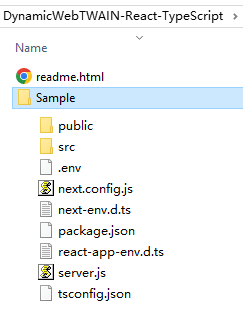
Note: The "Sample" directory mentioned in the steps below refers to the "Sample" directory shown in the image.
Prerequisite:
Please ensure that Node.js is installed. The recommended version is v20.13.1.
Steps:
Download the server-side Node.js code, unzip it. Under the "Upload" folder, there is a file "server.js". This is the backend page that accepts the uploaded data.
Run the server-side project
Open your terminal or Command Prompt and execute the following three commands to start the project:
1). Navigate to the server-side Sample directory:
cd [path]/Upload2). Install the dependencies:
npm install3). Run the application:
npm startModify the client-side upload function In
{path}\Sample\src\components\tools\dwtService.ts, modify the "URL" parameter of HTTPUpload() to match the actual path of the upload server you deployed. The "URL" parameter accepts both absolute and relative paths.Refer to the following code snippet:
Upload(): Promise<any> {
  return new Promise((res, rej) => {
    if (this._dwtObject && this._dwtObject.HowManyImagesInBuffer > 0) {
      //Path to the server-side script. You can adjust it according to the actual path of the upload server you deployed.
      let strUrl = "http://localhost:2020/Upload";
      let imgAry = [this._dwtObject.CurrentImageIndexInBuffer];
      this._dwtObject.HTTPUpload(
        strUrl,
        imgAry,
        Dynamsoft.DWT.EnumDWT_ImageType.IT_PNG,
        Dynamsoft.DWT.EnumDWT_UploadDataFormat.Binary,
        "WebTWAINImage.png",
        ()=>{
          res();
        }, (errCode, errString, responseStr) => {
          rej({
            code: errCode,
            message: errString
          });
        });
     } else {
      rej({
        code: -1,
        message: "There is no image in buffer."
      });
    }
  }
}
Run the client-side project
Open your terminal or Command Prompt and execute the following three commands to start the project:
1). Navigate to the Sample directory:
cd [path]/Sample2). Install the dependencies:
npm install3). Run the application:
npm startNavigate to
http://localhost:4200in your browser to launch the sample.
This article assumes that you have downloaded and unzipped this sample: DynamicWebTWAIN-Vue-JavaScript.zip. After unzipping it, the directory structure is shown in the image below.
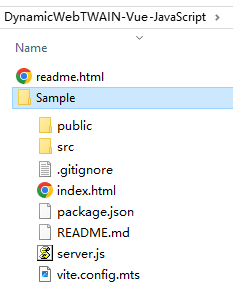
Note: The "Sample" directory mentioned in the steps below refers to the "Sample" directory shown in the image.
Prerequisite:
Please ensure that Node.js is installed. The recommended version is v20.13.1.
Steps:
Download the server-side Node.js code, unzip it. Under the "Upload" folder, there is a file "server.js". This is the backend page that accepts the uploaded data.
Run the server-side project
Open your terminal or Command Prompt and execute the following three commands to start the project:
1). Navigate to the server-side Sample directory:
cd [path]/Upload2). Install the dependencies:
npm install3). Run the application:
npm startModify the client-side upload function In
{path}\Sample\src\components\tools\dwtService.js, modify the "URL" parameter of HTTPUpload() to match the actual path of the upload server you deployed. The "URL" parameter accepts both absolute and relative paths.Refer to the following code snippet:
Upload() {
  return new Promise((res, rej) => {
    if (this._dwtObject && this._dwtObject.HowManyImagesInBuffer > 0) {
      //Path to the server-side script. You can adjust it according to the actual path of the upload server you deployed.
      let strUrl = "http://localhost:2020/Upload";
      let imgAry = [this._dwtObject.CurrentImageIndexInBuffer];
      this._dwtObject.HTTPUpload(
        strUrl,
        imgAry,
        Dynamsoft.DWT.EnumDWT_ImageType.IT_PNG,
        Dynamsoft.DWT.EnumDWT_UploadDataFormat.Binary,
        "WebTWAINImage.png",
        ()=>{
          res();
        }, (errCode, errString, responseStr) => {
          rej({
            code: errCode,
            message: errString
          });
        });
     } else {
      rej({
        code: -1,
        message: "There is no image in buffer."
      });
    }
  }
}
Run the client-side project
Open your terminal or Command Prompt and execute the following three commands to start the project:
1). Navigate to the Sample directory:
cd [path]/Sample2). Install the dependencies:
npm install3). Run the application:
npm startNavigate to
http://localhost:4200in your browser to launch the sample.
This article assumes that you have downloaded and unzipped this sample: DynamicWebTWAIN-Vue-TypeScript.zip. After unzipping it, the directory structure is shown in the image below.
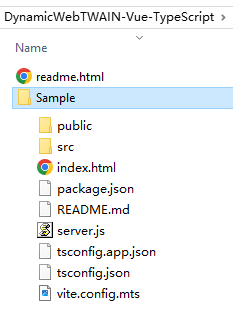
Note: The "Sample" directory mentioned in the steps below refers to the "Sample" directory shown in the image.
Prerequisite:
Please ensure that Node.js is installed. The recommended version is v20.13.1.
Steps:
Download the server-side Node.js code, unzip it. Under the "Upload" folder, there is a file "server.js". This is the backend page that accepts the uploaded data.
Run the server-side project
Open your terminal or Command Prompt and execute the following three commands to start the project:
1). Navigate to the server-side Sample directory:
cd [path]/Upload2). Install the dependencies:
npm install3). Run the application:
npm startModify the client-side upload function In
{path}\Sample\src\components\tools\dwtService.ts, modify the "URL" parameter of HTTPUpload() to match the actual path of the upload server you deployed. The "URL" parameter accepts both absolute and relative paths.Refer to the following code snippet:
Upload(): Promise<any> {
  return new Promise((res, rej) => {
    if (this._dwtObject && this._dwtObject.HowManyImagesInBuffer > 0) {
      //Path to the server-side script. You can adjust it according to the actual path of the upload server you deployed.
      let strUrl = "http://localhost:2020/Upload";
      let imgAry = [this._dwtObject.CurrentImageIndexInBuffer];
      this._dwtObject.HTTPUpload(
        strUrl,
        imgAry,
        Dynamsoft.DWT.EnumDWT_ImageType.IT_PNG,
        Dynamsoft.DWT.EnumDWT_UploadDataFormat.Binary,
        "WebTWAINImage.png",
        ()=>{
          res();
        }, (errCode, errString, responseStr) => {
          rej({
            code: errCode,
            message: errString
          });
        });
     } else {
      rej({
        code: -1,
        message: "There is no image in buffer."
      });
    }
  }
}
Run the client-side project
Open your terminal or Command Prompt and execute the following three commands to start the project:
1). Navigate to the Sample directory:
cd [path]/Sample2). Install the dependencies:
npm install3). Run the application:
npm startNavigate to
http://localhost:4200in your browser to launch the sample.
Online Demo
https://demo.dynamsoft.com/web-twain/
Original post creation date: Jun 14, 2024
Last modified date: Sep 19, 2024